
Related Manuals for Legacy Helix


Summary of Contents for Legacy Helix
- Page 1 All manuals and user guides at all-guides.com Owners Manual For The Helix Loudspeaker System...
-
Page 2: Table Of Contents
All manuals and user guides at all-guides.com Table of Contents Page Registration Owners Record The Cabinetry / Our Commitment Warranty Setup Unpacking Your Speakers Speaker Placement Speaker Connections 9-12 Wave Launch Processor 13-21 Technology Designer’s Notes Specifications... -
Page 3: Owners Record
Refer to this when calling your dealer regarding this product. Model: Helix Serial No: _________________________ Date of purchase: ___________________ Thank you for selecting a Legacy Loudspeaker System. These hand- crafted instruments will provide you with many years of listening en- joyment. -
Page 4: The Cabinetry / Our Commitment
All manuals and user guides at all-guides.com The Cabinetry / Our Commitment Handcrafted Beneath the surface of Helix’s elegant exterior lies rigid MDF construction. Interlocking joinery maximizes the strength of the cabinet parts. Polyester fiberfill is selected for internal damping. -
Page 5: Warranty
All manuals and user guides at all-guides.com Warranty Legacy Audio supports its customers and products with pride. We cheerfully warrant our loud- speaker products we manufacture from defects in materials and workmanship for a period of seven (7) years. Electronic components such as internal amplifiers and digital processors are covered for three (3)years. -
Page 6: Unpacking Your Speakers
All manuals and user guides at all-guides.com Unpacking Your Speakers Helix is a large loudspeaker requiring assistance of a dolley, a cord- less Philips screw driver and two or more physically capable individu- als to uncrate and locate. Here are some uncrating tips: Carefully remove screws securing the lid of the crate, and lift panel away. -
Page 7: Speaker Placement
All manuals and user guides at all-guides.com Speaker Placement A speaker setup (left) that works well with HELIX follows these ratios: Distance, d1, between the speakers (center to center) = Distance, d2, from plane of speaker front to listener. Toe the speakers into the listening area. In most circum stances crossing speaker axes just slightly behind of the lis tener’s head works best. - Page 8 The HELIX speaker has a carefully shaped polar pattern. This as- sures that the wave-launch generated will sum coherently at the listening position. To the left is an illustration of how our new He- lix speaker performs.
-
Page 9: Speaker Connections
All manuals and user guides at all-guides.com Speaker Connections The Terminal Plate The four-way HELIX requires the user to provide three channels of amplification per speaker. This may be accomplished via three stereo amplifiers, a combination of mono blocks and stereo amplifiers, or a single six- channel amplifier. - Page 10 All manuals and user guides at all-guides.com Speaker Connections It is advantageous, when practical, to position the amplifiers midway between the HELIX speakers. This will keep the speaker cable lengths to a minimum.
- Page 11 All manuals and user guides at all-guides.com Speaker Connections HELIX Internal Wiring (For use by qualified technicians only)
- Page 12 All manuals and user guides at all-guides.com Speaker Connections Xilica XD Cable Connections From Left channel of preamp output Processor Input 1 Right channel of preamp output Processor Input 2 Processor Output 1 Left Subwoofer Processor Output 2 Left Midbass Processor Output 3 Left Midrange Processor Output 4...
-
Page 13: Wave Launch Processor
Wave Launch Processor The high definition Digital Wavelaunch Processor hosts a LEGACY custom algorithm which automatically loads when the proc- essor is powered on. Factory settings are ‘plug and play’, and do not require a computer to utilize. Connections between the preamp, power amplifier, and speakers should be as shown on previous page. - Page 14 All manuals and user guides at all-guides.com Wave Launch Processor Downloading and Installing the XConsole software Downloading From Included CD Your Wave Launch Processor will come with a CD or USB drive containing the XConsole software. Insert the CD and find the install file. Move/Save the install file to your computer.
- Page 15 All manuals and user guides at all-guides.com Wave Launch Processor The XD processor will allow you to make adjustments to your system from a laptop computer from your listener position. Connecting Your Computer with the Xilica Processor - Connecting will require a long USB Device cable. These can be found at most electronic or big box stores. It is the same cable that a USB printer would use.
- Page 16 All manuals and user guides at all-guides.com Wave Launch Processor - Go back to the XConsole software. At the top of the screen click “Setup” then “Port Connections” This bring up a new dialog box. Select the COM port number you obtained from the device manger and click “OK.” The software will warn you that you must restart the software for your changes to take effect.
- Page 17 All manuals and user guides at all-guides.com Wave Launch Processor Making Adjustments with Wavelaunch Processor After installing the included software, connect the processor to the computer via a USB cable. Launch the XConsole software. When asked if you want to connect to the device, click yes. In the Device List, click on the device that is connected.
- Page 18 All manuals and user guides at all-guides.com Wave Launch Processor In the Device List, click on the device that is connected. This will launch the program that is currently on the processor. Adjustments to the processor can be made to “Input 1: Left” and “Input 2: Right”. Clicking on “In 1: Left”...
- Page 19 All manuals and user guides at all-guides.com Wave Launch Processor Making a boost with the parametric EQ In this example, we have selected Parametric EQ 2 (PEQ2) by clicking in its box, which will turn red to indicate your selection. Once highlighted, locate the blue boxes with up and down arrows, at the bottom of the interface.
- Page 20 All manuals and user guides at all-guides.com Wave Launch Processor Making a cut with the graphic EQ In this example, we have selected Graphic EQ 8 by clicking in its box which will turn red to indicate your selection. Once high- lighted, locate the blue boxes with up and down arrows, at the bottom of the interface.
- Page 21 All manuals and user guides at all-guides.com Wave Launch Processor Adjusting using the EQ plot Adjustments made to both the parametric and graphic EQ are reflected in the graph occupying the upper portion of the screen. You can select them by clicking on their number, and dragging up to boost, and down to cut. Dragging to the left decreases the frequency, while dragging to the right increases the frequency.
-
Page 22: Designer's Notes
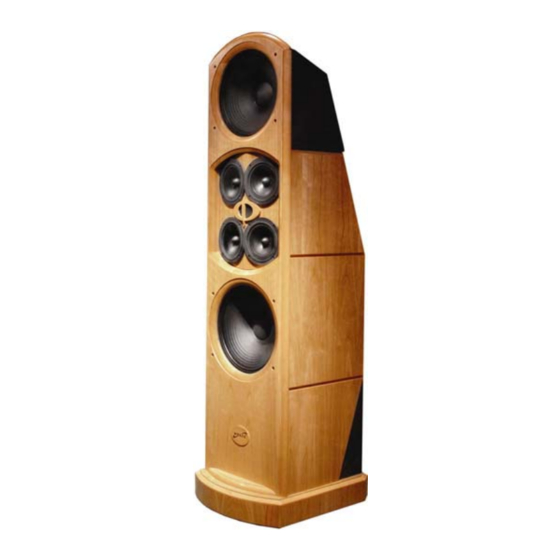
HELIX system. HELIX is a reference monitor system. It will deliver more than 120 dB over the full audible spectrum owing to the appli- cation of Neodymium magnets in the woofer and high frequency motors. The foundation of each HELIX monitor is a 15” sub- woofer with a copper anodized, aluminum diaphragm driven by a 750-watt internal amplifier. -
Page 23: Specifications
All manuals and user guides at all-guides.com Specifications System Type: 10 drivers, 5 way Tweeter: Neo-Quadra-pole Midrange: 4 x 6” Curvilinear Midwoofer: 3 x 15” Neodymium Woofer: 1 x 15” Copper/Aluminum Low Frequency Alignment: Tri-coil Stabilized Frequency Response: 22Hz – 30 kHz Impedance: 4 Ohms Sensitivity:... - Page 24 Legacy Audio Distributor in Low Voltage Directive 2006/95/EC your country. A listing of Legacy EMC Directive 2004/108/EC Audio Distributors can be found on the Legacy Audio website www.legacyaudio.com or by contacting Legacy Audio at: 3023 E.
- Page 25 All manuals and user guides at all-guides.com Notes:...
- Page 26 All manuals and user guides at all-guides.com ©2012 Legacy Audio 3023 E Sangamon Ave. Springfield, IL 62702 Phone: 800-283-4644 Fax: 217-544-1483...
Need help?
Do you have a question about the Helix and is the answer not in the manual?
Questions and answers