Advertisement
Quick Links
Advertisement

Subscribe to Our Youtube Channel
Related Manuals for Siruba VC008B


Summary of Contents for Siruba VC008B
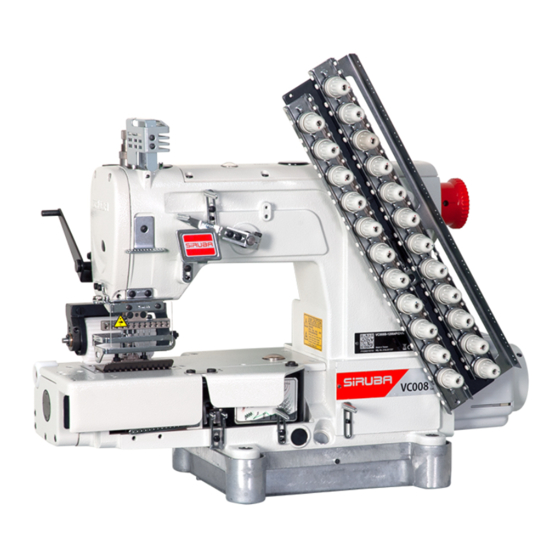
- Page 1 Introduction 使用說明書與零件圖 INSTRUCTIONS BOOK & PARTS LIST VC008B...
- Page 3 如果忽視此標記而運行了錯誤的機械操作,保養時肯定會引起當事者 或第三者人員重傷或死亡。 如果忽視此標記而運行了錯誤的機械操作,保養時有可能會引起當事 者或第三者人員受傷及造成設備損壞。 運動 部 位, 謹 防 工傷 事 故 Moving part, beware of industrial accident 高壓 部 位, 謹 防 觸電 事 故 High voltage, beware of electric shock 高溫 部 位, 謹 防 燙傷 事 故 High temperature, beware of burns 禁止...
- Page 4 頁 /PAGE INDEX 索引 GENERAL SAFETY INSTRUCTIONS 一般安全事項說明 IMPORTANT SAFETY INSTRUCTIONS 重要安全事項說明 WARNING 特別事項 TYPES AND SPECIFICATIONS 種類及規格說明 HOW TO INSTALL THE MACHINE 機器如何安裝 FILL AND CHANGE THE LUBRICATION OIL 潤滑油之注入與更換 CHANGE THE NEEDLE 針之更換 THREADING 穿線方法 THREAD CONTROL ADJUSTMENT 控線調整...
- Page 5 Introduction 後拉滾輪供給量之調整 ADJUST THE SUPPLEMENT OF THE REAR PULL WHEEL ADJUST THE DISTANCE BETWEEN UPPER AND LOWER GEAR 上下滾輪間隙調整 TABLE CUT-OUT 桌板圖 PARTS LIST 零件圖 DEMOLITION PROCEDURE 報廢流程...
-
Page 6: General Safety Instructions
GENERAL SAFETY 一般安全事項說明 INSTRUCTIONS Warning! 警告! When using this machine, basic safety 當使用這台機器,基本安全預防應恆被遵守 Precautions should always be followed to ,以減輕火災、電擊、或是個人傷害的風險 reduce the risk of fire, electric shock and 。包含以下注意事項。 personal injury, including the followings. 在操作這台機器之前,請閱讀所有說明並且 Read all these instructions before 緊記於心。... - Page 7 Introduction 8. 中斷機器電源 8. Disconnect machine When not in use, before servicing and 當不使用機器時、維修前、以及更換配件 when changing accessories. 時。 9. 避免誤啟動 9. Avoid unintentional starting Do not carry a plug-in tool with a finger on 不要以手指置於啟動開關上之後,搬運一個 the switch. Ensure the power switch is off 已插入電源的工具。確定在插電之前,電源...
-
Page 8: Important Safety Instructions
IMPORTANT SAFETY 重要安全事項說明 INSTRUCTIONS For operating safely and getting the 恭喜您購買本機器,為了使這台機器能獲 best functions of this machine, you must 得最佳功能以及安全的操作,務必請正確 operate it correctly. Please read and 的使用這台機器,使用前請仔細閱讀使用 follow the instructions of this manual, 說明書,希望您能長期使用它。請記得將 and keep it at hand for future references. 此說明書放在容易取得的地方。... - Page 9 Introduction unattended. (5) 若使用離合器馬達而無煞車片裝置 (5)If clutch motors without brake pads are used,must wait until the motor stops 時,必須待馬達完全停止。 completely. 8. 假如不慎讓機器及配件使用之油或油 8. If grease, oil, or any fluid contacts your skin or eyes by any chance, 脂,接觸到眼睛、皮膚或誤食時,請立 please wash the contacted area 刻以水清洗接觸部位及就診。...
- Page 10 15. 為使機器能正常操作以及減少噪音, 15. In order to operate properly and to reduce the noise, please place the 機台務必平放地上,機器避免在強烈 machine flat and level on the ground. 噪音的環境下操作。 Avoid operating the sewing machine at a noisy surrounding. 16. 選用適當的電源插頭,並由電子技師 16. Select a proper power plug and install it by an electrician.
- Page 11 Introduction c. 當您打開電源開關後或機器已 在運轉 c. Please never put your fingers under the needle(s) or in the thread take-up 中,絕不可將您的手放在針的下方或針 cover to prevent physical injuries when 線控線桿外蓋中,以免導致人員受傷。 you turn on the power switch or operate the machine. d. 當機器運轉中,梭頭高速轉動,為了避 d. While the machine is in operation, the 免對手可能引起之...
- Page 12 WARNING 特別事項 Please confirm the followings to avoid 為了避免機器故障及損壞,請先確定以下 malfunction or damage to this machine. 事項: 1. 當您安裝好機器後,做第一次機器操作 1. After installing the machine, and before the first operation, please clean it 前,請徹底清潔機器。 completely. 2. 清除運送途中累積之灰塵及溢出之油 2. Clean all dust and overflowed oil during transportation.
- Page 13 Introduction 1. 型號分類 表示: V C0 0 8 B - 04 06 4 P V AD (2 ) ( 4) ( 6) (7 ) V C0 0 8 B - 04 4 8- 1 9 1 P (2 ) ( 5) ( 6)
- Page 14 ( 5 ) 針之 針幅 ( 不等距 )( 圖 2 / 表 2) (5)Interspac e of need les( unequa l spa ce) ( Fig.2 / Table.2) 圖 2/Fig.2 總針寬 (C) 形式 A - B - A Types Total Width 0448 - 191 3/16"...
- Page 15 Introduction ( 7) 輔助配件 : (7)Indica tes t he ac cessory: Application 編號 用途 Pneumatic Presser Foot Lifter 氣壓式抬壓腳裝置 Condense Stitching Device 密縫裝置 Tubular Elastic Inserting and Attaching 環型褲頭鬆緊帶上帶裝置 Tape Attaching 貼帶裝置 Elastic Thread Shirring 伸縮線抽摺縫裝置 Pneumatic Automatic Thread Trimmer 自動切線裝置...
- Page 16 1. 依 本機器所附 桌板裁製圖及零 件組合圖 1. Use the accessories of the machine one by one to install the a nti-shock 所 列之配件, 依序安裝防震基座及線架 。 ( 如圖 3、圖 4 所示 ) seat a nd thread stand as the atta ched table cut-out and the parts list showed. (Fig .3 , Fig.4) 圖...
- Page 17 Introduction 圖 5/Fig.5 2 . 潤 滑 油 之 更 換 ( 圖 6 ) 2. C ha n g e the lub ricat io n o il (F ig .6 ) * 將 卸 油 孔 處 旋鈕 旋 開 ,使 油 槽之 油完 全 * Lo os e n o il s cre w a n d re - lo ck it a fter the o il in th e o il ta n k h as e mp tie d .
-
Page 18: Needle System
A dd t he lu b rica tio n re g ula rl y; the cy cl e 定 期 加 潤 滑 油 ,周 期 為 一 星期 。( 需按 時加油 的 孔 )( 圖 8 、 圖 9 ) is o ne we e k .( The ho les n ee de d t o b e a dde d the o il. - Page 19 Introduction 圖 10/Fig.10 ( 圖 11) 圖 11/Fig.11...
- Page 20 2. 在穿勾針 線時 ,應將勾針座引出軸 P 沿 箭 2 .When threa ding ,the leading shaft of t he looper holder should be p ull 頭方向拉出使 勾針座向前彈出,然後進 行 穿線。( 圖 1 2) out as t he arrow direc tion,so tha t t he looper holder will slightly move forward.Then,proceed thread ing.
- Page 21 Introduction 圖 14/Fig.14 * 當針棒上升至上 始點 時,調整針尖與針板 面 *When t he needle bar rises to the upper 之距離為 13~13. 5mm ( 圖 14 ) d ead point, adjust the d ist anc e from p inpoint t o t he surface of the needle p lat e to be 13~13.5mm.( Fig .14) ( 圖...
- Page 22 圖 17/Fig.17 1. 將勾針完 全插入勾針座內稍微鎖緊螺絲 A 1.Insert the looper into the looper ho lder 。 ( 圖 18) completely,and t ighten the screw A a lit tle.(Fig.18) 2 . 轉動皮帶 輪使 針上升,並使勾針前 進至左 2.Turn the belt pulley to raise the n eed le 側中心線...
- Page 23 Introduction 圖 20/Fig.20 TIMING POSITION OF THE NEEDLE AND THE LOOPER When t he needle sta rt s moving up from 當 針由下始點 開始 往上移 ,且勾針由後始點 往 前 移至如 ( 圖 2 1)A 所示之位置時。勾針尖 t he lower dea d point,a nd t he loope r 與針...
- Page 24 撥 線 桿 A 與車針之 間隙如 ( 圖 23 )。 The dista nce bet ween t he t hread w ip er A and the needle refer t o ( Fig.23) . 當 針棒於下方 位置時,將撥線桿 A 固定螺 絲 When the needle locates at lower B ( 圖...
- Page 25 Introduction 圖 25/Fig.25 當 針尖下降至勾 針 間隙約 1 m m,撥線桿 A 正 好 由右 始點向左移。( 圖 2 6) (Fig. 26) 圖 26/Fig.26 When the nee dle bar g oes down fro m the 當 針棒由上始點 下降至車針位於勾針背 面的 中 心位置時,勾 針線控線 A 也正好由下始點 upp er dead point and the need le locates 往...
- Page 26 2 . 微調整時,放 鬆 螺絲 E,將線導片 B 上 下 2.For doing micro-adjust ment,loos en 移 動調整再鎖緊 螺絲 E。 sc rew E ,and move t he thread guid e B up and down to adjust .Then retig hten the screw E . The thread ing a mount will be different 線...
- Page 27 Introduction 調整 時參照 ( 圖 3 0) When doing a djustment,p lease ref er to ( Fig .30). 1. 放鬆送 具 C 固 定螺絲 A。 1.Loosen the fixed sc rew A of t he feed dog C. 2. 上下移 動送具 C 使符合上述條件 時,再鎖 2.Move the fe ed dog C up a nd down 緊螺...
- Page 28 送 具上升至上始點 時應與 針板平行。( 圖 29 ) (Fig. 30) ( 圖 30) 壓下 按鈕 A,並轉 動皮帶 輪,使按鈕卡住 針 具 距調 整組,再轉 動皮帶輪至所需之縫 目後, 放 開此 按鈕。( 圖 31 ) 調 長縫 目時,將皮 帶輪往順時針方向旋轉, 反 之則 小。 調 整縫 目時,馬達 需在停止狀態。 圖...
- Page 29 Introduction 供 給量之調整 ( 一 ): F EE DING LE NGTH ADJ USTMENT( 一 ) 1. 適用微量調整 之情 況。 1.App licable for slig ht a djustment cond ition. 2. 放鬆連桿螺帽 後, 參考 ( 圖 3 2) 往 A 移動 2.Loose the nut of sha ft. The movement 供給量變大,...
- Page 30 圖 34/Fig.34 ( 圖 34) (Fig. 34) (Fig. 35) ( 圖 35) 圖 35/Fig.35...
- Page 31 Introduction ( 圖 36) 圖 36/Fig.36 布 料 薄布 料 ( L ) 中厚 布料 ( M ) 厚 布料 ( H ) M at er i a l 平輪 ( Fla t Typ e ) 齒輪 ( G e ar Typ e) 齒輪...
- Page 59 DEMOLITION PROCEDURE 報廢流程...
- Page 60 由於對產品的改良及更新,本產品使用說明書中與零件圖之產品及外觀的修改恕不事先通知 ! The specification and/or appearances of the equipment described in this instruction book & parts list are subject to change because of modification which will without previous notice. VY201.JUN.2020...
Need help?
Do you have a question about the VC008B and is the answer not in the manual?
Questions and answers