Table of Contents
Advertisement
Quick Links
Model #GBMR001
USE AND CARE GUIDE
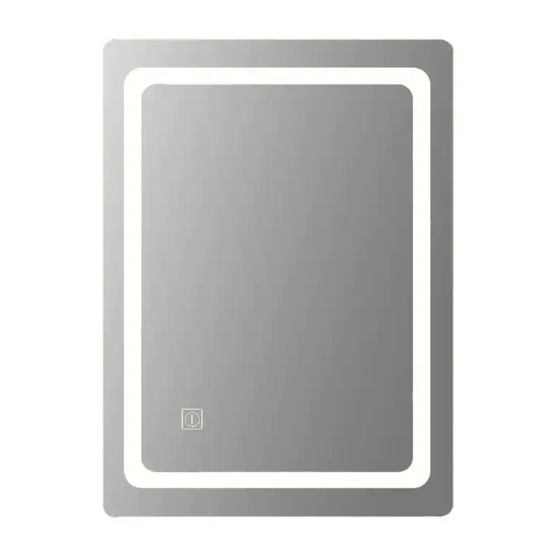
LED MIRROR
Questions, problems, missing parts? Before returning to the store,
call Glacier Bay Customer Service.
8 a.m. - 7 p.m., EST, Monday - Friday, 9 a.m. - 6 p.m., EST, Saturday
GLACIER (1-855-434-5224)
HOMEDEPOT.COM/GLACIERBAY
THANK YOU
We appreciate the trust and confidence you have placed in Glacier Bay through the purchase of this LED mirror. We strive to continually create
quality products designed to enhance your home. Visit us online to see our full line of products available for your home improvement needs. Thank
you for choosing Glacier Bay!
Advertisement
Table of Contents

Related Manuals for Glacier bay GBMR001


Summary of Contents for Glacier bay GBMR001
- Page 1 THANK YOU We appreciate the trust and confidence you have placed in Glacier Bay through the purchase of this LED mirror. We strive to continually create quality products designed to enhance your home. Visit us online to see our full line of products available for your home improvement needs. Thank...
-
Page 2: Table Of Contents
Table of Contents Table of Contents ............2 Tools Required .................5 Safety Information ............2 Installation Guidelines .............5 Storage Instructions ............. 3 Package Contents ..............6 Warranty ................ 4 Installation ..............7 Consumer Responsibilities ........13 Limited Lifetime Warranty ............4 What is Covered ...............4 Maintenance .............. -
Page 3: Storage Instructions
Safety Information (continued) NOTE: Please read and understand this entire manual before WARNING: Please note that changes or modifications of this attempting to assemble, operate or install the product. product is not expressly approved by the party responsible for compliance could void the user’s authority to operate the □... -
Page 4: Warranty
PRIOR TO INSTALLATION, for a replacement. □ The GLACIER BAY warrants mirrors to be free from defects in workmanship and materials under normal use and service for a period of one (1) year. -
Page 5: Pre-Installation
Pre-Installation PLANNING INSTALLATION Check the LED mirror for damage before installation. If any part of the LED mirror is missing or damaged, contact the Customer Service Team at 1-855-434-5224. TOOLS REQUIRED Safety Screw Rubber goggles driver mallet Pencil Drill (ø8mm / 5/16 in. bit) INSTALLATION GUIDELINES When installing this product, the screws should reach the wood studs behind the plasterboard wall. -
Page 6: Package Contents
Pre-Installation (continued) PACKAGE CONTENTS ON/OFF Touch Sensor Capteur Tactile ON/OFF Sensor Tactil ON/OFF Part Description Quantity Wall anchor Screw ST4X40 Twist-cap connector HOMEDEPOT.COM/GLACIERBAY Please contact 1-855-434-5224 for further assistance. -
Page 7: Installation
Installation (Option#1) Installing wall anchors Positioning □ Measure and mark the positions of the holes for the □ Insert the wall anchors (AA) using a rubber mallet until hanging screws of the LED mirror. the wall anchors are flush with the wall. □... - Page 8 Installation (Option#1) (continued) Installing the screws Connecting wires □ Install the screws (BB) with screwdriver. □ For a standard size junction box, a standard 4.9 in. x 1 in. round junction box cover can be used (Not Supplied). □ Connect the neutral (N) and live (L) wires to your own, using the twist-cap connectors (CC).
- Page 9 Installation (Option#1) (continued) Installing the mirror □ Hang the LED mirror onto the screws (BB). HOMEDEPOT.COM/GLACIERBAY Please contact 1-855-434-5224 for further assistance.
- Page 10 Installation (Option#2) Installing wall anchors Positioning □ Measure and mark the positions of the holes for the □ Insert the wall anchors (AA) using a rubber mallet until hanging screws of the LED mirror. the wall anchors are flush with the wall. □...
- Page 11 Installation (Option#2) (continued) Installing the screws Connecting wires □ Install the screws (BB) with screwdriver. □ For a standard size junction box, a standard 4.9 in. x 1 in. round junction box cover can be used (Not Supplied). □ Connect the neutral (N) and live (L) wires to your own, using the twist-cap connectors (CC).
- Page 12 Installation (Option#2) (continued) Installing the mirror □ Hang the LED mirror onto the screws (BB). HOMEDEPOT.COM/GLACIERBAY Please contact 1-855-434-5224 for further assistance.
-
Page 13: Consumer Responsibilities
□ The GLACIER BAY’s mirrors products will remain beautiful for many years if you properly care for them. □ The GLACIER BAY does not recommend the use of harsh abrasive cleansers on any of its products. Harsh cleansers will damage the finish of your mirror. - Page 14 Questions, problems, missing parts? Before returning to the store, call Glacier Bay Customer Service. 8 a.m. - 7 p.m., EST, Monday - Friday, 9 a.m. -6 p.m., EST, Saturday GLACIER (1-855-434-5224) HOMEDEPOT.COM/GLACIERBAY Retain this manual for future use.
Need help?
Do you have a question about the GBMR001 and is the answer not in the manual?
Questions and answers