Advertisement

O O v v e e r r v v i i e e w w
Introduction
In This Document
Safety is #1
Questions?
Dec 2008
Quick-Start Guide
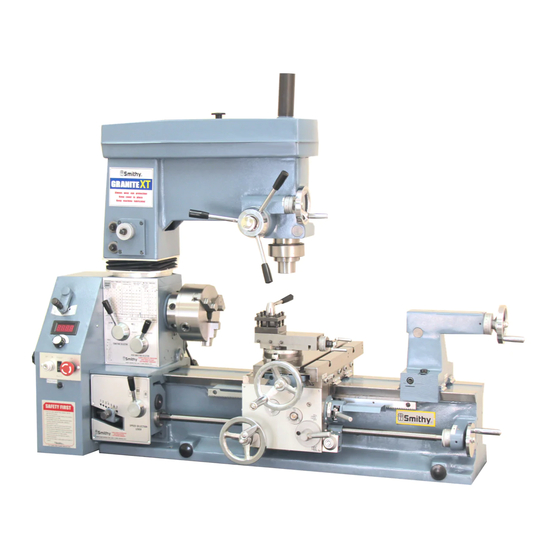
Congratulations on your purchase of a Smithy machine. With proper setup and
care, your machine should provide many years of quality work and enjoyment.
This guide covers general instructions for several Smithy metal-working machines.
You will receive a detailed operating guide, reference manual, and DVD packed in
with your machine. We recommend keeping this quick-start guide with those items
when they arrive.
Enjoy your Smithy machine!
This document covers basic information that you will need to prepare for the
delivery and to begin setting up your Smithy machine. The topics in this document
include:
Tracking Your Shipment and Preparing for Delivery
Taking Delivery
Opening the Crate
Removing the Machine from the Pallet
Securing the Machine to a Work Bench
Smithy machines have been proven to be safe and reliable. However, if abused or
operated improperly, any machine can cause injury to you or others. Please read
this guide and the operating guide carefully before you start machining. Proper use
will create a safe working environment and prolong the life of your machine.
In this manual, the symbols below draw attention to specific operating issues.
DANGER
! !
If this action is not avoided, it will cause permanent harm to your health,
such as death or serious injury, and it may also cause permanent damage to your machine.
WARNING
! !
If this action is not avoided, it can cause potential harm to your health,
resulting in death or serious injury, and has potential to cause serious harm to your machine.
CAUTION
! !
If this action is not avoided, it may cause potential harm to your health,
such as minor to moderate injury, and may also cause moderate harm to your machine.
For pre-delivery questions not covered in the guide, dial 1-800-476-4849,
Monday through Friday, 8:00 a.m. to 5:00 p.m. (Eastern Standard Time).
Quick-Start Guide for Smithy Metal-Working Machine
Introduction to the Quick Start Guide
Topic
Page
2
4
6
7
11
1

Advertisement

Table of Contents
loading

Summary of Contents for Smithy Granite 1324 Series

  • Page 1 Enjoy your Smithy machine! This document covers basic information that you will need to prepare for the In This Document delivery and to begin setting up your Smithy machine. The topics in this document include: Topic Page...
  • Page 2 Please note, some items - like Smithy 4-Jaw chucks - are packaged in small wood- en crates, which we DO NOT pack inside with your Smithy in order to avoid dam- age to your machine. Those items will be shipped via UPS or US Mail.
  • Page 3: Work Bench

    P P r r e e p p a a r r i i n n g g f f o o r r D D e e l l i i v v e e r r y y Here are some things you can do to prepare your shop or work space for your new Smithy machine.
  • Page 4: Receiving The Machine

    1 carton @ 160 1 @ 59-1/2 x 25 x 13-1/2 Smithy recommends that you use an open-bed pick-up truck, a cargo van, a cube Vehicles van, or a sturdy trailer to pick up your machine. Smaller vehicles may not have the load capacity or sufficient clearance for loading at the shipping terminal.
  • Page 5: Important Note

    The crate is intended to protect the machine; damage to the crate does not Important Note necessarily mean that your Smithy machine has been damaged. However, noting any damage to the crate on the delivery receipt will make it much easi- er to substantiate a claim if there actually is damage.
  • Page 6 Check the machine carefully for signs of damage, especially if you noted damage to Step 7 the crate earlier. Dec 2008 Quick-Start Guide for Smithy Metal-Working Machine...
  • Page 7 Before removing your machine from the pallet, review the instructions on page 11 for securing your machine to the work bench. Depending on the model, your fully assembled Smithy machine can weigh 900 pounds or more. Use a mechanical device to lift the entire machine, or disassemble some parts of the machine and reassemble them on the bench, as outlined in this guide.
  • Page 8 Use wrenches to remove the nuts and bolts that hold the machine base to the pal- let. Step 3 Remove the Smithy boxes that contain your Quick Start Pak. Remove the Millhead (see diagram below) Step 4 Lock the millhead locking handle. Using a sharp knife or razor blade, score the paint where the millhead attaches to the headstock.
  • Page 9 The gib for the 1200 series is on the operator’s side of the machine. Remove the Lathe Chuck (see diagram below) Step 6 Removal of the lathe chuck depends on which Smithy machine you have. Chuck Mounting Chuck...
  • Page 10 M M o o v v i i n n g g Y Y o o u u r r S S m m i i t t h h y y w w i i t t h h o o u u t t M M e e c c h h a a n n i i c c a a l l P P o o w w e e r r , , continued Step 7 Remove the Carriage Assembly Smithy does not recommend that you remove the carriage assembly unless it Important Note is absolutely necessary. It is very easy for several small parts to fall into the apron assembly and cause problems later.
  • Page 11: Mounting Hardware

    There are four mounting-bolt holes on the machine base. Follow the mounting hard- Mounting ware recommendations shown for the benches available for purchase from Smithy. Hardware Use equivalent hardware if you have built your own work bench, adjusting the length of the bolts for the thickness of your bench top.
  • Page 12 3 holes @ 0.5 inch diameter 1300 Series Mounting Bolt Layout GN-1324, GN-1324 MX & IMX 4 holes @ 0.5 inch diameter GN-1340, GN-1340MX & IMX 4 holes @ 0.5 inch diameter Continued on the next page... Dec 2008 Quick-Start Guide for Smithy Metal-Working Machine...
  • Page 13 Ready for begin cleaning and setting up the machine. Watch the DVD and read your operation Cleaning and guide thoroughly to familiarize yourself with your machine and the operations of Setup! your machine. Dec 2008 Quick-Start Guide for Smithy Metal-Working Machine...

Table of Contents