Table of Contents
Advertisement
Available languages
Available languages
Quick Links
Advertisement
Table of Contents

Related Manuals for Steren CCTV-070


Summary of Contents for Steren CCTV-070
- Page 2 IMPORTANT Before using your new Color Video Doorphones System, please read the following recommendations. • This device must be placed in an area with adequate ventilation in order to avoid humidity and dust. • Do not place this device near magnetic devices such as TVs and VCRs.
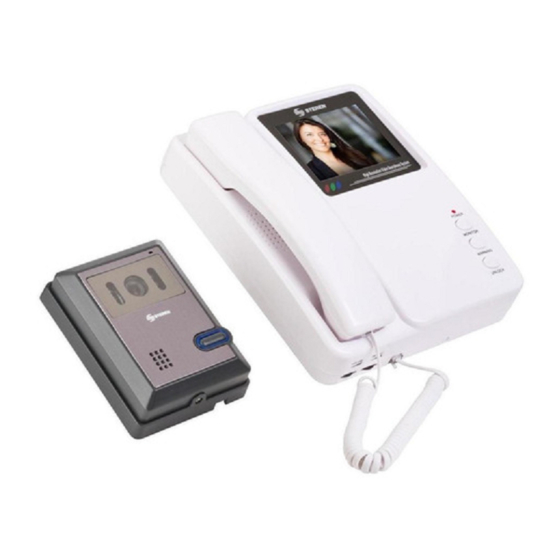
- Page 3 FEATURES • Allows for the identification and communication with people outside your home or office. • Infrared night-vision camera allows you to recognize visitors even at night time. • Perfect for home or office. • Easy to install. • High resolution color images. ENGLISH-03...
- Page 4 CONTROLS 1. Screen. 2. Handset. 3. Volume. 4. Brightness. 5. Earphone jack. 6. A/V output jack. 7. Power indicator light. 8. Monitor Button. 9. Alert Button. 10. Door Open Button. 11. Microphone. 12. Camera. 13. Infrared LED. 14. Speaker. 15. Call Button. 16.
-
Page 5: Installation
INSTALLATION INSTALLING THE CAMERA It is recommended that you install the camera at a height of 4.5 – 5 feet 1. Select the place where you wish to install the camera. 2. Move the camera adjust switch up and down in order to have the camera define the viewable area. -
Page 6: Camera Back Panel
3. Place the connection cable (white cable with four colored strands at each end) on the rear side of the mounting base. Connect them according to the following chart as seen: CAMERA BACK PANEL CABLE COLOR BLACK WHITE YELLOW A B C D YELLOW WHITE BLACK... - Page 7 4. Connect the two cables (black/red) to an electric door latch (not included) in order to be able to open the door. AN ELECTRIC LOCK BLACK (no included) 5. Set the mounting base to the desired height and place two screws in order to mount it firmly to the wall.
- Page 8 INSTALLING THE INTERCOM It is recommended that the intercom be placed at a height of 4.5-5 feet 1. Set the metal plate using screws at the desired height. ENGLISH-08...
- Page 9 2. On the intercom, connect the cameras cables according to the colors on the following chart: INTERCOM CABLE COLOR BLACK WHITE YELLOW 3. Set the intercom on the previously installed metal base. 4. Connect the power cable to an electrical outlet near the intecom. ENGLISH-09...
-
Page 10: Operation
OPERATION 1. When a visitor presses the call button, you will hear a ring on the intercom. The image of the visitor will simultaneously be displayed on the monitor. 2. Pick up the handset in order to speak with the visitor. The system will power off after you hang up the handset. -
Page 11: Specifications
SPECIFICATIONS Intercom Input: 110/240V~ 50/60Hz 10W Dimensions: 8.8 x 7.5 x 2.5 in. Weight: 58.5 oz. Frequency horizontal: 15,625kHz Frequency vertical: 50Hz. Ringtone: Ding-dong. Screen 3.5” TFT-LCD Camera Input: 12 V - - - 2W Angle of vision: 53 degrees. Ilumination: 0,1 lux a 30cm Dimensions:... -
Page 12: Warranty
Part number: CCTV-070 Brand: Steren WARRANTY This Steren product is warranted under normal usage against defects in workmanship and materials to the original purchaser for one year from the date of purchase. CONDITIONS 1.- This warranty card with all the required information, invoice or purchase ticket, product box or package, and product, must be presented when warranty service is required. - Page 13 RETAILER INFORMATION Name of the retailer Address Product Brand Part number Serial number Date of delivery In case your product fails or have questions, please contact your nearest dealer. If you are in Mexico, please give a call to our Call Center. Call Center 01 800 500 9000...
- Page 15 IMPORTANTE Antes de utilizar su nuevo Kit C Antes de utilizar su nuevo intercomunicador por favor lea las siguientes recomendaciones • El equipo debe ser colocado en un lugar con ventilación adecuada, para prevenir humedad, polvo o la luz directa del sol. •...
- Page 16 CARACTERISTICAS • Permite la identificación y comunicación con el exterior de la casa u oficina. • Cámara infrarroja de visión nocturna permitiendo reconocer visitantes por las noches. • Ideal para casa u oficina. • Fácil de instalar. • Alta resolución de imagen y a color. ESPAÑOL-03...
- Page 17 CONTROLES 1. Pantalla. 2. Auricular. 3. Volumen. 4. Brillo. 5. Entrada para conectar el auricular. 6. Salida A/V. 7. Indicador de encendido. 8. Botón de monitor. 9. Botón de alerta. 10. Botón de apertura de puerta. 11. Micrófono. 12. Cámara. 13.
- Page 18 INSTALACION INSTALANDO LA CAMARA Se recomienda que fije la cámara a una altura de 1,45 m a 1,6 m 1. Seleccione el lugar donde desee instalar la cámara. 2. Mueva el interruptor de ajuste de la cámara hacia arriba o abajo para que la cámara visualice un área definida.
- Page 19 3. Coloque el cable de conexión (cable blanco con 4 hilos de colores en cada extremo) en la parte trasera de la base de montaje de la cámara, conectando los siguientes colores: CUBIERTA TRASERA DE LA CAMARA COLOR DEL CABLE NEGRO BLANCO AMARILLO...
- Page 20 4.- Conecte los 2 cables (negro/rojo) a una cerradura eléctrica (no incluido) para la apertura de puerta. ROJO A UNA CERRADURA ELECTRICA NEGRO (no incluido) 5. Fije la base de montaje de la cámara a la altura deseada e introduzca 2 tornillos hasta que quede firmemente sujeta en la pared. Por ultimo coloque la cámara en la base y atornille hasta que quede firmemente sujeto.
- Page 21 INSTALANDO EL INTERCOMUNICADOR Se recomienda que fije el intercomunicador a una altura de 1,45 m a 1,6 m 1. Fije la placa de metal utilizando tornillos y taquetes a la altura deseada. ESPAÑOL-08...
- Page 22 2. En el intercomunicador conecte el extremo del cable de la cámara de acuerdo a los siguientes colores. INTERCOMUNICADOR COLOR DEL CABLE NEGRO BLANCO AMARILLO ROJO 3.- Sujete el intercomunicador en la base de metal previamente instalado. 4.- Conecte el cable de corriente a un contacto eléctrico cercano al intercomunicador.
- Page 23 OPERACION 1.-Cuando el visitante oprima el botón de llamada. Escuchará un timbre en el intercomunicador. La imagen del visitante se mostrará simultáneamente en la pantalla. 2.-Levante el auricular para hablar con el visitante, el sistema se apagará después de que cuelgue. Si no contesta el sistema se apagará automáticamente después de 30 segundos.
-
Page 24: Especificaciones
ESPECIFICACIONES Intercomunicador Entrada: 110/240V~ 50/60Hz 10W Dimensiones: 225 x 190 x 62 mm Peso: 1657gr. Frequencia horizontal: 15,625kHz Frequencia vertical: 50Hz. Tono de llamada: Ding-dong. Pantalla: 3,5” (9cm) LCD TFT Cámara Entrada: 12 V - - - 2W Angulo de visión: 53 degrees. -
Page 25: Póliza De Garantía
1.- Para hacer efectiva la garantía, presente ésta póliza y el producto, en donde fue adquirido o en Electrónica Steren S.A. de C.V. 2.- Electrónica Steren S.A de C.V. se compromete a reparar el producto en caso de estar defectuoso sin ningún cargo al consumidor. Los gastos de transportación serán cubiertos por el proveedor. - Page 26 Biólogo MaximIno Martínez No. 3408 Int. 3 y 4, San Salvador Xochimanca, México, D.F. 02870, RFC: SPE941215H43 ELECTRONICA STEREN DEL CENTRO, S.A. DE C.V. Rep. del Salvador 20 A y B, Centro, 06000, México. D.F. RFC: ESC9610259N4 ELECTRONICA STEREN DE GUADALAJARA, S.A.
Need help?
Do you have a question about the CCTV-070 and is the answer not in the manual?
Questions and answers