Advertisement
Quick Links
Advertisement

Subscribe to Our Youtube Channel
Related Manuals for Smoke hollow SH36GW


Summary of Contents for Smoke hollow SH36GW
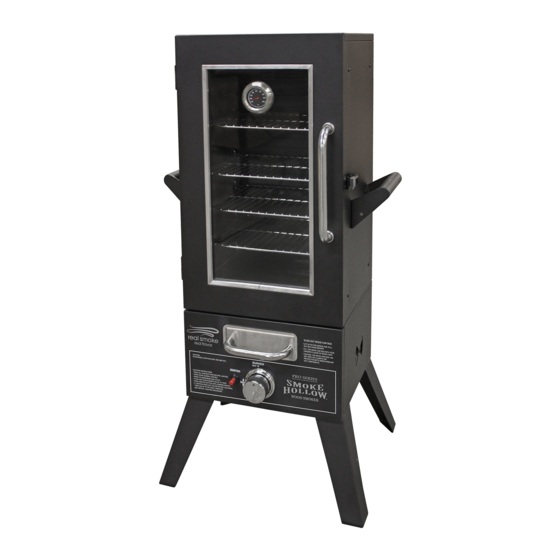
- Page 1 SH36GW...
- Page 5 SH36GW SH36GW SH36GW-01 SH36GW-02 34162G-22 Door Handle SH36GW-03 Handle Bezel SH36GW-04 SH36GW-05 SH36GW-06 SH36GW-07 Small Damper 3A02000 SH36GW-08 38205GW-3 38205GW-3A SH36GW SH36GW-13 SH36GW-13A #10 Spring Washers SH36GW-14 SH36GW-15 SH36GW-17 PS4415-19...
- Page 6 Locate: Lower Cabinet assembly. Leg(10&11),(12)1/4-20x5/8" bolts Tools needed: Phillips Head Screwdriver Procedure: Turn the Lower Cabinet Assembly upside down. Place each leg at the corner of the smoker cabinet assembly. Fasten each leg with three 1/4-20x5/8" bolts. Turn the Lower Cabinet assembly right side up.
- Page 7 Procedure: Place(6)Cooking Grid Supports on EACH side of she Smoker Cabinet at the same height opposite each other.These will hold the Cooking Grids and Water Pan when they are slid in place.fig6.1...
- Page 8 Step 7 Locate: Water Pan(15), Cooking Racks(17) Tools needed: None Procedure:Put the five Cooking Racks and Water Pan into the Cooking Grid Support. Fig 7.1. Step 8 Procedure: Put the Wood Chip Box Lid on the Wood Chip Box,and slide Wood Chip Box onto theWood Chip Box Support rail..Fig8.1 Fig8.1 Step 9...
- Page 9 Step 10 Locate: Door Assembly(2). Tools needed: None Procedure: Attach the Door Assembly on the Smoker Cabinet. Fig 11.1. Step 11 Locate: Heat Indicator Fig10.1 Note: The Heat Indicator is supplied with one fiber washer and one wing nut. Tools needed: None Procedure: 1.
- Page 10 Step 14 Locate: Grease Pan(10). Tools needed: None Procedure: Slide the Grease Pan into the Grease Rails provided in the bottom panel from left hand side, as shown in the figure. Fig 14.1 Fig14.1 Step 15...
- Page 13 slide the box into the smoker. To add wood chips while cooking, lift up on the wood chip box handle and pull out the wood chip box from the smoker. Dump the wood chip ash in a metal container (Preferably with water) to extinguish the wood chip ash. (Note: The wood chip box lid will stay on the wood chip box when dumping the ash) Refill the wood chip box with wood chips, close the lid and slide the wood chip box...
- Page 14 Fig 16.1 Fig 16.1 Fig 17.1 Fig 17.1 Fig 18.1 Fig 18.1 Fig 19.1 Fig 19.1...
- Page 22 PartNumber:SH36GW-IM Revision:June 2015...
Need help?
Do you have a question about the SH36GW and is the answer not in the manual?
Questions and answers