Table of Contents
Advertisement
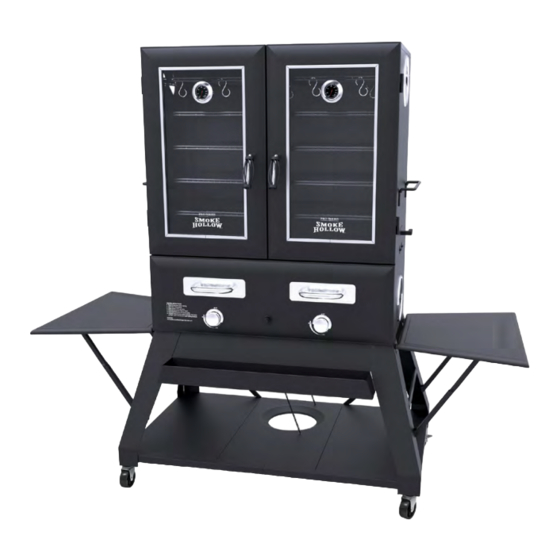
Owner's Manual
PRO SERIES
Extra Wide
Gas Smoker
Model
SH3616DW
THIS INSTRUCTION MANUAL CONTAINS IMPORTANT INFORMATION
NECESSARY FOR PROPER ASSEMBLY AND SAFE USE OF THE APPLIANCE.
READ AND FOLLOW ALL WARNINGS AND INSTRUCTIONS BEFORE
ASSEMBLING AND USE OF THE APPLIANCE.
FOLLOW ALL WARNINGS AND INSTRUCTIONS WHEN USING THE APPLIANCE.
KEEP THIS MANUAL FOR FUTURE REFERENCE.
CUSTOMER SERVICE: 1-866-475-5180 (Monday–Friday, 8:30 am–4:30 pm, CST)
www.olp-inc.com
FOR OUTDOOR USE ONLY
Advertisement
Table of Contents

Related Manuals for Smoke hollow SH3616DW


Summary of Contents for Smoke hollow SH3616DW
- Page 1 Owner’s Manual PRO SERIES Extra Wide Gas Smoker Model SH3616DW THIS INSTRUCTION MANUAL CONTAINS IMPORTANT INFORMATION NECESSARY FOR PROPER ASSEMBLY AND SAFE USE OF THE APPLIANCE. READ AND FOLLOW ALL WARNINGS AND INSTRUCTIONS BEFORE ASSEMBLING AND USE OF THE APPLIANCE.
- Page 2 DANGER IF YOU SMELL GAS: 1. SHUT OFF GAS TO THE APPLIANCE 2. EXTINGUISH ANY OPEN FLAME 3. OPEN LID 4. IF ODOR CONTINUES, KEEP AWAY FROM THE APPLIANCE AND IMMEDIATELY CALL YOUR GAS SUPPLIER OR YOUR FIRE DEPARTMENT. DANGER 1.
- Page 3 1-866-475-5180 (Monday–Friday, 8:30 am–4:30 pm, CST). NOTE : DO NOT RETURN UNIT TO THE STORE BEFORE CALLING THE TOLL FREE NUMBER. Do not dispose of your cartons until you are completely satisfied with your new Smoke Hollow smoker. WARNING CALIFORNIA PROPOSITION 65...
-
Page 4: Parts And Tool List
Parts and Tool List Note: For assistance, including missing or damaged parts, call toll free 1- 866-475-5180 from 8:30 am - 4:30 pm Central Time, Monday - Friday 7.2. 1 1 1.2 1 1.1 1 1.3 1 1.4 28.2 28. 1... -
Page 5: Parts List
1- 866-475-5180 from 8:30 am - 4:30 pm Central Time, Monday - Friday Factory Item Qty. Description Part # Assembled Upper Cabinet Assembly SH3616DW-01 Left Upper Door Assembly SH3616DW-02.1 Right Upper Door Assembly SH3616DW-02.2 Cooking Grid Hook SH3616DW-03 Door Handle... - Page 6 1- 866-475-5180 from 8:30 am - 4:30 pm Central Time, Monday - Friday Hardware Pack Parts List Factory Item Qty. Description Part # Assembled #10-24 x 1/2 Screw SH3616DW-29 #10-24 x Hex Nut SH3616DW-30 1/4-20 x 5/8 Screw SH3616DW-31 1/4-20 x 1/2 Screw SH3616DW-32 M5 Spring Washer SH3616DW-33...
-
Page 7: Smoker Assembly
Smoker Assembly Step 1 Locate: • Lower Cabinet Assembly • (2) Control Knobs Procedure: Attach (2) Control Knobs to the valve stems as shown here. Control Knobs Step 2 Locate: • (2) Air Dampers • (2) #10-24 x 1/2 Screws Procedure: •... - Page 8 Smoker Assembly Step 3 Locate: • Right Front Leg • Left Rear Leg Left Front Leg • Left Front Leg Left Rear Leg • (9) 1/4 -20 x 5/8 Screws Right Front Leg Procedure: Attach Legs shown here to lower cabinet with (9) screws.
- Page 9 Smoker Assembly Step 5 Locate: • (6) 1/4 -20 x 1/2 Screws Procedure: Attach Bottom Table Assembly to the bottom of the legs with (6) screws listed. Do not tighten yet. Left Rear Right Front Left Front Locate: Step 6 •...
- Page 10 Smoker Assembly Step 7 Locate: • (2) Locking Casters • (2) Non-Locking Casters Non-Locking Casters Locking Procedure: Casters Screw the Locking Casters into the bottom of the front Legs as shown here. Screw the Non-Locking Casters into the bottom of the back legs. Front of Lower Cabinet Assembly Locate: Step 8...
- Page 11 Smoker Assembly Step 9 Locate: • Grease Tray Procedure: Slide Grease Tray into Lower Cabinet as shown. Step 10 Locate: • (2) Brackets - Tank Block - Side • (2) Brackets -Tank Block - Back #10-24 x 1/2 Screws • (8) Procedure: Attach Brackets Tank Block - Side and Brackets -Tank...
- Page 12 Smoker Assembly Step 11 Locate: • Gas Tank Retainer Wire • Zip-tie Procedure: Attach the Gas Tank Retainer Wire to the Bottom Table Assembly as shown here. Attach gas hose with Zip-tie to right rear leg securely. Step 12 Locate: •...
- Page 13 Smoker Assembly Locate: Step 13 • (2) Wood Chip Trays Procedure: Slide (2) Wood Chip Trays into Lower Cabinet. Wood Chip Trays Step 14 Locate: • Upper Cabinet Assembly Air Damper • (2) Air Dampers Air Damper • (2) #10-24 x 1/2 Screws •...
- Page 14 Smoker Assembly Step 16 Locate: • (2) Water Fill Door Handles Procedure: Attach Water Fill Door Handles to Water Fill the Water Fill Door Panels on both Door Handle sides of Upper Cabinet with pre- assembled screws. Locate: Step 17 •...
- Page 15 Smoker Assembly Step 19 Locate: • Water Pan Support Procedure: Place Water Pan Support onto Cabinet Assembly as shown. Step 20 Locate: • (2) Water Pans Water Pans Procedure: Place Water Pans into the large openings in the Water Pan Support as shown.
- Page 16 Smoker Assembly Step 22 Locate: • (5) Cooking Grids Procedure: Slide Cooking Grids into the Cooking Grid Supports as shown here. Locate: Step 23 • (10) S-Hooks (Sausage Hangers) Procedure: Place S-Hooks onto the top Cooking Grid as shown here. Step 24 Locate: •...
- Page 17 Smoker Assembly Step 25 Locate: • (2) Heat Indicators Procedure: Attach Heat Indicators to both Door Windows using the Fiber Washer and Wing Nut pre-assembled with each Heat Indicator. Locate: Step 26 • (2) Door Handles Procedure: Attach Door Handles to both Doors using the flat washers, spring washer and nut (pre-assembled with each Door Handle).
- Page 18 LP Gas Cylinder Installation WARNINGS AND SPECIFICATIONS • Only connect this smoker to a Type 1 cylinder valve. The Type 1 valve can be identified with the large external threads on the valve outlet. • Do NOT connect to a propane cylinder other than a 20 lb. (9.1 kg) capacity. •...
-
Page 19: Operating Instructions
Operating Instructions LP GAS CYLINDER (TANK) SPECIFICATIONS: The installation of this appliance must be in accordance with all applicable local codes, or the National Fuel Gas Code ANSI Z223.1 NFPA 54. When purchasing or exchanging a cylinder for your gas smoker, it must be: 1. - Page 20 Operating Instructions LP-Cylinder installed on the unit as shown LP Cylider Capacity and Specifications: LP Cylider Capacity and Specifications: The 20 lb (9.1 kg). LP cylinder used with this smoker must conform to the following The 20 lb (9.1 kg). LP cylinder used with this smoker must conform to the following requirements.
-
Page 21: Leak Testing
Operating Instructions LEAK TESTING: WARNING: NEVER USE YOUR SMOKER WITHOUT LEAK TESTING ALL GAS CONNECTIONS, HOSES AND PROPANE TANK. DANGER: TO PREVENT FIRE OR EXPLOSION HAZARD: • Do not smoke or permit ignition sources in the area while conducting a leak test. •... - Page 22 Operating Instructions SEASON YOUR SMOKER PRIOR TO ITS FIRST USE Seasoning seals the interior of your smoker to enhance flavoring, durability and overall performance. 1. Add water to both water pans. 2. Add wood chips to the wood chip trays and burn Smoker at 300°F for 45–60 minutes.
-
Page 23: Match Lighting Instructions
Operating Instructions ADDING WATER TO SMOKER To add water to the smoker, simply open the side water fill doors on both sides of the smoker and slowly pour water from a cup or pitcher into the opening. Fill the Water Pans up to about an inch from the top of the pans. -
Page 24: Cooking Instructions
Operating Instructions COOKING INSTRUCTIONS IMPORTANT: Before each use, clean and inspect the hose and connection to the LP gas cylinder. If there is evidence of abrasion, wear, cuts or leaks, the hose must be replaced before the smoker is used. Refer to the “leak test”... -
Page 25: Care And Maintenance
Care and Maintenance CARE AND MAINTENANCE TO BE PERFORMED BEFORE EACH USE: CAUTION: All care and maintenance procedures are to be performed only while the smoker is turned off and cooled. • Clean the water pans and cooking grids with hot, soapy water. Rinse and dry thoroughly. You may prefer to coat the water pans and cooking grids lightly with cooking oil or cooking spray. - Page 26 In a gas smoker, soaking the wood chips may prolong the life of the wood chips but it will also take longer to produce smoke so we will leave that decision up to you. Do not soak your wood chips when using your Smoke Hollow electric smoker. What you need to smoke meats: Internal Meat Thermometer An internal meat thermometer is a must to cook large pieces of meat to make sure it is done internally.
- Page 27 Smoking Techniques Smoked Pork Tenderloin Take outside wrapper off of meat and wash thoroughly in cold water. Place tenderloin on a paper towel to soak up excess water. Rub your favorite pork rub on the loin (we recommend Head Country Pork seasoning). Preheat smokers to 225 degrees and place loin in the center of the smoker.
-
Page 28: Limited Warranty
5400 Doniphan Drive Neosho, MO 64850 www.olp-inc.com © 2016 Outdoor Leisure Products, Inc. No part of this work may be reproduced, modified, distributed, or otherwise used without prior written permission. Smoke Hollow is a trademark of Outdoor Leisure Products, Inc. 01052017A...
Need help?
Do you have a question about the SH3616DW and is the answer not in the manual?
Questions and answers