Table of Contents
Advertisement
Available languages
Available languages
Quick Links
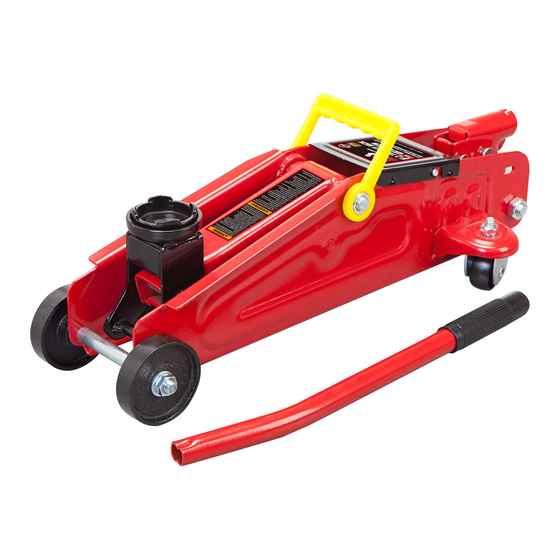
OWNER'S MANUAL
2 TON TROLLEY JACK
Item: T820014S
Questions, problems, missing parts? Before returning to your retailer, contact our customer service
department at www.torin-usa.com/support.
Read carefully and understand all ASSEMBLY AND OPERATION INSTRUCTIONS before operating.
Failure to follow the safety rules and other basic safety precautions may result in serious personal
injury.
REGISTER
YOUR PRODUCT
http://www.torin-usa.com/
customer-support/
register-a-product.html
SCAN CODE
Version 06232020
Advertisement
Table of Contents

Related Manuals for Torin BIG RED T820014S


Summary of Contents for Torin BIG RED T820014S
- Page 1 SCAN CODE OWNER’S MANUAL 2 TON TROLLEY JACK Item: T820014S Questions, problems, missing parts? Before returning to your retailer, contact our customer service department at www.torin-usa.com/support. Read carefully and understand all ASSEMBLY AND OPERATION INSTRUCTIONS before operating. Failure to follow the safety rules and other basic safety precautions may result in serious personal injury.
-
Page 2: Safety Markings
Homes, Trailers, RV’s, Campers, nor Fifth Wheels, etc... 16. Failure to heed these markings may result in personal injury and/or property damage. TECHNICAL SPECIFICATIONS Item Capacity Lifting Range Lifting Range Lifting Range Lifting Range Min. (Inch) Max. (Inch) Min. (cm) Max. (cm) T820014S 2 TON 5-5/16 13.5... - Page 3 1. Turn release valve counterclockwise one full turn ASSEMBLY to the open position. 1. Familiarize yourself with the jack. Cover Plate Lifting Arm Saddle Front Wheel 2. Rapidly pump the handle 6-8 times. Leave handle in down position to expose oil fill plug. 3.
-
Page 4: Before Use
BEFORE USE 1. Before using this product, read the owner's manual completely and familiarize yourself thoroughly with the product and the hazards associated with its improper use. 2. Perform the air purge procedure. (See System Air Purge Procedure.) 3. Check and that the pump operates smoothly before putting into service. 4. -
Page 5: Maintenance Instructions
MAINTENANCE INSTRUCTIONS If you use and maintain your equipment properly, it will give you many years of service. Follow the maintenance instructions carefully to keep your equipment in good working condition. Never perform any maintenance on the equipment while it is under a load. Inspection You should inspect the product for damage, wear, broken or missing parts (e.g.: pins) and that all components function before each use. - Page 6 6. Position the jack on level ground and keep saddle TO ADD JACK OIL in the lowered position. Fill the oil case until oil level is just beneath the lower rim. Keep dirt and 1. Position the jack on level ground and lower the other foreign materials clear when pouring.
-
Page 8: Assembly Diagram
ASSEMBLY DIAGRAM REF# DESCRIPTION Shaft for front wheel Circlip 12 Rear caster Retaining washer 8 Nut M8 Left wall plate assembly Return spring Oil plug Power unit assembly Steel Ball Bearing Valve pistion Pin base Moust Piston Handle socket Retaining pin Seal kit... -
Page 9: Troubleshooting
TROUBLESHOOTING JACK JACK JACK POOR WILL NOT CAUSES AND SOLUTIONS WILL WILL WILL JACK LIFT TO LIFTING FULL LIFT HOLD LOWER EXTENSION LOAD LOAD Release valve is not completely closed (Turn handle clockwise). Weight Capacity Exceeded. Air is in the hydraulics. Purge air from system. -
Page 10: Enregistrez Votre Produit
ENREGISTREZ VOTRE PRODUIT http://www.torin-usa.com/ customer-support/ register-a-product.html SCANNEZ LE CODE MANUEL DU PROPRIÉTAIRE CRIC ROULEUR 2 TONNES Article No. TA82001 AVERTISSEMENT! Questions, problèmes, pièces manquantes? Avant de retourner voir votre fournisseur, appelez notre service à la clientèle au www.torin-usa.com/support. Lisez attentivement et comprenez toutes les DIRECTIVES DE MONTAGE ET DE FONCTIONNEMENT avant l’utilisation. -
Page 11: Spécifications Techniques
16. Il peut en résulter des blessures ou des dommages si vous ne suivez pas ces consignes. SPÉCIFICATIONS TECHNIQUES Article No. Capacité Amplitude de Amplitude de Amplitude de Amplitude de levage Min. levage Max. levage Min. levage Max. (Pouce) (Pouce) (cm) (cm) T820014S 2 TONNES 5-5/16 13.5... -
Page 12: Montage
MONTAGE 1. Familiarisez-vous avec le cric Bras de levage Plaque Sellette Bouchon de remplissage d’huile Roue de guidage 2. Alignez la base du levier sur la valve de purge placée en bas du logement du levier. Tournez le levier et la valve de purge en sens horaire pour les serrer. -
Page 13: Avant L'utilisation
AVANT L’UTILISATION 1. Avant d’utiliser ce produit, lisez entièrement le manuel du propriétaire et familiarisez-vous complètement avec le produit et les dangers qui se rapportent à son utilisation inappropriée. 2. Effectuez la procédure de purge. (Consultez la Procédure de purge du circuit.) 3. -
Page 14: Instructions D'entretien
INSTRUCTIONS D’ENTRETIEN Si vous utilisez et effectuez bien l’entretien de votre équipement, il vous rendra service pendant de nombreuses années. Suivez attentivement les directives d’entretien pour conserver votre équipement en bon état de fonctionnement. N’effectuez jamais d’entretien sur l’équipement pendant qu’il est sous charge. Inspection Vous devez inspecter le produit pour tout dommage, usure, pièces brisées ou manquantes (par ex. - Page 15 6. Positionnez le cric sur un sol de niveau et laissez AJOUT D’HUILE AU CRIC la sellette en position basse. Remplissez le 1. Positionnez le cric sur un sol de niveau et réservoir d’huile jusqu’à ce que le niveau se situe abaissez la sellette.
-
Page 16: Schéma De Montage
SCHÉMA DE MONTAGE RÉF nº DESCRIPTION QUANTITÉ Shaft for front wheel Circlip 12 Rear caster Retaining washer 8 Nut M8 Left wall plate assembly Return spring Oil plug Power unit assembly Steel Ball Bearing Valve pistion Pin base Moust Piston Handle socket Retaining pin Seal kit... -
Page 17: Dépannage
DÉPANNAGE CRIC CRIC CRIC LEVAGE CAUSES ET SOLUTIONS INSUFFI- SOULÈVE SOULÈVE MAIN- S’ABAISSE SANT DU PAS LA TIENT CRIC COMPLÈ- CHARGE PAS LA TEMENT CHARGE La soupape de sécurité n’est pas complètement fermée (Tournez la poignée en sens horaire). Capacité de levage dépassée. Il y a de l’air dans le circuit hydraulique. -
Page 18: Registre Su Producto
ESCANEE EL CÓDIGO MANUAL DEL PROPIETARIO GATO CARRETILLA 2 TONELADAS Elemento: T820014S ADVERTENCIA ¿Alguna pregunta o problema? ¿Le faltan piezas? Antes de recurrir a su distribuidor, llame a nuestro departamento de atención al cliente al www.torin-usa.com/support. Lea atentamente y entienda todas las INSTRUCCIONES DE ENSAMBLAJE Y OPERACIÓN antes de utilizar el producto. -
Page 19: Especificaciones Técnicas
16. Si no presta atención a estas marcas, pueden ocurrir lesiones personales o daños materiales. ESPECIFICACIONES TÉCNICAS Elemento Capacidad Rango de eleva- Rango de eleva- Rango de eleva- Rango de eleva- ción ción ción ción Mín. (pulg.) Máx. (pulg.) Mín. (cm) Máx. (cm) T820014S 2 TONELADAS 5-5/16 13.5... - Page 20 ENSAMBLAJE 1. Familiarícese con el gato. Brazo elevador Placa Silla Tapón aceite Rueda frontal 2. Alinee la base de la palanca con la válvula de liberación ubicada bajo el receptáculo de la palanca. Gire la palanca y la válvula de liberación en sentido horario para apretarlas.
-
Page 21: Antes Del Uso
ANTES DEL USO 1. Antes de utilizar este producto, lea todo el manual del propietario y familiarícese bien con el producto y los peligros asociados a su uso incorrecto. 2. Realice el procedimiento de purga de aire. (Consulte la sección Procedimiento de purga del sistema). 3. -
Page 22: Instrucciones De Mantenimiento
INSTRUCCIONES DE MANTENIMIENTO Si utiliza y da mantenimiento a su equipo correctamente, este le ofrecerá muchos años de servicio. Siga cuidadosamente las instrucciones de mantenimiento para mantener su equipo en buenas condiciones de funcionamiento. No haga ningún mantenimiento al equipo mientras esté llevando una carga. Inspección Debe inspeccionar el producto en busca de daños, desgaste, averías o piezas faltantes (p. - Page 23 6. Coloque el gato sobre suelo nivelado y mantenga PARA AGREGAR ACEITE AL GATO la montura en la posición baja. Llene el recipiente de aceite hasta que el nivel de aceite esté justo 1. Coloque el gato sobre suelo nivelado y baje la montura.
- Page 24 DIAGRAMA DE ENSAMBLAJE REF. No. DESCRIPCIÓN CANT. Shaft for front wheel Circlip 12 Rear caster Retaining washer 8 Nut M8 Left wall plate assembly Return spring Oil plug Power unit assembly Steel Ball Bearing Valve pistion Pin base Moust Piston Handle socket Retaining pin Seal kit...
-
Page 25: Solución De Problemas
SOLUCIÓN DE PROBLEMAS EL GATO EL GATO POCO NO LEVAN- CAUSAS Y SOLUCIONES GATO LEVANTE TA HASTA LEVAN- SOSTIE- ALCANZAR LA TA LA NE LA BAJA GATO EXTENSIÓN CARGA CARGA COMPLETA La válvula de liberación no está completamente cerrada. (Gire la palanca en sentido horario). Se superó... - Page 26 Torin Inc. 4355 E. Brickell Street Ontario, CA USA www.torin-usa.com Made in China - Fabriqué en Chine - Hecho en China...
Need help?
Do you have a question about the T820014S and is the answer not in the manual?
Questions and answers