Table of Contents
Advertisement
Quick Links
1.0 INTRODUCTION
The Nuaire Drimaster/Flatmaster range has been curing severe
condensation problems for over 20 years in some of the worst affected
properties throughout the world. Its successful operation depends
entirely upon the unit being installed strictly in accordance with these
instructions. We would, therefore, respectfully suggest that you read
through this guide in its entirety before commencing installation
and then go through this guide step by step to ensure a satisfactory
completion.
Units are supplied assembled and include a thermostatically controlled
heater. A unit mounted override switch is provided. A 'BOOST' speed
facility for additional ventilation is included, this is operated by a
remote switch (supplied).
The FLAT2000 L/R is a 'handed' product, with the L/R signifying the
discharge direction, as viewed from the front. The FLAT2000L unit is
supplied arranged for LEFT HAND discharge of air. The FLAT2000R unit
is supplied arranged for RIGHT HAND discharge of air.
IMPORTANT
Whilst the installation of the Flatmaster unit may be achieved
by a suitable craftsman, the provision of the electrical supply and
the connection of the unit to the mains must be carried out by a
qualified electrician.
IMPORTANT
Where the systems are installed in flats, ensure all regulatory
provisions are adhered to. Where the systems are installed in flats
where these regulatory provisions do not apply, good installation
practice should be observed.
For more information please refer to the Building Regulations,
Approved Document B (Fire safety) – Volume 1: Dwelling houses
(2006 Edition).
The unit is designed to take fresh air from outside, clean the air, and
discharge it into the central hallway via a system of ducting supplied by
the installer.
The dwelling supply grille is usually installed at high level in a central
location within the hallway, although discharging the air down the
length of the hallway (away from the front door) should also prove
acceptable. Unit performance may be enhanced if an existing heat
source can warm the discharged air e.g. by locating the discharge grille
above a radiator.
Before commencing installation decide the best position for the unit
and where the fresh air is to come from and be discharged to. The unit
can be installed in many different configurations and is supplied with
enough interchangeable spigots to enable it to be used with either
circular (100mm) or rectangular ducting (121mm x 60mm).
IMPORTANT
The heater outlet MUST NOT be left exposed. A minimum
distance of 500mm is required between the discharge grille and the
nuaire.co.uk
029 2085 8400
FLAT2000L/R
Low Energy Positive Input Ventilation Unit
Installation and Maintenance
heater.
Figure 1. Typical installation of a right handed unit with top
discharge (FLAT2000R).
Inlet position
Heater
Alternative
Right hand
inlet position
Flatmaster unit
2.1 Spigot Inserts
The unit is designed to be used with rigid ducting only. Ensure that
when the ducting is fitted it is secured in place using wall brackets and
screws on the duct as close to the spigots as possible to prevent the
spigot inserts (fig 1) or rigid ducting from being removed or accidentally
knocked off. If it is necessary to fit flexible ducting then the spigot
inserts should be glued in place, using super glue Loctite 454 Gel, at the
clip points 1, 2, 3 & 4 for all spigot inserts (see fig. 2).
Figure 2. Fitting spigot inserts.
Outlet
Clip & glue points
1
2
4
3
'Blank off' plate
Note: If the circular spigot is used as an outlet, the 115 x 55mm clear
blanking plate will need to be fitted (as shown). This plate should be
prevented from movement by the use of silicone sealant.
Figure 3. Fitting the blanking plate for use with circular spigots.
Blanking
plate
28. 10. 19. Leaflet Number 670901
The EMC Directive
2014/30/EU
The Low Voltage
Directive
2014/35/EU
500mm
Discharge grille
'Blank off'
plate
Inlet
1
4
2
3
1
4
2
3
Alternative inlet position
Outlet
Spigot
1
Advertisement
Table of Contents

Subscribe to Our Youtube Channel
Related Manuals for NuAire FLAT2000L


Summary of Contents for NuAire FLAT2000L
- Page 1 The FLAT2000 L/R is a ‘handed’ product, with the L/R signifying the Alternative Right hand discharge direction, as viewed from the front. The FLAT2000L unit is inlet position supplied arranged for LEFT HAND discharge of air. The FLAT2000R unit Flatmaster unit is supplied arranged for RIGHT HAND discharge of air.
- Page 2 7 for FLAT2000R example). connect the Flatmaster to the input and discharge grilles. 2.5.1 Fixing All Necessary Ducting Figure 5. Fitting deflector plate for a FLAT2000L. A full range of ductwork and ductwork ancillaries are available. Please Deflector plate Deflector plate...
- Page 3 Installation and Maintenance FLAT2000L/R Low Energy Positive Input Ventilation Unit Figure 9. Rear input Input grille (louvres 100mm dia / 121x60mm rectangular ducting slant downwards) installation (view from 100mm dia / 121x60mm (note input side kept as short as possible) above).
- Page 4 FLAT2000, 400mm rectangular ducting (120 x 60 mm), transition piece and supply grille. Warning: Ensure that the fan is isolated from the mains supply The FLAT2000L & FLAT2000R are handed products, the rotation switch before removing cover. should not be adjusted from its factory setting.
- Page 5 5.3 Thermostat Set Point The occupier will normally require the heater to activate when the outside air temperature falls below a predetermined point. This predetermined point is factory set to 10°C, Nuaire recommend that the thermostat be set at 10°C. 6.0 MAINTENANCE The maintenance requirements for this product can be found in the “Product Safety –...
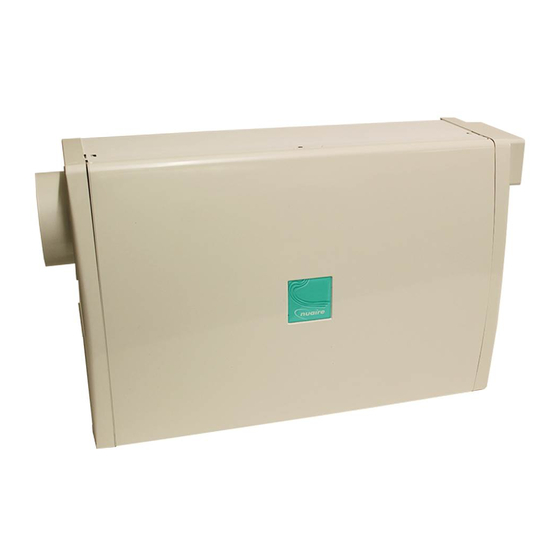
- Page 6 Installation and Maintenance FLAT2000L/R Low Energy Positive Input Ventilation Unit Product Safety - Essential Operational Checks Project Address YYYY Date Of Check No action required Unit Code Remedial action required Unit Serial Number Make safe and corrective Figure 15. FLAT2000 unit with cover installed...
Need help?
Do you have a question about the FLAT2000L and is the answer not in the manual?
Questions and answers