
Subscribe to Our Youtube Channel
Related Manuals for Motion Concepts Invacare Matrx Mini back

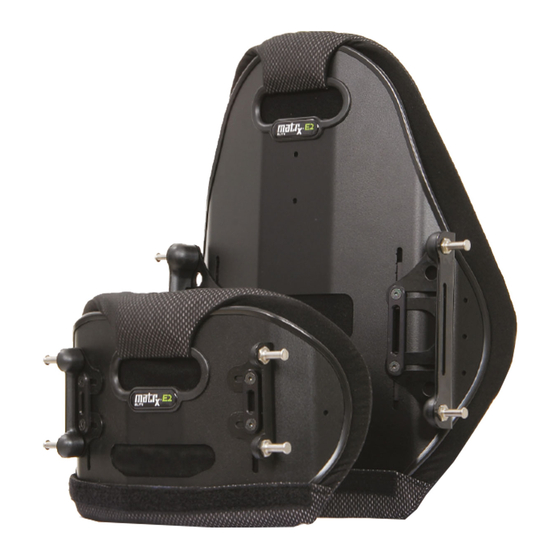
Summary of Contents for Motion Concepts Invacare Matrx Mini back
- Page 1 back IMPORTANT! The installation instructions contained in this manual should only be carried out by a qualified technician.
-
Page 2: Table Of Contents
Lumbar Support (Optional) AFETY YMBOLS Proper set-up and safe use of your Invacare Matrx Mini Back depends on your own good judgement and common sense, as well as that of your provider, caregiver and/or health professional. The following symbols are used throughout this manual to identify warnings, cautions and important notes. -
Page 3: General Warnings
1.0 General Warnings WARNING! DO NOT USE THIS PRODUCT OR ANY AVAILABLE OPTIONAL EQUIPMENT WITHOUT FIRST COMPLETELY READING AND UNDERSTANDING THESE INSTRUCTIONS AND ANY ADDITIONAL INSTRUCTIONAL MATERIAL SUCH AS OWNER’S MANUALS, SERVICE MANUALS OR INSTRUCTION SHEETS SUPPLIED WITH THIS PRODUCT OR OPTIONAL EQUIPMENT. -
Page 4: Hardware Kit Contents
Ass’y If any of the above hardware is missing or (Right Assembly Shown) misplaced, please contact your local Invacare/Motion Concepts Representative to obtain the necessary replacements parts, or you may contact our Customer Service Dept. directly for assistance. Canada: 905-695-0134 USA: 716-447-005 3.0 Tools Required... -
Page 5: Prior To Installation- Important
4.0 Prior to Installation- Important! 4.1 Back Sizes/ Weight Capacity: 4.2 Mounting Plate Configuration: The Mounting Plates are pre-assembled on the Cane Clamps in the rearmost mounting configuration. This maximizes the seat depth of the wheelchair seat (up to a maximum 2” (51 ) rearward offset - see Figure 1 below). - Page 6 (PBCR’s). The PBCR’s are designed to replace existing push handles or cane extensions on standard 1” (26 ) back posts. The Cane Clamps can be mounted directly onto the replacement back cane if necessary. Cane Replacements are available from Motion Concepts (part#-TRX2810).
-
Page 7: Matrx Mini Installation
5.0 Matrx Mini Installation WARNING! The installation hardware provided is high strength and tested for durability. DO NOT substitute hardware. Use only the hardware supplied. Remove existing wheelchair back (if applicable). Establish the desired Mounting Plate set-up/configuration for the user (per Section 4.0). - Page 8 Long pins are designed to allow installation onto back canes that are up to 1" (25mm) wider than the nominal width of the backrest. Example: 12" (31cm) Invacare Matrx Mini Back fits: 12" (31cm) seat frame/back cane width = Standard Pins...
- Page 9 5.0 Matrx Mini Installation NOTE: When exchanging/installing the mounting pins, the threaded Backing Plate must be properly re-aligned with the mounting pins in order to complete the installation- see images below. Mounting Pins Backing Insert backing plate in correct Plate orientation &...
- Page 10 5.0 Matrx Mini Installation To adjust the mounting pins: i) With the back secured in place on the wheelchair, determine the amount of adjustment required for each mounting pin (see Figure 7). ii) Remove the backrest from the wheelchair and use the wrench provided to loosen each flange nut.
- Page 11 5.0 Matrx Mini Installation Verify that the overall fit and alignment of the back is correct (make further adjustments as needed). 10 Fully secure the Cane Clamp assembly onto both back posts, and ensure the mounting plates do not slip or rotate. 11 To best determine the optimal depth &...
-
Page 12: Disengaging The Matrx Mini
6.0 Disengaging the Matrx Mini 6.1 Disengaging the Back from the Wheelchair see Figure 9) : Simultaneously lift the release levers (left & right) to unlock the latch mechanism (1) and release the upper pins from the mounting plates (2) Note: refer to Section 8.0 for backs equipped with the one-hand cord release Lift the entire backrest up and forward to disengage the lower pins from the lower slots in the mounting plates (3). -
Page 13: Care And Maintenance Instructions
7.0 Care and Maintenance Instructions 7.1 Care and Laundering: Carefully remove the cover by releasing the velcro hook and loop fasteners along the top & bottom edge and inside of the back shell. General Care and Cleaning: The cover may be easily wiped down with a damp cloth when necessary. -
Page 14: One-Hand Cord Release Mechanism (Optional)
8.0 One-Hand Cord Release (Optional) 8.1 Installation Instructions: Note: The cord release mechanism is illustrated using a Standard Elite Back Thread the Nylon Cord through the holes in the latch mechanism at the top of the left and right mounting plates (1) thread cord through the latch mechanism Install the spring loaded Cord-Lock mechanism onto the nylon cord... -
Page 15: Lumbar Support (Optional)
9.0 Lumbar Support (Optional) P L E A S E N O T E The Lumbar Support is a pre-fabricated foam insert that provides lower back support for additional comfort. The position of the lumbar insert can be adjusted inside the Matrx Mini cover (see instructions below), or it may be removed if no lumbar support is desired. - Page 16 The original back must be returned to the dealer and will become the property of Motion Concepts as a condition of processing the warranty claim. All warranty claims must be made through the dealer where the cushion was purchased. Except for express warranties made herein, all other warranties of fitness or use for a particular purpose are excluded.
Need help?
Do you have a question about the Invacare Matrx Mini back and is the answer not in the manual?
Questions and answers