Table of Contents
Advertisement
Quick Links
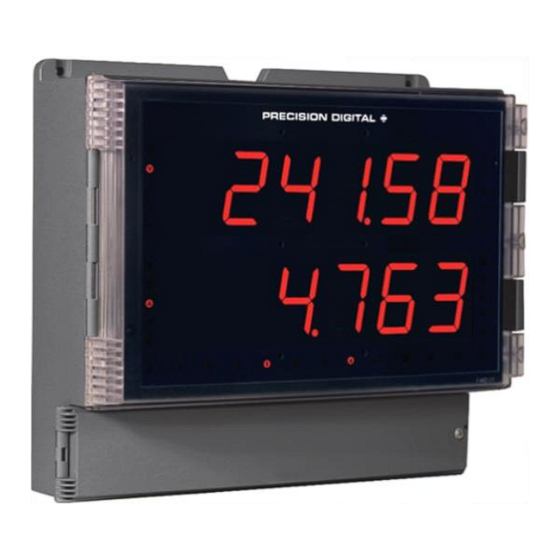
Helios PD2-6400 High Voltage & High Current Meter
Instruction Manual
•
Large Display NEMA 4X, IP65 Wall Mounted Meter
•
(1) High Voltage and (1) High Current Input
•
Multiplication for Apparent Power Calculation
•
0-300 VAC or VDC Voltage Input
•
0-5 AAC or ADC Current Input
•
Large Dual-Line 6-Digit Display, 1.8" (46 mm) Digits Readable up to 100 Feet (30 Meters) Away
•
4 Relays with Interlocking Capability + Isolated 4-20 mA Output Option
•
Free PC-Based, On-Board, MeterView Pro USB Programming Software
•
SunBright Display Standard Feature; Great for Outdoor Applications
•
Operating Temperature Range: -40 to 65°C (-40 to 149°F)
•
Conformal Coated PCBs for Dust and Humidity Protection
•
UL & C-UL Listed. E160849; 508 Industrial Control Equipment
•
Input Power Options: 85-265 VAC / 90-265 VDC or 12-24 VDC / 12-24 VAC
•
Programmable Display, Function Keys & Digital Inputs
•
On-Board RS-485 Serial Communications
•
Modbus RTU Communication Protocol Standard
•
External 4-Relay & Dual 4-20 mA Output Expansion Modules
•
5 Digital Inputs & 4 Digital Outputs Standard
•
Password Protection
•
Light / Horn & Button Accessory
•
Split Core AC Current Transformers Up to 1000 A AC Available
•
Control Station Accessory for Remote Operation
•
3-Year Warranty
PRECISION DIGITAL CORPORATION
233 South Street • Hopkinton MA 01748 USA
Tel (800) 343-1001 • Fax (508) 655-8990
www.predig.com
MeterView Pro
USB Install
Advertisement
Table of Contents

Related Manuals for Helios PD2-6400


Summary of Contents for Helios PD2-6400
- Page 1 Helios PD2-6400 High Voltage & High Current Meter Instruction Manual MeterView Pro USB Install • Large Display NEMA 4X, IP65 Wall Mounted Meter • (1) High Voltage and (1) High Current Input • Multiplication for Apparent Power Calculation • 0-300 VAC or VDC Voltage Input •...
- Page 2 PC with a USB cable. We recommend that the first thing you do after taking the meter out of the box is WARNING connect the Helios to your PC with the provided USB Cancer and Reproductive Harm - www.P65Warnings.ca.gov cable – do not use a different cable. DO NOT apply...
-
Page 3: Table Of Contents
Helios PD2-6400 High Voltage & High Current Meter Instruction Manual Table of Contents Introduction ......................6 Ordering Information ................... 6 Specifications....................... 8 General ......................8 Voltage and Current Inputs ................9 Relays ....................... 9 USB Connection ....................9 Isolated 4-20 mA Transmitter Output ............10 RS-485 Serial Communications .............. - Page 4 Helios PD2-6400 High Voltage & High Current Meter Instruction Manual Relay and Alarm Operation Diagrams ............31 High Alarm Operation (Set > Reset)..............31 Low Alarm Operation (Set < Reset) ............31 High Alarm with Fail-Safe Operation (Set > Reset) ........31 Low Alarm with Fail-Safe Operation (Set <...
- Page 5 Figure 5. Conduit Holes Location – Bottom View ........... 12 Figure 6. Vertical Pipe Mount Assembly............13 Figure 7. Horizontal Pipe Mount Assembly ............. 13 Figure 8. PD2-6400-6H0 / 7H0 Connectors Label ..........15 Figure 9. PD2-6400-6H7 / 7H7 Connectors Label ..........15 Figure 10. Power Connections ................. 16 Figure 11.
-
Page 6: Introduction
Silence button PDA2362-AR Ack and Reset buttons PDA2362-BB Two blank buttons PDA2364-MRUE Menu, right, up, enter buttons Note: Control stations can be connected directly to the Helios meter’s on-board digital inputs. See Remote Operation of Meter on page 20 for details. - Page 7 1. Specify MOD-PD2LH model as a separate item on the order for the PDA6405-100 0-5 AAC Output Helios to order the Light / Horn & Button accessory installed and 200 AAC Current Transformer with wired. Meter is sold separately. PDA6405-200 2.
-
Page 8: Specifications
Helios PD2-6400 High Voltage & High Current Meter Instruction Manual Specifications Isolation 500 V AC/DC potential allowed between voltage and current input channels. Channels isolated by 3 MΩ impedance Except where noted all specifications apply to 4 kV input/output-to-power line operation at +25°C. -
Page 9: Voltage And Current Inputs
Helios PD2-6400 High Voltage & High Current Meter Instruction Manual Voltage and Current Inputs Relays High Voltage One high voltage input (Channel V) 0-300 VDC Rating 4 SPDT (Form C) internal and rated 3 A Input or VAC; Switch Selectable, Modbus PV @ 30 VDC and 125/250 VAC resistive load;... -
Page 10: Isolated 4-20 Ma Transmitter Output
Helios PD2-6400 High Voltage & High Current Meter Instruction Manual Isolated 4-20 mA Transmitter Digital Input (F4) Output Function Remote operation of front-panel buttons, acknowledge/reset relays, reset max/min Output Process channel A, V, or P, max or min for values. See Function Keys & Digital I/O... -
Page 11: Compliance Information
Helios PD2-6400 High Voltage & High Current Meter Instruction Manual Compliance Information Safety Information Safety • Read complete instructions prior to installation UL & C-UL USA & Canada and operation of the meter. Listed UL 508 Industrial Control Equipment (USA) C22.2 No. -
Page 12: Wall Mounting Instructions
Helios PD2-6400 High Voltage & High Current Meter Instruction Manual Mounting Dimensions Wall Mounting Instructions The meter can be mounted to any wall using the four 4.77" provided mounting holes. Note that the bottom (121.2 mm) mounting holes are located underneath the lower door panel. -
Page 13: Pipe Mounting Instructions
Helios PD2-6400 High Voltage & High Current Meter Instruction Manual Pipe Mounting Instructions The meter can also be mounted to a pipe using the optional pipe mounting kit (PDA6260). This kit includes two mounting plates, two U-bolts, and the necessary nuts and bolts. To mount the meter to a pipe using the pipe mounting kit accessory, follow these instructions. -
Page 14: Installation Overview
USB cable. We recommend that the first thing you do after taking the meter out of the box is connect the Helios to your PC with the provided USB cable. DO NOT apply AC or DC power to the meter... -
Page 15: Connections
Helios PD2-6400 High Voltage & High Current Meter Instruction Manual Connections All connections are made to screw terminal connectors located under the lower door panel. Remove the single securing screw in order to access the wiring terminals. • Use copper wire with 60°C or 60/75°C insulation for all line voltage connections. Observe all safety regulations. -
Page 16: Power Connections
Helios PD2-6400 High Voltage & High Current Meter Instruction Manual Power Connections Current Input The following figures show examples of connecting the Power connections are made to a two-terminal meter for a current input. Note that in addition to the connector labeled POWER. -
Page 17: Relay Connections
Helios PD2-6400 High Voltage & High Current Meter Instruction Manual Current and Voltage Input Relay Connections The following figures show examples of connecting the Relay connections are made to two six-terminal meter for both current and voltage input. Note that in connectors labeled RELAY1 –... -
Page 18: Switching Inductive Loads
Helios PD2-6400 High Voltage & High Current Meter Instruction Manual Switching Inductive Loads RS-485 Connections The use of suppressors (snubbers) is strongly The RS-485 connections are made to a five terminal recommended when switching inductive loads to connector used for Modbus® RTU serial prevent disrupting the microprocessor’s operation. -
Page 19: Digital I/O Connections
Helios PD2-6400 High Voltage & High Current Meter Instruction Manual RS-485 Connection Examples RS-485 Converter Connections Figure 25 below details the wiring connections from the RS-485 connector to an RS-485 serial converter (such as the PDA7485-I or PDA8485-I) for a five-wire RS-232 Serial network. -
Page 20: F4 Digital Input Connections
Helios PD2-6400 High Voltage & High Current Meter Instruction Manual F4 Digital Input Connections Remote Operation of Meter The meter can be operated via the programming A digital input, F4, is standard on the meter. This buttons or a PDA2364-MRUE remote control station... -
Page 21: Setup And Programming
Helios PD2-6400 High Voltage & High Current Meter Instruction Manual Setup and Programming There is no need to recalibrate the meter when first received from the factory. The meter is factory calibrated prior to shipment for amps and volts with calibration equipment that is certified to NIST standards. -
Page 22: Programming Buttons
Remote Buttons The meter can be operated via a remote control station (PDA2364-MRUE) using the digital input connections. The PDA2364-MRUE mimics the Helios’s four programming buttons: Menu, Right Arrow, Up Arrow, and Enter. See Remote Operation of Meter on page 20 for details. -
Page 23: Display Functions & Messages
Helios PD2-6400 High Voltage & High Current Meter Instruction Manual Display Functions & Messages Display Functions & Messages Display Parameter Action/Setting The meter displays various functions and messages Description during setup, programming, and operation. The D Vp Display VP Alternate display of following table shows the main menu functions and channel V &... -
Page 24: Main Menu
Helios PD2-6400 High Voltage & High Current Meter Instruction Manual Display Functions & Messages Display Functions & Messages Display Parameter Action/Setting Display Parameter Action/Setting Description Description LatCH nmAn Latching Set relay for latching Manual Press Enter to manually operation control relays or analog... -
Page 25: Setting Numeric Values
Helios PD2-6400 High Voltage & High Current Meter Instruction Manual Setting the Decimal Point (dEc pt) Setting Numeric Values The decimal point may be set with up to five decimal The numeric values are set using the Right and Up places or with no decimal point at all. -
Page 26: Setting The Input Calibration (Incal)
Helios PD2-6400 High Voltage & High Current Meter Instruction Manual Setting the Input Calibration (InCal) Scaling the Meter without a Signal Source It is very important to read the following information, The voltage and current inputs can be scaled to before proceeding to program the meter: display the process variables in engineering units. - Page 27 Helios PD2-6400 High Voltage & High Current Meter Instruction Manual Error Message (Error) Calibrating the Meter for Channel A An error message indicates that the calibration or (CAL-A) scaling process was not successful. After the error message is displayed, the meter...
-
Page 28: Setting The Display Parameter & Intensity (Dsplay)
Helios PD2-6400 High Voltage & High Current Meter Instruction Manual Setting the Display Parameter & After setting up the input and display, press the Menu button to exit programming and skip the rest of the Intensity (dsplay) setup menu. Display line 1 (line 1) can be programmed to... -
Page 29: Setting The Input Units Or Custom Tags (Units)
Helios PD2-6400 High Voltage & High Current Meter Instruction Manual Setting the Input Units or Custom Setting the Relay Operation Tags (units) (relay) Enter the input unit or custom tag that will be This menu is used to set up the assignment and displayed if alternating process input and units is operation of the relays. -
Page 30: Setting The Relay Assignment (Assign)
Helios PD2-6400 High Voltage & High Current Meter Instruction Manual Setting the Relay Assignment Programming Set and Reset (asSign) Points The relays may be assigned to their the current or High alarm indication: program set point above reset voltage input channels, the apparent power channel point. -
Page 31: Relay And Alarm Operation Diagrams
Helios PD2-6400 High Voltage & High Current Meter Instruction Manual High Alarm with Fail-Safe Relay and Alarm Operation Operation (Set > Reset) Diagrams The following graphs illustrate the operation of the relays, status LEDs, and ACK button. High Alarm Operation (Set > Reset) Note: Relay coil is energized in non-alarm condition. -
Page 32: Time Delay Operation
Helios PD2-6400 High Voltage & High Current Meter Instruction Manual Time Delay Operation The following graphs show the operation of the time delay function. When the signal crosses the set point, the On time delay timer starts and the relay trips when the time delay has elapsed. -
Page 33: Relay Operation Details
Helios PD2-6400 High Voltage & High Current Meter Instruction Manual Front Panel LEDs Relay Operation Details The alarm status LEDs on the front panel are Overview available on all meters, even those without relays The four-relays option for the meters expands its... -
Page 34: Non-Latching Relay (Auto)
Helios PD2-6400 High Voltage & High Current Meter Instruction Manual Non-Latching Relay (Auto) Latching Relay with Clear (Lt-Clr) In this application, the meter is set up for automatic In this application, the meter is set up for manual reset (non-latching relay). Acknowledging the alarm... -
Page 35: Acknowledging Relays
Helios PD2-6400 High Voltage & High Current Meter Instruction Manual Acknowledging Relays Setting Up the Interlock Relay (Force On) Feature There are three ways to acknowledge relays programmed for manual reset: Relays 1-4 can be set up as interlock relays. To set... -
Page 36: Scaling The 4-20 Ma Analog Output (Aout)
Helios PD2-6400 High Voltage & High Current Meter Instruction Manual Scaling the 4-20 mA Analog Reset Menu (reset) Output (Aout) The Reset menu is used to reset the maximum or minimum reading (peak or valley) reached by the The 4-20 mA analog output can be scaled to provide process;... -
Page 37: Setting Up The Password (Pass)
Helios PD2-6400 High Voltage & High Current Meter Instruction Manual Disabling Password Protection Setting Up the Password (pass) To disable the password protection, access the The Password menu is used for programming three Password menu and enter the correct password levels of security to prevent unauthorized changes to twice, as shown below. -
Page 38: Advanced Features Menu
Helios PD2-6400 High Voltage & High Current Meter Instruction Manual Advanced Features Menu Advanced Features Menu & Display Messages To simplify the setup process, functions not needed Display Parameter Action/Setting for most applications are located in the Advanced adder Adder Addition constant used in Features menu. -
Page 39: Noise Filter (Filter)
Helios PD2-6400 High Voltage & High Current Meter Instruction Manual Noise Filter (filter) Advanced Features Menu & Display Messages The noise filter is available for unusually noisy signals Display Parameter Action/Setting that cause an unstable process variable display. The C Hi... -
Page 40: Modbus Rtu Serial Communications (Serial)
Helios PD2-6400 High Voltage & High Current Meter Instruction Manual Modbus RTU Serial Select Menu (SElect) Communications (serial) The Select menu is used to select the number of linearization points applied to the input for either The meter is equipped with serial communications... -
Page 41: Math Function (Nmath)
The cutoff function is independent Analog Output Calibration for Channel A and V. Procedure Wire the PD2-6400 4-20 mA output to a current Analog Output Programming loop that includes a power supply (internal or (AoutPr) external 12 to 24 VDC), and the mA input on the digital meter. -
Page 42: Programmable Function Keys User Menu (User)
Helios PD2-6400 High Voltage & High Current Meter Instruction Manual Programmable Function Keys Display Description Ln1 Lo Display minimum channel A display value User Menu (user) on line 1 The User menu allows the user to assign the Ln1 HL Display maximum &... -
Page 43: Internal Calibration (Ical)
Helios PD2-6400 High Voltage & High Current Meter Instruction Manual Internal Calibration (ICAL) The meter is factory calibrated prior to shipment to read in amps and volts. The calibration equipment is certified to NIST standards. The use of calibrated signal sources is necessary to perform the internal calibration of the meter. -
Page 44: Meter Operation
Helios PD2-6400 High Voltage & High Current Meter Instruction Manual Meter Operation Digital Inputs Operation Five (5) digital inputs, F4, DI-1 to DI-4, come standard The meter is capable of accepting two input channels on the meter. These digital inputs are programmed (A and V) of either current (0-5 AAC/DC) or voltage identically to function keys F1, F2, and F3. -
Page 45: Troubleshooting
Helios PD2-6400 High Voltage & High Current Meter Instruction Manual Troubleshooting Reset Meter to Factory Defaults When the parameters have been changed in a way The rugged design and the user-friendly interface of that makes it difficult to determine what is happening,... -
Page 46: Factory Defaults & User Settings
Helios PD2-6400 High Voltage & High Current Meter Instruction Manual Factory Defaults & User Settings Factory Defaults & User Settings The following table shows the factory setting for most Parameter Display Default Setting of the programmable parameters on the meter. - Page 47 Helios PD2-6400 High Voltage & High Current Meter Instruction Manual Factory Defaults & User Settings Parameter Display Default Setting F1 function key Reset max & min F2 function key Line 1 Max & Min F3 function key Acknowledge relays F4 function...
-
Page 48: Troubleshooting Tips
Helios PD2-6400 High Voltage & High Current Meter Instruction Manual Troubleshooting Tips This meter is a highly sophisticated instrument with an extensive list of features and capabilities. If the programming buttons are used to program the meter, it may be a difficult task to keep everything straight. That is why we strongly... - Page 49 Helios PD2-6400 High Voltage & High Current Meter Instruction Manual Contact Precision Digital Technical Support Call: (800) 610-5239 or (508) 655-7300 Fax: (508) 655-8990 Email: support@predig.com Sales Support Call: (800) 343-1001 or (508) 655-7300 Fax: (508) 655-8990 Email: sales@predig.com Place Orders Email: orders@predig.com...
Need help?
Do you have a question about the PD2-6400 and is the answer not in the manual?
Questions and answers