Table of Contents
Advertisement
Quick Links
Advertisement
Table of Contents

Related Manuals for IrisVision LIVE


Summary of Contents for IrisVision LIVE
- Page 1 User Guide V 4.0...
- Page 3 Never walk while wearing the IrisVision headset Never drive while wearing the IrisVision headset Your IrisVision will speak – the ability to turn voice commands off is also possible WARNINGS If you have a pacemaker, do NOT wear the headset on a lanyard.
- Page 4 All trademarks are the property of IrisVision™, unless otherwise specified. IrisVision, Global is the owner of patent 10,444,833 NOTE: By powering on your IrisVision headset, you agree to the terms of use described in the End User License Agreement (EULA), which can be found at:...
-
Page 5: Table Of Contents
About IrisVision ..........4 What is Included ..........5 Setting Up Wi-Fi ..........13 Wireless Charging Pad Instructions ....19 Powering the IrisVision Using the Magnetic Braided Power Cable ........22 Headset Overview ..........23 Using IrisVision ..........26 Voice Commands ..........38 Alexa Integration .......... -
Page 6: About Irisvision
Welcome Thank you for purchasing an IrisVision device. This guide provides the essential information you need to set up and use your new IrisVision unit. For help with specifics and troubleshooting, contact a specialist at IrisVision. About IrisVision IrisVision is an FDA registered Class-1 medical device that combines state-of-the-art virtual reality technology from Samsung with custom software developed by the nation’s... -
Page 7: What Is Included
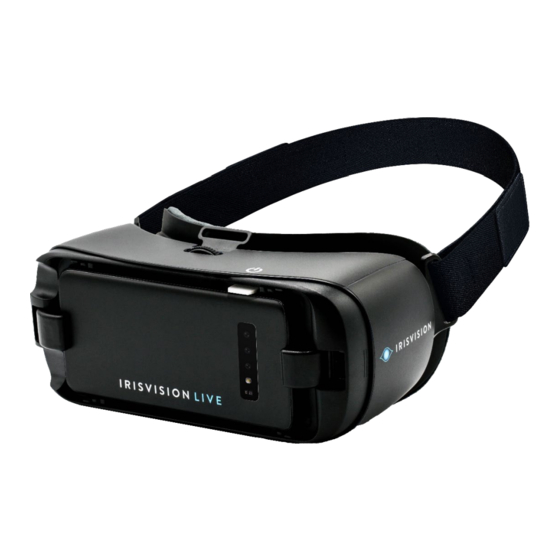
What is Included Your IrisVision device comes with the following items: IrisVision Display Unit • Headset • Wireless Charging Pad • Fast Charger and Cable • Magnetic Braided Power Cable and Charger • Carrying Case • Warranty Card • Lanyard •... - Page 8 What is Included IrisVision Display Unit (front and back views)
- Page 9 What is Included Headset with adjustable straps Back of headset...
- Page 10 What is Included Wireless Charging Pad...
- Page 11 What is Included Fast Charger and Cable (used with the Wireless Charging Pad)
- Page 12 What is Included Magnetic Braided Power Cable...
- Page 13 What is Included Carrying Case NOTE: When using your headset outside, take the carrying case with you. When not using your headset, please place it inside the case to minimize unintentional damage or environmental exposure.
- Page 14 What is Included Earphones for watching videos (may be in either white or black) Front of headset showing earphone connection New Flashlight capability! See page 42 for details.
-
Page 15: Setting Up Wi-Fi
Setting Up Wi-Fi IrisVision can be configured to connect to your Wi-Fi. A Wi-Fi connection allows our Customer Support team to assist you more efficiently, as well as allowing you to use Video Player mode. NOTE: IrisVision does not require Wi-Fi to function. - Page 16 Step 2: Powering on the Display Unit Press the Power button on the right side (see the picture below). Power Button...
- Page 17 Step 3: Configuring Wi-Fi Go to the Home screen. • Swipe up from the bottom of the screen and press the small white rectangular box. Tap IrisVision Manager • app. Tap Setup Wifi. •...
- Page 18 Step 3: Configuring Wi-Fi – continued Turn on Wi-Fi . •...
- Page 19 Step 3: Configuring Wi-Fi – continued • Select your network, and then enter your password. Example_1 Example_2 Example_3 Example_4 Example_4 Example_5 Example_6 Example_7 Example_8 Example_9 NOTE: IrisVision does not require Wi-Fi to function, Wi-Fi is required to use Alexa and Video Player.
- Page 20 Step 4: Connecting the Display Unit to the Headset Insert the Display Unit into the headset by matching the yellow dots as shown below. Securely lock the Display Unit into the headset by pushing the Display Unit against the spring lock, as shown below.
-
Page 21: Wireless Charging Pad Instructions
Wireless Charging Pad Instructions Your IrisVision will take approximately 5 hours to fully charge and will automatically return to Focus mode when powered on. NOTES: Please make sure that your headset is powered on and • the Display Unit is installed into the headset. - Page 22 While the headset is charging, the charging pad will emit a solid red light (circled). When the headset is fully charged, the charging pad will emit a solid green light (circled). If the red light is not on or if it is flashing, the headset is not charging.
- Page 23 The IrisVision’s battery lasts 3 hours. It can last 3+ hours without continuous use, and all day (8 to 10 hours) on standby. You can make the most of this time by powering the headset off when you are not using it.
-
Page 24: Powering The Irisvision Using The Magnetic Braided Power Cable
Magnetic Braided Power Cable As an alternative to using the built-in battery to operate your IrisVision, you can connect the headset to an external cell phone battery (not included) using the magnetic braided power cable, This method is useful when you want to watch videos and television;... -
Page 25: Headset Overview
Headset Overview Snapshot Mode Button Button Touchpad... - Page 26 Headset Overview – continued Focus Wheel Power Tab Magnetic Braided Power Cable Port...
- Page 27 Headset Overview – continued IrisVision Display Unit Volume Button Power Button Fast Charging Port (for use with fast charging cable and fast charger)
- Page 28 Using IrisVision: Step 1 Powering – Power on the Display Unit by pressing the white tab down for 5 seconds. A vibration will indicate that the headset is powering on.
- Page 29 Place the headset over your eyes and pull the straps back over your head. Adjust the straps and secure them using the VELCRO brand fasteners to achieve the best fit. NOTE: Do not walk around while wearing the IrisVision headset.
- Page 30 Using IrisVision: Step 3 – Setting Up Focus Slowly spin the focus wheel on the top center of your headset to adjust the focus, similar to adjusting binoculars. After powering on your headset, it should automatically show Focus mode. It contains an image with beach chairs.
- Page 31 Focus Wheel...
-
Page 32: Using Irisvision
Using IrisVision: Step 4 – IrisVision Modes Your IrisVision headset comes with 5 default modes: Focus (page 28) • Scene (page 50) • Television (page 55) • Reading (page 59) • Reading Inverted (page 60) • After adjusting the focus wheel, press the Mode button to enter the first mode, called “Scene”. - Page 33 Mode Button NOTE: You can change the brightness in every mode to increase or decrease the brightness of the screen. For more information, see “Voice Commands” on page 38.
- Page 34 Using IrisVision: Step 5 – Zoom In and Zoom Out IrisVision allows you to magnify your live view. Locate the touchpad. The touchpad is located on the right side of the headset under the Mode and Snapshot buttons. Place your right index finger on the touchpad. We recommend putting your hand in a fist with your index finger pointed out to steady your hand on the touchpad.
- Page 35 Wait for the beep or microphone to appear before saying the word or phrase. Double Tap on the Touchpad • Say “Zoom In” • Say “Zoom Out” • Say “Set Zoom X” X = value between 1-12. • Say “Max zoom” – zooms in to 12x magnification •...
- Page 36 Snapshot The Snapshot button allows you to save a photo of your view in any live mode. A list of the live modes can be found page Locate the Snapshot button. The Snapshot button is located to the left of the Mode button.
- Page 37 Wait for the beep or microphone to appear before saying the word or phrase. Double Tap on the Touchpad • Say “Take Snapshot” • Say “Exit Snapshot” Snapshot Button...
-
Page 39: Voice Commands
Voice Commands... - Page 40 Remember to wait for the audio beep or the image of a microphone to appear. General Commands Say “IrisVision Assistant” for general instructions on • how to use the IrisVision headset controls. Say “Voice Command Help” for instructions on how to •...
- Page 41 NOTE: If a mode is disabled, you will not have access to that mode. If you want to activate a mode that is not responding, please email support@irisvision.com or refer to the Configuration Guide. Say “Next” to navigate forward to the next mode.
- Page 42 Say “Photo Gallery” to navigate directly to Photo • Gallery mode. Say “Video Player” to navigate directly to Video Player • mode. Adjusting Zoom / Magnification Say “Set Zoom to <number>” to set magnification to a • specific level (1 to 14). Example: Say “Set Zoom to 7”. Say “Zoom In”...
- Page 43 Adjusting Volume Say “Set volume to <number>” to set volume to a • specific level (1 to 15) Example: Say “Set volume to 10”. Say “Increase volume” to increase volume by 1 • (maximum 15). Say “Decrease volume” to decrease volume by 1 •...
- Page 44 Enabling and Disabling Voice Prompts Say “Enable voice prompts” to enable voice prompts • for speech notification – as “device inserted correctly”, “charging confirmation”, “battery level”, and so on. Say “Disable voice prompts” to disable voice prompts • for speech notification. Mode-Specific Commands Say “Help”...
- Page 45 Say “Increase exposure” to increase the television • exposure compensation up 1 level. Say “Decrease exposure” to decrease the television • exposure compensation down 1 level. Say “Save exposure for television <1 or 2 or 3>” • save the television exposure compensation to the defined TV preset (3 available presets).
- Page 46 “News” playlist. • Say “Entertainment” to navigate to the “Entertainment” • playlist. Say “IrisVision” to navigate to the “IrisVision” playlist. • Say “Save video” to save a video to the Bookmarked • list when prompted. Say “Remove video”...
-
Page 47: Alexa Integration
Alexa Integration You can initiate a conversation with Alexa and get real-time information such as: News • Weather • Sports Updates • Facts • Jokes • Stories • Currently not supported: Playing music or audiobooks • Ongoing conversations • Integration with smart devices •... - Page 48 This is intended to help you either set up your own personal Amazon account or create an Amazon account in order to use the built-in Alexa feature with your IrisVision headset. Please follow these instructions if you already have an Amazon Alexa account.
- Page 49 After it is charged, you can power the device on if it is not already on. Remove the IrisVision Display Unit from the headset. Access the IrisVision Manager app on the Display Unit (for instructions, see “Configuring Wi-Fi” on page 15). Look for the “Amazon Account” option.
-
Page 51: Irisvision Modes
IrisVision Modes... - Page 52 Scene Mode Scene mode is the default Live View mode. This mode replicates the vivid colors and contrast of the scenery in front of you. Experience a brighter image with auto focus and zoom in up to 14 times magnification.
- Page 53 NOTE: To re-position the magnification bubble using the Configuration menu, please refer to the Configuration Guide or contact Customer Support by email at support@irisvision.com or by phone at +1-855-207-6665 for assistance.
- Page 54 Scene Mode with Bubble – continued Wait for the beep or microphone to appear before saying the word or phrase. Double Tap on the Touchpad • Say “Scene with Bubble”...
- Page 55 Decrease the FOV (make the image smaller) by swiping down on the touchpad. NOTE: You can also zoom in on a particular object or entity within your FOV. For more information, see “Using IrisVision: Step 5 – Zoom In and Zoom Out” on page 32.
- Page 56 Wait for the beep or microphone to appear before saying the word or phrase. Double Tap on the Touchpad • Say “RP”...
- Page 57 (not provided). DO NOT use this cord to charge your headset. For information on using the magnetic braided power cable, see “Powering the IrisVision Using the Magnetic Braided Power Cable” on page 22. For more information on charging the headset, see...
- Page 58 Wait for the beep or microphone to appear before saying the word or phrase. Double Tap on the Touchpad • Say “Television”...
- Page 59 Bioptic Bioptic mode positions a viewfinder at the top center of the screen that allows you to magnify a specific section without losing the greater context of the view in front of you. Turn your head to place the viewfinder in the center of the screen to an area you wish to have magnified.
- Page 60 • Configuration menu. For more information, please refer to the Configuration Guide or contact Customer Support by email at support@irisvision.com or by phone at +1-855- 207-6665 for assistance. Wait for the beep or microphone to appear before saying the word or phrase.
- Page 61 Reading Reading mode presents reading material with black letters on a white background. It is best for reading text material such as books or papers without color. NOTE: For reading magazines or materials with color, it is best to return to Scene mode. Wait for the beep or microphone to appear before saying the word or phrase.
- Page 62 Reading Inverted Reading Inverted mode is a variation of Reading mode which provides white letters on a black background. This enhances the contrast and provides reduced glare on the screen, which can be helpful to those overwhelmed by bright scenes. Wait for the beep or microphone to appear before saying the word or phrase.
- Page 63 Reading Line Reading Line mode presents text in black letters on a white background. It also provides a magnification bar in the center of the screen to magnify one or more lines of text while allowing a normal view above and below the bar. Increase the size of the reading line by slowly swiping up on the touchpad.
- Page 64 Reading Green Reading Green mode is a variation of Reading mode which shows black text on a green background. This may also help reading by providing better screen contrast without the brightness of a white background. Wait for the beep or microphone to appear before Double Tap on the Touchpad •...
- Page 65 Reading Yellow Reading Yellow mode is a variation of Reading mode which shows black text on a yellow background. It increases screen contrast without the brightness of a white background and is helpful when reading for extended periods of time. Wait for the beep or microphone to appear before saying the word or phrase.
- Page 66 IrisReader IrisReader uses Optical Character Recognition (OCR) to display captured text to the reader and will read it aloud one word at a time. The word being spoken is highlighted on the display. Cycle to IrisReader mode and center the text you would like to have read on the screen.
- Page 67 IrisReader – continued Wait for the beep or microphone to appear before saying the word or phrase. Double Tap on the Touchpad • Say “IrisReader”...
- Page 68 The images are stored on the headset and can be exported to your computer. Please contact Customer Support by email at support@irisvision.com or by phone at +1-855-207-6665 for assistance. In Photo Gallery mode, select a photo by swiping on the touchpad.
- Page 69 Photo Gallery – continued...
- Page 70 Photo Gallery – continued Wait for the beep or microphone to appear before saying the word or phrase. Double Tap on the Touchpad • Say “Photo Gallery” • Say “Open Photo” • Say “Exit Photo” • Say “Next Photo” • Say “Previous Photo” •...
- Page 71 There are 3 categories: News, Entertainment, and IrisVision which refer to the playlists of videos we have on our IrisVision YouTube channel. Scroll through the list of available videos by swiping up and down on the touchpad. The video in focus should be highlighted yellow.
- Page 72 Video Player – continued Search: Double tap the touchpad to activate voice search. Say, “Search” and then say the title or description of a video. For example, say “Search cats” to see videos of cats. After you have performed a search, you can still swipe laterally to navigate through the list of playlists.
- Page 73 Video Player – continued How to Bookmark Videos Search for a new video you would like to watch • Scroll down to highlight the video you would like to • watch and tap once on the touchpad to select it. While the video is playing, or when the video has •...
- Page 74 Video Player – continued Wait for the beep or microphone to appear before saying the word or phrase. Double Tap on the Touchpad Say “Video Player” • Say “Next Video” • Say “Previous Video” • Say “Play Video” • • Say “Save Video” •...
-
Page 75: Recommendations For Use
Recommendations for Use Remember: Do not walk around while wearing • IrisVision. For additional tips and answers to Frequently Asked • Questions, please visit: www.irisvision.com/FAQ Bubble Size. We recommend keeping the bubble size • between 20-30% while zooming in on different objects. - Page 76 Mode button. The headset will not enter Sleep mode when in Television mode. It is recommended that you power off the IrisVision unit when not in use. To do this, press and hold down the white tab on top of the headset for 5 seconds.
-
Page 77: Cleaning Tips
Cleaning Tips for Your IrisVision Headset Wipe the outer parts of the headset with a dry, soft cloth • or wipe. The touchpad can collect the oil from your fingers as you operate the headset, so wiping down at least once a week is recommended. -
Page 78: How To Turn Off Your Headset
The screen will soon turn black and the unit will power off. You can then put it away. To turn your IrisVision back on, press and hold down the white tab for 5 seconds until you feel the button vibrate. - Page 80 IrisVision Customer Support Speak with an IrisVision Advocate IrisVision advocates are standing by to assist you with any questions you may have about setting up or using your IrisVision system. Contact Your Clinician If you have purchased the IrisVision from your clinician, he or she is familiar with your needs and will be able to respond to your questions more quickly and efficiently.
Need help?
Do you have a question about the LIVE and is the answer not in the manual?
Questions and answers