Advertisement
Aluminum Fence
Ready-to-Assemble Kit
Assembly and Installation Instructions
PLEASE READ OWNER'S MANUAL COMPLETELY
BEFORE ASSEMBLING YOUR BRACKET KIT
To register your product, please visit: www.barretteoutdoorliving.com/product-registration
34109932BOM V1 3/14
Models
73017993 / 73017994 / 73017995 / 73017996
73017997
Owner's Manual
Version
1.0
Advertisement
Table of Contents

Related Manuals for Barrette 73017993


Summary of Contents for Barrette 73017993
- Page 1 34109932BOM V1 3/14 Aluminum Fence Models Ready-to-Assemble Kit 73017993 / 73017994 / 73017995 / 73017996 Assembly and Installation Instructions 73017997 PLEASE READ OWNER'S MANUAL COMPLETELY Owner's Manual BEFORE ASSEMBLING YOUR BRACKET KIT Version To register your product, please visit: www.barretteoutdoorliving.com/product-registration...
-
Page 2: Material Checklist
Please read these instructions carefully before installing Material Checklist: your Barrette fence. If you have any questions or issues installing the fence, please contact us at 1-800-336-2383 for assistance. Rubber Mallet String Stakes Concrete Mix Before You Begin…... -
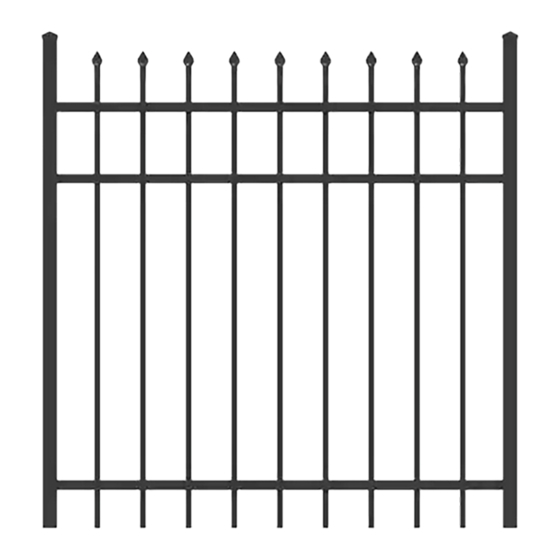
Page 3: Product Overview
Product Overview: Top Rail ProLock ™ Locking Strip Post Top Middle Rail Punched Holes Pickets Post Bottom Rail ProLock ™ Locking Strip... -
Page 4: Layout Installation
Layout installation • Using the worksheet as a guide, establish your fence line by staking out the areas you wish to enclose. Locate each point in which you will need an end, corner or gate post and mark it with a stake. •... - Page 5 Make sure arrows on locking strip point towards rail above and place/snap in Slide rails over locking strips. Push fi rst picket into bottom rail, then bumps from locking strip into the holes of the pickets for all rails. the second, folllowed by the third, etc. until the last picket. Repeat this process for the top rails.
- Page 6 First Post Installation (Gate Post) Use a rubber mallet to gently drive the post tops onto the posts. Be Mix the concrete on the dry side to allow the posts to set faster. See careful not to damage the post top. chart below to determine the minimum depth for your fence.
- Page 7 Panel / Post Installation CAUTION: Do not install all posts fi rst. Installation should proceed post- Place the next required post (line/corner/end) into the dug hole, and slide panel-post-panel… the post onto the rails of the panel as far as possible. Pour concrete around that post and tamp down, leaving concrete about As the gate post (or corner) is setting up, install the fi...
- Page 8 Once four or so panels are installed, check to make sure all posts and After concrete has set, fasten the fence section to the posts using panels are still level. If a correction needs to be made, use a rubber #8 x 1"...
- Page 9 Hang gate to post. Make sure the horizontal rails of the gate are at the same level Drive two 1 ⁄ ⁄ ⁄ ⁄ " self-tapping screws through upper hinge into post post (use the inside as the horizontal rails of the fence panels. Do this by either lifting gate by hand, or holes on the hinge).
- Page 10 What is covered: Barrette Outdoor Living warrants vinyl and aluminum products to include; vinyl and aluminum fence, vinyl and aluminum railing and plastic lattice against defects or workmanship for as long as you own your home. Barrette Outdoor Living will at its option replace the product in question with new product of the same or equivalent value at no charge.
Need help?
Do you have a question about the 73017993 and is the answer not in the manual?
Questions and answers