Table of Contents
Advertisement
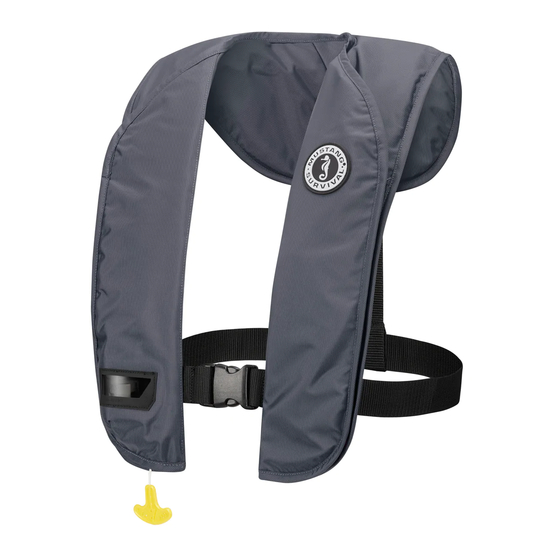
MD2014 INFLATABLE PFD
Manual Inflation Model
USCG APPROVALS:
RECREATIONAL: TYPE III
UNINSPECTED COMMERCIAL
VESSELS: TYPE V
DO NOT REMOVE PRIOR TO SALE
HT3159 (Rev17Jul2012)
MD2016 INFLATABLE PFD
Manual with Automatic
Backup Inflation Model
USCG APPROVALS:
RECREATIONAL: TYPE III
UNINSPECTED COMMERCIAL
VESSELS: TYPE V
Advertisement
Table of Contents

Related Manuals for Mustang Survival MD2014


Summary of Contents for Mustang Survival MD2014
- Page 1 MD2014 INFLATABLE PFD MD2016 INFLATABLE PFD Manual Inflation Model Manual with Automatic Backup Inflation Model USCG APPROVALS: RECREATIONAL: TYPE III USCG APPROVALS: UNINSPECTED COMMERCIAL RECREATIONAL: TYPE III VESSELS: TYPE V UNINSPECTED COMMERCIAL VESSELS: TYPE V DO NOT REMOVE PRIOR TO SALE...
-
Page 2: Table Of Contents
SPECIAL CONSIDERATIONS FOR AUTOMATIC DEVICES (MD2016) ..6 DEFLATING THE INFLATABLE PFD ............7 USAGE BELOW FREEZING ..............8 RE-ARMING YOUR PFD (MD2014) ............. 8 RE-ARMING YOUR PFD (MD2016) ........... 10 REPACKING ..................13 IS YOUR PFD IN GOOD AND SERVICEABLE CONDITION? ....13... - Page 3 CARE AND MAINTENANCE INSTRUCTIONS ........14 CLEANING AND STORING OF YOUR INFLATABLE PFD (MD2014) ..16 CLEANING AND STORING OF YOUR INFLATABLE PFD (MD2016) ..16 HOW AND WHY TO TEST YOUR PFD ..........16 MODEL MD2016 ................17 HOW DO YOU TEST YOUR PFD USING THE AUTOMATIC INFLATOR? (MD2016) ..................
-
Page 4: Approval Conditions And Carriage Requirements
Not recommended for non-swimmers or weak swimmers. Users of inflatable PFDs must be at least 16 years old. Commercial - Models MD2014 and MD2016 are U.S. Coast Guard approved Type V inflatable PFDs, approved ONLY WHEN WORN for use on uninspected commercial vessels less than 40 feet in length not carrying passengers for hire as a substitute for a Type III PFD when used in accordance with this owner’s manual. -
Page 5: Why Are Pfds Required Safety Equipment
The Inflatable PFD is designed to offer maximum mobility with minimum bulk. The Inflatable PFD (MD2014) can be inflated either manually by jerking a pull-tab, or orally (by mouth). The Inflatable PFD (MD2016) can be inflated either automatically during water immersion, manually by jerking a pull-tab, or orally by mouth. -
Page 6: Component Inspection Instructions
1). Ensure the service indicator is green. If the service indicator is red, the mechanism has been fired or is incorrectly fitted (see "Re-arming Your PFD (MD2014)" on page 8 or see "Re-arming Your PFD (MD2016)" on page 10). NOTE: The service indicator must be green before proceeding. -
Page 7: Sizing And Fit
straps and hardware are still strong. All Velcro ™ and waist belt are securely fastened. Inflatable PFD is not twisted. Oral-inflation dust cap is in the stowed position (Fig. 6). For the MD2016 only - Ensure the bobbin is valid. The PFD, or bobbin, must have been purchased within the last three (3) years. -
Page 8: Inflating Your Inflatable Pfd
(Fig. 3). The Inflatable PFD should fully inflate within 5 seconds. Figure 3 Manual Inflator Automatic Inflator MD2014 MD2016 2) Automatic Backup Inflation (MD2016) Inflation will occur automatically within 10 seconds after the inflator is immersed in water. The water-sensing bobbin will disintegrate,... -
Page 9: Special Considerations For Automatic Devices (Md2016)
IMPORTANT: See Special Considerations for Automatic Devices 3) Oral Inflation Figure 4 Properly armed and inspected Inflatable PFDs will inflate when manually or automatically activated. However, you can fully inflate the Inflatable PFD by mouth (Fig. 4) should inflation not occur, or if you are in a non- emergency situation. -
Page 10: Deflating The Inflatable Pfd
Care and attention should be taken to ensure that when the device is used in these types of conditions, auto-inflation does not occur prematurely. If this PFD should inflate prematurely, a re-arm kit (MA2014) is required to re-arm the device. IMPORTANT: The Inflatable PFD should be re-armed according to the instructions (see "Re-arming Your PFD (MD2016)"... -
Page 11: Usage Below Freezing
PFD, after inflation. WARNING: CO inflation could over-pressurize and damage your Inflatable PFD if already fully inflated. RE-ARMING YOUR PFD (MD2014) Figure 7 MD2014 Manual Inflator Cylinder Step 2 Sensor Ring... - Page 12 Your PFD (MD2014)" on page 8). NOTE: The service indicator must be green before proceeding. 6) Refold the Inflatable PFD in accordance with the Repacking section (see "Repacking" on page 13) YOUR INFLATABLE PFD (MD2014) IS NOW READY FOR MANUAL USE...
-
Page 13: Re-Arming Your Pfd (Md2016)
RE-ARMING YOUR PFD (MD2016) Figure 9 MD2016 Automatic Inflator Step 3 Cylinder Step 2 Sensor Ring Yellow Bobbin Step 9 (white side up) Bayonet Step 3 HOUSING*** Step 10 Step 4 O-Ring Step 9 Housing Shoulder Step 8 Pins Service Indicator Step 11 Lever Step 10... - Page 14 1) Open inflator cover flap so that the manual/automatic inflator is exposed (Fig. 9). 2) Remove the cylinder/bayonet assembly by rotating counter- clockwise and then pull out. Discard the used cylinder/ bayonet assembly. 3) Remove cap by turning counter-clockwise. (Fig. 9). 4) Remove bobbin from cap or housing unit.
- Page 15 IMPORTANT: You will damage the sensor ring if bobbin and cap are not installed first. 10) Push, and hold, the lever into the inflator housing. The pull-cord should be situated in the groove (Fig. 11). Install a new cylinder/ bayonet assembly by engaging bayonet tabs in housing, pushing in then turning clockwise 1/8 turn to a full stop (Fig.
-
Page 16: Repacking
REPACKING Gently squeeze the Inflatable PFD with the oral tube dust cap in the deflate position (Fig. 6, page 7) until all air or gas has been expelled (Fig. 5, page 7). Do not wring or twist the Inflatable PFD. Put the oral tube dust cap back in its stowed position on the oral inflation tube (Fig. -
Page 17: Care And Maintenance Instructions
Examine the service indicator through the window panel, ensuring it is green. If the indicator is red, the mechanism requires service. See Re-arming Your PFD (MD2014) on page 8 or see Re-arming Your PFD (MD2016) on page 10. Ensure the manual pull-tab is accessible. - Page 18 3) After Each Inflation - Re-arm the Inflatable PFD. See Re-arming Your PFD (MD2014) on page 8 or Re-arming Your PFD (MD2016) on page 10. 4) Annually - Perform the following at the beginning of each...
-
Page 19: Cleaning And Storing Of Your Inflatable Pfd (Md2014)
Hang to dry on a plastic coat hanger. Be sure to replace CO cylinder/bayonet assembly (see "Re-arming Your PFD (MD2014)" on page 8). Always store your Inflatable PFD in a warm, dry place out of direct sunlight. -
Page 20: Model Md2016
(for MD2014 see Fig. 8 and for MD2016 see Fig. 11). Repeat this several times to check the manual inflation system. -
Page 21: How Do You Test Your Pfd Using The Manual Inflator
7) Let the Inflatable PFD dry thoroughly. Re-arm and Repack the PFD (see "Re-arming Your PFD (MD2014)" on page 8 or see "Re-arming Your PFD (MD2016)" on page 10 and see "Repacking" on page 13). -
Page 22: How Do You Test Your Pfd Using The Oral Inflator
Inflatable PFD using the oral inflator. 9) Let the Inflatable PFD dry thoroughly. Re-arm (for your model) and Repack the PFD (see "Re-arming Your PFD (MD2014)" on page 8 or see "Re-arming Your PFD (MD2016)" on page 10 and see "Repacking"... -
Page 23: Hypothermia
HYPOTHERMIA Prolonged exposure to cold water causes a condition known as hypothermia - a substantial loss of body heat, which leads to exhaustion and unconsciousness. Most drowning victims first suffer from hypothermia. The following chart shows the effects of hypothermia: how hypothermia affects most adults. How hypothermia affects most adults Water Temperature ˚C (˚F) Exhaustion or... -
Page 24: Each Of These Devices Is Intended To Help You Save Your Own Life
8) Do not dry your Inflatable PFD in front of a radiator or other source of direct heat. INFLATABLE PFD SAFETY ACCESSORIES MA2014 Re-arm Kit – Contains 24-gram replacement CO cylinder/ bayonet assembly and bobbin. MD2014 will not use the bobbin. -
Page 25: Additional Information
ADDITIONAL INFORMATION If you need more information about PFDs and safe recreational boating, contact your state boating authority, U.S. Coast Guard Auxiliary, U.S. Power Squadron, Red Cross, or your nearest unit of the U.S. Coast Guard; or call the free boating course number 1-800-336- BOAT (in VA, 1-800-245-BOAT). - Page 28 TOLL FREE 1.800.526.0532 EMAIL CUSTSERV@MUSTANGSURVIVAL.COM Mustang Survival and seahorse design is a registered trademark of Mustang Survival Corp. Our commitment to quality has earned our Burnaby facilities ISO 9001 registration, the highest of all international standards. This is our guarantee you’re receiving the ultimate in design and manufacturing.
Need help?
Do you have a question about the MD2014 and is the answer not in the manual?
Questions and answers