Stihl FS 70 Instruction Manual
Hide thumbs
Also See for FS 70:
- Instruction manual (92 pages) ,
- Instruction manual (76 pages) ,
- Instruction manual (20 pages)
Table of Contents
Advertisement
Advertisement
Table of Contents

Related Manuals for Stihl FS 70


Summary of Contents for Stihl FS 70
- Page 1 STIHL FS 70 Instruction Manual...
-
Page 3: Table Of Contents
Minimize Wear and Avoid Damage Main Parts Specifications Maintenance and Repairs Disposal EC Declaration of Conformity This instruction manual is protected by copyright. All rights reserved, especially the rights to reproduce, translate and process with electronic systems. FS 70 C, FS 70 RC... -
Page 4: Safety Precautions And Working Techniques
When not using the machine, it must be Intake air: Winter laid down in such a way that it does not operation endanger anyone. Ensure that the machine cannot be used without Handle heating authorization. FS 70 C, FS 70 RC... - Page 5 Only use cutting attachments and moving parts of the machine. Do not accessories that are explicitly approved for this power tool model by STIHL or are technically identical. If you have any FS 70 C, FS 70 RC...
- Page 6 By vehicle: When transporting in a Cutting attachment or – vehicle, properly secure your machine to interchangeable attachment: prevent turnover, damage and fuel correctly fitted, secure and in spillage. perfect condition FS 70 C, FS 70 RC...
- Page 7 0. and secure footing. Hold the unit securely. The cutting attachment must be clear of the ground and all other obstructions because it may begin to run when the engine starts. FS 70 C, FS 70 RC...
- Page 8 – do not run the engine your ability to hear warnings (shouts, unnecessarily, accelerate the engine alarms, etc.) is restricted. only when working. FS 70 C, FS 70 RC...
- Page 9 – e. g. due to the material from the cutting attachment and deflector. cutting attachment rotating during idling To reduce the above-named risks – risk of injury! involved in operating a metal cutting attachment, ensure that the diameter of FS 70 C, FS 70 RC...
- Page 10 It must be made of high- advice. Use only a spark plug of the type quality materials and have a suitable approved by STIHL and make sure it is geometry (shape, thickness). Maintenance and Repairs in good condition – see "Specifications".
- Page 11 To reduce the risk of serious injury, never use wire or metal-reinforced line in place of the nylon line. STIHL Polycut Mowing Head with Polymer Blades For mowing unobstructed edges of meadows (without posts, fences, trees or similar obstacles). FS 70 C, FS 70 RC...
- Page 12 The risk of kickout is greatest when the parts. black area of the rotating cutting attachment comes into contact with a Resharpen the grass cutting blade solid object. according to instructions when it has dulled noticeably. FS 70 C, FS 70 RC...
-
Page 13: Approved Combinations Of Cutting Attachment, Deflector, Handle And Harness
English Approved Combinations of Cutting Attachment, Deflector, Handle and Harness Cutting Attachment Deflector Handle Shoulder Strap/Harness FS 70 C, FS 70 RC... -
Page 14: Mounting The Bike Handle
(230 mm dia.) screw them into clamp (6) as far as stop – tighten them only moderately WARNING at this stage. Non-metal grass cutting blades are not approved. FS 70 C, FS 70 RC... - Page 15 – make sure the throttle trigger handlebar (5) until the holes (6) line moves freely. up – the throttle trigger (4) must point towards the gearbox. Insert the screw (1) and tighten it down firmly. FS 70 C, FS 70 RC...
-
Page 16: Mounting The Loop Handle
Loop Handle". machine or is available as a special Leave the barrier bar permanently accessory. mounted to the loop handle. Fit the square nuts (3) in the barrier bar (6); the holes must line up. FS 70 C, FS 70 RC... -
Page 17: Fitting The Carrying Ring
If no barrier bar is fitted – lock the nuts if Tighten down the screw firmly. necessary. Metal Version The carrying ring comes standard with the machine or is available as a special accessory. FS 70 C, FS 70 RC... -
Page 18: Mounting The Deflector
Slip the thrust plate (1) over the blade. shaft (2). Mounting the Deflector NOTICE The thrust plate on the gearbox is Deflectors (1) and (2) are both mounted necessary for mounting cutting tools. to the gearbox in the same way. FS 70 C, FS 70 RC... - Page 19 The output shaft (2) must be blocked with the stop pin (7) or screwdriver (7) to mount or remove cutting tools. These parts come standard with the machine or are available as special accessories. FS 70 C, FS 70 RC...
- Page 20 If the mounting nut has become too Direction of rotation is indicated by an loose, fit a new one. arrow on the inside of the deflector. Keep the leaflet and packaging of the metal cutting tool in a safe place. FS 70 C, FS 70 RC...
-
Page 21: Fuel
Use a canister approved for storing Use only high-quality brand-name fuel. Pour oil into canister first, then gasoline with a minimum octane rating add gasoline and mix thoroughly. of 90 – leaded or unleaded. FS 70 C, FS 70 RC... -
Page 22: Fueling
Closing the Tank Cap can quickly make the fuel mix unusable. STIHL MotoMix may be stored for up to 2 years without any problems. Thoroughly shake the mixture in the canister before fueling your machine. -
Page 23: Fitting The Harness
Balance the machine – see "Balancing the Machine". Put on the shoulder strap (1). Adjust the length of the strap so that the carabiner (2) is about a hand’s width below your right hip. Balance the machine. FS 70 C, FS 70 RC... -
Page 24: Starting / Stopping The Engine
Proceed as follows to adjust the floating position: Move the carrying ring up or down the drive tube – tighten the screw moderately – let the unit go and wait until is its balanced – then check the floating position. FS 70 C, FS 70 RC... - Page 25 The ignition is switched on again after the engine stops – the engine is then ready to start. Press in the choke lever (5) and turn it to < at the same time. FS 70 C, FS 70 RC...
- Page 26 Continue cranking until the engine runs. Other Hints on Starting Engine stalls in cold start position g or under acceleration Move the choke knob to < and continue cranking until the engine runs. FS 70 C, FS 70 RC...
-
Page 27: Transporting The Unit
Empty the fuel tank and keep the machine in a dry place, well away from sources of ignition, until you need it again. For longer out-of- service periods – see "Storing the Machine". FS 70 C, FS 70 RC... -
Page 28: Cleaning The Air Filter
1/2 to 3/4 turn in the same direction. WARNING If the cutting attachment continues to run when the engine is idling, have your machine checked and repaired by your servicing dealer. FS 70 C, FS 70 RC... -
Page 29: Spark Plug
Arcing may occur if the adapter nut (1) is loose or missing. Working in an easily combustible or explosive atmosphere may cause a fire or an explosion. This can result result in serious injuries or damage to property. FS 70 C, FS 70 RC... -
Page 30: Engine Running Behavior
Resharpen Dispose of fuel properly in with a grinder or have the work done Have the muffler checked for accordance with local by a dealer – STIHL recommends a contamination (carbonization) by your environmental requirements. STIHL servicing dealer. servicing dealer. -
Page 31: Maintaining The Mowing Head
If necessary, remove the mowing engages – and allow it to spring The thermoplastic cutting blades are head. back. referred to as "blades" in the following. Pull ends of the lines outward. FS 70 C, FS 70 RC... - Page 32 To reduce the risk of injury, always shut off the engine before installing the blades. Remove the mowing head. Replace blades as shown in the illustrated instructions. Mount the mowing head on the machine. FS 70 C, FS 70 RC...
-
Page 33: Maintenance And Care
Carburetor Adjust idle speed Readjust electrode gap Spark plug Replace after every 100 operating hours Visual inspection Cooling inlets Clean All accessible screws and nuts (not adjust- Retighten ing screws) FS 70 C, FS 70 RC... - Page 34 (very dusty work area, etc.), shorten the specified intervals accordingly. Visual inspection Cutting attachment Replace Check tightness Metal cutting attachment Sharpen Safety labels Replace STIHL recommends an authorized STIHL servicing dealer. FS 70 C, FS 70 RC...
-
Page 35: Minimize Wear And Avoid Damage
Deflectors for cutting attachments – owner, they should be performed by a servicing dealer. Clutch – STIHL recommends that you have Filters (air, fuel) – servicing and repair work carried out exclusively by an authorized STIHL FS 70 C, FS 70 RC... -
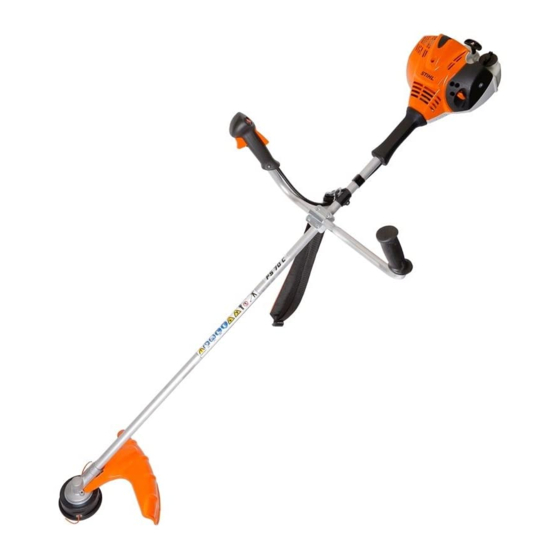
Page 36: Main Parts
12 Carrying ring 13 Throttle cable retainer 14 Carburetor adjusting screws 15 Choke lever 16 Air filter cover 17 Machine support 18 Loop handle 19 Barrier bar (country specific) 20 Drive tube 21 Sleeve Serial number FS 70 C, FS 70 RC... -
Page 37: Specifications
107 dB(A) with metal tool: 107 dB(A) All-position diaphragm carburetor with FS 70 RC integral fuel pump with mowing head: 107 dB(A) Fuel tank capacity: 340 cm (0.34 l) with metal tool: 107 dB(A) FS 70 C, FS 70 RC... -
Page 38: Maintenance And Repairs
The K-factor in accordance with replacement parts which have been Directive 2006/42/EC is 2.0 dB(A) for approved by STIHL for this power tool or the sound pressure level and sound are technically identical. Only use high- power level; the K-factor in accordance quality replacement parts in order to with Directive 2006/42/EC is 2.0 m/s... -
Page 39: Disposal
Make: STIHL Series: FS 70 C FS 70 C-E FS 70 RC STIHL products must not be thrown in Dr. Jürgen Hoffmann FS 70 RC-E the garbage can. Take the product, Director Product Certification & accessories and packaging to an... -
Page 40: Guide To Using This Manual 2 Ukca Declaration Of Conformity
The measured and guaranteed sound power levels were determined in accordance with the UK regulation Noise Emission in the Environment by Equipment for use Outdoors Regulations 2001, Schedule 8, using the ISO 10884 standard. FS 70 C, FS 70 RC... - Page 41 English FS 70 C, FS 70 RC...
- Page 42 English FS 70 C, FS 70 RC...
- Page 44 0458-570-0121-E englisch www.stihl.com *04585700121E* 0458-570-0121-E...
Need help?
Do you have a question about the FS 70 and is the answer not in the manual?
Questions and answers