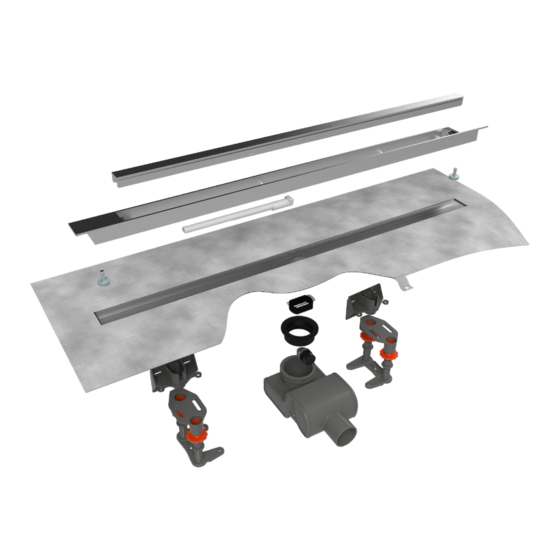
Summary of Contents for ESS Easy Drain Z Xs
- Page 1 Z1, Z2, Z3, Z4 INSTALLATION ADVICE Installation advice Consejo para la instalación Conseils de montage...
-
Page 2: Table Of Contents
CONTENTS Contenido Table des matières Installation options Height adjustable support Height adjustable support | Wall mounted Installation guide | Standard clamp drain Installation guide - Wall | No-hub sleeve Installation guide Sealing guide Trim | Xs (Centered) Trim | Xs (Wall mounted) Installation diagram | Standard clamp drain Installation diagram - Wall | No-hub sleeve Maintenance instructions... -
Page 3: Installation Options
INSTALLATION OPTIONS Opciones de instalación Variantes de montage Along the wall | Wall mounted Centered | Wall-to-Wall At the entrance Xs (Z1) Xs (Z2) Xs (Z3) Xs (Z4) -
Page 4: Height Adjustable Support
HEIGHT ADJUSTABLE SUPPORT Montaje del pie de ajuste Socle de montage ajustable CLAMP DRAIN & DRAIN SUPPORT It is not recommended to use any supporting feet when installing the Xs with bottom outlet in combination with a clamp drain. Make sure the outlet can be fitted tightly in the gasket of the clamp drain. -
Page 5: Height Adjustable Support | Wall Mounted
HEIGHT ADJUSTABLE SUPPORT - WALL MOUNTED Montaje del pie de ajuste Socle de montage ajustable width measure for height... -
Page 6: Installation Guide | Standard Clamp Drain
INSTALLATION GUIDE - CLAMP DRAIN Manual de instalación Explications de montage CLAMP DRAIN* NOT INCLUDED OUTLET HOLE: DISTANCE TO WALL MAKE SURE THE CONNECTION BETWEEN THE A: 1 ” CLAMP DRAIN BASE AND SIPHON/DISCHARGE PIPE B: 1 ” + WALL BOARD THICKNESS IS WATERTIGHT! SLOPED MORTAR BED THE TOP OF THE CLAMP DRAIN MUST BE INSTALLED... - Page 7 CONCRETE BOARD (AT LEAST ¼” ABOVE THE FLOOR) TEST >> CONTINUE ON PAGE 9...
-
Page 8: Installation Guide - Wall | No-Hub Sleeve
INSTALLATION GUIDE - NO-HUB SLEEVE Manual de instalación Explications de montage NO-HUB SLEEVE* NOT INCLUDED TEST CONTINUE ON PAGE 9... -
Page 9: Installation Guide
INSTALLATION GUIDE Manual de instalación Explications de montage CENTERED SLOPED MORTAR BED WALL-to-WALL SLOPED MORTAR BED WALL MOUNTED SLOPED MORTAR BED WALL MOUNTED | WALL-toWALL SLOPED MORTAR BED... -
Page 10: Sealing Guide
SEALING Impermeabilizante d’Étanchéité All sealing instructions are similar for every type of installation, e.g. centered, wall-to-wall etc. Only the way in which the waterproofing membrane is fitted to the walls differs between the various types of installation (see drawing on page 9). FLEXIBLE SEALING COMPOUND FLEXIBLE SEALING COMPOUND OPTIONAL: SEAL THE ENTIRE FLOOR WITH... -
Page 11: Trim | Xs (Centered)
INSTALLATION GUIDE - TRIM CENTERED Manual de instalación Explications de montage MAX. TILE THICKNESS: 1” (25 MM) - Page 12 SEE INSTALLATION DIAGRAM: P.14 & 15 (WALL)
-
Page 13: Trim | Xs (Wall Mounted)
INSTALLATION GUIDE - TRIM WALL Manual de instalación Explications de montage MAX. TILE THICKNESS: 1” (25 MM) FILL UP HOLLOW SPACES BENEATH THE FLANGES SEE INSTALLATION DIAGRAM: P.14 & 15 (WALL) -
Page 14: Installation Diagram | Standard Clamp Drain
INSTALLATION DIAGRAM Standard Clamp drain PLYWOOD CONCRETE Xs drain body Sloped mortar bed - first layer TAF (Tile Adjustable Frame) Sloped mortar bed - second layer Strainer Pan liner / Moisture resistant material Elastic sealant - Silicone Pea Gravel Tiles 2”... -
Page 15: Installation Diagram - Wall | No-Hub Sleeve
INSTALLATION DIAGRAM - WALL No hub Sleeve FILL UP PLYWOOD CONCRETE WALL Xs drain body Pre-assembled waterproofing membrane TAF (Tile Adjustable Frame) Thin-set sheet membrane (entire floor!) Strainer Sloped mortar bed - first layer Elastic sealant - Silicone Pan liner / Moisture resistant material Tiles No-Hub sleeve* Thin set tile adhesive... -
Page 16: Maintenance Instructions
MAINTENANCE INSTRUCTIONS Instrucciones de mantenimiento Instructions d’entretien • Do not use abrasives and/or sharp/scraping objects to clean the Xs®. • The siphon trap should be cleaned periodically to remove any dirt that may have collected. • We recommend the use of EasyClean Set (ED-SC) for daily maintenance and cleaning of your Xs®. •... -
Page 17: Important Assembling Advice
Important assembling advice: Xs Suitable for renovation work and new construction Xs should only be installed by specialist companies in compliance with the building regulations. To achieve the best possible result, please carefully read the installation guide. If you have any questions, please consult your supplier. - Page 18 Indicaciones importantes de colocación: Xs Adecuado tanto en los edificios de nueva construcción como en la de renovación Únicamente una empresa especializada puede colocar el Xs y siempre teniendo en cuenta las disposiciones técnicas de instalación. Para que la colocación resulte satisfactoria, lea las indicaciones de montaje cuidadosamente.
- Page 19 Consignes de montage importantes: Xs Pour les nouvelles constructions et pour les projets de rénovation Le montage de le Xs devra, dans le respect des règles de la construction, être réalisé uniquement par une entreprise spécialisée. Pour obtenir un résultat optimal, veuillez lire attentivement les instructions de montage.
- Page 20 Deer Park, NY 11729 T: 001-(888) 317-7927 F: 001-(888) 488-1617 email: sales-usa@esspost.com www.easydrainusa.com Manufacturer: Easy Sanitary Solutions Nijverheidsstraat 60 7575 BK Oldenzaal, The Netherlands tel: +31 (0)541 200800 email: info@esspost.com www.easydrain.com ESS PRODUCTS ARE PATENTED AND REGISTRATED TRADEMARKS MADE BY ESS 2019 rev.1...


Need help?
Do you have a question about the Easy Drain Z Xs and is the answer not in the manual?
Questions and answers