Table of Contents
Advertisement
Available languages
Available languages
Quick Links
Operating Instructions
Domestic Pump set
Warning symbols contained in this service manual - Simboli d'avvertenza di questo manuale - Símbolos
de advertencia contenidos en este manual - Avertissements inclus dans cette notice de service
Risk by electric shock.
Pericolo di scarica elettrica
Riesgo de choque eléctrico
Danger par choc électrique.
Risk for people and/or objects.
Pericolo per persone o oggetti
Riesgo para personas u objetos
Risque de dommages corporels ou matériels
EN
IT
E
E
FR
ES
E
E
Onematic easy
Advertisement
Table of Contents

Related Manuals for Coelbo ONEMATIC easy


Summary of Contents for Coelbo ONEMATIC easy
- Page 1 Onematic easy Operating Instructions Domestic Pump set Warning symbols contained in this service manual - Simboli d'avvertenza di questo manuale - Símbolos de advertencia contenidos en este manual - Avertissements inclus dans cette notice de service Risk by electric shock.
- Page 2 BODY CONNECTIONS-COLLEGAMENTO CORPO-CONEXIONES EN EL CUERPO-CONNEXIONS DU CORPS Pumpensicheru ng 10 A Fig. 3 -Single-phase motor -Single-phase power supply -Minimum level -Alert monitoring -Motor monofase -Alimentazione elettrica -Nivel mínimo -Monitorizzazione delle -Motor monofásico allarme monofase -Livello minimo -FUSE 20 A -Moteur monophasé...
-
Page 3: Main Characteristics
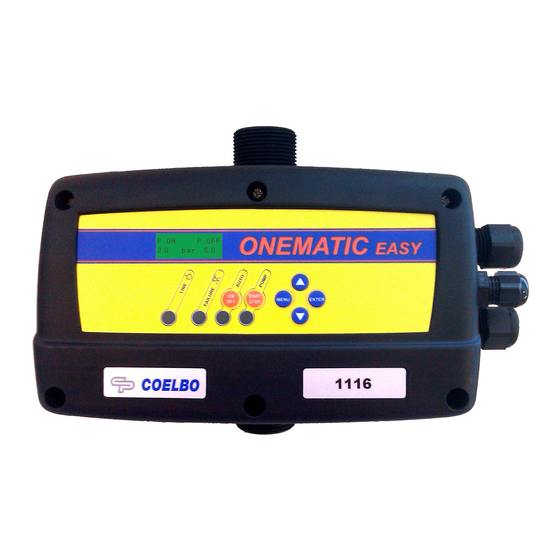
0. DESCRIPTION. ONEMATIC easy is a compact automatic control unit for single-phase elctric pumps. The system manages the start and stop of the pump depending on the pressure detected by its internal transducer and the flow detected by the internal flow sensor. It can be run either in pressure-dependent mode (start pressure and stop pressure) or on/off mode (start pressure between 1÷5 bar, stopped by... -
Page 4: Technical Characteristics
Before hydraulically connecting the pump, it is essential to install a non-return valve at the pump´s suction side. ONEMATIC easy must be connected in vertical position with the inlet port ( G1 ¼” male) directly connected to the main pump discharge, and the outlet port (G1 ¼” male) to the main network. - Page 5 7. STARTUP. It is recommended to connect ONEMATIC easy to the electric supply via the motor protection switch. Wait for 5 seconds while the ONEMATIC easy is running autotest. If the unit is started for the first time, it will directly open the configuration menu. The LCD screen will display a message for language selection.
- Page 6 D R Y R U N Description: if ONEMATIC easy detects lack of water in the inlet of the automatic control unit for more than 10 seconds, it will stop the pump and the ART will be triggered. System reaction: after 5 minutes ART system will restart the pump for 30 seconds, trying to restore the system.
-
Page 7: Blank Screen
Simultaneous alerts are displayed on the LCD screen successively every 3 seconds. All alerts can be acknowledged by pressing the On/off push-button in manual mode. WARNING: ONEMATIC easy has a volt-free contact with 1 A maximum intensity for the transmission of signals to different types of alarm equipment (optical, acoustics, etc). See connection diagram. -
Page 8: Caratteristiche Principali
(pressione di messa in marcia tra 1-5 bar e sconessione per il sensore di portata). 1. CLASSIFICA E TIPO. D'accordo con la norma EN-60730-1 il Onematic easy è un dispositivo di montaggio indipendente, tipo 1B cn software di classe A e ambiente pulito. -
Page 9: Caratteristiche Tecniche
1 A per la trasmissione di diversi tipi di segnali (ottiche, acustiche, ecc) appena si rilevi un guasto previamente riflesso nello schermo LCD. Vedere allacciamento Fig.4.(OPZIONALE) Controllo di livello minimo: il Onematic easy dispone di una entrata che disattiva la pompa appena si spegne l'interrutore esterno di livello minimo. Per il suo collegamento vedere Fig.4.(OPZIONALE) -
Page 10: Messa In Marcia
7. MESSA IN MARCIA. Collegare il Onematic easy alla rete elettrica mediante l'interruttore magnetotermico. Attendere 5 secondi che il Onematic easy faccia l'auto reset. Se è la prima volta che si mette in marcia il dispositivo accediremo direttamente nel menù di configurazione – in caso contrario pulsare MENÙ... - Page 11 Descrizione: il Onematic easy ha rilevato che la pompa non risponde e la spegne per evitare il deterioramento. Il Onematic easy dispone di un gruppo di tre fusibili di 10 A (ritardati) per la sua protezzione. Nel caso di pompe con consumazioni inferiori, è raccomandabile sustituire per fusibili adeguati alla consumazione delle pompe.
- Page 12 Le allarme si ristabiliscono al passare al modo manuale premendo il pulsante AUTO On/Off. ATTENZIONE: Il Onematic easy dispone di un contattore commutato di libero potenziale ed intensità massima 1 A per trasmettere segnali ottiche o acustiche quando si attiva un allarme. Vedere schema di connessionato 10.
-
Page 13: Características Principales
(presión de puesta en marcha entre 1÷5 bar y desconexión por el sensor de caudal. 1. CLASIFICACIÓN Y TIPO. De acuerdo con la norma EN-60730-1 el Onematic easy es un dispositivo de montaje independiente, tipo 1B con software de clase A y ambiente limpio. -
Page 14: Características Técnicas
Antes de proceder a la instalación hidráulica es imprescindible instalar una válvula de retención en la aspiración de la bomba.. El Onematic easy debe ser conectado en posición vertical, la aspiración ( 1 ¼” macho) directamente a la impulsión de la bomba y la salida (1 ¼” macho) a la red. -
Page 15: Puesta En Marcha
7. PUESTA EN MARCHA. Conectar el Onematic easy a la red eléctrica con el interruptor magnetotérmico. Esperar unos 5 segundos a que el Onematic easy realice un autotest. Si es la primera vez en poner en marcha el dispositivo entraremos directamente en el menú de configuración- en caso contrario pulsar MENU durante 3. - Page 16 Fallo definitivo: LED FAILURE ENCENDIDO. S E N S O R Descripción: El Onematic easy nos informa en la pantalla LCD de las averías en el sensor de presión. En caso de producirse esta alarma contactar con el servicio técnico.
- Page 17 Las alarmas se restablecen al pasar a modo manual pulsando el botón AUTO On/off. ATENCIÓN: El Onematic easy dispone de un contacto conmutado de libre potencial y de intensidad máxima 1 A para transmitir señal óptica o acústica cuando se activa una alarma. Ver esquema de conexiones en Fig. 4..
-
Page 18: Caractéristiques Principales
0. DESCRIPTION. Onematic easy est un appareil compact pour la commande automatique de pompes à moteur monophasé ou triphasé. Il commande la mise en marche et l'arrêt d'une pompe en fonction de la pression relevée par le capteur intégré et en fonction du débit relevé par le capteur de débit intégré. -
Page 19: Caractéristiques Techniques
à être débranché lors du démontage. Raccorder les dispositifs auxiliaires : Signalisation d'alarme : Onematic easy est muni d'un contact libre de potentiel, intensité max. 1 A, pour la transmission de signaux (alarme visuelle, sonore, etc.) après détection d'un défaut affiché à l'écran à cristaux liquides. -
Page 20: Mise En Service
7. MISE EN SERVICE Il est recommandé de raccorder le Onematic easy au réseau électrique à travers un disjoncteur de moteur. Attendre 5 secondes pendant que Onematic easy effectue un test automatique. À la première mise en service de l'appareil de commande, le menu de configuration s'ouvre automatiquement. Un message s'affiche à l'écran pour la sélection de la langue. - Page 21 M A . ` E A Description: lorsque le Onematic easy détecte un manque d'eau d'une durée de plus de 10 secondes à l'entrée de l'appareil de commande, la pompe est arrêtée et la fonction ART est activée. Comportement du système: Le système ART redémarre la pompe au bout de 5 minutes pour une durée de 30 secondes et essaie de rétablir le système.
- Page 22 être validées en fonctionnement manuel par pression de la touche On/off. AVERTISSEMENT: l'appareil de commande Onematic easy est muni d'un contact libre de potentiel, intensité max. 1 A, pour la transmission de signaux (alarme visuelle, sonore, etc.). Voir schéma électrique.
-
Page 23: Warranty
ONEMATIC easy should be used only for the transport of clean water. It cannot be used for transport of other kinds of liquid. It is recommended to use an accumulator in order to avoid continuous start-stops due to the deterioration of taps, valves, and also to prevent "water hammer"... - Page 24 130505D...
Need help?
Do you have a question about the ONEMATIC easy and is the answer not in the manual?
Questions and answers