Table of Contents

Related Manuals for CD Automation CD3000S2PH


Summary of Contents for CD Automation CD3000S2PH
- Page 1 CD3000S USER’S MANUAL Rev. 01/2021 From 10 to 90A M-3000S2-10-90 CD Automation S.r.l. Via Picasso, 34/36 - 20025 Legnano (MI)- Italy Tel. +39 0331 577479 - Fax +39 0331 579479 E-mail: info@cdautomation.com - Web: www.cdautomation.com...
-
Page 3: Declaration Of Conformity
Declaration of conformity Declaration of conformity - Dichiarazione di Conformità PRODUCT MANUFACTURER / PRODUTTORE: CD Automation S.R.L. Controllers, Drives & Automation Via Picasso, 34/36 - 20025 Legnano (MI)- Italy P.I. 08925720156 -Tel. +39 0331 577479 - Fax +39 0331 579479 E-mail: info@cdautomation.com - Web: www.cdautomation.com... -
Page 4: Important Warnings For Safety
User’s manual CD3000S 2PH from 10A to 90A Important warnings for safety This chapter contains important information for the safety. The not observance of these instructions may result in serious personal injury or death and can cause serious damages to the Thyristor unit and to the components system included. - Page 5 User’s manual CD3000S 2PH from 10A to 90A WARNING! All service including inspection, installation, wiring, maintenance, troubleshooting, fuse or other user serviceable component replacement must be performed only by properly qualified personnel. Service personnel must read this manual before proceeding with work. While service is being performed unqualified personnel should not work on the unit or be allowed in the immediate vicinity.
- Page 6 User’s manual CD3000S 2PH from 10A to 90A AVERTISSEMENT! Au moment de relever des mesures de tension ou de courant en direct, utiliser un équipement de protection individuelle approprié pour les tensions et les potentiels d’arc électrique concernés. WARNING! Verify the voltage and current ratings of the power controller are correct for the application. AVERTISSEMENT! Vérifier que les valeurs de tension et de courant du régulateur de puissance sont correctes pour l’application.
-
Page 7: Maintenance
User’s manual CD3000S 2PH from 10A to 90A Maintenance In order to have a corrected cooling, the user must clean the heat-sink and the protective grill of the fans. The frequency of this servicing depends on environmental pollution. Also check periodically if the screw for the power cables and safety earth are tightened correctly (See Connection Diagram) Warranty condition Producer gives a 12 months warranty to its products. -
Page 8: Table Of Contents
User’s manual CD3000S 2PH from 10A to 90A Summary Declaration of conformity ........3 Important warnings for safety . -
Page 9: Quick Start
User’s manual CD3000S 2PH from 10A to 90A Quick Start 1.1 Standard version Attention: this procedure must be carried out by skilled people only. If the Order Code of the Thyristor unit is in line with what you really need, then CD3000S has been already configured in Factory and you just need to do the following steps: Verify CD3000S Sizing. -
Page 10: Basic Connections And Sizing
User’s manual CD3000S 2PH from 10A to 90A Basic Connections and sizing Wiring with resistive Load I= P 1,73V Delta wiring V = Nominal load voltage phase to phase I = Nominal load current P = Nominal load power Star wiring... -
Page 11: Identification And Order Code
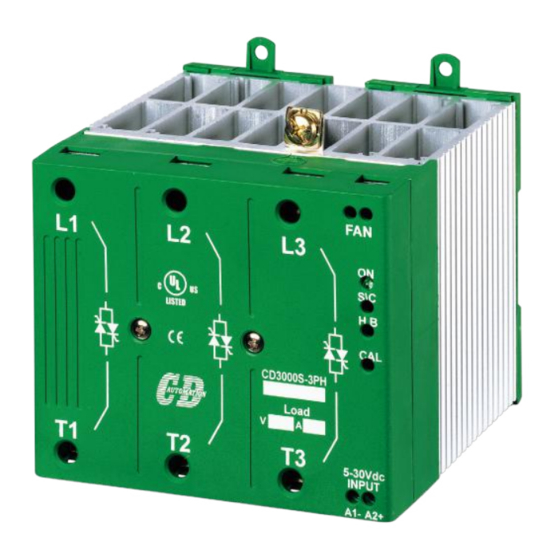
User’s manual CD3000S 2PH from 10A to 90A Identification and Order Code 3.1 Identification of the Unit Caution: Before to install, make sure that the Thyristor unit have not damages. If the product has a fault, please contact the dealer from which you purchased the product. The identification label give all the information regarding the factory settings of the Thyristor unit, this label is on the unit, like represented in figure. -
Page 12: Order Code
User’s manual CD3000S 2PH from 10A to 90A 3.2 Order Code CD3000S 2PH CURRENT (A) CONTROL MODE description Code OLD code Note description Code OLD code Note Open loop not in the code FUSES & OPTION description Code OLD code Note No Fuse / No Option NF / -... -
Page 13: Technical Specification
User’s manual CD3000S 2PH from 10A to 90A Technical Specification 4.1 General features Cover and Socket material: PolymericV2 Heat-sink: Anodized aluminum Delay switch ON time: 0.5 period Max Delay switch OFF time: 0.5 period Max Auxiliary Voltage: 12÷24V dc/ac (max 70mA) Fan Voltage 220Vac ±... -
Page 14: Environmental Installation Conditions
User’s manual CD3000S 2PH from 10A to 90A 4.4 Environmental installation conditions Ambient temperature 0-40°C (32-104°F) at nominal current. Over 40°C use the derating curve. Storage temperature -25°C to 70°C, -13°F to 158°F Installation place Don’t install at direct sun light, where there are conductive dust, corrosive gas, vibration or water and also in salty environmental. -
Page 15: Installation
User’s manual CD3000S 2PH from 10A to 90A Installation Before to install, make sure that the Thyristor unit have not damages. ≥5 cm If the product has a fault, please contact the dealer from which you purchased the product. Verify that the product is the same thing as ordered. - Page 16 User’s manual CD3000S 2PH from 10A to 90A Size: S4 65 mm Ø 4,5 mm 117 mm 123 mm Size: S7 Ø 4,5 mm 65 mm 117 mm 159 mm Size: S8 65 mm Ø 4,5 mm 117 mm 159 mm...
-
Page 17: Wiring Instructions
User’s manual CD3000S 2PH from 10A to 90A Wiring instructions CD3000S unit has isolated heatsink. For safety connect the heatsink to earth using its terminal with earth symbol. CD3000S can be susceptible to airborne interferences from near equipment or from interferences on main supply, so a number of precautions must be taken. -
Page 18: Diagram Of Control Connection - Standard Version
User’s manual CD3000S 2PH from 10A to 90A 6.1 Diagram of control connection - Standard Version Size S0 - Standard version 10A Input: LOAD Note: The user installation must be protected by electromagnetic circuit breaker or by fuse isolator. - Page 19 User’s manual CD3000S 2PH from 10A to 90A Size S1 - Standard version 15A-25A Input: LOAD Note: The user installation must be protected by electromagnetic circuit breaker or by fuse isolator.
- Page 20 User’s manual CD3000S 2PH from 10A to 90A Size S4 - Standard version 35A Size S7 - Standard version 45A Size S8 - Standard version 75A, 90A Fan Power Supply (for size S8) Input: A1-A2+ LOAD Note: The user installation must be protected by electromagnetic circuit breaker or by fuse isolator.
-
Page 21: Diagram Of Control Connection - Analog Input And/Or Heater Break Options
User’s manual CD3000S 2PH from 10A to 90A 6.2 Diagram of control connection - Analog Input and/or Heater Break Options 45A, 75A, 90A Fan Power Supply (for size S8) C1 C2 C3 1 2 3 4 5 6 7 8 HB Alarm Ext. -
Page 22: Heater Break Alarm And Scr Short Circuit
User’s manual CD3000S 2PH from 10A to 90A Heater break alarm and SCR short circuit Only with HB option The Heater Break circuit to work properly must have at least an input of 25% of the nominal current. H.B. circuit read load current via a current transformer 25-50/0.05 or 100/0.05 depending on thyristor size. Minimum current is 30% of the current transformer size’s. -
Page 23: Heater Break Calibration Procedure (Only With The Hb Option)
User’s manual CD3000S 2PH from 10A to 90A 7.2 Heater break Calibration procedure (only with the HB option) An automatic function sets the Heater Break Alarm. The auto setting function can be activated using the “CAL” button on front unit, or supply with 12-24Vdc the digital input “Cal Ext. -
Page 24: Firing Setting
User’s manual CD3000S 2PH from 10A to 90A Firing Setting 8.1 Firing Setting with Analog Input Option The BF firing performed in Digital mode in the Thyristor unit give a lot of advantages because switches Thyristor at zero voltage crossing (ZC) without EMC interferences. Analog input is necessary for BF and can be decided how many complete Cycle we want at 50% of power demand. -
Page 25: Input Setting
User’s manual CD3000S 2PH from 10A to 90A Input Setting 9.1 Input Setting with Analog Input Option The input type is already configured in line with customer requirements that are defined in the complete product code. However, if you wish to change the input type (ex. from 0÷10V to 4÷20mA) set the jumpers as below represented and then do the “Input calibration procedure”. -
Page 26: Input Calibration Procedure (Only With Analog Input Option)
User’s manual CD3000S 2PH from 10A to 90A 9.2 Input Calibration procedure (only with Analog Input Option) Warning: this procedure can be done just by specialized personnel and is needed only if you change the input type. Start TUNE Auxiliary power supply Mantain Key CAL pushed and give the power supply 2sec. -
Page 27: Fuses And Fuse Holder
User’s manual CD3000S 2PH from 10A to 90A Fuses and Fuse holder Warning: High speed fuses are only used for the thyristor protection and can not be used to protect the installation. CD3000S unit must be protected against short circuit by High speed fuses. The Fuses must have I²T 20% less than thyristor’s I²T. - Page 28 User’s manual CD3000S 2PH from 10A to 90A Fuse Holder size 15A-25A 42,5 17,8 45A-75A (CE) 75A (UL) -90A 75 35 25.5...
- Page 29 CD Automation S.r.l. Via Picasso, 34/36 - 20025 Legnano (MI) - Italy Tel. +39 0331 577479 - Fax +39 0331 579479 E-mail: info@cdautomation.com - Web: www.cdautomation.com...
Need help?
Do you have a question about the CD3000S2PH and is the answer not in the manual?
Questions and answers