Table of Contents
Advertisement
Quick Links
For replacement parts visit
WENPRODUCTS.COM
Your new tool has been engineered and manufactured to WEN's highest standards for dependability, ease
of operation, and operator safety. When properly cared for, this product will supply you years of rugged,
trouble-free performance. Pay close attention to the rules for safe operation, warnings, and cautions. If
you use your tool properly and for intended purpose, you will enjoy years of safe, reliable service.
NOTICE: Please refer to wenproducts.com for the most up-to-date instruction manual.
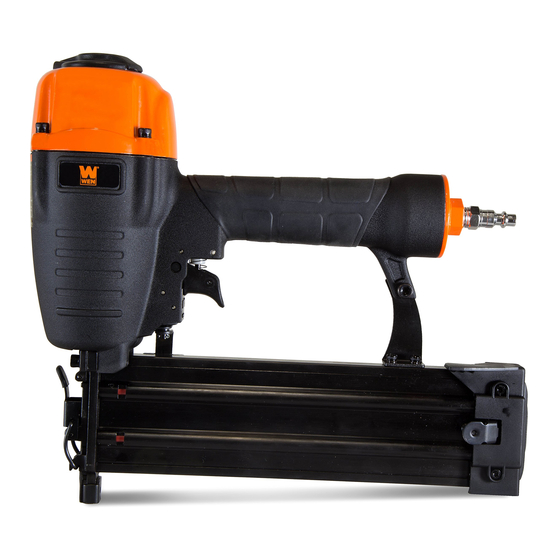
FINISH NAILER
IMPORTANT:
NEED HELP? CONTACT US!
Have product questions? Need technical support?
Please feel free to contact us at:
800-232-1195
techsupport@wenproducts.com
WENPRODUCTS.COM
16-GAUGE
Model # 61764
(M-F 8AM-5PM CST)
bit.ly/wenvideo
Advertisement
Table of Contents

Related Manuals for Wen 61764


Summary of Contents for Wen 61764
- Page 1 WENPRODUCTS.COM IMPORTANT: Your new tool has been engineered and manufactured to WEN’s highest standards for dependability, ease of operation, and operator safety. When properly cared for, this product will supply you years of rugged, trouble-free performance. Pay close attention to the rules for safe operation, warnings, and cautions. If you use your tool properly and for intended purpose, you will enjoy years of safe, reliable service.
-
Page 2: Table Of Contents
Know Your Finish Nailer Preparation and Adjustments Operation Maintenance Exploded View and Parts List Troubleshooting Warranty Statement TECHNICAL DATA Model Number: 61764 Minimum Operating Pressure: 70 PSI Maximum Operating Pressure: 120 PSI Air Inlet: 1/4"- 18 NPT Nail Diameter: 16 Gauge Brad Nails Nail Size Range: 3/4”... -
Page 3: Safety Introduction
SAFETY INTRODUCTION Hello! Thank you for purchasing the WEN Finish Nailer. Safe operation of this pneumatic tool requires that you read and understand this operator’s manual and all labels affixed to the tool. Safety is a combination of common sense, staying alert, and knowing how your tool works. -
Page 4: Safety Rules
SAFETY RULES Safety is a combination of common sense, staying alert and knowing how your item works. SAVE THESE SAFETY INSTRUCTIONS. WARNING: To avoid mistakes and serious injury, do not use your tool until the following steps have been read and understood 1. - Page 5 SAFETY RULES 13. USE ONLY clean dry and regulated air. Condensation from an air compressor can rust and damage the internal workings of the tool. 14. DO NOT USE BOTTLED GASES to power this tool. Bottled compressed gases including but not limited to oxygen, carbon dioxide, nitrogen, hydrogen, propane, acetylene or air are not for use with pneumatic tools.
- Page 6 SAFETY RULES 28. DO NOT DISCHARGE fasteners into open air, concrete, stone, extremely hard woods, knots or any material too hard for the fastener to penetrate. 29. DO NOT DRIVE FASTENERS near the edge of your work material. The workpiece may split, causing the fastener to ricochet, injuring you or a bystander.
-
Page 7: Know Your Finish Nailer
KNOW YOUR FINISH NAILER Carefully unpack the nailer and all its parts. Check all components and compare against the graph below. If any part is damaged or missing, please contact our customer service at (800) 232-1195, M-F 8-5 CST or email us at techsup- port@wenproducts.com. -
Page 8: Preparation And Adjustments
PREPARATION AND ADJUSTMENTS LUBRICATING THE TOOL (Fig. 1) This tool requires lubrication before each use (especially the first use). Proper lubrication is the owner’s responsibil- ity. Failure to lubricate the tool properly will dramatically shorten the life of the tool and void the warranty. NOTE: An automatic in-line oiler is a convenient way to provide oil to the tool. - Page 9 PREPARATION AND ADJUSTMENTS LOADING THE FASTENERS (Fig. 3) WARNING: Always load the fasteners after connecting the tool to its air supply. Never aim the tip of the nailer at a person or animal in case of misfire. 1. Press the magazine lock (Fig. 3 - 1) to pull back the mov- able magazine (Fig.
- Page 10 PREPARATION AND ADJUSTMENTS WARNING: Before each use, check the nailer, compressed air connections and air lines. If any parts are missing or damaged, do not operate this tool until the parts are repaired and replaced. Failure to do so could possibly result in a serious personal injury. TYPES OF TRIGGERS Two different triggers are included with your nailer.
-
Page 11: Operation
OPERATION ADJUSTING THE DRIVING DEPTH (Fig. 7) Make sure to disconnect the air supply and remove fasteners from maga- zine before making adjustments. The nailer is equipped with a depth adjustment wheel (Fig. 7 - 1) for setting the penetration depth of the fasteners. - Page 12 OPERATION CLEARING JAMMED NAILS (Fig. 9) WARNING: Disconnect air line from the tool and remove all fasteners before removing jammed nails to avoid personal injury. Keep the tool pointed away from yourself and others. 1. Disconnect the nailer from the air supply and remove all remain- ing fasteners from the magazine.
-
Page 13: Maintenance
MAINTENANCE WARNING: Disconnect tool from air supply and empty fasteners from the magazine before performing any cleaning or maintenance. LUBRICATION Routine lubrication of the tool is required for best performance. An automatic in-line oiler is recommended. If tool is used without an in-line oiler, place 2 drops of pneumatic tool oil into the air inlet of the tool at the beginning of each workday or after about 1 hour of continuous use. -
Page 14: Exploded View And Parts List
EXPLODED VIEW AND PARTS LIST... - Page 15 EXPLODED VIEW AND PARTS LIST Part No. Description Part No. Description 61764-001 Screw 61764-044 Trigger Assembly 61764-002 Spring Washer 61764-045 61764-003 Bushing 61764-046 O-Ring (9.5x1.9) 61764-004 Exhaust Cover 61764-047 O-Ring (10.3x1.9) 61764-005 Washer 61764-048 O-Ring (12.8x1.9) 61764-006 Screw 61764-049 Trigger Valve Head...
-
Page 16: Troubleshooting
TROUBLESHOOTING WARNING: Stop using the tool immediately if any of the following problems occur or risk serious per- sonal injury. Repairs and replacements should only be performed by authorized personnel. If you have any questions, please contact our customer service at (800) 232-1195, M-F 8-5 CST. Problem Common Causes Solution... - Page 17 LIMITED TWO YEAR WARRANTY WEN Products is committed to build tools that are dependable for years. Our warranties are consistent with this commitment and our dedication to quality. LIMITED WARRANTY OF WEN CONSUMER POWER TOOLS PRODUCTS FOR HOME USE GREAT LAKES TECHNOLOGIES, LLC (“Seller”) warrants to the original purchaser only, that all WEN con- sumer power tools will be free from defects in material or workmanship for a period of two (2) years from date of purchase.
- Page 18 THANKS FOR REMEMBERING...
Need help?
Do you have a question about the 61764 and is the answer not in the manual?
Questions and answers