Advertisement
Table of Contents
PLEASE CONTACT MOEN FIRST
For Installation Help, Missing or Replacement Parts
(USA)
1-800-BUY-MOEN (1-800-289-6636)
WWW.MOEN.COM
(Canada)
1-800-465-6130
WWW.MOEN.CA
POR FAVOR, CONTÁCTESE PRIMERO CON MOEN
Para obtener ayuda de instalación, piezas faltantes o de recambio
011 52 (800) 718-4345
(Costa Este)
WWW.MOEN.COM.MX
VEUILLEZ D'ABORD CONTACTER MOEN
En cas de problèmes avec l'installation, ou pour obtenir toute pièce
manquante ou de rechange
1-800-465-6130
WWW.MOEN.CA
HELPFUL TOOLS
HERRAMIENTAS ÚTILES
For safety and ease of
Para que el cambio de la
faucet replacement,
llave sea fácil y seguro,
Moen recommends the
Moen le recomienda usar
use of these helpful tools.
estas útiles herramientas.
3/32 Hex
Llave Hexagonal
Clé Hexagonale
OUTILS UTILES
Par mesure de sécurité et
pour faciliter
l'installation, Moen
suggère l'utilisation des
outils suivants.
3/32 Hex
Llave Hexagonal
Clé Hexagonale
Thread seal tape
Cinta para sellar roscas
Ruban pour joints letés
BATTERY POWERED EXPOSED TYPE FLUSH VALVE
MODELS 8310S35, 8310, 8310DF16, 8311, 8312, 8314, 8315, 8316, 8310SR35, 8310R16,
8310RDF16, 8310SR128, 8312R10, 8312SR05, 8312SR125, LAT8311, LAT8310, LAT8310DF16,
LAT8312, LAT8312M0125, LAT8312M10, LAT8316
VÁLVULA DE DESCARGA EXPUESTA DE BATERÍAS
MODELOS 8310S35, 8310, 8310DF16, 8311, 8312, 8314, 8315, 8316, 8310SR35, 8310R16,
8310RDF16, 8310SR128, 8312R10, 8312SR05, 8312SR125, LAT8311, LAT8310, LAT8310DF16,
LAT8312, LAT8312M0125, LAT8312M10, LAT8316
ROBINET DE CHASSE À PILE
MODÉLES 8310S35, 8310, 8310DF16, 8311, 8312, 8314, 8315, 8316, 8310SR35, 8310R16,
8310RDF16, 8310SR128, 8312R10, 8312SR05, 8312SR125, LAT8311, LAT8310, LAT8310DF16,
LAT8312, LAT8312M0125, LAT8312M10, LAT8316
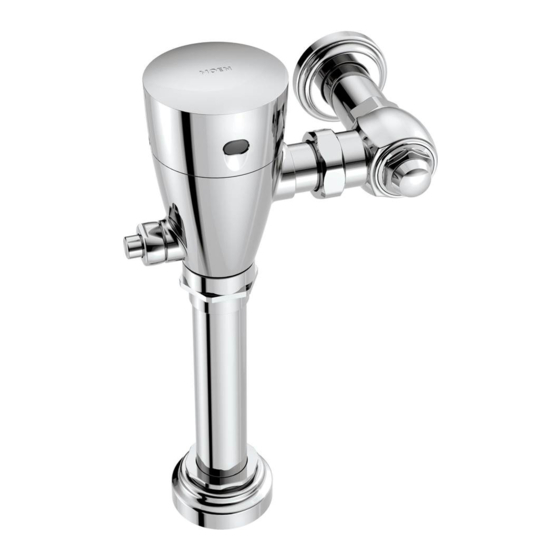
Image is for reference only
(Style varies by model)
La imagen es sólo como referencia
(El estilo varía por el modelo)
Cette image n'est offerte qu'à titre indicatif seulement
(Le style varie selon le modèle)
Record Purchased Model Number:
3/32 Hex
Registro del número de modelo comprado:
Llave Hexagonal
Clé Hexagonale
Consigner ici le numéro du modèle acheté :
_______________________
Thread seal tape
(Save instruction sheet for future reference)
Cinta para sellar roscas
Ruban pour joints letés
(Guarde la hoja de instrucciones para futura referencia)
(Garder ces directives pour référence ultérieure)
Register Online:
Regístrese en línea:
S'enregistrer en ligne :
www.moen.com/product-registration
INS10424B - 2/20
Thread seal tape
Cinta para sellar roscas
Ruban pour joints letés
Advertisement
Table of Contents

Related Manuals for Moen 8310S35


Summary of Contents for Moen 8310S35
- Page 1 INS10424B - 2/20 BATTERY POWERED EXPOSED TYPE FLUSH VALVE PLEASE CONTACT MOEN FIRST MODELS 8310S35, 8310, 8310DF16, 8311, 8312, 8314, 8315, 8316, 8310SR35, 8310R16, For Installation Help, Missing or Replacement Parts 8310RDF16, 8310SR128, 8312R10, 8312SR05, 8312SR125, LAT8311, LAT8310, LAT8310DF16, LAT8312, LAT8312M0125, LAT8312M10, LAT8316 (USA) VÁLVULA DE DESCARGA EXPUESTA DE BATERÍAS...
-
Page 2: Parts List
Parts List A. Wall Escutcheon Vacuum Breaker P. Hex Wrench B. Inlet Cover J. Discharge Tube Q. Vacuum Breaker Nut C. Battery Pack K. Adapter R. Escutcheon Nut D. Set Screws (x2) L. Flush Valve Angle Stop S. Escutcheon E. Flush Valve Assembly M. - Page 3 INS10424B - 2/20 Copper pipe Tubo de cobre Tuyau en cuivre Attach Adapter (K) to copper pipe. Note: soldering may be required. Install Wall Escutcheon (A) onto Pipe & Adapter (K). Slide Inlet Cover (B) onto Adapter (K). Conecte el adaptador (K) al tubo de cobre. Nota: puede ser necesa- Instale el chapetón de pared (A) sobre el tubo y el adaptador (K).
- Page 4 Install Slip Washer (F), Seal Pad (G), and Vacuum Breaker Pad (H) Insert Escutcheon Nut (R) into Escutcheon (S). Insert Discharge Tube (J) into Escutcheon (S). into Vacuum Breaker (I). Install Lower Slip Washer (T) and Lower Seal Pad (U) through Inserte la tuerca del chapetón (R) en el chapetón (S).
- Page 5 INS10424B - 2/20 Loosen Set Screws (D) with Wrench (P) until Front Cover (O) is free. Remove the Front Cover (O). Re-install Battery Pack cap to Battery Pack (C) until it snaps into Leave Set Screws (D) installed in the Flush Valve Assembly (E). Hook Front Cover (O) onto Flush Valve Assembly (E).
- Page 6 Attach Flush Valve Assembly (E) onto Flush Valve Angle Stop (L). Attach Vacuum Breaker Nut (Q) to Flush Valve Assembly (E). Tighten Set Screws (D) with Hex Wrench (P). Hand tighten. Tighten Nut and Assembly together. Apriete los tornillos de fijación (D) con una llave hexagonal (P). With adjustable wrench or channel locks, finish tightening.
-
Page 7: Mode Programmation
Visite pro.moen.com/ suivantes : Chasse sentinelle, et distance de détection. Consulter on sensor programming. sensor para ver videos sobre programación del sensor. le site pro.moen.com/sensor pour voir des vidéos portant sur la programmation du capteur. Sentinel Flush On/Off: Descarga centinela Encendida/Apagada: Sentinel Flush is designed to flush out the water lines daily if the La descarga centinela está... - Page 8 Il suffit d’écrire area code and telephone number. estado a otro o de una provincia o nación a otra. Moen lo à Moen inc. à l’adresse indiquée ci-dessous, pour expli- asesorará en el procedimiento a seguir para hacer válida quer le défaut, d’inclure une preuve d’achat, d’inscrire...
Need help?
Do you have a question about the 8310S35 and is the answer not in the manual?
Questions and answers