Table of Contents
Advertisement
Quick Links
Advertisement
Table of Contents

Related Manuals for TCL 10 Pro


Summary of Contents for TCL 10 Pro
- Page 2 Note: This is a user manual for TCL 10 Pro T799B. There may be certain differences between the user manual description and the phone’s operation, depending on the software release of your phone or specific carrier services. Help Refer to the following resources to get more FAQ, software, and service information.
-
Page 3: Table Of Contents
Table of Contents Safety and use �������������������������������������������������������������������������������� 6 Radio waves ���������������������������������������������������������������������������������� 10 Licences ����������������������������������������������������������������������������������������15 General information ��������������������������������������������������������������������� 18 Your mobile�����������������������������������������������������������������������������20 Keys and connectors ............. 20 Getting started ............... 23 Home screen ..............25 Text input ��������������������������������������������������������������������������������34 Using the Onscreen Keyboard ........34 Text editing .............. - Page 4 Connecting to a computer via USB ....... 58 Sharing your phone's cellular data connection ....59 Connecting to virtual private networks ......60 Multimedia applications �������������������������������������������������������� 62 Camera ................62 Gallery ................66 Others �������������������������������������������������������������������������������������� 68 Radio ................68 IR Remote ..............69 Support Center ..............
- Page 5 10.5 Home screen & wallpapers ..........81 10.6 Sound ................81 10.7 Advanced features ............82 10.8 Smart Manager .............. 85 10.9 Security ................. 85 10.10 Location ................. 86 10.11 Privacy ................87 10.12 Apps ................87 10.13 Storage ................87 10.14 Account ................
- Page 6 Exercise caution when holding your phone near your ear while the loudspeaker is in use. PROTECT YOUR EYE TCL 10 Pro received TÜV Rheinland Low Blue Light certification. The display protects against harmful blue light exposure, guarding your eyes during long-duration viewing.
-
Page 7: Safety And Use
Safety and use ���������������������������� We recommend that you read this chapter carefully before using your phone. The manufacturer disclaims any liability for damage, which may result as a consequence of improper use or use contrary to the instructions contained herein. TRAFFIC SAFETY: Given that studies show that using a phone while driving a vehicle constitutes a real risk, even when the hands-free kit is used (car kit,... - Page 8 • Do not drop, throw, or bend your phone; • Use only batteries, battery chargers, and accessories which are recommended by TCL Communication Ltd. and its affiliates and are compatible with your phone model. TCL Communication Ltd. and its affiliates disclaim any liability for damage caused by the use of other chargers or batteries;...
- Page 9 PRIVACY: Please note that you must respect the laws and regulations in force in your jurisdiction or other jurisdiction(s) where you will use your phone regarding taking photographs and recording sounds with your phone. Pursuant to such laws and regulations, it may be strictly forbidden to take photographs and/or to record the voices of other people or any of their personal attributes, and reproduce or distribute them, as this may be considered to be an invasion of privacy.
- Page 10 In European Union countries: These collection points are accessible free of charge. All products with this sign must be brought to these collection points. In non-European Union jurisdictions: Items of equipment with this symbol are not to be thrown into ordinary bins if your jurisdiction or your region has suitable recycling and collection facilities;...
-
Page 11: Radio Waves
Radio waves �������������������������������� THIS PHONE MEETS THE GOVERNMENT’S REQUIREMENTS FOR EXPOSURE TO RADIO WAVES. Your phone is a radio transmitter and receiver. It is designed and manufactured not to exceed the emission limits for exposure to radio-frequency (RF) energy. These limits are part of comprehensive guidelines and establish permitted levels of RF energy for the general population. - Page 12 Although the SAR is determined at the highest certified power level, the actual SAR level of the phone while operating can be well below the maximum value. This is because the phone is designed to operate at multiple power levels so as to use only the power required to reach the network.
- Page 13 Note: This equipment has been tested and found to comply with the limits for a Class B digital device pursuant to part 15 of the FCC Rules. These limits are designed to provide reasonable protection against harmful interference in a residential installation. This equipment generates, uses and can radiate radio frequency energy and, if not installed and used in accordance with the instructions, may cause harmful interference to radio communications.
- Page 14 Note that any data shared with TCL Communication Ltd. is stored in accordance with applicable data protection legislation. For these purposes TCL Communication Ltd. implements and maintains...
- Page 15 • The risks involved with the processing of the personal data, and; • The sensitivity of the personal data processed. You can access, review, and edit your personal information at any time by logging into your user account, visiting your user profile or by contacting us directly.
-
Page 16: Licences
SD-3C, LLC. The Bluetooth word mark and logos are owned by the Bluetooth SIG, Inc. and any use of such marks by TCL Communication Ltd. and its affiliates is under licence. Other trademarks and trade names are those of their respective owners. - Page 17 US Information Concerning the Federal Communications Commission (“FCC”) Requirements for Hearing Aid Compatibility with Wireless Devices When wireless devices are used near hearing devices (such as hearing aids and cochlear implants), users may detect a buzzing, humming, or whining noise. Some hearing devices are more immune than others to this interference, and wireless devices also vary in the amount of interference that they generate.
- Page 18 How the ratings work M-Ratings: Wireless devices rated M3 or M4 meet FCC requirements and are likely to generate less interference to hearing devices than wireless devices that are not labeled. M4 is the better or higher of the two ratings. T-Ratings: Wireless devices rated T3 or T4 meet FCC requirements and are likely to be more usable with a hearing device’s telecoil (“T Switch”...
-
Page 19: General Information
General information ������������������� • Website: www.tclcanada.com/ca/ • Manufacturer: TCL Communication Ltd. • Address: 5/F, Building 22E, 22 Science Park East Avenue, Hong Kong Science Park, Shatin, NT, Hong Kong • Electronic labeling path: Touch Settings > System > Regulatory & safety or press *#07# to find more information about labelling , such as FCC ID. - Page 20 TCL Communication Ltd. shall not be held legally responsible for such differences, if any, nor for their potential consequences, which responsibility shall be borne by the carrier exclusively.
-
Page 21: Your Mobile
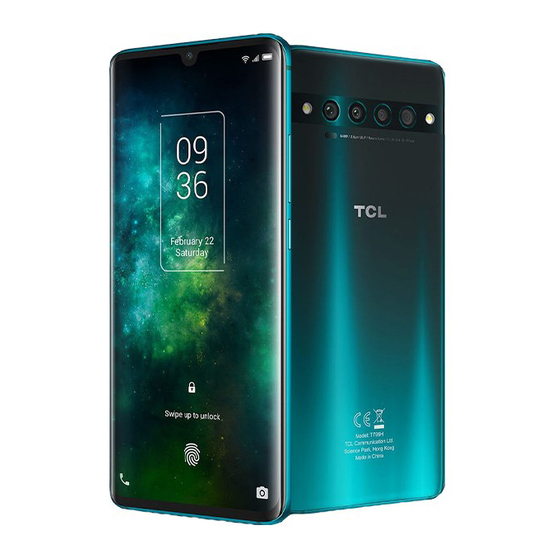
Your mobile��������������������������� 1�1 Keys and connectors IR light 3.5mm headset connector Microphone Receiver Sensors Front camera Touch screen Fingerprint sensor Recent apps Back key Home key Speaker SIM card slot/ microSD card slot Microphone USB Type-C connector... - Page 22 LED flash Laser Detection Multiple rear Auto Focus cameras Volume up/down Power key Smart key Smart Key (left of the device) • Smart key settings are available at: Settings > Advanced features > Smart Key. Or touch Smart Key in the app list. Back key • Touch to go back to the previous screen, or close a dialog box, options menu, the notification panel, etc.
- Page 23 Home key • Touch to return to the Home screen from any other application or screen. Recent apps • Touch to switch between recently opened individual app activities and documents. Power key (right of the device) • Press: Lock the screen/Light up the screen. • Press and hold: Show the popup menu to select from Power off/Restart/Airplane mode.
-
Page 24: Getting Started
1�2 Getting started 1�2�1 Setting up Inserting or removing the SIM/microSD card ① Use the provided SIM pin to open the SIM tray. ② Place the Nano SIM card into the tray slot labeled "SIM". ③ Place the microSD card into the tray slot labeled "SD". Note: microSDTM cards are sold separately. - Page 25 Your phone only supports nano-SIM cards. Do not attempt to insert other SIM types; otherwise this may cause damage to your phone. Charging the battery You are advised to fully charge the battery ( ). Charging status is indicated by a percentage displayed on screen while the phone is powered off.
-
Page 26: Home Screen
1�2�3 Powering off your phone Press and hold the Power key until options appear, then select Power off. 1�3 Home screen You can bring all of the items that you use most frequently (applications, shortcuts, folders) to your Home screen for quick access. - Page 27 1�3�1 Using the touchscreen Touch To access an application, touch it with your finger. Touch and hold To enter the available options for an item, touch and hold the item. For example. Select a contact in Contacts and touch and hold it. An options list will then appear.
- Page 28 Rotate Automatically change the screen orientation from portrait to landscape by turning the phone sideways to have a better screen view. 1�3�2 Status bar From the status bar, you can view both phone status (on the right side) and notification information (on the left side). Drag down the status bar to view notifications and drag again to enter the quick settings panel.
- Page 29 Touch to access Settings, where you can set more items. Touch to clear all event–based notifications (other ongoing notifications will remain). Quick settings panel Touch and drag down from the top of the screen once using two fingers, or twice using one finger to open the Quick settings panel. You can enable or disable functions or change modes by touching the icons, e.g.
- Page 30 Touch to turn on/off items, e.g. Wi-Fi, Bluetooth etc. Touch to customize your Quick settings panel. 1�3�3 Lock/Unlock your screen To protect your phone and privacy, you can lock the screen with a pattern, PIN, password, fingerprint, or face. To create a screen unlock pattern, touch Settings > Security > Screen lock.
- Page 31 To unlock the phone screen Press the Power key once to light up the screen, swipe up and unlock the screen with the method you have set. Double touch to enter the Swipe up to detailed screen unlock the screen Swipe right to Swipe left to enter Phone...
- Page 32 • Hold your phone 20-50 cm from your face. Position your face in the square shown on the screen. For best results, we suggest that the face key is enrolled indoors and away from direct sunlight. • Enable Face unlock when screen turns on, or you have to swipe first before.
- Page 33 Wallpaper customization Touch and hold an empty area on the Home screen, then touch Wallpapers to customize wallpaper. 1�3�5 Widgets and recently used applications Consult widgets Touch and hold the empty area in the Home screen, then touch Widgets to display all widgets. Touch the selected widget and slide it to move to your preferred screen.
- Page 34 Touch one thumbnail and slide it up to close the application, slide it right/left to switch the applications. Touch Clear all at the bottom of the screen to close all the running applications. 1�3�6 Volume adjustment Press the Volume key to adjust the Media volume. Touch the icon to adjust Alarm, Ring and Notification volume.
-
Page 35: Text Input
Text input ������������������������������ 2�1 Using the Onscreen Keyboard Onscreen Keyboard settings Touch Settings > System > Language & input, touch the Virtual keyboard you want to set up and a series of settings will become available. Adjust the Onscreen Keyboard orientation Turn the phone sideways or upright to adjust the onscreen keyboard orientation. -
Page 36: Text Editing
2�1�1 Android keyboard Enter numbers or select from contacts. Touch to switch between "abc/ Abc" mode; Touch and hold to Touch and hold to switch to "abc/ change keyboards. ABC" mode. Touch and hold to Switch between select symbols. symbol and Touch to switch input method. - Page 37 You can also insert new texts if preferred • Touch where you want to type, or touch and hold a blank area. The cursor will blink and the tab will appear. Drag the tab to move the cursor. • If you have cut or copied any text, touch the tab to show the Paste option which allows you to complete pasting immediately.
-
Page 38: Call, Call Log And Contacts
Call, Call log and Contacts � 3�1 Phone ������������������������������������������������������� 3�1�1 Making a call From the Phone app, use the keypad to enter the phone number, or keyboard to enter the contact name. Then tap to place the call. View the call's detailed information Call logs: touch to Show the dial pad... - Page 39 Touch and hold to access voicemail Enter the desired number from the dial pad and touch to place the call or select a contact from Favorites, Recents, or Contacts by sliding or touching tabs, then make the call. The number you entered can be saved to Contacts by touching Create new contact or Add to a contact.
- Page 40 Emergency call If your phone has network coverage, dial the emergency number and touch to make an emergency call. Depending on your network and country this could even work without a SIM card and without typing in the SIM PIN code. 3�1�2 Answering or rejecting a call When you receive a call:...
- Page 41 3�1�3 Calling your voicemail Your voicemail is provided by your network to avoid missing calls. It works like an answering machine that you can consult at any time. To access your voicemail, touch and hold If you receive a voicemail, appears on the Status bar.
- Page 42 End the current call. Touch to mute the current call. Touch this icon again to unmute the call. Display the dial pad. Touch to activate the speaker during the current call. Touch this icon again to deactivate the speaker. Make another call. Put a call on hold.
-
Page 43: Call Log
Conference calls You can set up a conference call as follows. • Place a call to the first participant of the conference call. • Touch to add another call. • Enter the phone number of the person you want to add to the conference and touch . -
Page 44: Contacts
3�3 Contacts �������������������������������������������� Contacts enables quick and easy access to the contact you want to reach. Use Contacts to view your saved contacts or create a new contact. Synchronize your contacts from your email account(s) and other applications to your phone. 3�3�1 Consult your Contacts To see your contacts, touch... - Page 45 3�3�2 Adding a contact Touch in the contact list to create a new contact. You are required to enter the contact's name and other contact information. By scrolling up and down the screen, you can move from one field to another. Touch to save Select a picture or take a photo for the Phone contact...
- Page 46 3�3�3 Editing your contacts To edit contact information, touch in the contact details screen. When finished, touch Save. 3�3�4 Using the Quick contact panel Touch a contact to open the Quick contact panel. • Touch or the number to make a call. • Touch to send a message.
- Page 47 3�3�5 Sharing contacts You can share a single contact or contacts with others by sending the contact's vCard to them via Bluetooth, Gmail, etc. • From the Contacts screen, touch and hold a contact and touch • Select the application to perform this action. 3�3�6 Accounts Contacts, data or other information can be synchronized from...
-
Page 48: Messages
Messages ������������������������� 4�1 Writing a new message You can create, edit, send, and receive SMS and MMS with this phone. To access Messages, touch from the App drawer. On the message list screen, touch to write text/multimedia messages. - Page 49 Sending a text message • To add recipients, enter a mobile phone number or select a contact in the To bar. • After entering a mobile phone number, tap Send to XXX. • In the Text message bar, enter the text of the message. • Touch to insert emoticons, location, voice memo, or other file.
- Page 50 4�1�1 Manage messages When receiving a message, will appear on the Status bar as a notification. Drag down the Status bar to open the Notification panel. Touch the new message to open and read it. You can also access the Messages application and touch the message to open it. Messages are displayed as a conversation.
-
Page 51: Calendar, Clock, And Calculator
Calendar, Clock, and Calculator ����������������������������� 5�1 Calendar �������������������������������������������� Use Calendar to keep track of important meetings, appointments, etc. To view the calendar and create events, touch from the app drawer. 5�1�1 Multimode view You can display the Calendar by Schedule, Day, 3 days, Week, or Month, touch to select. -
Page 52: Clock
5�1�3 To delete or edit an event To delete or edit an event, touch the event to enter its details screen. > Delete to delete. Touch to edit the event, or touch 5�1�4 Event reminder If a reminder is set for an event, the upcoming event icon will appear on the Status bar as a notification when the reminder time arrives. - Page 53 5�2�2 Clock To view the date and time, touch Clock. • Touch to choose a city. 5�2�3 Timer From the Clock screen, touch Timer to enter. • Set the time. • Touch to start the countdown. • Touch to pause. • Touch to reset.
- Page 54 5�2�4 Stopwatch From the Clock screen, touch Stopwatch to enter. • Touch to start the Stopwatch. • Touch to show a list of records according to the updated time. • Touch to pause. • Touch to reset. • Touch to share. 5�2�5 Adjust Clock settings Touch...
-
Page 55: Calculator
5�3 Calculator ������������������������������������������ There are two panels available: Basic panel and Advanced panel. Touch to switch between panels, select one of the following two ways: Touch to delete digits one by one. -
Page 56: Getting Connected
Getting connected ��������������� To connect to the internet with this phone, you can use 2G/3G/4G networks or Wi-Fi, whichever is most convenient. 6�1 Connecting to the Internet 6�1�1 2G/3G/4G The first time you turn on your phone with your SIM card inserted, it will automatically configure your network service: 2G, 3G or 4G. - Page 57 To enable data roaming • Touch Settings > Network & internet > Cellular network > Data roaming. • Turn on • When data roaming is disabled, you can still perform data exchange with a Wi-Fi connection (refer to “6.1.2 Wi-Fi”). To set preferred network mode • Touch Settings >...
-
Page 58: Connecting To A Bluetooth Device
• Enter the name of the network and any required network information. • Touch SAVE. To forget a Wi-Fi network The following steps prevent automatic connections to networks which you no longer wish to use. • Turn on Wi-Fi, if it’s not already on. • On the Wi-Fi screen, touch and hold the name of the saved network. -
Page 59: Connecting To A Computer Via Usb
To pair/connect your phone with a Bluetooth device To exchange data with another device, you need to turn Bluetooth on and pair your phone with the Bluetooth device with which you want to exchange data. • Touch Settings > Bluetooth & device connection > Bluetooth >... -
Page 60: Sharing Your Phone's Cellular Data Connection
To connect your phone to the computer Use the USB cable that came with your phone to connect the phone to a USB port on your computer. You will receive a notification that the USB is connected. Open the Notification panel and touch Android system, then, in the next dialogue, choose the way in which you want to transfer files. -
Page 61: Connecting To Virtual Private Networks
When mobile hotspot is activated, you can rename your phone's Wi-Fi network (SSID) and secure its Wi-Fi network. • Touch Settings > Network & internet > Hotspot & tethering > Mobile hotspot. • Touch Set up mobile hotspot to rename the network SSID or set your network security. - Page 62 • In the dialog that opens, enter any requested credentials and touch CONNECT. To disconnect from a VPN: • Touch the VPM you want to disconnect from. In the dialog that opens, touch DISCONNECT. To edit/delete a VPN To edit a VPN: • Touch Settings >...
-
Page 63: Multimedia Applications
Multimedia applications ������ 7�1 Camera ���������������������������������������������� Your mobile phone is fitted with a camera for taking photos and videos. Before using the camera, make sure that you remove the protective lens cover to avoid it affecting your picture quality. To take a photo or video, touch from the app drawer. - Page 64 To take a photo The screen acts as the viewfinder. First, position the object or landscape in the viewfinder, touch the screen to focus if necessary. Touch to capture. The photo will be automatically saved. You can also touch and hold to take burst shots, the maximum number is 20.
- Page 65 Stop motion: Capture a number of photos of a certain scene, then convert them into a speed up video. Light trace: Capture creative movements of light using a long exposure photograph. Pano: Touch to turn on the panorama function. Touch the shutter button to start taking a panoramic photo and move the phone steadily along the direction indicated by the onscreen line.
- Page 66 • Video stabilization (EIS): Touch to turn on/off. • AI camera: Touch to turn on/off AI noise reducing function and AI anti-shaking with Neural network learning solution. • Calorie detection : Turn on to detect the calorie content of a captured object. • AI composition : Touch to turn on/off.
-
Page 67: Gallery
Two more options are available when you switch to using the front camera: • Face beauty: Touch to adjust skin smoothing and enhance coloring effect to portraits. • Mirror camera: Touch to turn on/off. 7�2 Gallery ����������������������������������������������� Gallery acts as a media player for you to view photos and play videos. - Page 68 Working with pictures You can work with pictures by rotating or cropping them, sharing them with friends, setting them as a contact photo or wallpaper, etc. Find the picture you want to work on, and touch the picture in the full-screen picture view.
-
Page 69: Others
Others ������������������������������������ 8�1 Radio ����������������������������������������������� Your phone is equipped with a radio with RDS functionality. You can use the application as a traditional radio with saved channels or with visual information related to the radio program displayed if you turn to stations that offer Visual Radio service. To listen to the radio, you must insert headphones. -
Page 70: Ir Remote
Touch to exit radio. Drag to change current frequency. Touch to go to the previous channel. Touch to enable/disable the loudspeaker. Touch to scan channels. Touch to add/remove the current station to/from favorites. Touch to play/stop. Touch to go to next saved channel. 8�2 IR Remote������������������������������������������... -
Page 71: Support Center
8�3 Support Center ��������������������������������� Support Center helps you to learn more about Hot FAQs, operation instructions, troubleshooting, etc. use it to send us your feedback. 8�4 Other applications The previous applications in this section are preinstalled on your phone. To download and install more 3rd party applications, use the Google Play Store application. -
Page 72: Google Applications
Google applications ������������� Google apps are preinstalled on your phone to improve work efficiency and help you enjoy life. This manual briefly introduces the apps. For detailed features and user guides, refer to related websites or the introduction provided in the apps. -
Page 73: Maps
9�3 Maps Google Maps offers satellite imagery, street maps, 360° panoramic views of streets, real-time traffic conditions, and route planning for travelling by foot, car, or public transportation. By using this application, you can get your own location, search for a place, and get suggested route planning for your trips. -
Page 74: Duo
In Play Store, search for the app you need, download it and then follow the installation guide to install the app. You can also uninstall, update an app, and manage your downloads. 9�7 A video chat mobile app. With phone numbers verified, users can easily video call people from their contact list. -
Page 75: Files
9�11 Files Files displays all data stored on the phone, including both external SD card and internal storage, such as applications, media files downloaded from Google Play Store, YouTube or other locations; Videos, pictures or audios you have captured; other data transferred via Bluetooth, USB cable, etc. -
Page 76: Settings
Settings ������������������������ To go to Settings, touch from the app drawer. 10�1 Networks & internet 10�1�1 Wi-Fi Using Wi-Fi you can access the internet without using your SIM card whenever you are in range of a wireless network. The only thing you have to do is to enter the Wi-Fi screen and configure an access point to connect your phone to the wireless network. - Page 77 Cellular data If you do not need to transmit data on cellular networks, turn off Cellular data to avoid incurring significant charges for data use on local carrier cellular networks, particularly if you do not have a cellular data agreement. Data usage is measured by your phone, and your carrier may count differently.
-
Page 78: Bluetooth & Device Connection
10�2 Bluetooth & device connection 10�2�1 Bluetooth Bluetooth allows your phone to exchange data (videos, images, music, etc.) within a small range with another Bluetooth supported device (phone, computer, printer, headset, car kit, etc.). For more information on Bluetooth, refer to “6.2 Connecting to a Bluetooth device”. -
Page 79: Display
10�3 Display 10�3�1 Status bar With this menu, you can set the style of the status bar, select whether notification icons are folded and how the battery percentage is displayed. 10�3�2 Notch Turn on for full screen apps to get the best experience on the phone. 10�3�3 Full screen apps Most applications installed on the phone will automatically adapt to... - Page 80 10�3�6 Eye comfort mode Eye comfort mode can effectively reduce blue light radiation and adjust the color temperature to relieve eye fatigue. You can also create a custom schedule to turn on it. 10�3�7 Adaptive brightness Adjust screen brightness automatically. 10�3�8 Auto-rotate screen Select whether the screen rotates automatically or not.
-
Page 81: Nxtvision
10�3�13 Flip cover mode Flip cover mode for full functionality of your flip cover. Turn on 10�3�14 Notification light Turn on to display notification with light effect. 10�4 NXTVISION 10�4�1 Visual enhancement Toggle the switch to enable. Automatically adjust contrast, sharpness and saturation to make the screen image clearer, with a richer depth of detail and improved brightness for dark scenes when viewing photos or playing videos and games. -
Page 82: Home Screen & Wallpapers
10�4�4 Screen color The device allows you to change the range of display tones according to the display content. When choosing Vivid, you can adapt the screen's color temperature according to the ambient light. 10�5 Home screen & wallpapers With this menu, set your home apps, choose your favorite wallpapers, theme styles, and etc. -
Page 83: Advanced Features
10�6�4 Default alarm ringtone Set your alarm ringtone. 10�6�5 Other sounds and vibrates Set dial pad tones, screen locking sounds, tap sounds, etc. 10�7 Advanced features 10�7�1 System navigation Select your favorite navigation button layout. 10�7�2 App Cloner App Cloner will duplicate one app on your Home screen and you can enjoy both of them respectively at the same time. - Page 84 • Long press any icon to enter edit mode. You can remove the item by touching the icon, then touch Done. • Touch the icon on the right button corner to enter Settings. This menu offers various customization options, such as On/Off Edge bar, Continuous switch tabs, Disable edge bar when using full-screen apps, edit tabs etc.
- Page 85 Do not disturb while game Turn on Block notification and Constant brightness to create a nice environment for gaming. Prevent accidental touches Turn on Double check for the gesture, in full screen games, the full screen gestures need to be double swipe to take effects. Three-finger screen capture and Smart key will be disabled while gaming after turned on.
-
Page 86: Smart Manager
10�7�10 Switch Phone Switch Phone helps you to transfer content from an old phone to a new one, tap the icon to view Q & A. 10�8 Smart Manager Smart Manager ensures your phone is operating in top form by automatically scanning and optimizing data usage to preserve battery levels, manage storage and protect against security threats. -
Page 87: Location
10�9�3 Face key Face key allows you to unlock your device with your facial data. Set it according to the on-screen steps. Ensure that you are facing the phone screen when using face recognition. Note: you need to set a pattern, PIN, or password before using face key. -
Page 88: Privacy
10�11 Privacy To protect your privacy, you can set an app to be allowed or forbidden to access your location, SMS, phone, etc. Also whether or not to show passwords or choose the activities and info that you want to Google to save. 10�12 Apps Touch to view details about the applications installed on your phone,... -
Page 89: Digital Wellbeing & Parental Controls
10�15 Digital Wellbeing & parental controls In this menu you can find how much time you have spent on the phone and even on each app. You can customize the time limit for using the phone so that have a healthy and balanced life. In addition, parents are able to restrict their children's usage time to manage their browsing habits. - Page 90 10�18�2 System updates If you want to update the system, touch CHECK FOR UPDATES (refer to “11.1 FOTA upgrade”). 10�18�3 Languages & input Touch to configure language settings, the on-screen keyboard, voice input settings, pointer speed, and etc. 10�18�4 Date & time Use Date &...
- Page 91 10�18�6 Reset Touch to choose Network settings reset (including Wi-Fi, Cellular data & Bluetooth), Reset app preferences, or Factory data reset. Factory data reset will erase all of your personal data from the internal phone storage, including information about your Google account, any other accounts, your system and application settings, and any downloaded applications.
-
Page 92: Making The Most Of Your Phone
Making the most of your phone ��������������������������������� 11�1 FOTA upgrade Use the FOTA (Firmware Over The Air) upgrade to update your phone's software. To access updates, from the app list, touch Settings > System > System updates. Turn on data connection or Wi-Fi before searching for updates. -
Page 93: Accessories
Accessories ���������������������� Standard accessories • Charger • USB Cable • SIM Card Pin • Accessories depend on countries. • Only use the TCL batteries, chargers, and accessories included along with your device. -
Page 94: 13 1 Year Limited Warranty
1 YEAR LIMITED WARRANTY ���������������������� For information on warranty of your device, visit the USA and Canada websites at https://www.tclcanada.com/ca/mobile/warranty... -
Page 95: Electronic Information
Electronic Information ����� For more information on Electronic Recycling: 1) Visit TCL Electronic Recycling Program website at https://www. tclcanada.com/ca/mobile/accessibility-compliance/electronic- recycling-program/, or 2) Call TCL USA Customer Support at 1-855-224-4228. Battery Recycling (USA & Canada): TCL partners with Call2Recycle to offer a safe and convenient ®... -
Page 96: Troubleshooting
Troubleshooting ��������������� Before contacting the service center, here are some instructions to help you troubleshoot your device: • For optimal operation, fully charge the battery. • To improve the phone’s performance, remove unnecessary files or apps on your phone. • Update your phone's software via Settings > System > System updates. - Page 97 • If it still doesn't work, reset the phone or update software. My phone can't charge properly • Make sure that you are using the TCL charger that comes with the phone. • Make sure that your battery is not completely discharged; if the battery power has been empty for a long time, it may take around 20 minutes to display the battery charging indicator on the screen.
- Page 98 Invalid SIM card • Make sure that the SIM card has been correctly inserted. • Make sure that the chip on your SIM card is not damaged. • Make sure that the service of your SIM card is available. My phone can't make outgoing calls • Make sure that you have dialed a valid number and have touched • For international calls, check the country and area codes.
- Page 99 I can't use the features described in the manual • Check with your carrier to make sure that your subscription includes this service. • Make sure that this feature doesn't require a TCL accessory. When I select a number from my contacts, the number can't be dialed • Make sure that you have correctly recorded the number in your...
- Page 100 • Contact your network carrier to check service availability and MMS parameters. • Verify the server center number or your MMS profile with your carrier. • The server center may be swamped. Try again later. SIM card PIN locked • Contact your network carrier to obtain the PUK (Personal Unblocking Key) code.
- Page 101 • After a partial charge, the battery level indicator may not be exact. Wait for at least 20 minutes after removing the charger to obtain an exact indication. • Adjust the brightness of screen as appropriate. • Extend the email auto-check interval for as long as possible. • Update news and weather information on manual demand, or increase their auto-check interval.
-
Page 102: Specifications
Specifications ������������������� Processor: • Qualcomm Snapdragon 675 Platform: • Android Q Memory: • 128GB ROM + 6GB RAM Dimensions (LxWxT): • 158.5 x 72.4 x 8.6~9.2mm Weight: • 177g Display: • 6.47" touch screen with 2340x1080 Network: • GSM: B2/3/5/8 (1900/1800/850/900) • UMTS: B1/2/4/5/8 (2100/1900/1700/850/900) • LTE: B1/2/3/4/5/7/8/12/13/17/25/26/28/38/40/41/66 (2100/1900/ 1800/1700/850/2600/900/700/700/700/1900/850/700/2600/2300/... - Page 103 • Wi-Fi 802.11 b/g/n for 2.4GHz, 802.11 a/n/ac for 5GHz • 3.5 mm audio jack • Type-C USB 2.0 Camera: • 64M + 2M 2.9µm night shoot + 5M AF Marco + 16M super wide • 24M front camera Audio & Video supported formats: • 3GP, 3G2, AAC, AVI, ADTS, ASF, AWB, FLAC, IMY, MID, MKV, MOV, MP3, MPEG-4, MXMF, OGG, OTA, RTTTL, RTX, WAV, WEBM, XMF...
- Page 104 For more information on how to use the phone, please go to tclusa.com and download the complete user manual. Moreover, on the website, you can also find answers to frequently asked questions.
Need help?
Do you have a question about the 10 Pro and is the answer not in the manual?
Questions and answers