Table of Contents
Advertisement
Advertisement
Table of Contents

Related Manuals for TCL 10 5G


Summary of Contents for TCL 10 5G
- Page 2 Settings > System > About phone > Status > IMEI information on the phone itself. Obtaining warranty service First follow the advice in this guide or go to www.tcl.com/global/en/ service-support-mobile.html. Then check hotlines and repair centre information through www.tcl.com/global/en/service-support-mobile/ hotline&service-center.html Viewing legal information On the phone, go to Settings >...
-
Page 3: Table Of Contents
Table of Contents Your mobile................6 Keys and connectors ............6 Getting started ..............9 Home screen ..............11 Text input ................20 Using the Onscreen Keyboard ........20 Text editing ..............21 Call, Call log and Contacts ........... 22 Phone ................22 Recent ................ - Page 4 Multimedia applications ............47 Camera ................47 Gallery ................51 Others ..................53 Support Centre .............. 53 Other applications ............53 Google applications ............... 54 Chrome ................54 Gmail ................54 Maps ................54 YouTube ................. 55 Drive ................55 Play Store ..............
- Page 5 10.10 Location ................. 67 10.11 Privacy ................67 10.12 Apps ................67 10.13 Storage ................67 10.14 Account ................67 10.15 Digital Wellbeing & parental controls ......68 10.16 Google ................68 10.17 Accessibility ..............68 10.18 System ................68 11 Making the most of your phone ...........
- Page 6 Exercise caution when holding your device near your ear while the loudspeaker is in use. TCL 10 5G has been awarded Hi-Res Audio certification. Hi-Res Audio gives you an audio quality that exceeds that of a CD and is close to that of the studio recording.
-
Page 7: Your Mobile
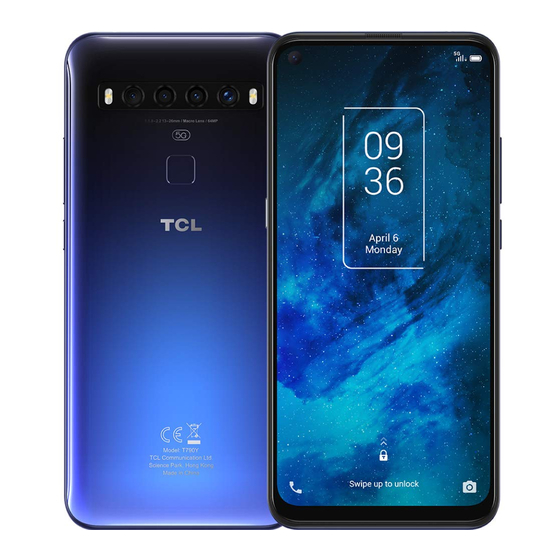
Your mobile......Keys and connectors Receiver Microphone Headset connector Front Camera Touch screen Back key Recent apps Home key Microphone Speaker USB Type-C... - Page 8 Camera Flash/Flashlight Finger print Camera SIM card slot/ microSD card Volume key slot Google Power key Assistant (left of the device) Google Assistant • Press to enter Google Assistant. Back key • Touch to go back to the previous screen, or close a dialog box, options menu, the notification panel, etc.
- Page 9 Home key • Touch to return to the Home screen from any other application or screen. Recent apps • Touch to switch between recently opened individual app activities and documents. Power key (right of the device) • Press: Lock the screen/Light up the screen. • Press and hold: Show the popup menu to select from Power off/Restart/Aeroplane mode.
-
Page 10: Getting Started
Getting started 1.2.1 Setting up Inserting or removing the SIM/microSD card Insert the pin into the hole and pull out the tray. Insert or remove your SIM card or microSD card. ② ① You must insert your SIM card to make phone calls. You do not need to power off your phone before inserting or removing the SIM card as this phone supports hot swap. - Page 11 1.2.2 Charging the battery You are advised to fully charge the battery ( ). Charging status is indicated by a percentage displayed on screen while the phone is powered off. The percentage increases as the phone is charged. To reduce power consumption and energy waste when the battery is fully charged, disconnect your charger from the plug;...
-
Page 12: Home Screen
1. Connect your phone with the device to be charged using an OTG cable. 2. After connecting, a reminder box will pop up indicating that your phone can charge the other phone and that the battery will reduce quickly during the charging. 3. - Page 13 Status bar • Status/Notification indicators • Touch and drag down to open the notification panel Search bar • Touch to enter text search screen • Touch to enter voice search screen Touch an icon to open an application, folder, etc.
- Page 14 Drag Place your finger on the screen to drag an object to another location. Slide/Swipe Slide the screen to scroll up and down the applications, images, and web pages. You can slide the screen horizontally too. Flick Similar to swiping, but flicking makes it move quicker. Pinch/Spread Place two fingers on the screen surface and draw them apart or together to scale an element on the screen.
- Page 15 Notification panel When there are notifications, touch and drag down the Status bar to open the Notification panel to read more detailed information. Touch to access Settings, where you can set more items. Touch to clear all event–based notifications (other ongoing notifications will remain). Quick settings panel Touch and drag down from the top of the screen once using two fingers, or twice using one finger to open the Quick settings panel.
- Page 16 Touch to turn on/off items, e.g. Wi-Fi, Bluetooth etc. Touch to customise your Quick settings panel. 1.3.3 Lock/Unlock your screen To protect your phone and privacy, you can lock the screen with a pattern, PIN, password, fingerprint or face. To create a screen unlock pattern, touch Settings > Security > Screen lock.
- Page 17 To unlock the phone screen Press the Power key once to light up the screen, swipe up and unlock the screen with the method you have set. Double touch to enter the detailed screen Swipe up to unlock the screen Swipe right to Swipe left to enter Phone...
- Page 18 • Hold your phone 20-50 cm from your face. Position your face in the square shown on the screen. For best results, we suggest that the face key is enrolled indoors and away from direct sunlight. • Enable Face unlock when screen turns on, or you have to swipe first before.
- Page 19 Wallpaper customisation Long press an empty area on the Home screen, then touch Wallpapers to customise wallpaper. 1.3.5 Widgets and recently used applications Consult widgets Long press the empty area in the Home screen, then touch Widgets to display all widgets. Touch the selected widget and slide it to move to your preferred screen.
- Page 20 Touch one thumbnail and slide it up to close the application, slide it right/left to switch the applications. Touch Clear all at the bottom of the screen to close all the running applications. 1.3.6 Volume adjustment Press the Volume key to adjust the Media volume. Touch the icon to adjust Alarm, Ring and Notification volume.
-
Page 21: Text Input
Text input ......Using the Onscreen Keyboard Onscreen Keyboard settings Touch Settings > System > Language & input, touch the Virtual keyboard you want to set up and a series of settings will become available. Adjust the Onscreen Keyboard orientation Turn the phone sideways or upright to adjust the onscreen keyboard orientation. -
Page 22: Text Editing
Text editing You can edit text which you have entered. • Long press or double touch within the text you want to edit. • Drag the tabs to change the amount of text to edit. • The following options will appear: Cut, Copy, Share and Select all. -
Page 23: Call, Call Log And Contacts
Call, Call log and Contacts . Phone ............3.1.1 Making a call To make a call, touch in the Favourites tray. View the call's detailed information Call logs Show the dial pad Favourite numbers Contacts... - Page 24 Long press to access voicemail Enter the desired number from the dial pad and touch to place the call or select a contact from Contacts or Recent by sliding or touching tabs, then make the call. The number you entered can be saved to Contacts by touching the Create new contact icon , or the existing icon.
- Page 25 Emergency call If your phone has network coverage, dial the emergency number and touch to make an emergency call. Depending on your network and country this could even work without a SIM card and without typing in the SIM PIN code. 3.1.2 Answering or rejecting a call When you receive a call:...
- Page 26 If you receive a voicemail, appears on the Status bar. Open the Notification panel and touch New voicemail. 3.1.4 During a call To adjust the volume during a call, press the Volume up/down key.
- Page 27 End the current call. Display the dial pad. Touch to activate the speaker during the current call. Touch this icon again to deactivate the speaker. Touch to mute the current call. Touch this icon again to unmute the call. Touch to on hold. To avoid accidental operation of the touchscreen during a call, the screen will be locked automatically when you put the cellphone close to your ear;...
-
Page 28: Recent
• Enter the phone number of the person you want to add to the conference and touch . You can also add participants from Recent or Contacts. • Touch to start the conference. • Touch to end the conference call and disconnect all callers. 3.1.6 Call settings Touch... - Page 29 3.3.1 Consult your Contacts To see your contacts, touch from the App drawer. • Touch to open the Quick contact panel • Touch and hold to share or delete the selected contact Add new contact Deleted contacts will also be removed from other applications on the phone or web the next time you synchronise your phone.
- Page 30 Touch to save Select a picture or take a photo for the Phone contact Touch to open available labels Add to/remove from Favourites To add a contact to favourites, you can touch a contact to view details then touch to add the contact to favourites. To remove a contact from favourites, touch on the contact details screen.
- Page 31 3.3.4 Using the Quick contact panel Touch a contact to open the Quick contact panel. • Touch or the number to make a call. • Touch to make a video call • Touch to send a message. The icons available on the Quick contact panel depend on the information you have for the contact and the applications and accounts on your phone.
- Page 32 • From the Contacts screen, long press a contact and touch • Select the application to perform this action. 3.3.6 Accounts Contacts, data or other information can be synchronised from multiple accounts, depending on the applications installed on your phone. To add an account, touch from the contacts list and touch Settings >...
-
Page 33: Messags
Messags ......Writing a new message You can create, edit and receive SMS and MMS with this phone. To access Messages, touch from the App drawer. On the message list screen, touch to write text/multimedia messages. - Page 34 Sending a text message • To add recipients, enter a mobile phone number or select a contact in the To bar. • After entering a mobile phone number, tap Send to XXX. • In the Text message bar, enter the text of the message. • Touch to insert emoticons.
- Page 35 Messages are displayed as a conversation. Touch a message to enter the message composing screen: Touch to call the number; To adjust message settings, touch and select Settings on the message list screen.
-
Page 36: Calendar, Clock, And Calculator
Calendar, Clock, and Calculator ......Calendar ..........Use Calendar to keep track of important meetings, appointments, etc. To view the calendar and create events, touch from the app drawer. 5.1.1 Multimode view You can display the Calendar by Schedule, Day, 3 days, Week, or Month, touch to select. -
Page 37: Clock
5.1.3 To delete or edit an event To delete or edit an event, touch the event to enter its details screen. > Delete to delete. Touch to edit the event, or touch 5.1.4 Event reminder If a reminder is set for an event, the upcoming event icon will appear on the Status bar as a notification when the reminder time arrives. - Page 38 5.2.2 Clock To view the date and time, touch Clock. • Touch to choose a city. 5.2.3 Timer From the Clock screen, touch Timer to enter. • Set the time. • Touch to start the countdown. • Touch to pause. • Touch to reset.
- Page 39 5.2.4 Stopwatch From the Clock screen, touch Stopwatch to enter. • Touch to start the Stopwatch. • Touch to show a list of records according to the updated time. • Touch to pause. • Touch to reset. • Touch to share. 5.2.5 Adjust Clock settings Touch...
-
Page 40: Calculator
Calculator .......... There are two panels available: Basic panel and Advanced panel. Touch to switch between panels, select one of the following two ways: Touch to delete digits one by one. -
Page 41: Getting Connected
Getting connected ....To connect to the internet with this phone, you can use 2G/3G/4G/5G networks or Wi-Fi, whichever is most convenient. Connecting to the Internet 6.1.1 2G/3G/4G/5G The first time you turn on your phone with your SIM card inserted, it will automatically configure your network service: 2G, 3G, 4G or 5G. - Page 42 • Touch Disable, National roaming only or All networks. • When roaming mode is disabled, you can still perform data exchange with a Wi-Fi connection (refer to “6.1.2 Wi-Fi”). To set preferred network mode • Touch Settings > Network & internet > Mobile network > Preferred network type.
-
Page 43: Connecting To A Bluetooth Device
To forget a Wi-Fi network The following steps prevent automatic connections to networks which you no longer wish to use. • Turn on Wi-Fi, if it’s not already on. • On the Wi-Fi screen, touch and hold the name of the saved network. - Page 44 To rename your device • Touch Settings > Bluetooth & device connection > Bluetooth > Device name. • Enter a name, and touch RENAME to confirm. To pair/connect your phone with a Bluetooth device To exchange data with another device, you need to turn Bluetooth on and pair your phone with the Bluetooth device with which you want to exchange data.
-
Page 45: Connecting To A Computer Via Usb
Note: A calibration reminder will pop up everytime connected Bluetooth speaker changes. And only connect to Wi-Fi 5GHz network could the third or the fourth BT devices be connected. Connecting to a computer via USB With the USB cable, you can transfer media files and other files between your phone and computer. -
Page 46: Connecting To Virtual Private Networks
To share your phone's data connection via USB and Bluetooth, or as a mobile hotspot • Go to Settings > Network & internet > Hotspot & tethering to activate these functions. To rename or secure your mobile hotspot • Go to Settings > Network & internet > Hotspot & tethering > Mobile hotspot to activate. - Page 47 Before adding a VPN, you should set a screen lock for your phone. To connect/disconnect to/from VPN To connect to a VPN: • Touch Settings > Network & internet > VPN. • The VPNs you have added are listed. Touch the VPN you want to connect with.
-
Page 48: Multimedia Applications
Multimedia applications ..Camera ..........Your mobile phone is fitted with a camera for taking photos and videos. Before using the camera, make sure that you remove the protective lens cover to avoid it affecting your picture quality. To take a photo or video, touch from the app drawer. - Page 49 To take a photo The screen acts as the viewfinder. First, position the object or landscape in the viewfinder, touch the screen to focus if necessary. Touch to capture. The photo will be automatically saved. You can also long press to take burst shots, the maximum number is 20.
- Page 50 Pano: Touch to turn on the panorama function. Touch the shutter button to start taking a panoramic photo and move the phone steadily along the direction indicated by the onscreen line. Once the slots are filled, the photo will be automatically saved. If the slots are not fully filled, touch the shutter button again to save the photo.
- Page 51 • Calorie detection : Turn on to detect the calorie content of a captured object. • AI composition : Touch to turn on/off. • Dark shot: Toggle the switch to take a wonderful picture in dark environment. • Volume button function: Touch to customise the Volume button to Shutter or Volume when using camera.
-
Page 52: Gallery
Gallery ..........Gallery acts as a media player for you to view photos and play videos. In addition, a set of further operations to pictures and videos are available for selection. To view the photos you have taken, touch from the app drawer. Select photos for further operation Pictures and videos are displayed by Moments, Albums and Explore in the Gallery. - Page 53 • Touch to share the picture. • Touch to edit the picture. Choose picture effect. Set as None or Dehaze. Crop, Straighten, Rotate, Mirror or Draw the picture. Adjust the picture colour, exposure, contrast, shadows , highlights and etc. • Touch to set the picture as your favourite.
-
Page 54: Others
Others ........Support Centre ......... Support Centre helps you to learn more about FAQ, contact us, use it to send us your feedback, diagnose your device and etc. Other applications The previous applications in this section are preinstalled on your phone. -
Page 55: Google Applications
Google applications ..... Google apps are preinstalled on your phone to improve work efficiency and help you enjoy life. This manual briefly introduces the apps. For detailed features and user guides, refer to related websites or the introduction provided in the apps. -
Page 56: Youtube
YouTube YouTube is an online video-sharing application where users can upload, view, and share videos. Available content includes video clips, TV clips, music videos, and other content such as video blogging, short original videos, and educational videos. It supports a streaming function that allows you to start watching videos almost as soon as they begin downloading from the internet. -
Page 57: Photos
Photos Google Photos stores and backs up your photos and videos. It also automatically analyses photos and organises them into groups, so that you can quickly find the photos you need. Keep notes A note taking application developed by Google. You can insert images, lists, and make voice recordings in your notes. -
Page 58: Settings
Settings ......To go to Settings, touch from the app drawer. 10.1 Networks & internet 10.1.1 Wi-Fi Using Wi-Fi you can access the internet without using your SIM card whenever you are in range of a wireless network. The only thing you have to do is to enter the Wi-Fi screen and configure an access point to connect your phone to the wireless network. - Page 59 Data usage is measured by your phone, and your operator may count differently. 10.1.4 Hotspot & tethering This function allows you to share your phone's mobile data connection via USB or as a portable Wi-Fi access point (refer to “6.4 Sharing your phone's mobile data connection”). 10.1.5 For more information on VPN, refer to “6.5 Connecting to virtual private networks”.
-
Page 60: Bluetooth & Device Connection
10.2 Bluetooth & device connection 10.2.1 Bluetooth Bluetooth allows your phone to exchange data (videos, images, music, etc.) within a small range with another Bluetooth supported device (phone, computer, printer, headset, car kit, etc.). For more information on Bluetooth, refer to “6.2 Connecting to a Bluetooth device”. -
Page 61: Display
10.3 Display 10.3.1 Status bar With this menu, you can set the style of the status bar, select whether notification icons are folded and how the battery percentage is displayed. 10.3.2 Hole-punch display Turn on for full screen apps to get the best experience on the phone. 10.3.3 Full screen apps Most applications installed on the phone will automatically adapt to... -
Page 62: Nxtvision
10.3.6 Eye comfort mode Eye comfort mode can effectively reduce blue light radiation and adjust the colour temperature to relieve eye fatigue. You can also create a custom schedule to turn on it. 10.3.7 Adaptive brightness Adjust screen brightness automatically. 10.3.8 Auto-rotate screen Select whether the screen rotates automatically or not. -
Page 63: Home Screen & Wallpapers
10.4.2 SDR to HDR This is only available after enabling visual enhancement. Enhance the colour, contrast and depth of detail of streaming video from any source to provide HDR-quality viewing. 10.4.3 Reading mode Reading mode reproduces a physical book reading experience on your screen. -
Page 64: Advanced Features
10.6.1 Do Not Disturb preferences If you do not want to be disturbed by your phone or information ringtones during work or rest, you can set the Do Not Disturb mode. Swipe down the Status bar twice to access the Quick Settings panel and tap to turn on Do Not Disturb. - Page 65 10.7.2 App Cloner App Cloner will duplicate one app on your Home screen and you can enjoy both of them respectively at the same time. 10.7.3 Screen Recorder Set the video resolution and sound. To activate Screen Recorder, touch the icon in the Quick Settings panel.
-
Page 66: Smart Manager
10.7.8 Smart key You can customise a variety of powerful features to make the use of the phone more convenient. Touch Single press, Double press or Long press, then set Action as Open an app or Open a feature, and then set a shortcut for an App or a feature. - Page 67 10.9.2 Fingerprint sensor Use your Fingerprint to unlock the screen or clear notifications, take a photo/video, pick up a call, and etc. Access Settings > Security > Fingerprint sensor to activate these functions. 10.9.3 Face key Face key allows you to unlock your device with your facial data. Set it according to the on-screen steps.
-
Page 68: Location
10.10 Location Tap to set whether to allow an app to access your device's location. You can set allowing all the time, or only while the app is in use. 10.11 Privacy To protect your privacy, you can set an app to be allowed or forbidden to access your location, SMS, phone, etc. -
Page 69: Digital Wellbeing & Parental Controls
10.15 Digital Wellbeing & parental controls In this menu you can find how much time you have spent on the phone and even on each app. You can customise the time limit for using the phone so that have a healthy and balanced life. In addition, parents are able to restrict their children's usage time to manage their browsing habits. - Page 70 10.18.3 System updates If you want to update the system, touch CHECK FOR UPDATES (refer to “11.1 FOTA upgrade”). 10.18.4 Languages & input Touch to configure language settings, the on-screen keyboard, voice input settings, pointer speed, and etc. 10.18.5 Date & time Use Date &...
- Page 71 10.18.7 Reset Touch to choose Network settings reset (including Wi-Fi, Mobile data & Bluetooth), Reset app preferences, or Factory data reset. Factory data reset will erase all of your personal data from the internal phone storage, including information about your Google account, any other accounts, your system and application settings, and any downloaded applications.
-
Page 72: Making The Most Of Your Phone
Making the most of your phone ......... 11.1 FOTA upgrade Use the FOTA (Firmware Over The Air) upgrade to update your phone's software. To access updates, from the app list, touch Settings > System > System Update. Turn on data connection or Wi-Fi before searching for updates. -
Page 73: Accessories
Standard accessories • Charger • USB Cable • Screen Protector • Wrap Sticker • Gel Protective case • SIM Card Pin • Accessories depend on countries. • Only use the TCL batteries, chargers, and accessories included along with your device. -
Page 74: Limited Warranty
LIMITED WARRANTY ..Your product is warranted against any defect or malfunctioning which may occur in conditions of normal use during the warranty period listed below from the date of purchase as shown on your original invoice. Phone & embedded battery 12 months USB cable, charger 12 months... - Page 75 In no event shall TCL Communication Ltd. or any of its affiliates be liable for indirect, incidental or consequential damages of any nature whatsoever, including but not limited to commercial or financial loss or damage, loss of data or loss of image to the full extent those damages can be disclaimed by law.
-
Page 76: Troubleshooting
Troubleshooting ....Before contacting the service centre, here are some instructions to help you troubleshoot your device: • For optimal operation, fully charge the battery. • To improve the phone’s performance, remove unnecessary files or apps on your phone. • Update your phone's software via Settings > System > System Update. - Page 77 • If it still doesn't work, reset the phone or update software. My phone can't charge properly • Make sure that you are using the TCL charger that comes with the phone. • Make sure that your battery is not completely discharged; if the battery power has been empty for a long time, it may take around 20 minutes to display the battery charging indicator on the screen.
- Page 78 • Check your phone's internet connection settings. • Make sure that you are in a place with network coverage. • Try connecting at a later time or another location. Invalid SIM card • Make sure that the SIM card has been correctly inserted. • Make sure that the chip on your SIM card is not damaged.
- Page 79 I can't use the features described in the manual • Check with your operator to make sure that your subscription includes this service. • Make sure that this feature doesn't require a TCL accessory. When I select a number from my contacts, the number can't be dialled • Make sure that you have correctly recorded the number in your...
- Page 80 • Try later if the network is busy. I can't send and receive MMS • Check your phone storage as it might be full. • Contact your network operator to check service availability and MMS parameters. • Verify the server centre number or your MMS profile with your operator.
- Page 81 The battery drains too fast • Make sure that you follow the complete charge time (minimum 120 minutes). • After a partial charge, the battery level indicator may not be exact. Wait for at least 20 minutes after removing the charger to obtain an exact indication.
- Page 82 • If you still cannot access your phone, apply to the authorised repair centre, but remember that it will not be regarded as a warranty case.
-
Page 83: Specifications
Specifications ....Processor: • Qualcomm Snapdragon 765G Platform: • Android 10 Memory: • 128GB ROM + 6GB RAM Dimensions (LxWxT): • 163.65 x 76.56 x 9.05 mm Weight: • 210g Display: • 6.53" touch screen with 2340x1080 Network: • GSM: B2/3/5/8 (1900/1800/850/900) • UMTS: B1/2/4/5/8 (2100/1900/1700/850/900) • LTE: B1/3/5/7/8/20/28/32/38/40/41 (2100/1800/850/2600/900/800 /700/1500/2600/2300/2500) - Page 84 • Wi-Fi 802.11 b/g/n for 2.4GHz, 802.11 a/n/ac for 5GHz • 3.5 mm audio jack • Type-C USB 2.0 Camera: • 64Mp+8Mp super wide+5Mp Macro+2M depth • 16Mp front camera Audio & Video supported formats: • AAC LC, AAC+, eAAC+, AAC ELD, AMR-NB, AMR-WB, FLAC, GSM, MIDI, MP3, Opus, WAV, Vorbis, ALAC, AIFF, APE • HEVC, H.264, VP9, VP8, MPEG-2, MPEG-4, H.263 Battery...
- Page 85 Safety and use ......We recommend that you read this chapter carefully before using your phone. The manufacturer disclaims any liability for damage, which may result as a consequence of improper use or use contrary to the instructions contained herein. •...
- Page 86 Please consult your doctor and the device manufacturer to determine if operation of your phone may interfere with the operation of your medical device. Switch the phone off when you are near gas or flammable liquids. Strictly obey all signs and instructions posted in a fuel depot, petrol station, or chemical plant, or in any potentially explosive atmosphere.
-
Page 87: Safety And Use
Do not paint it. Use only batteries, battery chargers, and accessories which are recommended by TCL Communication Ltd. and its affiliates and are compatible with your phone model. TCL Communication Ltd. and its affiliates disclaim any liability for damage caused by the use of other chargers or batteries. - Page 88 We are not responsible for such third party provider’s privacy or security practices. Any personal data you shared with TCL Communication Ltd. will be handled in accordance with our Privacy Notice. You can check our Privacy Notice by visiting our website: https://www.tcl.com/content/...
- Page 89 • PRIVACY Please note that you must respect the laws and regulations in force in your jurisdiction or other jurisdiction(s) where you will use your phone regarding taking photographs and recording sounds with your phone. Pursuant to such laws and regulations, it may be strictly forbidden to take photographs and/or to record the voices of other people or any of their personal attributes, and reproduce or distribute them, as this may be considered to be an invasion of privacy.
- Page 90 They will then be recycled, preventing substances being disposed of in the environment, so that their components can be reused. In European Union countries: These collection points are accessible free of charge. All products with this sign must be brought to these collection points. In non-European Union jurisdictions: Items of equipment with this symbol are not to be thrown into ordinary bins if your jurisdiction or your region has suitable recycling...
- Page 91 • CHARGERS Mains powered chargers will operate within the temperature range of: 0°C (32°F) to 45°C (113°F). The chargers designed for your phone meet the standard for safety of information technology equipment and office equipment use. They are also compliant with the ecodesign directive 2009/125/EC. Due to different applicable electrical specifications, a charger you purchased in one jurisdiction may not work in another jurisdiction.
-
Page 92: Radio Waves
Radio waves ........ Proof of compliance with international standards (ICNIRP) or with European Directive 2014/53/EU (RED) is required of all phone models before they can be put on the market. The protection of the health and safety for the user and any other person is an essential requirement of these standards or this directive. - Page 93 For more information, you can go to tcl.com. Additional information about electromagnetic fields and public health...
- Page 94 Your phone is equipped with a built-in antenna. For optimal operation, you should avoid touching it or degrading it. As mobile devices offer a range of functions, they can be used in positions other than against your ear. In such circumstances the phone will be compliant with the guidelines when used with a headset or USB data cable.
-
Page 95: Licences
The Bluetooth word mark and logos are owned by the ® Bluetooth SIG, Inc. and any use of such marks by TCL Communication Ltd. and its affiliates is under licence. Other trademarks and trade names are those of their respective owners. - Page 96 TCL Communication Ltd. You may download the source codes from https://sourceforge.net/ projects/tcl-mobile/files/. The provision of the source code is free of charge from the internet. We hereby point out that the end user warranty against infringement of IPR is solely limited to the EU/EEA/Switzerland.
-
Page 97: General Information
General information ....• Internet address: https://www.tcl.com • Hotline: Go to our website www.tcl.com/global/en/service- support-mobile/hotline&service-center.html • Manufacturer: TCL Communication Ltd. • Address: 5/F, Building 22E, 22 Science Park East Avenue, Hong Kong Science Park, Shatin, NT, Hong Kong • Electronic labelling path: Touch Settings > System >... - Page 98 NFC 13.56 MHz: -22.491 dBuA/m at 10m Regulatory information Hereby, TCL Communication Ltd. declares that the radio equipment type TCL T790Y is in compliance with Directive 2014/53/EU. The full text of the EU declaration of conformity is available at the following internet address: www.tcl.com/global/en/service-support-...
- Page 99 Third Party Materials. Moreover, the present Third Party Materials, which are provided free of charge by TCL Communication Ltd., may be subject to paid updates and upgrades in the future; TCL Communication Ltd. waives any responsibility regarding such additional costs, which shall be borne exclusively by the purchaser.
- Page 100 You can also find answers to frequently asked questions there too. For more information on how to use the phone, please go to tcl.com and download the complete user manual. Moreover, on the website, you can also find answers to frequently asked questions.
Need help?
Do you have a question about the 10 5G and is the answer not in the manual?
Questions and answers