
Subscribe to Our Youtube Channel
Related Manuals for LG CF3DAT


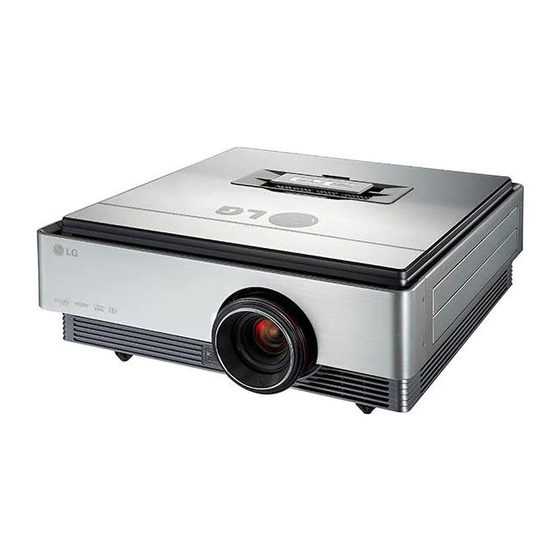
Summary of Contents for LG CF3DAT
- Page 1 OWNER'S MANUAL LCOS PROJECTOR Please read this manual carefully before operating your projector and retain it for future reference. CF3DAT P/NO: MFL67281303 (1111-REV00) www.lg.com...
- Page 2 LCOS PROJECTOR LCOS PROJECTOR The lightning fl ash with arrowhead symbol, within an equilateral triangle, is intended to alert the user to the presence of uninsulated “dangerous voltage” within the product’s enclosure that may be of suffi cient magnitude to constitute a risk of electric shock to persons. The exclamation point within an equilateral triangle is intended to alert the user to the presence of important operating and maintenance (servicing) instructions in the literature accompanying the appliance.
-
Page 3: Table Of Contents
Contents Contents Safety Precautions............4 Audio Function Adjusting Volume ..............31 Parts and Components Stereo/SAP Broadcast Setup ..........31 Main Unit ...................9 Time Function Control Panel ................9 Setting Current Time ............. 32 Back ..................10 Scheduling On and Off ............32 Name of remote control buttons ...........11 Using SLEEP Function ............ -
Page 4: Safety Precautions
Safety Precautions Safety Precautions Please take note of the safety instructions to prevent any potential accidents or misuse of the projector. ꔈ Safety Instructions are given in two forms, i.e. 'Warning' and 'Notes' as detailed below. Warning: The violation of this instruction may cause serious injury and even death. Note: The violation of this instruction may cause injury or damage to the projector. - Page 5 Keep bat- switch it off and unplug it from the teries out of reach of children. power outlet and contact an LG Electronics Service Center. If a child swallows a battery, consult a doctor immediately.
- Page 6 LG casing. Electronics Service Center. This may cause mechanical failure or personal injury.
- Page 7 Safety Instructions Outdoor Antenna Grounding Disposal of your old appliance If an outdoor antenna is installed, follow the precautions below. An outdoor antenna system should not be located in the vicinity of overhead power lines or other electric light or power circuits, or where it can come in contact with such power lines or circuits as death or serious injury can occur.
- Page 8 Safety Instructions Disposal of waste batteries/accumulators * The fl uorescent lamp used in this product contains a small amount of mercury. * Do not dispose of this product with general household waste. 1. When this crossed-out wheeled bin symbol is * Dispose of this product must be carried out attached to batteries/accumulators of Your product in accordance to the regulations of your local...
-
Page 9: Parts And Components
Parts and Components Parts and Components Main Unit Top Filter Cover * Be careful not to block the filter cover while the projector is in use. Zoom ring Focus ring Air vents * Do not block or close the air vents while the projector is in use. -
Page 10: Back
Parts and Components Back ANTENNA IN port RS232C port RGB port USB (SVC ONLY) port LAN port HDMI IN 1,2 port HDMI IN 1 HDMI IN 2 RGB IN ANTENNA IN RS-232C COMPONENT IN VIDEO OPTICAL OUT (SVC ONLY) A sensor receiving the remote control signal. AC IN port * Be careful not to block the sensor receiving the remote control signal. -
Page 11: Name Of Remote Control Buttons
Parts and Components Name of remote control buttons INPUT button LIGHTING POWER button LIGHTING button (You can see light on the remote control SLEEP PICTURE INPUT PICTURE button buttons.) SLEEP button TV button NUMBER button FLASHBK PREVIOUS CHANNEL button LIST MARK FAVORITE button 3D button... -
Page 12: Projector Status Indicators
Parts and Components Projector Status Indicators * Lamp indicator, operation indicator and temperature indicator at the top of the projector show the user the operating status of the projector. Operation indicator Power Button Temperature indicator Turns the projector On/Off. Lamp indicator Top filter cover lock Blue Standby. -
Page 13: Accessories
Parts and Components Accessories LIGHTING SLEEP PICTURE INPUT FLASHBK LIST MARK MUTE 3D OPTION MENU RATIO Q.MENU AUTO INFO BACK VIDEO COMP HDMI 1 HDMI 2 KEY.S PATTERN STILL BLANK Remote Control Battery (AAA) 2EA User Guide 3D Glasses Power Cord Polishing Cloth eZ-Net Manager CD Top Filter... -
Page 14: Installation And Configuration
Installation and Configuration Installation and Configuration Caution on Installation Place the projector in a well-ventilated environment. ꔈ To prevent internal heat build-up, install the projector in a ꔈ Do not place the projector on a carpet or rug. This may pre- well-ventilated place. -
Page 15: Projection Distance Per Screen Size
Installation and Configuration Projection Distance per Screen Size 1. Place the projector on a sturdy, level surface, together with the PC or audio/video source. 2. The distance between the projector and the screen determines the actual size of the image. 3. -
Page 16: Turning On The Projector
Installation and Configuration Turning on the Projector 1. Connect the power cord correctly to turn the projector on. 2. Press the POWER button. The power indicator blinks green. ꔈ Power on time is long due to the characteristics of the 3D projector. ꔈ... -
Page 17: Focus And Position Of The Screen Image
Installation and Configuration Focus and Position of the Screen Image When an image appears on the screen, check if it is in focus and fits the screen properly. Zoom ring Focus ring ꔈ To adjust the focus of the image, rotate the focus ring. ꔈ... -
Page 18: Connecting Device
Connecting Device Connecting Device Connecting a Speaker or Headphones To listen to sound through speakers, earphones or headphones, connect them to the voice output jack of the projector. Connecting an Antenna To watch TV programs using an indoor/outdoor antenna, connect the antenna line to the projector's ANTENNA IN port. -
Page 19: Connecting To A Video Player
Connecting Device Connecting to a Video Player <How to Connect> <Video Player> Connect the projector's VIDEO port to the audio/video device's output jack using a video cable. Video Cable Connecting to a DVD Player * The output jack Y, P or P of the DVD player may be marked as Y, Pb, Pr/Y, B-Y, R-Y/Y, Cb, or Cr depending on the model. -
Page 20: 3D Function
3D Function 3D Function * 3D technology uses different video frames for each eye to add depth to the video. * 3D images can be viewed only on a silver screen. Caution When Watching 3D Video • Watch 3D images within the optimum viewing angle and distance. - If you are outside the optimum viewing angle or distance, you may not be able to watch 3D images. -
Page 21: Watching 3D Images
3D Function Watching 3D Images 1. Please refer to the table below for supported 3D video formats. Horizontal Frequency Vertical Frequency Signal Resolution Supported 3D Formats (kHz) (Hz) 45.00 Top & Bottom, Side by Side HDMI 3D Top & Bottom 37.50 720P 1280 x 720... -
Page 22: Setting 3D Mode
3D Function 4. Press the 3D button during viewing to exit 3D mode and watch 2D video. 3D Mode 3D Mode Watch the original image. Watch the original image. 2D → 3D 3D → 2D 2D Off Cancel 3D Off Cancel Option Description... -
Page 23: Function
Function Function * The On-Screen Display (OSD) in this manual is an example to help you understand how to operate the product, and may be slightly different on your projector. * Most of the examples shown are with RGB (PC) input. Channel Functions Auto Tuning 1. -
Page 24: Editing Channels
Function Editing Channels 1. Press the MENU button, then go to Channel with the ∧, ∨, <, > buttons and press OK 2. Press the ∧, ∨ buttons to go to Channel Edit and press OK . 3. Press the ∧, ∨, <, > buttons to select a channel to edit. 4. -
Page 25: Displaying Program Information
Function Displaying Program Information If you press the Info button or OK button on the remote control, the program information is displayed on the screen. Brief Info Title Test.. 6:35 PM Sat, Jul 2, 2011 6:30 PM 7:45 PM ꘋ ꔫ ꔥ... -
Page 26: Video Function
Function Video Function Picture Mode * The best picture quality is maintained according to the selected picture option. Picture Mode 1. Press the PICTURE button on the remote control. 2. Press the ∧, ∨ buttons to select a picture Mode. Vivid (User) Vivid Standard... -
Page 27: Adjusting Picture Settings
Function Adjusting Picture Settings 1. Press the MENU button, then go to Picture with the ∧, ∨, <, > ꔂ Move ꔉ OK PICTURE buttons and press OK 3D Mode Picture Mode : Vivid • Contrast 2. Press the ∧, ∨ buttons to go to a desired picture option and press •... - Page 28 Function * Configurable options may differ depending on input signal or video settings, etc. - This function is available only for Vivid/Standard/Natural/Cinema/Sport/Game. Color Temperature ꔈ Changes the color saturation settings. Warm will have more reds and cool will have more blues. ꔈReduces image noise.
-
Page 29: Picture Initialization Function
Function Picture Initialization Function * The settings for each input and Picture Mode are reset to the factory defaults. ꔂ Move ꔉ OK PICTURE Picture Mode : Vivid 1. Press the MENU button, then go to Picture with the ∧, ∨, <, > • Contrast buttons and press OK ... -
Page 30: Using The Screen Size Function
Function Using the Screen Size Function Press the RATIO button on the remote control. Aspect Ratio 16:9 Just Scan Set By Program Cinema Zoom1 Zoom 16:9 ꔈ Settings may vary depending on the input signal. ꔦ ꔈ You can also use the MENU or Q.MENU button. ꔈ... -
Page 31: Adjusting Pc Input
Function Adjusting PC Input 1. Press the MENU button, then go to Screen with the ∧, ∨, <, > buttons ꔂ Move ꕉ Prev. SCREEN and press OK . ꔐ ꔃ 1024 x 768 Resolution 1280 x 768 2. Press the ∧, ∨ buttons to go to RGB Config. and press OK Auto Config. -
Page 32: Time Function
Function Time Function Setting Current Time * You can check or change the time while using the projector. 1. Press the MENU button, then go to Time with the ∧, ∨, <, > buttons and press OK . TIME ꔂ Move ꔉ OK ꔗ... -
Page 33: Using Sleep Function
Function Using SLEEP Function Sleep Timer * The projector can be turned off at a preset time. 1. Press the SLEEP button on the remote control. 2. Press the ∧, ∨ buttons to select a desired preset time. ꔦ 10 min. 20 min. -
Page 34: Selecting Audio Language
Function Selecting Audio Language * Other languages may be available if a digital signal is provided by the broadcasting station. This feature operates only in DTV/CADTV mode. 1. Press the MENU button. Then, move to OPTION with the ∧, ∨, <, ꔂ... -
Page 35: Using The Blank Image Function
Function Using the Blank Image Function * To attract attention during a meeting or training, use the Blank Image function. 1. Press the BLANK button on the remote control. ꔈThe screen is covered by a background color. ꔈFor more information about selecting background color, see the Selecting the Blank Image Color section below. 2. -
Page 36: To Adjust The Brightness Of The Screen
Function To adjust the brightness of the screen ꔂ Move ꔉ OK OPTION Menu Language : English Audio Language : English 1. Press the MENU button, then go to OPTION with the ∧, ∨, <, > Caption : Text 1 buttons and press OK Blank Image : Black Camera Calibration... - Page 37 Function <How to Connect> <PC> Connect the LAN port of the projector to the LAN port of the PC or router using a LAN cable. LAN cable <Router> Connecting to a PC <How to Use> ꔂ Move ꔉ OK OPTION 1.
-
Page 38: Setting Set Id
Function Setting SET ID ꔂ Move ꔉ OK OPTION ▲ Set ID is 1 - 99. Blank Image : Blue * Only the saved Set ID is effective. Camera Calibration Lamp Mode : Normal 1. Press the MENU button, then go to OPTION with the ∧, ∨, <, > High Altitude : Off Network Setting... - Page 39 Function PARENTAL CONTROL/RATINGS * Parental Control can be used to block specific channels, ratings and other viewing sources. The Parental Control Function (V-Chip) is used to block program viewing based on the ratings sent by the broad- casting station. The default setting is to allow all programs to be viewed. Viewing can be blocked by choosing the type of the program and the categories.
-
Page 40: Lock
Function LOCK Setting a Password * To use Locking System function, you need to set a password. 1. Press the MENU button, then go to LOCK with the ∧, ∨, <, > buttons ꔂ Move ꔉ OK LOCK and press OK Lock System: Off Set Password Block Channel 2. -
Page 41: Enabling Block Channel
Function Enabling Block Channel 1. Press the MENU button, then go to LOCK with the ∧, ∨, <, > buttons ꔂ Move ꔉ OK LOCK and press OK Lock System: Off Set Password 2. Press the 0 - 9 buttons to enter a password. Block Channel Movie Rating TV Rating-Children... -
Page 42: Tv Rating General
Function TV Rating General ꔂ Move ꔉ OK LOCK Lock System: Off * Based on the ratings, blocks certain TV programs that you and your family do Set Password not want to view. Block Channel Movie Rating 1. Press the MENU button. Then, move to LOCK with the ∧, ∨, <, > TV Rating-Children buttons and press the OK button. -
Page 43: Serial Communication Function
Function Serial Communication Function * If the projector is connected to a PC through an RS-232C cable, you can use the PC to control functions of the projector such as power On/Off or input selection, etc. * You cannot use RJ45 AND RS-232C simultaneously. For serial communication, use LAN Off in the Network Settings. Establishing Serial Communication * Connect the RS-232C (serial connector) of the PC to the RS-232C connector at the back of the projector. - Page 44 Function 2. OK Acknowledgement [Command2] [ ] [Set ID] [ ] [OK] [Data] [x] * If a set receives the data successfully, it returns ACK in the above format. Here, the data will be the information from the projector indicating the current status of the projector if it is in data read mode.
- Page 45 Function 01. Power (Command:ka) 04. Volume Mute(Command:ke) ⇒ Controls power On/Off of the projector. ⇒ Adjusts Volume Mute On/Off. Transmission Transmission [k] [a] [ ] [Set ID] [ ] [Data] [Cr] [k] [e] [ ][Set ID] [Data] [Cr] Data 0 : Power Off Data 0: Volume Mute On (Volume Off) 1: Power On...
- Page 46 Function 12. Remote Control Lock/Key Lock 08. Color (Command : ki) (Command: km) ⇒ Adjusts screen color. ⇒ Sets the function of locking the remote control and Transmission local keypad of the remote control. [k] [i] [ ] [Set ID] [ ] [Data] [Cr] Transmission Data Min : 0 - Max : 64...
- Page 47 Function 16. Black Level (Command: nm) 19. Input Select (Command: xb) ⇒ Adjusts the value of Black Level ⇒ Select the input signal of a set. Transmission Transmission [n] [m] [ ] [Set ID] [ ] [Data] [Cr] [x] [b] [ ] [Set ID] [ ] [Data] [Cr] Data 0: Low 1: High...
- Page 48 Function <Key Code> Key Name Key Name Key Code Key Code Key Name Key Name Key Code Key Code 0x40 0x40 0x4C 0x4C ∧ ∧ LIST LIST 0x41 0x41 0x1A 0x1A ∨ ∨ FLASHBK FLASHBK 0x06 0x06 0x1E 0x1E > >...
-
Page 49: Communication Using Hyper Terminal
Function Communication using Hyper Terminal You can control multiple projectors from a single computer using the protocol. 1. Setting Hyper Terminal 1. Specifying communication port in User Configuration 2. Set to 9600 4. Set to ASCII 3. Set to Test registration information... - Page 50 Function 2. Example of entering input switching command by using Hyper Terminal.
-
Page 51: Miscellaneous
Miscellaneous Miscellaneous Supported Monitor Display * The following table lists the display formats supported by the projector. Horizontal Frequency Resolution Vertical Frequency (Hz) (kHz) * If the projector does not support the input signal, the "Invalid Format" message appears on the screen. * The projector supports the DDC1/2B type as a Plug &... -
Page 52: Maintenance
If dust or stains accumulate on the projector, it may appear on the screen, or the screen may appear darker. Cleaning is there- fore very important. If replacement parts are required, contact your seller or an LG Electronics Service Center. To clean the parts of a projector, turn off the projector and pull the plug from the power outlet. - Page 53 Miscellaneous Cleaning the projector filter It is recommended to clean the filter once a month to maintain the performance of the projector. When prompted to clean the filter, take the following steps. <Cleaning the Top Filter> 1. Turn off the projector and unplug the power cord. Place the projector on a table or flat surface. 2.
-
Page 54: Do Not Turn Off The Projector
LED has changed to blue as the fan is still running. ꔈ Allow the lamp to cool down for 1 hour before replacing it. ꔈ Replace only with the same type of lamp from an LG Electronics Service Center. Using another manufacturer's lamp may damage the projector and lamp. - Page 55 Make sure to use the same type of lamp for replacement. If the lamp cover is not installed correctly, the projector will not be turned on. In this case, check if the lamp is installed cor- rectly before contacting LG Electronics Service Center.
-
Page 56: Troubleshooting
Miscellaneous Troubleshooting Please check the following when there is a problem with the projector before contacting LG Electronics Service Center. Symptom Checkpoint and Solution A. Check if the power light is turned on or the lens cap is closed. In addition, check if the cables are connected correctly according to the description in this manual. -
Page 57: Product Specifications
Miscellaneous Product Specifications MODELS CF3DAT (CF3DAT-JS) Resolution 1920 (H) x 1080 (V) pixels Aspect ratio 16:9 (H:V) Panel size (mm) 15.4 Projection distance Wide: 0.88 m - 9.08 m (76.2 cm - 762.0 cm) (Video size) Tele: 1.14 m - 11.8 m (76.2 cm - 762.0 cm) -
Page 58: Open Source Software Information
MPL library: nanox You can ask LG Electronics for the source codes at the e-mail address below. We will send you a CD-ROM if you pay for expenses such as media cost or delivery, etc.: opensource@lge.com This is effective for 3 years from the purchase date of the projector. -
Page 59: Memo
Miscellaneous MEMO... - Page 60 The model and serial number of the LG Customer Information Center projector is located on the back or one side of the projector. Record it below should you 1-800-243-0000 ever need service. USA, Consumer User 1-888-865-3026 MODEL USA, Commercial User...
Need help?
Do you have a question about the CF3DAT and is the answer not in the manual?
Questions and answers