
Subscribe to Our Youtube Channel
Related Manuals for Capital PROFESSIONAL SERIES


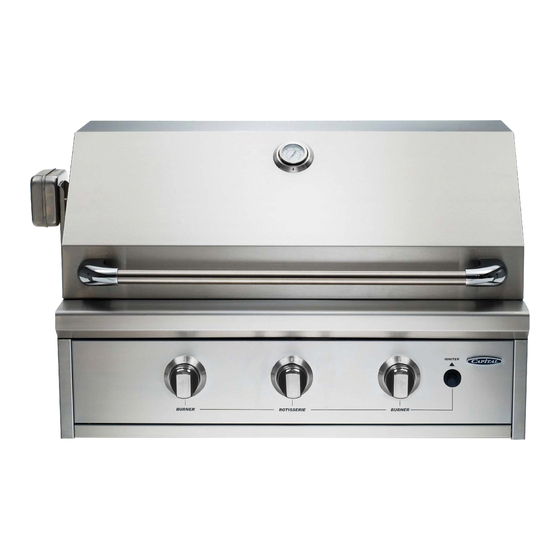
Summary of Contents for Capital PROFESSIONAL SERIES
- Page 1 PROFESSIONAL SERIES Outdoor Collection Use and Care Guide PRO32RBI N & PRO36RBI L PRO36RBI N & PRO 36 RBI L Available in Natural Gas and LPG versions www.capitalbrand.com.au...
-
Page 2: Table Of Contents
MESSAGE WARNINGS LOCATION SAFETY PRACTICES & PRECAUTIONS 6 - 8 GAS SPECIFICATIONS LPG INSTALLATION LEAK TESTING NATURAL GAS INSTALLATION & BUILT IN CLEARANCES BUILT-IN CLEARANCES AIR SHUTTER INSTRUCTIONS REPLACING THE BATTERY BURNER ADJUSTMENT 16 - 17 USING THE GRILL / FEATURES / LIGHTING INSTRUCTIONS 18 -19 HELPFUL HINTS USING THE ROTISSERIE... -
Page 3: Message
Congratulations on making a smart choice! You have joined an elite group of cooking enthusiasts who demand only the very best from their appliances. A Capital Cooking appliance promises years of enjoyment and maximum pleasure, allowing cooks everywhere to create culinary memories that last a lifetime. -
Page 4: Warnings
(including rotisserie burner) and lid closed for more than 8 minutes at any given time. Failure to follow provided instructions or follow basic safety precautions will void all warranties. Capital Cooking is not responsible for damages or injuries caused by a failure to follow instructions or basic safety practices. -
Page 5: Location
LOCATION WARNING: NOT FOR USE IN MARINE CRAFT, CARAVANS OR MOBILE HOMES. PUTTING YOUR BARBECUE IN AN ENCLOSURE This appliance must only be used in an above ground, open air situation with natural ventilation, without stagnant areas, where gas leakage and products of combustion are rapidly dispersed by wind and natural convection. -
Page 6: Safety Practices & Precautions
When properly cared for, your Capital barbecue will give you years of safe and reliable enjoyment. However, extreme care must be taken since the barbecue produces intense heat, increasing the risk of accident. - Page 7 SAFETY PRACTICES AND PRECAUTIONS BE SURE all control knobs are in the OFF position and barbecue is cool prior to using any aerosol cleaner on or around the barbecue. The chemical that produces the spraying action could, in the presence of heat, ignite or cause metal part to corrode.
- Page 8 SAFETY PRACTICES AND PRECAUTIONS A NOTE ON CLOTHING: For personal safety, wear proper apparel. Loose fitting garments or sleeves should never be worn while using this appliance. Some synthetic fabrics are highly flammable and should not be worn while cooking. A NOTE ON COOKWARE: Only certain types of glass, heat-proof glass ceramic, earthenware, or other glazed utensils are suitable for barbecue use.
-
Page 9: Gas Specifications
GAS SPECIFICATIONS GAS TYPE NATURAL GAS LPG GAS Pressure 1.0 kPa Pressure 2.70 kPa Injector Drill Size Injector Drill (MJ/hr) Size (MJ/hr) Main Burners #44/2.18mm 20.76 #55/1.32mm 20.38 Rotisserie burner (32”) #51/1.70mm 13.46 #59/1.04mm 13.45 Rotisserie burner (36”) #48/1.95mm 16.23 #57/1.09mm 16.08 TOTAL GAS CONSUMPTION... -
Page 10: Lpg Installation
LPG INSTALLATION Gas Cylinder Safety Information This appliance is designed to be used with a gas cylinder not exceeding 9KG Capacity. The Gas cylinder must be constructed and marked in accordance with specifications and certified to AS 2469 for LPG. The gas cylinder supply valve must be turned off when the appliance is not in use. -
Page 11: Leak Testing
LEAK TESTING GENERAL: Although all gas connections on the grill are leak tested at the factory prior to shipment, a complete gas tightness check must be performed at the installation site due to possible mishandling in shipment, or excessive pressure unknowingly being applied to the unit. Periodically check the whole system for leaks, or immediately check if the smell of gas is detected. -
Page 12: Natural Gas Installation & Built In Clearances
NATURAL GAS INSTALLATION and BUILT IN CLEARANCES NATURAL GAS INSTALLATION ADVICE If your Capital BBQ is made for Natural Gas. The installation shall only be performed by a qualified installer and installed in accordance with AS/NZS 5601 Gas Installation code and SAA Wiring Rules. -
Page 13: Built-In Clearances
BUILT IN CLEARANCES PRO32 PRO36 POWER POWER CORD CORD LEFT SIDE LEFT SIDE PRO36 PRO32 Professional Grills CUT-OUT HEIGHT 235mm 235mm WIDTH 902mm 800mm DEPTH 489mm 489mm... -
Page 14: Air Shutter Instructions
AIR SHUTTER ADJUSTMENTS BURNER AIR SHUTTER ADJUSTMENT Each burner air shutter is tested at the factory prior to shipment; however, variations in the local gas supply may make it necessay to adjust the air shutter. The flames of the burners should be visible checked and compared with the following figure. -
Page 15: Replacing The Battery
REPLACING BATTERY REPLACING THE BATTERY The Professional Series grills utilize one AAA battery. The battery is located inside the igniter button. Remove the igniter button by pushing the button in and turning it counter-clockwise a quarter turn. Remove / insert battery and replace igniter button by pushing the button in and turning clockwisea quarter turn. - Page 16 BURNER ADJUSTMENTS BURNER AIR ADJUSTMENT To adjust tube burner flames: 1. Be careful as the burner may be very hot! 2. If the flame is yellow, indicating insufficient air, adjust the air shutter counter clockwise to allow more air to the burner.
-
Page 17: Burner Adjustment
BURNER ADJUSTMENTS (continued) To Adjust: (Tools Required: Pliers, Flat Head Screwdriver) 1. Light the burner. 2. Turn the control knob to the lowest setting (all the way counter clockwise). 3. Remove the knob. 4. While holding the valve shaft with the pliers, insert a thin flat-Head screwdriver into the shaft and while viewing the burner adjust to a minimum stable flame. -
Page 18: Using The Grill / Features / Lighting Instructions
USING THE GRILL / FEATURES BARBECUING or GRILLING? YOUR CHOICE! Did you know there is difference between barbecuing and grilling? Barbecuing requires slow cooking foods with low to moderate heat, and grilling requires intense searing heat to lock in the juices. The Precision Series” is the most versatile grill on the market, because it allows you to do both simultaneously. - Page 19 USING THE GRILL / FEATURES REPLACEMENT OF REGULATOR AND HOSE: The pressure regulator and hose assembly supplied with the unit must be used. For Natural Gas installations the Regulator will be supplied with your BBQ and must be used. If replacement is required it must be replaced with an AS/NZS certified NG regulator.
-
Page 20: Helpful Hints
HELPFUL HINTS A FEW WORDS ON MEAT: The doneness of the meat, whether rare, medium or well done, is affected to a large degree by the thickness of the cut. Expert chefs say that it is impossible to have a rare doneness with a thin cut of meat. The cooking time is affected by the kind of meat, the size and shape of the cut, the temperature of the meat when cooking begins, and the degree of doneness desired. -
Page 21: Using The Rotisserie
USING THE ROTISSERIE USING THE ROTISSERIE: Lighting the rotisserie burner: NOTE: The safety valve on all Professional Series rotisserie sections is included in the main burner valve. No separate safety button is necessary to operate the rotisserie safety feature. NEVER USE ROTISSERIE BURNER WHEN GRILLING SURFACE IS USED. - Page 22 USING THE ROTISSERIE (continued) NOTE: The grill rotisserie system is designed to cook items from the back using infrared heat. The location of the burner allow the placement of the rotisserie basting pan (included) beneath the food to collect juices and drippings for basting and gravy.
- Page 23 USING THE ROTISSERIE (continued) WARNING Keep hands and face away from front of burner! STAND TO THE SIDE WHEN LIGHTING. ONCE LIT, MOVE HAND AWAY QUICKLY! WARNING: Electrical Grounding Instructions: This rotisserie motor is equipped with a three-prong plug for your protection against shock hazard and should be plugged directly into a properly grounded GPO using an appropriate extension cord.
-
Page 24: Care And Cleaning
To improve rust, wash all stainless steel surfaces every 3-4 weeks with fresh water and stainless steel cleaner. Capital will not warrantee for rust due to failure to follow recommendations set forth in this section. The grill is constructed out of non-rusting and non-magnetic stainless steel. After initial usage, areas of the grill may discolor from the intense heat given off the the burners: this condition is normal. -
Page 25: Burner Removal And Cleaning
BURNER REMOVAL AND CLEANING GRILL BURNER: WARNING! To prevent burns, make sure the burner is cool before removing for cleaning. Remove the grill grates. Then lift out the radiant trays. Grasp the burner and pull it up carefully and slightly towards the rear wall of the unit so the burner head comes off the brass orifice at the front. -
Page 26: Parts List
PROGRILL 36” PRO GRILL 36” PRO GRILL 36” PART NUMBER DESCRIPTION PART NUMBER DESCRIPTION 1. 81000-01 Tube End Cap 30. 82111 Elbow Male-Female 2. 10018-10 Tube Handle 31. 10675-32 Body 36” Weld/Assy. 3. 82425-01 Temperature Gauge 32. 10875-01 Drip Pan Shield 4. - Page 27 PROGRILL 32” PRO GRILL 32” PRO GRILL 32” PART NUMBER DESCRIPTION PART NUMBER DESCRIPTION 1. 81000-01 Tube End Cap 30. 82111 Elbow Male-Female 2. 10018-10 Tube Handle 31. 10675-32 Body 36” Weld/Assy. 3. 82425-01 Temperature Gauge 32. 10875-01 Drip Pan Shield 4.
-
Page 28: Troubleshooting
Only authorized service agencies can perform warranty service. Call a Capital specialist at 1300 762 219. Grill won’t light when knob is turned: •... -
Page 29: Warranty
(1) year from the original date of purchase. Capital will repair or replace, at its option, any part, which falls or is found to be defective during the warranty period, at no cost to the original purchaser. - Page 30 NOTES...
- Page 31 NOTES...
- Page 32 We reserve the right to change these specifications or design without notice. THE ART OF PRECISION AUSTRALIA ARISIT PTY LIMITED 40-44 Mark Anthony Drive, Dandenong South, VIC 3175, Australia Warranty, Service And Spareparts Phone: 1300 762 219 Email: arisit.warranties@arisit.com NEW ZEALAND ARISIT PTY LIMITED PO Box 68-140 Newton, Auckland 1145, New Zealand...
Need help?
Do you have a question about the PROFESSIONAL SERIES and is the answer not in the manual?
Questions and answers