V-ZUG Combair SEP Operating Instructions Manual
Hide thumbs
Also See for Combair SEP:
- Operating instructions manual (76 pages) ,
- Operating instructions manual (56 pages)
Table of Contents
Advertisement
Quick Links
Advertisement
Table of Contents

Related Manuals for V-ZUG Combair SEP


Summary of Contents for V-ZUG Combair SEP
- Page 1 V-ZUG Ltd Oven Combair SEP Operating instructions...
- Page 2 The model number corresponds to the first 3 digits on the identification plate. These operating instructions apply to the models: Type Model no. Size system BCSEP 55-600/55-762 BCSEP60 60-600/60-762 Variations depending on the model are noted in the text. © V-ZUG AG, CH-6301 Zug, 2012...
-
Page 3: Table Of Contents
Contents 1 Safety precautions 1.1 Symbols used ..........5 1.2 General safety precautions . - Page 4 7 Operating modes 7.1 Top/Bottom heat ......... . 34 7.2 Bottom heat .
-
Page 5: Safety Precautions
Safety precautions Symbols used Denotes important safety precautions. Failure to observe said precautions can result in injury or in damage to the appliance or fittings! Information and precautions that should be observed. Information on disposal. Information about the Operating Instructions. Indicates step-by-step instructions. -
Page 6: General Safety Precautions
1 Safety precautions General safety precautions • Read the operating instructions before using the appliance for the first time! • This appliance is not intended for use by persons (including children) with reduced physical, sensory or mental capabilities, or lack of experience and/or knowledge, unless they are supervised or have been given instruction concerning use of the appliance by a person responsible for their safety. -
Page 7: Appliance-Specific Safety Precautions
1 Safety precautions Appliance-specific safety precautions • WARNING: The appliance and its accessible parts get hot during use. Be careful not to touch the heating elements. • Children under 8 years of age must be kept away unless constantly supervised. •... - Page 8 1 Safety precautions • A warming drawer and its contents get hot. • For appliances with pyrolytic self-cleaning, excessive soiling and accessories must be removed before carrying out pyrolytic self- cleaning. • Only use the food probe recommended for this oven. •...
-
Page 9: Instructions For Use
1 Safety precautions Instructions for use Before using for the first time • The appliance must be installed and connected to the mains supply in accordance with the separate installation instructions. Have a qualified fitter/electrician carry out the necessary work. Correct use •... - Page 10 1 Safety precautions Note on use • Use the childproof locking facility. • If the appliance is visibly damaged, do not use it. Contact our Customer Services. • If the appliance is not operating property, disconnect it from the mains power supply immediately.
- Page 11 1 Safety precautions Caution: Risk of injury! • Be careful not to put fingers in the door hinges. There is otherwise a risk of injury if the appliance door is moved. Particular care should be taken when children are around. •...
-
Page 12: Disposal
Disposal Packaging • All packaging materials (cardboard, plastic film (PE) and polystyrene (EPS)) are marked and should, if possible, be collected for recycling and disposed of in an environmentally friendly way. Disconnection • Disconnect the appliance from the mains. With a fixed appliance, this is to be carried out by a qualified electrician! Safety •... -
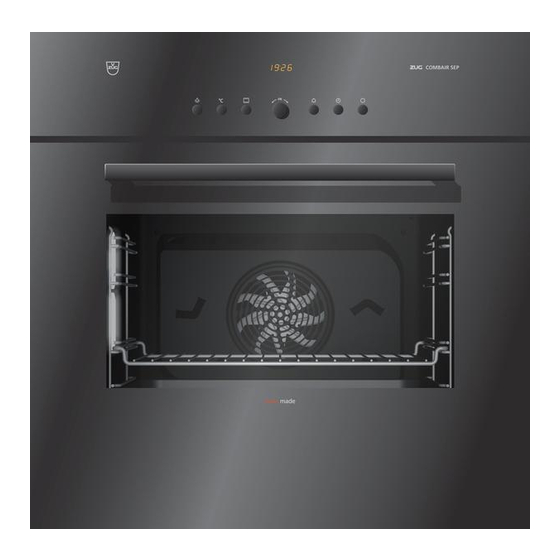
Page 13: Appliance Description
Appliance description Construction Operating and display elements Ventilation opening Door handle Appliance door Appliance/Warming drawer * * Depending on model... -
Page 14: Operating And Display Elements
3 Appliance description Operating and display elements ˚C ˚C Digital displays Temperature Time Operating time Switch-off time Timer Operating mode symbols Top/Bottom heat PizzaPlus Bottom heat Grill Hot air Grill-forced convection Hot air humid... - Page 15 3 Appliance description Symbols Warming drawer * Operating time Cooking space temperature Switch-off time Self-cleaning Time Timer * Depending on model Buttons Warming drawer * Adjusting knob Illumination Timer Cooking space temperature Time Operating time Switch-off time Operating mode * Depending on model...
-
Page 16: Cooking Space
3 Appliance description Cooking space Using protective inserts or aluminium foil can damage the appliance! Do not place any protective insert or aluminium foil on the cooking space floor. Appliance door Cooking space ventilation Door seal Grill/Top heat Illumination Cooking space temperature sensor Hot air fan Levels (labelled) The bottom heating element is beneath the cooking space floor. -
Page 17: Accessories
3 Appliance description Accessories Incorrect handling can cause damage! Do not use knives or cutting wheels to cut food in the accessories. Original TopClean baking tray • Baking tin for flans and biscuits • Use together with the wire shelf as a drip tray •... -
Page 18: Operating The Appliance
Operating the appliance The operating mode, the cooking space temperature, the operating time, the switch-off time and various other functions can be selected – with the appliance switched off – by pressing the appropriate button once or more. • The symbol for the function selected illuminates or flashes. •... -
Page 19: Using For The First Time
4 Operating the appliance Using for the first time Before operating the newly installed appliance for the first time, the following steps should be taken: Remove packaging and transport materials from the cooking space. ➤ flashes in the display, turn the adjusting knob to set the ➤... -
Page 20: Selecting The Operating Mode
4 Operating the appliance Selecting the operating mode Press the button repeatedly until the desired operating mode flashes. ➤ – The recommended temperature flashes in the display. – The operating mode symbol and flash. Operating modes Press the Operating mode button 1×... -
Page 21: Checking And Changing The Cooking Space Temperature
4 Operating the appliance Checking and changing the cooking space temperature Press the button. ➤ – The cooking space temperature set flashes in the display. – The symbol flashes. Turn the adjusting knob to change the cooking space temperature. ➤ Changing the operating mode Press the button repeatedly until the desired operating mode appears. -
Page 22: User Settings
User settings You can adjust the settings. With the appliance switched off, hold the adjusting knob depressed ➤ until – appears in the display. Press the adjusting knob to confirm. ➤ – appears in the display for «Childproof lock off». Turn the adjusting knob to select setting. - Page 23 5 User settings Possible settings off * Childproof lock visible * Time display invisible automatically with door * Illumination via button only high * Acoustic signal ˚C * Temperature unit ˚F 24 h * Time format 12 h Mains synchronisation on * no change Factory settings...
-
Page 24: Childproof Lock
5 User settings Childproof lock The childproof lock is to prevent the appliance being inadvertently switched If the button is pressed when the childproof lock is activated, – a double acoustic signal is emitted, – nothing happens when the button is pressed. Operating the appliance when the childproof lock is activated Hold the button depressed and press the... -
Page 25: Illumination
5 User settings Illumination With the «automatically with door» setting, the illumination turns on when the appliance door is opened and turns off when it is closed. The illumination can be switched on and off at any time by pressing button. -
Page 26: Time Format
5 User settings Time format Select the «24 h» setting to activate the European time format and the «12 h» setting for the US time format (a.m./p.m.). Mains synchronisation Mains synchronisation synchronises the appliance clock with the mains frequency. Irregular mains frequency can cause the clock to not run correctly. A pulse generator inside the appliance is used when mains synchronisation is switched off. -
Page 27: Time Functions
Time functions The following time functions are available: • Time • Timer • Operating time – time-controlled switch-off of the appliance • Delayed start – time-controlled switch-on and switch-off of the appliance When the appliance is switched off, the time display is dimmed between 24:00 and 6:00. -
Page 28: Timer
6 Time functions Timer The timer functions like an egg timer. It can be used at any time and independently of all other functions. Setting Press the button. ➤ – flashes in the display. – The symbol flashes. Turn the adjusting knob to set the duration. -
Page 29: Operating Time
6 Time functions Checking and changing Press the button. ➤ – The countdown to the time remaining flashes in the display. – The symbol flashes. Turn the adjusting knob to change the duration of the timer. ➤ Switching off before time Press the button 2×. - Page 30 6 Time functions Checking and changing Press the button. ➤ – The countdown to the time remaining flashes in the display. – The symbol flashes. Turn the adjusting knob to change the operating time. ➤ Switching off before time Press the button.
-
Page 31: Delayed Start
6 Time functions Delayed start The delayed start is activated when for the operating mode selected both an operating time and a switch-off time are set. The appliance switches automatically on and off again at the desired times. Perishables should not be kept unrefrigerated. Place the food in the cooking space. - Page 32 6 Time functions The switch-off time can be delayed by a maximum of 23 hrs. and 59 mins. If the time format has been selected, the switch-off time can be delayed by a maximum of 11 hrs. and 59 mins. Press the adjusting knob to confirm.
- Page 33 6 Time functions End of the operating time When the set duration is up – the operating mode selected switches off automatically – a long, intermittent acoustic signal is emitted for 1 minute – flashes in the display – the symbol flashes –...
-
Page 34: Operating Modes
Operating modes All operating modes along with Fast heating are described below. Place tins, moulds, etc. on the wire shelf. ➤ Push the original baking tray into the cooking space with the «sloped» side ➤ to the back. The desired operating mode can be selected by pressing the button ➤... -
Page 35: Bottom Heat
7 Operating modes Bottom heat Temperature range 30–250 °C Recommended value 200 °C Level 2 (or 1) The cooking space is heated by the bottom heating element. • Intensive baking of flan bases • Preserving food Use a dark enamelled tray or a black tray or tin for crispy results. ➤... -
Page 36: Hot Air Humid
7 Operating modes Hot air humid Temperature range 30–250 °C Recommended value 180 °C 1 + 3 or 2 Level (or 1 + 2 + 3) A heating element behind the back wall of the cooking space heats up the air inside the cooking space, which is circulated evenly. -
Page 37: Grill
7 Operating modes Grill Temperature range 30–300 °C Recommended value 250 °C Level 3 or 4 The cooking space is heated by the grill element. • Flat food for grilling, e.g. steaks, chops, chicken parts, fish and sausages • Gratinating •... -
Page 38: Fast Heating
7 Operating modes Fast heating Fast heating can be used to shorten the preheating time. Fast heating can be used only with the operating modes. Select the desired operating mode and cooking space temperature. ➤ Hold the adjusting knob for 2 seconds. ➤... -
Page 39: Tips And Tricks
Tips and tricks Baking and roasting Result Solution • The baking or roast looks Next time, set a lower cooking space ➤ good on the outside but is temperature and lengthen the operating still doughy or raw on the time. inside. -
Page 40: Uneven Browning
8 Tips and tricks Uneven browning Result Solution • The baking has browned Next time, set a lower cooking space ➤ unevenly. temperature and adjust the operating time. If using , check that the ➤ levels selected are as recommended in the separate Tips on settings. -
Page 41: Option 9.1 Warming Drawer
Option Warming drawer Unauthorized storage of materials creates a fire hazard! Do not store any foodstuffs or combustible or flammable materials in the warming drawer! The warming drawer can be used to preheat the tableware or to briefly keep covered food warm. Press the button to switch the warming drawer on and off. -
Page 42: Care And Maintenance
Care and maintenance Risk of burns from hot surfaces! Allow the appliance and the accessories to cool down before cleaning. Incorrect handling can result in damage to the appliance! Do not use any abrasive or caustic cleaning agents, sharp or rough metal scrapers, steel wool, abrasive scouring pads, etc. -
Page 43: Cleaning The Door Seal
10 Care and maintenance 10.2 Cleaning the door seal Clean the door seal with a soft cloth dampened with water, but do not use ➤ any cleaning agent. Dry with a soft cloth. 10.3 Replacing the door seal Remove the damaged door seal. ➤... -
Page 44: Cleaning The Appliance Door
10 Care and maintenance 10.4 Cleaning the appliance door Clean the appliance door with a soft cloth dampened with water and a little ➤ washing-up liquid. Dry with a soft cloth. Removing the appliance door Risk of injury from moving parts! Be careful not to put fingers in the door hinges. -
Page 45: Cleaning The Accessories And Shelf Guides
10 Care and maintenance 10.5 Cleaning the accessories and shelf guides • The wire shelf and shelf guides can be cleaned in the dishwasher. • The original baking tray can be cleaned in the dishwasher; however, this will affect its TopClean non-stick properties. Removing and reassembling the shelf guides Press the shelf guides at the top back ➤... -
Page 46: Cleaning The Cooking Space
10 Care and maintenance 10.6 Cleaning the cooking space Incorrect handling can result in damage to the appliance! Do not bend the temperature sensor or heating elements. Remove any soiling from the cooking space while still hand warm using a ➤... - Page 47 10 Care and maintenance Selecting and starting pyrolytic self-cleaning Damage to accessories from self-cleaning! Remove accessories, shelf guides, roller runners, cookware and any other objects from out of the cooking space. Otherwise they can become discoloured and their surface rough. The rolling properties of roller runners deteriorate.
- Page 48 10 Care and maintenance Switching off before time Press the button 1×. ➤ The appliance door cannot be opened until the temperature of the cooking space has dropped below 300 °C. The appliance door cannot be opened until the temperature of the cooking space has dropped below 300 °C.
-
Page 49: Replacing The Halogen Light Bulb
10 Care and maintenance 10.8 Replacing the halogen light bulb WARNING: Risk of electric shock! Disconnect the appliance from the mains power supply before replacing the halogen light bulb. Risk of burns from hot surfaces! Allow the halogen light bulb and the appliance to cool down before replacing the halogen light bulb. -
Page 50: Trouble-Shooting
Trouble-shooting This section lists faults that can be solved simply by following the instructions given. If another fault is displayed or the fault cannot be remedied, please call Customer Services. Before calling Customer Services: Please note down the serial number (FN) (see Technical data for the identi- ➤... - Page 51 11 Trouble-shooting … the appliance door cannot be opened Possible cause Solution • The temperature of the Wait for it to cool down. ➤ cooking space is over The appliance door cannot be opened until 300 °C. the temperature of the cooking space has dropped below 300 °C.
- Page 52 11 Trouble-shooting … when grilling, thick smoke is given off Possible cause Solution • The food is too near to the Check that the level selected is as recom- ➤ mended in the Tips on settings. heating elements. • The cooking space Reduce the cooking space temperature.
- Page 53 11 Trouble-shooting … the following displays flash alternately Possible cause Solution • An interruption in the Cancel the error message by pressing the ➤ power supply. button. Disconnect the power supply for ➤ about 1 minute. Reconnect the power supply. ➤...
-
Page 54: After A Power Failure
11 Trouble-shooting 11.2 After a power failure After a power failure – flashes in the display – the symbol flashes Turn the adjusting knob to set the hour. ➤ Press the adjusting knob to confirm. ➤ Turn the adjusting knob to set the minutes. ➤... -
Page 55: Accessories And Spare Parts
Accessories and spare parts Please give model number of the appliance and exact description of the accessory or spare part when ordering parts. Accessories Original baking tray Wire shelf Tips on settings Bedienungsanleitung … Einstelltipps Special accessories For information see: www.vzug.com Spare parts Shelf guides... -
Page 56: Technical Data
Technical data External dimensions See Installation Instructions ➤ Electrical connection See identification plate 1 ➤ Note for testing institutes The energy efficiency class according to EN 50304/EN 60350 is determined using the operating modes. Placing thermocouples between the appliance door and the seal may result in leakage and thus in incorrect measurements. -
Page 57: Index
Index Accessories ....17, 55 F and E error messages ..52, 53 Cleaning ....45 Factory settings . - Page 58 14 Index Packaging ....12 Technical data ....56 PizzaPlus.
-
Page 59: Repair Service
Repair service The Trouble-shooting section will help you to carry out small repairs yourself, saving you the time and trouble of calling out a service technician and the cost that goes along with it. Whether you contact us about a malfunction or an order, please always state the serial number (FN) and the model type of your appliance. - Page 60 ➤ To switch off the appliance Press the button. ➤ To set the timer Press the button. ➤ Turn the adjusting knob to set the timer duration. ➤ V-ZUG Ltd Industriestrasse 66, CH-6301 Zug vzug@vzug.ch, www.vzug.com J44A.352-0...
Need help?
Do you have a question about the Combair SEP and is the answer not in the manual?
Questions and answers