Table of Contents
Advertisement
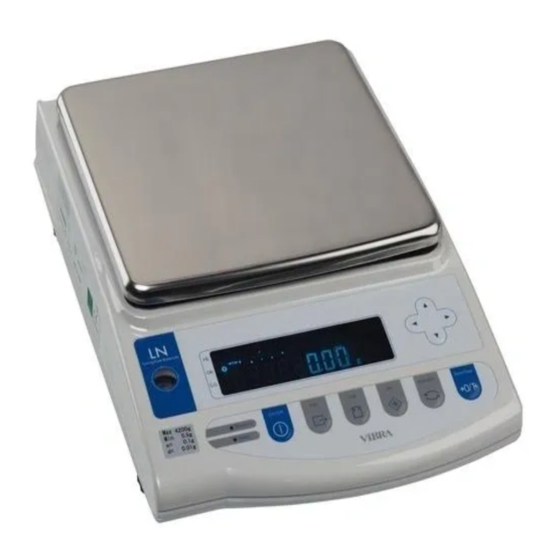
High-Precision Advanced Tuning Fork Balance
LNCE Series
Operation
To ensure safe and proper use of the balance, please read this
manual carefully.
After reading this manual, store it in a safe place near the balance, so
you can review it as needed.
SHINKO DENSHI CO., LTD.
Manual
IMPORTANT
360003M31
Advertisement
Table of Contents

Subscribe to Our Youtube Channel
Related Manuals for Shinko Denshi LN 223CE


Summary of Contents for Shinko Denshi LN 223CE
- Page 1 To ensure safe and proper use of the balance, please read this manual carefully. After reading this manual, store it in a safe place near the balance, so you can review it as needed. SHINKO DENSHI CO., LTD. 360003M31...
- Page 2 PREFACE Thank you for purchasing an LN CE Series electronic balance. This balance is equipped with a high precision mechanism. It provides parts counting, percentage weighing, and limit functions helpful in weighing a certain amount, and has various other functions. This advanced balance employs a user-friendly program, and the key arrangement is also easy to operate.
-
Page 3: Table Of Contents
Contents 1 Precautions Relating to Use......2 9 Calibration and Span Test for the Balance Span Adjustment with Built-in Weight (Auto-span Adjustment) ......41 2 Names of Component Parts ......5 Span Adjustment with External Weight .. 41 Span Test with Built-in Weight ....42 3 Installation of the Balance and Operation Span Test with External Weight ..... -
Page 4: Precautions Relating To Use
1 Precautions Relating to Use This Section “Precautions Relating to Use” sets forth precautionary notes that the user should observe in order to prevent physical injury to the user and/or damage to property. The nature of problems that may result in the event of improper operation, and consequential effects on the quality and performance of the balance, are indicated under the two categories of “Caution”... - Page 5 Do not place the balance on an unstable base or use the balance in a location where it may be subjected to shock. • The loaded sample may fall off the pan. Do Not Use • Accurate measurement may be rendered impossible.
- Page 6 Avoid applying excess force or impact to the balance. • Place the sample to be measured on the balance carefully to prevent breakage or malfunction. Do Not Apply Force Do not use the balance in a location were it may be subjected to abrupt changes in ambient temperature or humidity.
-
Page 7: Names Of Component Parts
2 Names of Component Parts Main Unit Wind shield 220g~620g capacity models Adjuster Fixed legs 1200g~15kg capacity models kg and 31kg capacity model Display Adjuster Level Operation key D-SUB9P RS232C Rear output connector (male) DIN8P connector for peripheral device output Jack for the AC adapter Antitheft hole (Use a wire, etc., through... - Page 8 Displayed Signs and Operation Keys 2.2.1 Displayed signs Display Description kg g Kilogram, gram →0← Zero-point − Minus Tare sign Gross weight Indication of stable balance (If this light is off, the balance is unstable.) ∗ Indicates that the addition function is enabled for accepting an additional load. Parts counting Percentage weighing Σ...
- Page 9 2.2.2 Operation keys and their functions Operation key Function On/Off key Turns the balance on or off. Starts output. Print key Also used to cancel the operation to set date/time. [Short press] Starts the setting a count or a percent. Set key [Continuous press] Starts the setting of a limit value when the limit function is enabled.
-
Page 10: Installation Of The Balance And Operation
3 Installation of the Balance and Operation Check Installation 1 Attach the pan base and pan to the main unit. Attach the pan base to the main unit. Be sure that the "FRONT" indication is on the display side when attaching the pan base. Align the bosses on the body with the holes on the pan base before fastening the screws. -
Page 11: Operation Check
Operation Check 3.3.1 Turn the power on and off and check the display Connect the AC adapter. The balance enters standby mode, and the Stand by lamp (LED) lights up. On/Off Press the On/Off key. When the display lights up, check it for missing signs. When an object is lying on the pan, the blinking “on 0”... - Page 12 Weigh additional samples 4 Reset the display to 0. Press the Zero/Tare key. The gross weight of the sample on the pan is reset to 5 Put an additional sample on the balance. The weight of the additional sample is displayed. In this way, you can add a sample and weigh it by pressing the Zero/Tare key to reset the displayed weight to 0.
- Page 13 Hints The following description applies commonly to the weighing machine, parts counting, percentage weighing, and gravimeter functions. A small amount of current is still flowing after the balance is turned off. In a standby state, the Stand by lamp (LED) is lit. When the balance is turned on, the LED goes out.
-
Page 14: Function1
4 Function1 Setting and Check 1. Call Function1. Keep pressing the Function key. When the display is changed to [Func] , release the key. Now you can set Function1. The first setting item is displayed [1. SEt 1]. (Refer to Section 4.2: Description of Function1 on Key released Continuous press page 13). -
Page 15: Description Of Function1
Description of Function1 Item Set Value Description Weighing machine (only supports weight measuring) Parts counting (parts counting and weight measuring) Percentage weighing (weight percent measuring and weight SEt. Weighing Mode measuring) Gravimeter (measurement of specific gravity) Statistics function (statistical calculation and weight measuring) Water Media MEd. - Page 16 Item Set Value Description Disable Auto sleep A.S. The balance goes into sleep mode 3 minutes later when it is operated on AC power. [ g ] Unit A [ kg ] ] (ct) None [ g ] Unit B b3.
-
Page 17: Additional Functions
Additional Functions Displayed when [2. SEL] is other than [0]. Item Set Value Description Always judge (even when the balance is unstable). Condition 21. Co. Judge only when the balance is stable. Detect when the limit is exceeded by more than 5 divisions. (Do not detect when the limit is exceeded by 5 or fewer divisions or the Range to Cover 22. -
Page 18: Interface
Interface Displayed when [6. I.F.] is [1-4]. Item Set Value Description Stop output Output continuously at all times Output continuously if stable (Stop output if unstable) Output once when the Print key is pressed (whether the balance is stable or unstable). Output once when the balance is stable. -
Page 19: Function2
5 Function2 Setting and Check 1 Call Function2. Press the Function key while holding down the Zero/Tare key. Press the Function key while holding down the Zero/Tare key. When [Func2] is displayed, release the key. The display is changed to [1 Id 0]. Key released 2 Change settings. -
Page 20: Weighing Mode
6 Weighing Mode You can select a weighing mode from the five types in Function1: a weighing machine, a parts counting, a percentage weighing, and a gravimeter. All the weighing modes except for the gravimeter support additional functions (the addition function and the limit function) depending on the display unit. -
Page 21: Parts Counting
Parts Counting The parts counting function employs an automatic memory update method, also referred to as a Self Counting System. When you put a specified number of samples on the balance, and put additional samples, the balance automatically updates the average unit weight of the samples. However, you cannot add more than two times as many samples as the first reading. - Page 22 5 Put additional samples on the balance. Add no more than two times as many samples as the displayed number and wait until it is stable again. A beep will sound and the memory is updated. Repeating this operation will improve the resolution of parts counting for more accurate measurements.
-
Page 23: Percentage Weighing
Percentage Weighing 6.4.1 Set a reference weight by weighing an actual sample You can make the display indicate the weight percentage (%) of a sample with respect to a reference sample weight. 1 Select the percentage weighing function. Select the percentage weighing function [1 SEt. - Page 24 6.4.2 Set a reference weight by entering a value You can enter a reference weight in the balance, and then make the display indicate the weight percentage (%) of a sample with respect to the reference. 1 Set a reference weight. Press the Function key for a few seconds.
-
Page 25: Gravimeter
Gravimeter When the balance is used as a gravimeter, specific gravity is measured by hanging a sample, thus requiring an optional hooking device. Any net or cage, hanging strings, or containers that may be required to hang the sample on the balance should be prepared by the user for the particular sample to be subjected to the measurement. - Page 26 6. Measure the weight of the sample in the air. Measure the weight of the sample put in a cage or on a pan, in the air. After the weight display is stable, press the Set key to enter the weight. When the weight is entered, a [ ] is displayed in the bottom left of the display and a [...
- Page 27 6.5.2 Entering water temperature or the specific gravity of the media This is for entering correction data for the liquid media to be used for the measurement. Enter water temperature if the media is water. Otherwise, enter the specific gravity value of the liquid. Use Function1 for selecting the media as follows: Correction data input procedures Set the balance for gravimeter and...
- Page 28 6.5.3 Gravimeter measurement data output (1) Output before gravimeter measurement With the gravimeter function, the operation is with the [61. o.c. 7] (output once when Print key is pressed after it is stabilized) mode, regardless of the setting by [61.o.c.]. (2) Output while specific gravity is displayed [12.
-
Page 29: Statistics Function
Statistics Function This is a function to collect weight data and display statistics such as the maximum and average values. Regardless of which function is selected, the measurement unit is set to “g,” and the minimum value is displayed to the maximum number of decimal places available. 6.6.1 Calculation items The statistics displayed by the statistics function (calculation items) are as follows:... - Page 30 6.6.2 Operational procedure Set Function1 to [1.SEt. 6]. 1. Start the statistics function. Then, press the Set key to switch to the statistics function. Place a tare container on the balance as appropriate. Zero-setting and tare are important in order to ensure that statistics are accurately calculated.
- Page 31 Caution In step 2, press the Print key only when the output control is set to [61. o.c. 7]. If the output control is set to [61. o.c. 4], the data is automatically output once when the balance is stable. If the statistics function is selected, only 4 or 7 can be enabled.
- Page 32 6.6.3 Printing out all of the statistical calculation results Using an output device, you can print out all of the statistical calculation results at once. Switch to the statistical calculation display before 1. Switch to the statistical calculation display. collecting the next data point. Press the Print key.
- Page 33 6.6.4 Cancelling the last collected data point You can cancel the last collected data point only once. Switch to the statistical calculation display before 1. Switch to the statistical calculation display. collecting the next data point. Press the Set key several times until “N” is displayed. 2.
-
Page 34: Addition Function
7 Addition Function The addition function allows you to find the cumulative weight of samples put on the balance one after another. Except for the gravimeter function, all other functions, i.e., weighing machine, parts counting, and percentage weighing functions support the addition function. Cumulate Function With the cumulate function, a cumulative weight can be obtained while samples are reloaded. -
Page 35: Net Addition Function
Net Addition Function The net addition function automatically performs tare range after an addition, so additions can be performed without having to replace samples. 1 Set Function1. Set Function1 from [2. SEL 1] to [2C. Ad.M 2]. Then, press the Set key to return to the measurement mode. -
Page 36: Limit Function
8 Limit Function The limit function judges a weight based on limit values that you have stored on the balance. The limit judgment result will be indicated by the position where the triangle [ ] is lit. When one or two points are set, the resulting display will be either HI (high), OK (proper), or LO (low). -
Page 37: Judge By Absolute Values
Judge by Absolute Values 8.4.1 Set two limit values by putting actual samples on the balance 1 Start the limit function. Press the Set key for a few seconds. When the display indicates [L. SEt], release the key. The current lower limit is displayed next to [LO Continuous press 2 Put the lower limit sample on the balance. - Page 38 8.4.2 Set two limit values by entering values 1 Start the limit function. Press the Set key until the display indicates [L. SEt]. The current lower limit is displayed next to [LO Continuous press 2 Switch to the value input screen. Press the Zero/Tare key.
-
Page 39: Judge By Deviation Values
Judge by Deviation Values 8.5.1 Set two limit values by putting actual samples on the balance 1 Start the limit function. Press the Set key for a few seconds. When [r.SEt] is displayed, release the key. The current reference weight blinks in the display. Key released Continuous press... - Page 40 8.5.2 Set two limit values by entering values 1 Start the limit function. Press the Set key for a few seconds. When [r.SEt] is displayed, release the key. The current reference weight blinks in the display. Continuous press 2 Switch to the value input screen. Press the Zero/Tare key.
- Page 41 Caution: The initial limit values are all zero. You can set separate limit values for the weighing machine, parts counting, and percentage weighing functions. However, absolute values and deviation values are saved in the same storage area. So if you switch between absolute values and deviation values, limit values are deleted.
-
Page 42: Bar Graph For The 2-Point Scale
Bar Graph for the 2-point Scale You can set two points for the limit function, and display a bar graph to indicate the result in a range specified by the two points. Except for the gravimeter function, all other functions, i.e., weighing machine, parts counting, and percentage weighing functions can support this function. -
Page 43: Calibration And Span Test For The Balance
9 Calibration and Span Test for the Balance An electronic balance, which is influenced by the acceleration of gravity, indicates different values depending on the location it is used. For this reason, you should calibrate your balance every time you relocate it. You should also calibrate it after a long time of no use or when it does not indicate correct values. -
Page 44: Span Test With Built-In Weight
The Span test will be performed to find an error of measure without making Span adjustment. Please use it to investigate the error of measure. Span Test with Built-in Weight * Only supported by the LN RCE series 1 Set Function1. Set Function1 with nothing put on the pan. -
Page 45: Calibration Of Built-In Weight
Calibration of Built-in Weight * This is a function to calibrate the built-in weight with an external weight. This function is available for LN RCE series, and only when the balance is not sealed, except the case of LN623CE or LN6202CE where it is available even when the balance is sealed. -
Page 46: Date And Time Setup
10 Date and Time Setup 10.1 Time Setup The time is displayed with a clock [ ] symbol. Set the time in Hour-Minute-Second format on a 24- hour basis. 1 Display the time. Press the Function key for a few seconds. When the display is changed from [Func] to [d-SEt], release the key. -
Page 47: Various Functions
11 Various Functions 11.1 Auto Sleep Function This is a function to turn off the display when the balance is left to stand in measurement mode for about 3 minutes. This function can only be used when the balance is operated on the AC adapter. To use the auto sleep function, enable it in Function1 [A. -
Page 48: Date Display
11.4 Date Display This is a function to set the date format to be displayed in the balance or output to a printer. Set date format in Function1 appropriately as shown below: 1 Output in Year-Month-Day format. 2 Output in Month-Day-Year format. Date Display F. -
Page 49: Interval Output Function
11.7 Interval Output Function This is a function to output data at regular intervals. You can also output data with the current time. Set an interval in Hour-Minute-Second format. To use the interval output function, enable it in Function1 to [61. o.c. A] or [61. o.c. b]. 11.7.1 Set interval output 1 Call the interval function. -
Page 50: Input Of Id No
11.8 Input of ID No. An ID number is used when data is printed in compliance with ISO/GLP/GMP. Set an ID number when you print data. When an ID number is displayed, two triangles, [ ] and [ ] are displayed in the upper left part of the display. -
Page 51: Entry Of Weight Error
11.9 Entry of Weight Error *These functions are not available when the balance is sealed,except the case of LN623CE or LN6202CE where they are available even when the balance Is sealed. By entering the weight error of an external reference weight to be used in span adjustment or span test, a more accurate calibration can be performed. -
Page 52: Input/Output Functions
12 Input/Output Functions 12.1 RS232C Output 12.1.1 Connector pin numbers and functions Signal Pin No. Input/Output Function & Remarks Name Input Receiving data Output Transmitting data HIGH Output (When the balance is powered ON) Signal ground 1 2 3 4 5 6 ... - Page 53 12.1.2 Connecting between the balance and a PC Sample connection with an IBM-PC/AT compatible machine Balance IBM-PC/AT compatible machine D-SUB9P D-SUB9P Sample wire connection with PC9801 Balance PC9801 D-SUB25P D-SUB9P...
- Page 54 12.1.3 Interface specifications (1) Transmission system Serial transmission, Start-stop synchronization (2) Transmission rate 1200/2400/4800/9600/19200 bps (3) Transmission codes ASCII codes (8/7 bits) (4) Signal level Compliant with EIA RS-232C. HIGH level (data logic 0) +5 to +15 V Low level (data logic 1) -5 to -15 V (5) Bit configuration Start bit 1 bit...
-
Page 55: Output To Peripherals
12.2 Output to Peripherals Our standard peripheral units can be connected to the balance. *1 These peripheral units include: CSP-160 12.2.1 Connector pin numbers and functions Signal Pin No. Input/Output Function & Remarks Name Tare setting from an EXT.TARE Input external device *2 Output Transmitting data... -
Page 56: Type Of Communication Texts
12.3 Type of Communication Texts This interface function uses the following three types of communication texts: (1) Output data Data, such as weight values, that is output from the balance to an external unit (2) Input commands Commands to control the balance from an external unit (3) Response Response that is output from the balance to an input command Caution:... - Page 57 (4) Format with 6-digit value with auxiliary scale interval that is compatible with type approval This format is composed of 15 characters, including the terminators (CR=0DH, LF=0AH). A slash “/” is inserted before the auxiliary scale interval. While the format with 6-digit value is selected, the auxiliary scale is output in this format. (5) Format with 7-digit value with auxiliary scale interval that is compatible with type approval This format is composed of 16 characters, including the terminators (CR=0DH, LF=0AH).
- Page 58 12.4.3 Numeric data 6-digit numeric format: (D1-D7: 7 characters) 7-digit numeric format: (D1-D8: 8 characters) D1 to D7(D8) Code Description 0 – 9 30H to 39H Digits 0 – 9 Decimal point (floating) Omitted when numeric data does not contain decimal places.
- Page 59 12.4.6 Status (S2:1 character) Code Description Data stable * Data unstable * Data error (Indicates that data other than S2 is invalid.) ([o-Err], [u-Err]) (SP) No status specified * Data that is independent of whether the weighing condition is stable or not, such as cumulative values and unit weights, is independent of whether S2 is S or U when it is output.
-
Page 60: Input Commands
12.5 Input Commands The following 7 input commands are supported: (1) Tare range command (2) Set output control command (3) Set measurement mode command (4) Request date output command (5) Request time output command (6) Set interval command (7) Span adjustment/test command 12.5.1 Procedure for transmission (1) An input command is sent from an external device. - Page 61 12.5.2 Response You can select the response format of either the A00/Exx format or the ACK/NAK format in Function (1) A00/Exx format Consists of 5 characters including terminators (CR, LF). Response types Code Meaning Successful completion * Command error (when an errant command is received) (Errors other than E01) * Numeric format error...
- Page 62 12.5.3 Command format (1) Tare range (zero-setting) command Code Description Value Response A00: Successful completion E01: Command error • Set Tare E04: A tare range cannot be Range set or the zero-point (SP) None • cannot be adjusted Adjust the (because of a range zero-point violation or a weight...
- Page 63 12.5.4 Set measurement mode command Command Main Body Description Value Response Code character character A00: Successful Set to Mode 1 completion Set to Mode 2 None E01: Command Set to Mode 3 error Set to Mode 4 E02: (error) The measurement mode to be activated by the above mode settings 1 to 4 depends on the weighing mode currently in use.
- Page 64 You can select whether you want to output data in English or in Japanese (katakana) in the Printed Language [E3. P.F.] Function setting. Date format depends on the setting of Date Display in Function1 [F. dA.tE]. 12.5.6 Setting intervals Command Main Body Description Value Response...
- Page 65 12.5.8 Setting limit values Command Main Body Description Value Response first second ASCII code character character First setting point/lower limit A00: Successful Second setting completion Limit point/upper limit values E01:Command error Reference value E02:Set value error Third setting point Forth setting point Caution 1.
-
Page 66: Special Format Output
12.6 Special Format Output 12.6.1 Special format 1 This output format is applied when [7. I.F. 41] is selected in Function1 Measurement data (including decimal point) Unit Terminator P1 (One character): Set value error Polarity plus/zero: [+] (2BH), Minus: [-] (2DH) SP (One character): Space [ ] (20H) D1-D8 (Eight character): Measurement data,... - Page 67 12.6.2 Special format 2 This output format is applied when [7. I.F. 42] is selected in Function1. Unit Stability Measurement data (including polarity and decimal Termi- (One to three information point) nator characters) S1-S3 (three character): Stable: [S S] (53H) (20H) (53H), Unstable: [S D]: (53H) (20H) (44H) SP (One character): Space [ ](20H)...
-
Page 68: Use Printers
13 Use Printers 13.1 Setting up the Printer (1) Use CSP-160 with the balance. (2) Set proper print functions (print control) with the balance referring to the instruction manual for your printer. The factory default of our printer is manual printing (printer control). (3) Make the baud rate and other settings compatible between the balance and the printer. -
Page 69: Output In Compliance With Iso/Glp/Gmp
14 Output in Compliance with ISO/GLP/GMP When a span adjustment or span test is successfully completed, the balance presents the results according to the following format. If span adjustment or a span test is not completed successfully, no data will be printed. The "X" entries in the following tables will vary with the model or the weight used. - Page 70 (3) Span test with the built-in weight Japanese (Katakana) English テ ス ト ヒ ツ " ケ シ " コ ク カ タ シ キ セ イ ハ " ン テ ス ト ナ イ フ " フ ン ト "...
- Page 71 (5) Calibration of the built-in weight Japanese (Katakana) English ナ イ フ " フ ン ト " ウ コ ウ セ イ ヒ ツ " ケ シ " コ ク カ タ シ キ セ イ ハ " ン キ シ "...
-
Page 72: Operate On Batteries
15 Operate on Batteries This function can only be used with a balance equipped with optional batteries. The battery option is unavailable for LN RCE series units. 15.1 Specifications • Built-in batteries • Charge time: About 15 hours • Operation time: About 6 hours of continuous operation •... -
Page 73: Troubleshooting
16 Troubleshooting * Parentheses contain a page to refer to. Symptom Cause Measures to Take • No display → Ensure that the AC adapter The AC adapter is not connected. is connected. • The batteries are exhausted. → Recharge the batteries (page 70). -
Page 74: Specifications
17 Specifications 17.1 Basic Specifications Model 223CE 323CE 423CE 623CE 1202CE 2202CE 3202CE 223RCE 323RCE 423RCE 623RCE 1202RCE 2202RCE 3202RCE Item Weighing capacity [g] 1200 2200 3200 0.02 0.02 0.02 Minimum capacity [g] Verification scale 0.01 0.01 0.01 0.01 interval [g] Auxiliary scale interval [g] 0.001 0.001... - Page 75 17.2 Common Specifications ( 1) Weighing system Tuning fork system ・・・・・・・・・・・・・・・・・ (2) Tare range ・・・・・・・・・・・・・・・・・・・・・・ Full capacity (3) Fluorescent display ・・・・・・・・・・・・・・・ The FIP segment can display up to 8 digits. The segment is 12.5 mm high, and displays 8 digits for a weight.
- Page 76 17.3 Minimum Display by Unit of Measurement Model 223CE 323CE 423CE 623CE 1202CE 2202CE 3202CE Unit_of 223RCE 323RCE 423RCE 623RCE 1202RCE 2202RCE 3202RCE measuremant 1200 2200 3200 0.01 0.01 0.01 0.01 0.001 0.001 0.001 0.001 0.01 0.01 0.01 0.22 0.32 0.42 0.62 0.00001...
Need help?
Do you have a question about the LN 223CE and is the answer not in the manual?
Questions and answers