Table of Contents
Advertisement
Quick Links
Advertisement
Table of Contents

Related Manuals for NETGEAR LG6100D


Summary of Contents for NETGEAR LG6100D
- Page 1 ® NETGEAR LTE Gateway LG6100D User Guide [UG template version 13a]...
-
Page 2: Table Of Contents
Table of Contents Get Started ............................ 1 Package Contents ......................... 1 Your Gateway ........................1 Care and Maintenance ......................2 System Requirements ......................2 Set Up Your Gateway ......................2 Attach the Antennas ....................... 2 Place Your Gateway ....................... 3 Start Your Gateway for the First Time ................ - Page 3 Set up a Guest Wi-Fi Network ..................... 18 Turn the Guest Wi-Fi Network On ................18 Turn the Guest Wi-Fi Network Off ................19 Share Your Wi-Fi Network ....................19 Manually Enter the Wi-Fi Information ................19 Connect Through WPS ....................19 Devices Page........................
- Page 4 General > MAC Address Cloning ................. 53 General > Remote Management .................. 54 Network > Setup ......................55 Network > Access Point Name ..................57 Network > SIM Security ....................58 Network > Status Details ....................59 Network > Broadband Settings (Dual WAN) ..............62 Router >...
- Page 5 Enable Port Filtering for an Application ................ 86 Disable Port Filtering for an Application ............... 86 Login Settings ........................87 Change the Gateway URL ................... 87 Change the admin Password ..................87 Mobile Network Settings ......................89 View Network Activation Information ................... 89 View Data Usage .........................
- Page 6 Specify the Site-to-Site VPN Connection ..............108 Enable the Site-to-Site VPN ..................109 Frequently Asked Questions ..................... 111 How Can I Tell I’m Connected to 3G or LTE? ..............111 How Do I Connect to Wi-Fi? ....................111 Is Roaming on LTE Supported? ..................111 What Do I Do if I Forget the Main or Guest Wi-Fi Password? ...........
- Page 7 Cannot Connect to Wi-Fi ....................121 Cannot Display the Home Page ..................122 Cannot Connect to the Mobile Broadband Network ............123 GPS Doesn’t Seem to Be Available ................... 124 Cannot Check for Updates ....................124 Technical Specifications ......................125 Radio Frequency and Electrical Specifications ..............
- Page 8 Index ............................170...
-
Page 9: Get Started
The following topics give you all the information you need to set up your gateway and Sprint service the first time. Package Contents Your package includes several items. ● NETGEAR 4G LTE Gateway 6100D ● Power adapter ● Micro-SIM (pre-installed) ●... -
Page 10: Care And Maintenance
Do not apply adhesive labels to your device. They may cause your device to overheat and may alter the antenna’s performance. System Requirements The following items are required to use your NETGEAR 4G LTE Gateway 6100D. ● One or more computers that support Wi-Fi (802.11b/g/n or 11ac) ●... -
Page 11: Place Your Gateway
2. Adjust the antennas so that they are vertical. Place Your Gateway Place your gateway in a location with a good 3G or LTE signal. 1. Place your gateway in a location with good 3G or 4G coverage, such as near a window. Note: When the gateway is powered on, you can use the Signal Quality LED position the gateway in the location with the best signal strength. -
Page 12: Start Your Gateway For The First Time
So it is accessible to an AC power outlet and near Ethernet cables for wired computers. In an elevated location such as a high shelf, keeping the number of walls and ceilings between the gateway and your other devices to a minimum. ... - Page 13 To find and select a Wi-Fi network, then connect with Wi-Fi: 1. Do one of the following, depending on your operating system. Windows 7: Right-click the Wi-Fi icon in the system tray. Windows Vista: Click Control Panel > Network and Internet > Network and Sharing Center >...
-
Page 14: Get Help
The Ethernet LAN LED on the gateway lights. Your computer connects to the gateway’s local area network (LAN). A message might display on your computer screen to notify you that an Ethernet cable is connected. Get Help Learn where you can get more information or assistance. Visiting the Sprint Website Sign on to sprint.com... -
Page 15: Gateway Basics
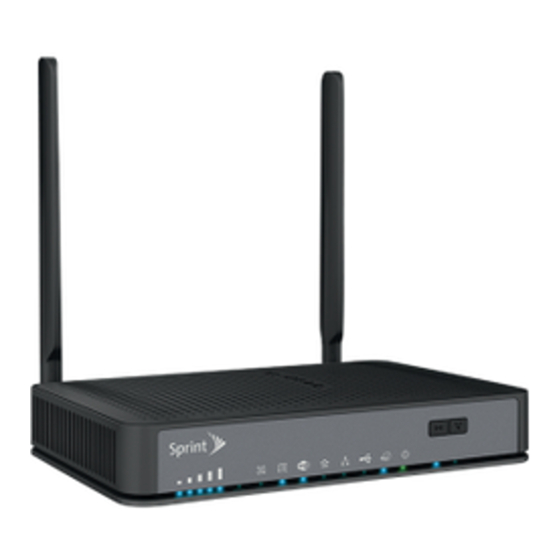
Gateway Basics Learn about the buttons, connectors, and other components of your gateway. Your gateway provides a simple way to use your Internet connection (3G or LTE) with any Wi-Fi-enabled device, and to share your Internet connection with friends and family. Components of Your Gateway Your gateway consists of several main components. -
Page 16: 3G And Lte Networks
● Main Wi-Fi dual-band: The gateway has two Main Wi-Fi networks, so you can connect with 2.4 GHz or 5 GHz Wi-Fi. To connect with 5 GHz, your computer or Wi-Fi-enabled device must support 5 GHz. ● Modem: The modem connects your gateway to the Internet via the best available network (customizable): LTE –... -
Page 17: Leds
To turn your gateway on: 1. Make sure that power adapter for your gateway is plugged in to an electrical outlet. 2. Press the Power On/Off button so that it is in the on position. Note: The LEDs on the gateway light unless you logged in to the gateway and turned off the LEDs from the Device page. -
Page 18: Micro-Sim
Off: No USB device is connected. Solid blue: The Internet connection is ready. Internet Solid amber: Network error. Slow blinking amber: The gateway failed to cut over from an Internet WAN connection to a mobile broadband connection. Off: No Internet connection. Solid green: The gateway is ready. -
Page 19: Web Browser Interface
Web Browser Interface When you connect to the gateway network (either with Wi-Fi or with an Ethernet cable), you can use a Web browser to log in to your gateway to view or change its settings. Log In to Your Gateway Tip: If you want to change your gateway’s Wi-Fi settings, use a wired Ethernet connection to avoid being disconnected when the new Wi-Fi settings take effect. - Page 20 Item Description Click to view the Home Page. Home Click to view the Devices Page. Devices Click to view the Wi-Fi Page. Wi-Fi Click to view the Page. Click to view the Settings Page. Settings Mobile broadband connection information – See Mobile Broadband Connection Information and...
-
Page 21: Alerts
Click to view the AirCard Facebook page in a new browser window or tab. Facebook (Your device must be connected to the network for this option to work.) Click to send NETGEAR your comments on your gateway. See Feedback Feedback Page. -
Page 22: Activate Your Account From The Home Page
● Mobile Broadband disconnected ● Wi-Fi is off ● Gateway is not activated ● SIM errors ● Roam Guard Activate Your Account from the Home Page Until your account is activated, you cannot use Sprint data services. To activate your account: 1. -
Page 23: My Account Summary
The Data Usage section displays monthly billing period statistics and current session statistics. Item Description Current billing cycle The amount of data sent and received during the billing period for each Usage of This network type. Month Reset button Click to set the displayed monthly usage values to 0MB. This does not reset the actual data usage for the billing cycle. - Page 24 The following information is displayed. Item Description The more bars, the stronger the signal. A triangle in the icon means your Signal device is roaming. See Signal Information for details. strength and roaming status Name of the available network. For example, “Sprint”. Network carrier name LTE or 3G...
- Page 25 GHz network. Connected Wi-Fi 5 GHz: A list of devices currently connected to the Main Wi-Fi 5 GHz network Guest Wi-Fi: A list of devices currently connected to the Guest Wi-Fi network. You can click any of the device names to view their details, or to block them from using your network.
-
Page 26: Your Network Connections
Your Network Connections Find out how to launch, share, and end your Internet network connection. Launch Your Mobile Network Connection After your gateway powers on and boots up, a connection to the best available network is launched automatically. Your gateway remains connected at all times, unless: ●... -
Page 27: Turn The Guest Wi-Fi Network Off
Turn the Guest Wi-Fi Network Off You can turn off the Guest Wi-Fi network on the gateway’s Wi-Fi page. To turn the guest Wi-Fi network off: 9. On a computer or wireless device that is connected to your gateway, launch a Web browser. -
Page 28: Devices Page
● The Wi-Fi radio is off because someone pressed the Wi-Fi On/Off button on the gateway. ● The Wi-Fi security option is WPA Personal, WEP, or WEP-related (for example, “WEP 64 Bit Open”). (WPS is available if the Wi-Fi security option is WPA/WPA2 Personal.) (See Wi-Fi Security.) -
Page 29: Wi-Fi Connect Page
4. Click Devices. The following information is displayed. Item Description A list of devices currently connected to the Main Wi-Fi network in the 2.4 GHz Main Wi-Fi band. (2.4 GHz) A list of devices currently connected to the Main Wi-Fi network in the 5 GHz Main Wi-Fi band. - Page 30 4. Click Wi-Fi. You can configure access to your Main and Guest Wi-Fi networks. You can: ● Edit the Main or Guest Wi-Fi names and passwords. See Change Wi-Fi Network Names Passwords. ● Turn the Guest Wi-Fi network on or off. See Setting up a Guest Wi-Fi Network.
-
Page 31: Wi-Fi Options Page
Guest Wi-Fi Click this button to turn the Guest Wi-Fi network on or off. Turn Off / Note: The rest of the Guest Wi-Fi fields / buttons appear only when the Turn On Guest Wi-Fi network is on. This is the name that identifies your Guest Wi-Fi network and is visible to Name other Wi-Fi-enabled devices. - Page 32 4. Click Wi-Fi > Options. You can: ● Edit the Main or Guest Wi-Fi names and passwords. See Change Wi-Fi Network Names Passwords. Your Network Connections...
- Page 33 ● Configure your Wi-Fi network’s connection parameters and security, and additional Wi-Fi options. ● Specify the maximum number of devices that can connect to the WiFi network. Note: For some of these Wi-Fi settings, if you change them, all connected devices will be disconnected and have to reconnect after the settings are saved.
-
Page 34: Mac Filter
This setting specifies the largest allowable size, in bytes, for a packet. If the Fragmentation packet is larger than this, it is fragmented into multiple packet before it is Threshold transmitted. To prevent poor network performance, it’s recommended to keep this value as large as possible (up to 2346). Security If broadcast is enabled (Yes), the wireless network is displayed in the list of Broadcast... -
Page 35: Wi-Fi Security
8. Click Wi-Fi > MAC Filter. You can: ● Turn MAC filtering off (“None”) or on (“Block List” or “White List”). ● Add or remove a device from the list. (See “Specifying Computers That Can Access the Network” and “Specifying Computers That Are Not Allowed to Access the Network”... - Page 36 Note: All devices used with the gateway must support the selected security type. Note: WPS is available only if you select either a WPA2 Personal option (including WPA/WPA2 Personal) or no security (not recommended). (See Connecting Through WPS.) Note: WEP is available only for the guest network. You can change the security used for Wi-Fi: 1.
-
Page 37: Change Wi-Fi Network Names And Passwords
two years old): Wi-Fi devices that use either WPA or WPA2 can connect to the NETGEAR 6100D. Supported by most Wi-Fi devices. 6. Click Submit. The option you select determines the Wi-Fi security used and also the maximum length of the Wi-Fi password. -
Page 38: Enable Or Disable The Block List
Also, the password length depends on the Wi-Fi encryption type that you’ve selected. (See Wi-Fi Security.) ● None – No password is required. ● WEP 64 bit – Open: The password must be 5 ASCII characters. ● WEP 64 bit – Shared: The password must be 5 ASCII characters. ●... -
Page 39: Display And Block Currently Connected Devices (Block List)
2. In the address or URL field of your browser, type http://myrouter. 3. When prompted to log in, enter admin for the user name and type the password. (The default password is password.) 4. Click Wi-Fi > MAC Filter. 5. Beside MAC Filter Mode, select Black List to block devices, or select White List to prevent devices from being blocked. -
Page 40: Allow Or Deny Computers Access To The Network (Mac Filter)
To allow any of these devices to connect to the network again, you can remove them from your device’s block list. To view and unblock devices on the block list: 1. On a computer or wireless device that is connected to your gateway, launch a Web browser. - Page 41 4. In the empty Name field, enter a name for the device. For example, “Amy’s PC”. 5. In the empty MAC Address field, enter the MAC address of the device you’re adding to the list. (If you don’t know this address, see Finding the MAC Address.) Click the...
-
Page 42: Wi-Fi Channel
Removing a Device From the Allowed or Disallowed Lists 1. On a computer or wireless device that is connected to your gateway, launch a Web browser. 2. In the address or URL field of your browser, type http://myrouter. 3. When prompted to log in, enter admin for the user name and type the password. (The default password is password.) 4. -
Page 43: Set The Maximum Number Of Wi-Fi Devices
Set the Maximum Number of Wi-Fi Devices You can enter the maximum number of Wi-Fi devices that are allowed to connect to the gateway at the same time. If your network is having performance issues, you might want to allow fewer Wi-Fi devices to connect to your gateway at the same time, or change the maximum number of devices that can connect to either the Main Wi-Fi or Guest Wi-Fi networks at the same time. -
Page 44: Set Up The Wds Base Station
● Wireless base station. The router acts as the parent access point that bridges traffic to and from the child repeater access point. The base station also handles wireless and wired local computers. To configure this mode, you must know the MAC addresses of the child repeater access point. -
Page 45: Set Up A Wds Repeater
4. Click Settings > Wireless Repeating Function. 5. Select the Enable Wireless Repeating Function check box. 6. Select the Wireless Base Station radio button. 7. To prevent wireless clients from associating with the base station and allow LAN client associations only, select the Disable Wireless Client Association check box. Note: You can leave the check box cleared if you prefer wireless clients to be able to associate with the base stations. -
Page 46: Gps Page
Use a wired Ethernet connection to set up the repeater unit to avoid conflicts with the wireless connection to the base station. If you are using the router as the base station with a different brand of router or gateway as the repeater, you might need to change more configuration settings. - Page 47 Your gateway provides GPS functionality to help you figure out where you are and get you where you’re going. There are a couple of requirements to access the GPS service. ● You must accept the GPS privacy agreement. ● GPS must be enabled. The GPS service may not be available if you are indoors.
- Page 48 ● Update the current location information (if GPS Mode is One-time) Note: The first time that you access GPS, you will be prompted to read and accept the Location-Based Services (LBS) end user license agreement. You must accept the agreement before you can use the GPS feature.
-
Page 49: Enable Or Disable Gps
● One-time – A single fix is used. Use this option if you’ll be using your device at the same location. ● Continuous – Fixes are obtained every few seconds (also known as auto-tracking). This is useful for turn-by-turn (TBT) navigation applications, such as driving directions, and for NMEA-enabled applications. -
Page 50: Use Metric Units For Gps
3. When prompted to log in, enter admin for the user name and type the password. (The default password is password.) 4. Click GPS. 5. In the GPS Settings section beside GPS Mode, select the desired mode (One-time or Continuous). 6. - Page 51 If you want to use a DDNS service, you must register for it. The Dynamic DNS client service provider will give you a password or key. Note: The gateway supports only basic DDNS, and the login and password might not be secure.
-
Page 52: File Sharing For Usb Drives
File Sharing for USB Drives You can connect a USB drive to the gateway’s USB port and share it with others on your network. You can specify how you want file sharing to be managed for files on a USB device attached to the gateway USB port. - Page 53 5. Click Settings > File Sharing. 6. To allow file sharing, select Enable in the File Server field. When this feature is enabled, all of the files on the USB drive are available as Windows Shared Files to other devices on the local area network (LAN). Shared files are not available to clients on the Internet outside of the local network.
- Page 54 9. To add a user, click the Add button and type the user name and password. 10. To edit a user’s credentials or password, click the user name. File Sharing for USB Drives...
-
Page 55: Gateway Settings
Gateway Settings Manage the gateway settings. Settings From the Settings page, you can configure your device, network, and router settings. General From the General page, you can configure your device’s LED status indicators, the gateway’s (web browser) URL and administrator password. 1. -
Page 56: General > Software And Reset
4. Click Settings > General. The following information is displayed. Item Description Router LED Indicates whether the LEDs are used (On) or not (Off). See Turning the Router LED LED On or Off. Homepage The URL used to show the homepage. See Changing the Gateway’s (Web UI name) URL. - Page 57 1. On a computer or wireless device that is connected to your gateway, launch a Web browser. 2. In the address or URL field of your browser, type http://myrouter. 3. When prompted to log in, enter admin for the user name and type the password. (The default password is password.) 4.
-
Page 58: General > System Logs
The following information is displayed. Item Description Click Save to make a copy (export) of the gateway’s current Download / configuration, so that you can restore it later if needed. See Exporting Backup Settings. Click Choose file to use a previously saved copy of your device Restore Settings configuration. -
Page 59: General > Date & Time Settings
4. Click Settings > General > System Logs. You can: ● Stop Capturing Logs ● Save as a File ● Clear logs General > Date & Time Settings Configure the date and time settings. Gateway Settings... - Page 60 To specify the date and time settings: 1. On a computer or wireless device that is connected to your gateway, launch a Web browser. 2. In the address or URL field of your browser, type http://myrouter. 3. When prompted to log in, enter admin for the user name and type the password. (The default password is password.) 4.
-
Page 61: General > Mac Address Cloning
■ This check box enables or disables the NTP server. You can edit the first NTP server entry and you can add, remove, or edit a second NTP server. 9. Click Submit. Your changes are saved. General > MAC Address Cloning Your computer's local address is its unique address on your network. -
Page 62: General > Remote Management
General > Remote Management The remote management feature lets you access your gateway over the Internet to view or change its settings. You need to know the gateway’s WAN IP address to use this feature. Tip: Be sure to change the password for admin to a secure password. The ideal password contains no dictionary words from any language and contains uppercase and lowercase letters, numbers, and symbols. -
Page 63: Network > Setup
6. In the Allow Remote Access By section, specify the external IP addresses to be allowed to access the gateway’s remote management: 7. For enhanced security, restrict access to as few external IP addresses as practical 8. Select one of the following: ... - Page 64 4. Click Settings > Network. You can: ● Configure network selection and roaming options. ● Check the network for a new Preferred Roaming List. The following information is displayed. Item Description The type of network that your device can connect to. See Setting the Network Mode Allowed Network...
-
Page 65: Network > Access Point Name
If selected, the roaming areas where a warning will appear when you Roaming Guard enter them. See Enabling / Disabling the Roaming Guard Warning Message. Click to check if a new PRL (Preferred Roaming List) is available on the Update PRL network, and use it to update your device. -
Page 66: Network > Sim Security
4. Click Settings > Network > APN. To add (or modify) an APN, see Configuring Access Point Names. The list of all APNs that have been set up includes the following information. Item Description The access point currently in use. Only one access point can be marked Active as active. -
Page 67: Network > Status Details
Note: The SIM PIN is required to disable SIM Security. To disable SIM security: 1. On a computer or wireless device that is connected to your gateway, launch a Web browser. 2. In the address or URL field of your browser, type http://myrouter. 3. - Page 68 4. Click Settings > Network > Status Details. The information that is displayed depends on your current connection. 4G/LTE Details Item Description Indicates whether you are connected to an LTE network. Connected Status Indicates the LTE service type. Service type The signal strength of the LTE network.
- Page 69 Serving Cell The transmitter power. A higher number is better. TX Power The IP address of the 4G LTE connection. IP Address The channel that is used to upload to the 4G LTE network. Channel UL The channel that is used to download from the 4G LTE network. Channel DL The International Mobile Station Identity is an identifier of a device on IMSI...
-
Page 70: Network > Broadband Settings (Dual Wan)
DRC Channel number. Channel Indicates if you are roaming on Sprint, domestically, or internationally. Roaming Preferred Roaming List version. To update the PRL, see Network Page. PRL Version Technical support staff may request this value from you. 1xRTT PN Technical support staff may request this value from you. EVDO PN Technical support staff may request this value from you. -
Page 71: Router > Basic
3. When prompted to log in, enter admin for the user name and type the password. (The default password is password.) 4. Click Settings > Network > Broadband Settings. Available options are: ● Used Fixedline Connection first if fails use Mobile Broadband Connection. ●... - Page 72 4. Click Settings > Router > Basic. 5. You can make changes to any of these fields. When you finish, click Submit. The following information is displayed. Item Description UPnP Current state of the Universal Plug and Play feature (On or Off). (See UPnP UPnP (Universal Plug and Play).)
-
Page 73: Router > Port Forwarding
The routing hardware’s IP address on the LAN. IP Address The routing hardware’s internal LAN subnet mask. Netmask This field enables (On) or disables (Off) DHCP. See DHCP. DHCP Server This specifies the starting and ending address of the range of IP DHCP IP Range addresses available for your device to dynamically (that is, not permanently) assign to computers connected to it. - Page 74 1. On a computer or wireless device that is connected to your gateway, launch a Web browser. 2. In the address or URL field of your browser, type http://myrouter. 3. When prompted to log in, enter admin for the user name and type the password. (The default password is password.) 4.
-
Page 75: Router > Port Filtering
Note: Port forwarding does not apply to normal browsing, file downloading, running most online games or other applications hosted on the Internet. (Some online games require port forwarding.) The following information is displayed. Item Description Indicates whether port forwarding is on (Enable) or off (Disable). Port Forwarding List of forwarded ports: This list appears only if port forwarding is on. -
Page 76: Router > Address Reservation
● Enable port filtering. (See Port Filtering Panel: Enable Port Filtering.) ● Add an application to a port filtering list. (See Port Filtering Panel: Enable Port Filtering for an Application.) ● Remove an application from the port filtering list. (See Port Filtering Panel: Disable Port Filtering for an Application.) - Page 77 4. Click Settings > Router > Address Reservation. 5. Click the Add button. 6. Select the radio button of the computer in the Reservation Table. 7. If the computer is not on the Address Reservation Table, enter the IP address, MAC address, and device name of the computer you want to add.
-
Page 78: Firewall Rules
3. When prompted to log in, enter admin for the user name and type the password. (The default password is password.) 4. Click Settings > Router > ALG. 5. Select the check boxes for the ALG services that you want. 6. - Page 79 To specify the firewall security level: All security levels, except “None,” protect against known Internet attacks and attempts at remote access to your modem. 1. On a computer or wireless device that is connected to your gateway, launch a Web browser.
-
Page 80: Support
default, just like High level security. Medium security, however, allows customization through NAT configuration so certain traffic can pass The low security setting will allow all traffic except for known attacks. With low, your modem is visible by other computers on the Internet Custom is an advanced configuration option that allows you to edit the Custom firewall configuration directly. -
Page 81: About
(You must be connected to the Internet to use this link.) Contact Sprint Customer Service by telephone (for business use or Manage Account personal use). Send NETGEAR your comments on your device. See Feedback Page. Voice Your Feedback About View information about your device and account. - Page 82 3. When prompted to log in, enter admin for the user name and type the password. (The default password is password.) 4. Click the About link in the top right corner. You can: ● Save the image on this page to a file on your computer. Click Save as a file. The following information is displayed.
-
Page 83: Feedback
Wi-Fi Details The Main Wi-Fi network name. (See also Change Wi-Fi Network Names Wi-Fi Name Passwords.) The MAC address of the LTE module. Each wireless device has a Wi-Fi MAC unique MAC address (assigned by its manufacturer). Address The security standard used for the Wi-Fi network. (See Wi-Fi Security.) Wi-Fi Security... -
Page 84: Ethernet Wan Settings
User Guide Read frequently asked questions and answers. FAQs Survey Participate in a NETGEAR customer survey. Customer Feedback Survey Ethernet WAN Settings Your gateway has an Ethernet WAN port on the rear panel. You can use an Ethernet cable to connect the gateway to Internet service. -
Page 85: Specify Wan Settings
2. Connect your modem. 3. Plug in, then turn on your modem. (Replace the batteries if you removed them.) 4. Use an Ethernet cable to connect your modem to the Ethernet WAN port of your gateway. 5. Connect the power adapter to the gateway, and plug the power adapter into an outlet. 6. -
Page 86: Mtu Size
4. Click Settings > General > WAN Setup. 5. Specify the following settings: ● Disable Port Scan and DoS Protection. DoS protection protects your LAN against denial of service attacks such as Syn flood, Smurf Attack, Ping of Death, Teardrop Attack, UDP Flood, ARP Attack, Spoofing ICMP, Null Scan, and many others. - Page 87 MTU Size Application The largest Ethernet packet size. This setting is typical for connections that 1500 do not use PPPoE or VPN, and is the default value for NETGEAR gateways, adapters, and switches Used in PPPoE environments 1492 Maximum size to use for pinging. (Larger packets are fragmented.) 1472 Used in some DHCP environments.
-
Page 88: Change The Mtu Size
Typical value to connect to dial-up ISPs. Change the MTU Size The default MTU size usually works, but you can change the MTU size. To change the MTU size: 1. On a computer or wireless device that is connected to your gateway, launch a Web browser. -
Page 89: Upnp (Universal Plug And Play)
UPnP (Universal Plug and Play) UPnP provides simple and robust connectivity among consumer electronics, intelligent appliances, and mobile devices from many different vendors. (For more information, see upnp.org.) Note: If UPnP is enabled, there are potential security risks. To enable UPnP: Before you can use UPnP, you must enable it. -
Page 90: Dns Mode
To enable DHCP: 1. On a computer or wireless device that is connected to your gateway, launch a Web browser. 2. In the address or URL field of your browser, type http://myrouter. 3. When prompted to log in, enter admin for the user name and type the password. (The default password is password.) 4. -
Page 91: Enable Port Forwarding
Auto: The DNS server specified by Sprint is used. Manual: The routing hardware assigns DHCP clients the DNS servers specified in the DNS 1 and DNS 2 fields. (These fields appear when Manual is selected.) Use this option to access a DNS server that provides customized addressing or if you have a local DNS server on your network. -
Page 92: Disable Port Forwarding For An Application
8. In the Protocol list, click the protocol(s) used for this application (TCP, UDP). 9. Click the to add this row to the list. 10. Click Submit. Disable Port Forwarding for an Application If you want to stop forwarding any ports, you can remove them from the forwarding list. Note: Port forwarding must currently be enabled. -
Page 93: Configure Dmz
1. On a computer or wireless device that is connected to your gateway, launch a Web browser. 2. In the address or URL field of your browser, type http://myrouter. 3. When prompted to log in, enter admin for the user name and type the password. (The default password is password.) 4. -
Page 94: Enable Port Filtering For An Application
Enable Port Filtering for an Application You can enable port filtering for certain application types. Note: Port Filtering must currently be enabled. (See Port Filtering Panel: Enabling Port Filtering.) 1. On a computer or wireless device that is connected to your gateway, launch a Web browser. -
Page 95: Login Settings
7. Click Submit. Login Settings You can customize the URL that you use to log in to the gateway and you can change the administrator password. Change the Gateway URL You may want to change the URL for the gateway to something more memorable. To change the URL: 1. - Page 96 5. In the Old Password field, type the old password. 6. In the New Password field, type the new password (1–31 letters, numbers, and symbols). 7. In the Confirm New Password field, type the new password again. 8. Select the Enable Password Recovery check box. 9.
-
Page 97: Mobile Network Settings
Mobile Network Settings View information about your mobile network activation, data usage, and settings. View Network Activation Information You can check whether network access is activated. 1. On a computer or wireless device that is connected to your gateway, launch a Web browser. -
Page 98: Network Settings
The Data Usage Billing Cycle section displays: ● Total amount of data used in the current billing cycle, and amounts used for each network type ● Number of days remaining in the current billing cycle. ● Date that the next billing cycle begins. ●... -
Page 99: Enable Or Disable The Roaming Guard Warning Message
Enable or Disable the Roaming Guard Warning Message Use this feature to have your device display a warning when you enter a roaming area. To enable or disable the roaming guard warning message: 1. On a computer or wireless device that is connected to your gateway, launch a Web browser. -
Page 100: Configure Access Point Names
6. Click Submit. Configure Access Point Names Your gateway comes preconfigured with the Access Point Name (APN) for Sprint. To add an APN for another network: 1. On a computer or wireless device that is connected to your gateway, launch a Web browser. -
Page 101: Software And Reset
Software and Reset Export and Import Settings You can save your gateway settings so that you can make changes to your configuration and, if necessary, restore the original settings. Export Settings Settings include configuration information for your gateway and its Wi-Fi networks. You can, for example, export (save) the current configuration, then make some changes and test them. -
Page 102: Update The Software And Firmware
7. Click Open to restore your device with the imported settings. Note: Your device may reset, and you may need to reconnect to Wi-Fi and the Internet. (See How Do I Connect to Wi-Fi? Launching Your Network Connection.) Update the Software and Firmware From time to time, updates may become available for your gateway, and your gateway will receive an alert. -
Page 103: Upgrade Firmware From A File
4. In the Alert message for the available update, click Install Now. 5. Follow the onscreen instructions. To get the update from the Software and Reset page: 1. On a computer or wireless device that is connected to your gateway, launch a Web browser. -
Page 104: Reset Device Settings Only
2. In the address or URL field of your browser, type http://myrouter. 3. When prompted to log in, enter admin for the user name and type the password. (The default password is password.) 4. Click Settings > General > Software and Reset. 5. - Page 105 You can reset your device to factory settings from the gateway’s Software and Reset page. Note: All connected devices will be disconnected and your device will reboot automatically. To reset the gateway to its factory settings: Note: You can only do a factory reset of your device with Sprint’s assistance. Contact Sprint Customer Service to obtain an SPC code that you will need to enter to perform the reset.
-
Page 106: Set Up A Virtual Private Network (Vpn)
Once connected, the remote users can access the LAN-side resources of the gateway. The gateway supports the following clients: NETGEAR ProSAFE VPN Client VPNG01L/VPNG05L Professional Software Version 5.14.003, available here: http://kb.netgear.com/app/answers/detail/a_id/20316 IPSecuritas VPN client Version 3.4 for MAC OS platforms from Lobotomo Software, ... - Page 107 To add VPN users: 1. On a computer or wireless device that is connected to your gateway, launch a Web browser. 2. In the address or URL field of your browser, type http://myrouter. 3. When prompted to log in, enter admin for the user name and type the password. (The default password is password.) 4.
-
Page 108: Specify The Client-To-Gateway Vpn Connection
To edit a VPN user: 1. Select the VPN user from the VPN Users list. 2. Click the Edit button. 3. Type the changes for the user name and password 4. Click the Save button. The changes are saved. To delete a VPN user: 1. - Page 109 4. Click Settings > General > VPN. 5. In the Remote Client to GW VPN Configuration section, click the Edit button next to the Pre-Shared Key field. 6. Type the pre-shared key. Note: The key is an alphanumeric string with a maximum length of 32 characters. 7.
-
Page 110: Enable The Client-To-Gateway Vpn
2. In the Remote Client to GW VPN Configuration section, click the Edit button next to the Pre-Shared Key field. 3. Enter the new value 4. Click the Save button. The new pre-shared key is saved. Enable the Client-to-Gateway VPN Enabling the VPN activates the remote client-to-gateway VPN server feature on the gateway. -
Page 111: Configure A Windows Computer As A Remote Client
Configure a Windows Computer as a Remote Client This example describes how to use NETGEAR ProSAFE VPN client software to set up a VPN client for the gateway. To use NETGEAR ProSAFE to set up a VPN client: Download the trial version of NETGEAR ProSAFE VPN client (VPNG01L/VPNG05L Professional Software Version 5.14.003) and install it on the Windows computer. - Page 112 • Authentication: Select SHA-1. • Key Group: Select DH2 (1024). 7. Click the Advanced tab. 8. Specify these settings in the Advanced screen: In the Advanced Features section, select the Mode Config check box and leave the other settings as shown. ...
-
Page 113: Configure A Mac Computer As A Remote Client
13. Click the Save button. 14. To initiate the VPN connection to the gateway, right-click the tunnel on the left pane and select Open Tunnel. When the connection is initiated, the icon on the Tunnel menu on the left pane turns green to indicate that the tunnel is established. - Page 114 4. In the Connections pane, click the + (plus) icon in the lower left corner. 5. Enter a connection name that is easy to understand. 6. Click the General tab. 7. Specify the following: In the Remote IPSec Device field, enter the WAN IP address of the gateway. ...
- Page 115 In the Remote Side section, enter the LAN-side IP subnet of the gateway with the subnet mask in CIDR format. The gateway and the client’s network must have different subnet ranges that do not overlap. 8. Click the Phase 1 tab. 9.
-
Page 116: Set Up A Site-To-Site Vpn
SIT_IDENTITY_ONLY Initial Contact Enable MODE_CFG Request Certificate Send Certificate Unique SAs IKE Fragmentation ● Leave NAT-T set to Disable and the Action after connection timeout set to Give up. 16. Close the Edit Connection window. The settings are saved. 17. -
Page 117: Enable The Site-To-Site Vpn
Note: This pre-shared key is unique to the site-to-site VPN configuration. If you set up a client-to-gateway VPN tunnel with this gateway, you must use a different pre-shared key for the site-to-site VPN. 4. In the Site-to-Site Configuration Details section, click the Add button. 5. - Page 118 5. Select the VPN Status Disable radio button. 6. Click the Apply button. The VPN connection is disabled, but your VPN settings are retained. Set up a Virtual Private Network (VPN)
-
Page 119: Frequently Asked Questions
Frequently Asked Questions Find out answers to questions you may have. How Can I Tell I’m Connected to 3G or LTE? When you log in to the gateway (http://myrouter), the network type icon (3G or LTE) appears in the Status section on the left side of the page, and the connection status is shown on the Network >... -
Page 120: What Do I Do If I Forget The Main Or Guest Wi-Fi Password
To change the roaming setting, see Setting the Roaming Mode. What Do I Do if I Forget the Main or Guest Wi-Fi Password? To see the Main Wi-Fi password and Guest Wi-Fi password 1. Look on the gateway’s label. 2. If you changed the Wi-Fi password and have forgotten what it is, use an Ethernet cable to connect a computer to one of the gateway’s yellow Ethernet LAN ports. -
Page 121: If The Connection Is "Always On," Am I Always Being Billed
1. Set GPS Mode to Continuous. (See Setting the GPS Mode.) 2. Determine the COM port number that your NETGEAR device (that is, your NETGEAR 6100D) is using. In the following example for Windows, the Device Manager shows that COM 16 is used. -
Page 122: Questions About Wps
In your case, the COM port number might be different. Note: If you don't know how to access the Device Manager, see http://kb.netgear.com/app/answers/detail/a_id/22868.) 3. Configure your GPS application to use the same COM port. For help, see the documentation of the GPS application. -
Page 123: Are Terminal Sessions Supported
Are Terminal Sessions Supported? Terminal sessions (for example, via telnet or ssh) are not supported. Frequently Asked Questions... -
Page 124: Tips
Tips This section provides information on getting the most out of your device and your network connection. Gateway Location Follow these guidelines in placing your device. ● Avoid moisture or extreme temperatures. ● For improved reception, place your gateway near a closed window. ●... -
Page 125: Improving 3G Network Service
Improving 3G Network Service To improve your network service, periodically check for PRL and profile updates. The PRL (Preferred Roaming List) is an account configuration item set by your service provider. It controls the radio channels and network carrier used by the 3G modem. To check for these updates: 1. -
Page 126: Security Tips
2. Double-click Network adapters. 3. Double-click the Wi-Fi client network adapter of your computer — for example, “Intel(R) WiFi Link 5100 AGN” in the screenshot below. 4. If the Wi-Fi client network adapter is by Intel, click Advanced and, in the Property list, click Power Management and move the slider all the way to the right (to Highest). -
Page 127: Finding The Ip Address
Tip: You can display a list of connected devices, including the MAC address of each device. Displaying and Blocking Currently Connected Devices (Block List). The steps to finding the MAC address of a device vary, depending on your operating system. Windows 1. - Page 128 Windows 1. Open a command prompt window. 2. Type cmd or command, and click OK. 3. At the command prompt, type ipconfig and press Enter. 4. Write down the IP Address for the entry that relates to the wireless network connection. (The IP address might be listed under “Ipv4 Address,”...
-
Page 129: Troubleshooting
See also Improving Signal Strength. Cannot Connect to Wi-Fi If your computer cannot connect to the Main or Guest Wi-Fi networks of the NETGEAR 6100D, there are several things you should check. Make sure that: ● The maximum number of Wi-Fi devices has not been reached. (To determine the... -
Page 130: Cannot Display The Home Page
● You’re connecting to the correct Wi-Fi network (SSID), and you’re using the correct Wi-Fi password. ● Nobody has changed the name or password of the Wi-Fi network. ● Your computer supports the type of Wi-Fi security that the network is set to use. Note: To connect to the gateway’s Wi-Fi network, each computer or Wi-Fi device must support the gateway’s Wi-Fi security type. -
Page 131: Cannot Connect To The Mobile Broadband Network
Google Chrome (version 30 or higher) ● If your computer has other adapters (for example, Ethernet) connected to other networks, disable or remove them from your computer. ● If Internet security software is running on your computer, disable it and see whether the error message still occurs. -
Page 132: Gps Doesn't Seem To Be Available
● If you’re roaming internationally, make sure that Any Network is selected. (See Setting the Roaming Mode.) ● Try the tips in Improving Signal Strength. ● Check with Sprint — a network or account problem may be preventing your device from obtaining service. -
Page 133: Technical Specifications
Technical Specifications This section lists the electrical, radio frequency, and other parameters of your device for those who require technical information. Radio Frequency and Electrical Specifications This section lists the radio frequency and electrical parameters of your device. Item Description Approvals Maximum: ~900 mA Current... -
Page 134: Software Specifications
Software Specifications This section lists the specifications that your device supports. Item Description IS-2000 Release 0 CDMA (3G) specification IS-707A Data service Release 9 3GPP IEEE 802.11b Wi-Fi specification IEEE 802.11g IEEE 802.11n WEP Open & Shared Wi-Fi security and WEP-64 encryption protocols WEP-128... -
Page 135: Environmental Specifications
Environmental Specifications This section describes the environmental conditions that your gateway can be used in. Item Description 32 to 140°F Operating temperature 14 to +140°F Storage temperature 149°F, 90% relative humidity for 24 hours Humidity Mechanical Specifications This section describes the dimensions and physical features of your device. Item Description 2.72"... - Page 136 2. Install wall anchors in the holes. Note: Use pan head Phillips wood screws, 3.5 x 20 mm (diameter x length, European) or #6 type screw, 1 inch long (U.S.). 3. Insert screws into the wall anchors, leaving 3/16 in. (0.5 cm) of each screw exposed. Technical Specifications...
-
Page 137: Safety Information
Data may be delayed, corrupted (i.e., have errors) or be totally lost. Although significant delays or losses of data are rare when wireless devices such as the NETGEAR 6100D are used in a normal manner with a well-constructed network, your device should not be used in situations where failure to transmit or receive data could result in damage of any kind to the user or any other party, including but not limited to personal injury, death, or loss of property. -
Page 138: Regulatory Notices
Regulatory Notices This section contains regulatory information for your device. The design of the NETGEAR 6100D complies with U.S. Federal Communications Commission (FCC) guidelines respecting safety levels of radio frequency (RF) exposure for mobile devices, which in turn are consistent with the following safety standards previously set by U.S. and international standards bodies: ●... - Page 139 ● Consult the dealer or an experienced radio/TV technician for help. CAUTION: Any changes or modifications not expressly approved by NETGEAR could void the user’s authority to operate the equipment. This device complies with Parts 15, 24, and 27 of the FCC Rules. Operation is subject to the...
-
Page 140: Legal
Legal This section contains important license and legal information. Patents This product contains technology developed by or for NETGEAR, Inc. This product includes technology licensed from QUALCOMM®. Licenses A large amount of the source code to this product is available under various free and open source licenses. - Page 141 To protect your rights, we need to make restrictions that forbid anyone to deny you these rights or to ask you to surrender the rights. These restrictions translate to certain responsibilities for you if you distribute copies of the software, or if you modify it. For example, if you distribute copies of such a program, whether gratis or for a fee, you must give the recipients all the rights that you have.
- Page 142 You may charge a fee for the physical act of transferring a copy, and you may at your option offer warranty protection in exchange for a fee. 2. You may modify your copy or copies of the Program or any portion of it, thus forming a work based on the Program, and copy and distribute such modifications or work under the terms of Section 1 above, provided that you also meet all of these conditions: a) You must cause the modified files to carry prominent notices stating that you changed the files and the date of any...
- Page 143 The source code for a work means the preferred form of the work for making modifications to it. For an executable work, complete source code means all the source code for all modules it contains, plus any associated interface definition files, plus the scripts used to control compilation and installation of the executable.
- Page 144 It is not the purpose of this section to induce you to infringe any patents or other property right claims or to contest validity of any such claims; this section has the sole purpose of protecting the integrity of the free software distribution system, which is implemented by public license practices.
- Page 145 12. IN NO EVENT UNLESS REQUIRED BY APPLICABLE LAW OR AGREED TO IN WRITING WILL ANY COPYRIGHT HOLDER, OR ANY OTHER PARTY WHO MAY MODIFY AND/OR REDISTRIBUTE THE PROGRAM AS PERMITTED ABOVE, BE LIABLE TO YOU FOR DAMAGES, INCLUDING ANY GENERAL, SPECIAL, INCIDENTAL OR CONSEQUENTIAL DAMAGES ARISING OUT OF THE USE OR INABILITY TO USE THE PROGRAM (INCLUDING BUT NOT LIMITED TO LOSS OF DATA OR DATA BEING RENDERED INACCURATE OR LOSSES SUSTAINED BY YOU OR THIRD PARTIES OR A FAILURE OF...
-
Page 146: Gnu General Public License (Version 3)
The hypothetical commands ‘show w’ and ‘show c’ should show the appropriate parts of the General Public License. Of course, the commands you use may be called something other than ‘show w’ and ‘show c’; they could even be mouse-clicks or menu items--whatever suits your program. - Page 147 To protect your rights, we need to prevent others from denying you these rights or asking you to surrender the rights. Therefore, you have certain responsibilities if you distribute copies of the software, or if you modify it: responsibilities to respect the freedom of others. For example, if you distribute copies of such a program, whether gratis or for a fee, you must pass on to the recipients the same freedoms that you received.
- Page 148 To “modify” a work means to copy from or adapt all or part of the work in a fashion requiring copyright permission, other than the making of an exact copy. The resulting work is called a “modified version” of the earlier work or a work “based on” the earlier work. A “covered work”...
- Page 149 work, and the source code for shared libraries and dynamically linked subprograms that the work is specifically designed to require, such as by intimate data communication or control flow between those subprograms and other parts of the work. The Corresponding Source need not include anything that users can regenerate automatically from other parts of the Corresponding Source.
- Page 150 You may charge any price or no price for each copy that you convey, and you may offer support or warranty protection for a fee. 5. Conveying Modified Source Versions. You may convey a work based on the Program, or the modifications to produce it from the Program, in the form of source code under the terms of section 4, provided that you also meet all of these conditions: a) The work must carry prominent notices stating that you modified it, and giving a relevant...
- Page 151 software interchange, for a price no more than your reasonable cost of physically performing this conveying of source, or (2) access to copy the Corresponding Source from a network server at no charge. c) Convey individual copies of the object code with a copy of the written offer to provide the Corresponding Source.
- Page 152 apply if neither you nor any third party retains the ability to install modified object code on the User Product (for example, the work has been installed in ROM). The requirement to provide Installation Information does not include a requirement to continue to provide support service, warranty, or updates for a work that has been modified or installed by the recipient, or for the User Product in which it has been modified or installed.
- Page 153 f) Requiring indemnification of licensors and authors of that material by anyone who conveys the material (or modified versions of it) with contractual assumptions of liability to the recipient, for any liability that these contractual assumptions directly impose on those licensors and authors. All other non-permissive additional terms are considered “further restrictions”...
- Page 154 actions infringe copyright if you do not accept this License. Therefore, by modifying or propagating a covered work, you indicate your acceptance of this License to do so. 10. Automatic Licensing of Downstream Recipients. Each time you convey a covered work, the recipient automatically receives a license from the original licensors, to run, modify and propagate that work, subject to this License.
- Page 155 If you convey a covered work, knowingly relying on a patent license, and the Corresponding Source of the work is not available for anyone to copy, free of charge and under the terms of this License, through a publicly available network server or other readily accessible means, then you must either (1) cause the Corresponding Source to be so available, or (2) arrange to deprive yourself of the benefit of the patent license for this particular work, or (3) arrange, in a manner consistent with the requirements of this License, to extend the patent license to...
- Page 156 continue to apply to the part which is the covered work, but the special requirements of the GNU Affero General Public License, section 13, concerning interaction through a network will apply to the combination as such. 14. Revised Versions of this License. The Free Software Foundation may publish revised and/or new versions of the GNU General Public License from time to time.
- Page 157 17. Interpretation of Sections 15 and 16. If the disclaimer of warranty and limitation of liability provided above cannot be given local legal effect according to their terms, reviewing courts shall apply local law that most closely approximates an absolute waiver of all civil liability in connection with the Program, unless a warranty or assumption of liability accompanies a copy of the Program in return for a fee.
-
Page 158: Gnu Lesser General Public License (Version 2.1)
The hypothetical commands `show w' and `show c' should show the appropriate parts of the General Public License. Of course, your program's commands might be different; for a GUI interface, you would use an “about box”. You should also get your employer (if you work as a programmer) or school, if any, to sign a “copyright disclaimer”... - Page 159 To protect your rights, we need to make restrictions that forbid distributors to deny you these rights or to ask you to surrender these rights. These restrictions translate to certain responsibilities for you if you distribute copies of the library or if you modify it. For example, if you distribute copies of the library, whether gratis or for a fee, you must give the recipients all the rights that we gave you.
- Page 160 In other cases, permission to use a particular library in non-free programs enables a greater number of people to use a large body of free software. For example, permission to use the GNU C Library in non-free programs enables many more people to use the whole GNU operating system, as well as its variant, the GNU/Linux operating system.
- Page 161 You may charge a fee for the physical act of transferring a copy, and you may at your option offer warranty protection in exchange for a fee. 2. You may modify your copy or copies of the Library or any portion of it, thus forming a work based on the Library, and copy and distribute such modifications or work under the terms of Section 1 above, provided that you also meet all of these conditions: a) The modified work must itself be a software library.
- Page 162 appeared, then you can specify that version instead if you wish.) Do not make any other change in these notices. Once this change is made in a given copy, it is irreversible for that copy, so the ordinary GNU General Public License applies to all subsequent copies and derivative works made from that copy.
- Page 163 6. As an exception to the Sections above, you may also combine or link a "work that uses the Library" with the Library to produce a work containing portions of the Library, and distribute that work under terms of your choice, provided that the terms permit modification of the work for the customer's own use and reverse engineering for debugging such modifications.
- Page 164 7. You may place library facilities that are a work based on the Library side-by-side in a single library together with other library facilities not covered by this License, and distribute such a combined library, provided that the separate distribution of the work based on the Library and of the other library facilities is otherwise permitted, and provided that you do these two things: a) Accompany the combined library with a copy of the same work based on the Library, uncombined with any other library facilities.
- Page 165 It is not the purpose of this section to induce you to infringe any patents or other property right claims or to contest validity of any such claims; this section has the sole purpose of protecting the integrity of the free software distribution system which is implemented by public license practices.
-
Page 166: Gnu Lesser General Public License (Version 3)
16. IN NO EVENT UNLESS REQUIRED BY APPLICABLE LAW OR AGREED TO IN WRITING WILL ANY COPYRIGHT HOLDER, OR ANY OTHER PARTY WHO MAY MODIFY AND/OR REDISTRIBUTE THE LIBRARY AS PERMITTED ABOVE, BE LIABLE TO YOU FOR DAMAGES, INCLUDING ANY GENERAL, SPECIAL, INCIDENTAL OR CONSEQUENTIAL DAMAGES ARISING OUT OF THE USE OR INABILITY TO USE THE LIBRARY (INCLUDING BUT NOT LIMITED TO LOSS OF DATA OR DATA BEING RENDERED INACCURATE OR LOSSES SUSTAINED BY YOU OR THIRD PARTIES OR A FAILURE OF THE LIBRARY TO... - Page 167 the Combined Work from the Application, but excluding the System Libraries of the Combined Work. 1. Exception to Section 3 of the GNU GPL. You may convey a covered work under sections 3 and 4 of this License without being bound by section 3 of the GNU GPL.
- Page 168 d) Do one of the following: 0) Convey the Minimal Corresponding Source under the terms of this License, and the Corresponding Application Code in a form suitable for, and under terms that permit, the user to recombine or relink the Application with a modified version of the Linked Version to produce a modified Combined Work, in the manner specified by section 6 of the GNU GPL for conveying Corresponding Source.
-
Page 169: License
License, you may choose any version of the GNU Lesser General Public License ever published by the Free Software Foundation. If the Library as you received it specifies that a proxy can decide whether future versions of the GNU Lesser General Public License shall apply, that proxy's public statement of acceptance of any version is permanent authorization for you to choose that version for the Library. -
Page 170: Libxml2 License
libxml2 License Except where otherwise noted in the source code (e.g. the files hash.c, list.c and the trio files, which are covered by a similar licence but with different Copyright notices) all the files are: Copyright (C) 1998-2003 Daniel Veillard. All Rights Reserved. Permission is hereby granted, free of charge, to any person obtaining a copy of this software and associated documentation files (the "Software"), to deal in the Software without restriction, including without limitation the rights to use, copy, modify, merge, publish, distribute, sublicense,... -
Page 171: Locapi License
list.c License list.c: lists handling implementation Copyright (C) 2000 Gary Pennington and Daniel Veillard. Permission to use, copy, modify, and distribute this software for any purpose with or without fee is hereby granted, provided that the above copyright notice and this permission notice appear in all copies. -
Page 172: Pimd License
THIS SOFTWARE IS PROVIDED BY THE COPYRIGHT HOLDERS AND CONTRIBUTORS "AS IS" AND ANY EXPRESS OR IMPLIED WARRANTIES, INCLUDING, BUT NOT LIMITED TO, THE IMPLIED WARRANTIES OF MERCHANTABILITY AND FITNESS FOR A PARTICULAR PURPOSE ARE DISCLAIMED. IN NO EVENT SHALL THE COPYRIGHT HOLDER OR CONTRIBUTORS BE LIABLE FOR ANY DIRECT, INDIRECT, INCIDENTAL, SPECIAL, EXEMPLARY, OR CONSEQUENTIAL DAMAGES (INCLUDING, BUT NOT LIMITED TO, PROCUREMENT OF SUBSTITUTE GOODS OR SERVICES;... -
Page 173: Shadow License
The mrouted program is covered by the license in the accompanying file named "LICENSE.mrouted". The mrouted program is COPYRIGHT 1989 by The Board of Trustees of Leland Stanford Junior University. shadow License Copyright (c) 1989 - 1994, Julianne Frances Haugh Copyright (c) 1996 - 2000, Marek Michałkiewicz Copyright (c) 2001 - 2006, Tomasz Kłoczko Copyright (c) 2007 - 2009, Nicolas François... -
Page 174: Openssl License
Permission to use, copy, modify, and/or distribute this software for any purpose with or without fee is hereby granted, provided that the above copyright notice and this permission notice appear in all copies. THE SOFTWARE IS PROVIDED "AS IS" AND ISC DISCLAIMS ALL WARRANTIES WITH REGARD TO THIS SOFTWARE INCLUDING ALL IMPLIED WARRANTIES OF MERCHANTABILITY AND FITNESS. -
Page 175: Original Ssleay License
CONTRIBUTORS BE LIABLE FOR ANY DIRECT, INDIRECT, INCIDENTAL, SPECIAL, EXEMPLARY, OR CONSEQUENTIAL DAMAGES (INCLUDING, BUT NOT LIMITED TO, PROCUREMENT OF SUBSTITUTE GOODS OR SERVICES; LOSS OF USE, DATA, OR PROFITS; OR BUSINESS INTERRUPTION) HOWEVER CAUSED AND ON ANY THEORY OF LIABILITY, WHETHER IN CONTRACT, STRICT LIABILITY, OR TORT (INCLUDING NEGLIGENCE OR OTHERWISE) ARISING IN ANY WAY OUT OF THE USE OF THIS SOFTWARE, EVEN IF ADVISED OF THE POSSIBILITY OF SUCH DAMAGE. -
Page 176: Trademarks
Trademarks SPRINT and the logo are trademarks of Sprint. NETGEAR and the NETGEAR logo are trademarks of NETGEAR, Inc. Windows® is a registered trademark of Microsoft Corporation. Mac and Mac OS are trademarks of Apple Inc., registered in the U.S. and other countries. -
Page 177: Limitation Of Liability
Notwithstanding the foregoing, in no event shall NETGEAR and/or its affiliates aggregate liability arising under or in connection with the NETGEAR product, regardless of the number of events, occurrences, or claims giving rise to liability, be in excess of the price paid by the purchaser for the NETGEAR product. - Page 178 Index Title, 13, 79 Cannot connect, 123 Allowed network mode, setting the, 91 Coverage type, 61 Altitude, 40 Ec/Io of network connection, 61 "Always on", and billing, 113 Network service, improving, 117 Antennas, attaching, 2 Overview, 8 Application RSSI of network connection, 61 Port filtering, disable, 86 Service type (PS), 61 Port filtering, enable, 86...
- Page 179 Button Connection Rate, 25 Power, 8 Connection status, 61 Wi-Fi On/Off, 10 LEDs, 9 WPS, 10 Contents, package, 1 Cannot check for updates, 124 Continuous GPS fix, 40 Cannot connect to the 3G or LTE network, Copyright information, 168 Cordless phones, 116 Cannot connect to Wi-Fi, 121 Corporate network, accessing through VPN, Cannot display the Home page, 122...
- Page 180 Disconnect from mobile network, button, 16 FAQ, 114 Display FAX, 126 Blocked devices, 31 Connected devices, 31 ID, 130 Regulatory notices, 130 Address, 65 Feedback, 75 Configuring, 85 Link, 73 Enable/disable, 65 File sharing, USB, 44 Enabling, 84 Filtered ports list, 68 DNS mode, 65 Firewall rules, 70 Setting, 82...
- Page 181 Height of gateway, 127 Altitude, 40 Help, getting Availability, 113 Customer Service, contacting, 6 Enable ./ disable, 40 FAQ (Frequently Asked Questions), 111 Enable/disable, 41 Sprint website, 6 FAQ, 113 Tips, 116 Heading, 40 Troubleshooting, 121 Latitude, 40 Home page, 11 Limitations, 113 Cannot display, 122 Longitude, 40...
- Page 182 TX power of LTE network connection, 61 Guest Wi-Fi, changing, 29 Upload channel for LTE network Main Wi-Fi, changing, 29 connection, 61 NETGEAR knowledge base, 121 LTE Connection LED, 9 Network MAC address, cloning, 53 3G, overview, 8 MAC address, finding for a device, 118...
- Page 183 Cannot connect, 123 Disabling for an application, 86 Carrier name, 16 Enable/disable, 68 Connection status, 61 Enabling, 85 Internet Connection status, 60 Port Filtering tab, 67 Mobile broadband connection details, 59 Port forwarding Mobile broadband status details, 59 Description, 65 Mode allowed, setting the, 91 Disabling for an application, 84 Protocols supported, 126...
- Page 184 Indicator, 62 Server, accessing, 66 LTE support, 111 Service plan, add additional options, 6 Message, 16 Serving Cell ID, 60 Mode, 56 Serving SID (home network area identifier), Mode, setting, 90 Status, 16 Session Data usage, 14 Roaming Guard, 57 Settings Roaming Guard warnings, enable/disable, Backup, 50...
- Page 185 ssh support, 115 General tips, 121 SSID, 75 TTY support, 126 SSLeay License, Original, 167 Turn off Guest Wi-Fi network, 19 Standard units for GPS, 40, 42 Turn on Guest Wi-Fi network, 18 Standby current, 125 Turning the gateway on, 9 Status connection details, 15 TVs, 116 Status Details, Settings page, 59...
- Page 186 Web browsers supported, 2 Wi-Fi Connect page, 21 Web server, accessing, 66 Wi-Fi LED, 9 Website Wi-Fi network, connecting to, 4 NETGEAR, 169 Wi-Fi On/Off button, 10 Sprint, 6 Wi-Fi Options page, Wi-Fi page, 23 Weight of gateway, 127 Wi-Fi Protected Setup (WPS)
Need help?
Do you have a question about the LG6100D and is the answer not in the manual?
Questions and answers