Advertisement
Quick Links
Advertisement

Summary of Contents for TREND COMBI 1001
- Page 1 COMBI 1001...
-
Page 2: Items Enclosed
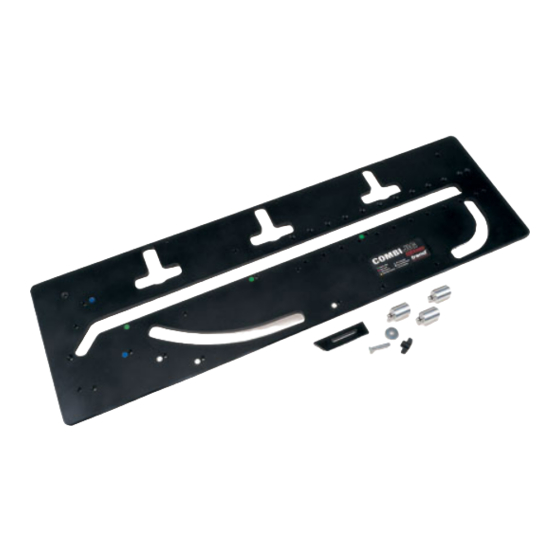
Combi 1001 ITEMS ENCLOSED 1 x Solid laminate combination template 2 x Location bushes 1 x Length setting stop 1 x Machine screw csk 1 x Manual 1 x Washer 1 x Knob 1 x Guarantee card Specification Length = 1200mm... -
Page 3: Safety Precautions
Combi 1001 SAFETY PRECAUTIONS Always switch off the power and unplug the Do not over-tighten collet as this will score the router when changing cutters or when making shank and create a weakness there. adjustments. It is also advisable to periodically check the Always wear protective goggles when routing. - Page 4 Felisatti R346EC GB/5 Trend sub-bases have a central recess to allow Makita 3612BR & 3600B fitting of the Trend guide bush to most makes of Ryobi RE600N & R600N, RE601 GB/5/A routers and are available ready to fit the most popular makes.
- Page 5 Combi 1001 UNIBASE comprises the following Fits following Router Models Atlas Copco OFSE2000 UNIBASE Bosch GOF 1300ACE, 1600A, 1700ACE Casals FT2000VCE DeWalt DW625EK, 629 UNIBASE Draper R1900V Elu MOF 31, 77, 98, 131, 177(E) Faithfull FPPR2000E 170mm Ø x 8mm...
- Page 6 Biscuit Jointer for the Router Worktops with inadequate support below them need additional stability by biscuit jointing the edges. The Trend biscuit jointing set for the router together with the No.20 biscuits will ensure worktops do not sag or warp in time, see Description Order Ref.
- Page 7 Combi 1001 Bolt-on Clamps Optional bolt-on clamps which fit directly onto COMBI1001. Fixing Bolt Kits are required for the clamps (1 off for PJ/CL/S and 2 off for PJ/CL/L). Description Order Ref. Short Clamp for COMBI1001 PJ/CL/S (1 off required)
- Page 8 Combi 1001 ASSEMBLY Margin Distance Location Bush Identification Three location bushes are used in different holes Allow 8.5mm when cutting joints. Measure or in the jig to align the correct template aperture use a batten of this for the application.
-
Page 9: Operation
Combi 1001 OPERATION Setting the Length Stop Setting the Length Stop for the Female Cut Length stop on Carry out the setting operation first: underside. Retained Fit bushes into Green dot location holes with screw & knob and offer the jig to the worktop as shown. - Page 10 Combi 1001 Female Joint IMPORTANT! When cutting a joint, hold the Leave the two location bushes in holes router guide bush hard against marked Green dot. (The Green dots must be the template and cut from left uppermost). Leave the length stop bush in position.
- Page 11 Combi 1001 Male Joint Routing the male part of the Joint Depending on accessibility lay female worktop into position on units. Lay male worktop on top and support other end. Using a pencil draw round the female cut onto the...
- Page 12 Combi 1001 Setting up length stop for out-of- Insert both location bushes into Red dot square joints holes. Red dot face uppermost. Lay jig across the worktop, ensure the location bushes touch the postform edge. Clamp jig in position with quick action...
- Page 13 Combi 1001 Cutting the Bolt Recesses Setting bolt recess length stop When the joint has been tested, proceed as follows to cut the recess for panel butt connectors on the underside of the Underside of worktop worktop. The same cutter and guide bush...
- Page 14 Combi 1001 Worktop Depth Routing the bolt recess in the Thickness Recess female part of the joint 22mm Underside of worktop 28mm Quick action Length stop (or accessory IMPORTANT! clamp here clamp PJ/CL/L) on underside Best results are achieved when the...
- Page 15 The biscuit jointing Underside View cutter set Trend Ref. 342 can be used with a portable router. The size of biscuit used should be No. 20. Ref. BSC/20/100 (100 biscuits) Ref.
- Page 16 Combi 1001 Routing the Corner Radius Corner Radius Direction of Location bushes Special Note: Due to the nature of this router travel (Black dot) particular edge laminate, the corner radius will be more awkward to laminate. Insert the three location bushes in holes marked Black dot as shown opposite.
- Page 17 Combi 1001 Routing the Curved Peninsular Curved Peninsular Insert the three location bushes in holes Location bushes (White dot) marked White dot as shown below. Locate the template on the worktop as illustrated ensuring that location bushes are touching the worktop edge. Clamp into position with quick action clamps.
- Page 18 Combi 1001 45° End Cut Routing the 45° End Cut Insert the three location bushes into holes marked Grey dot as shown below. Locate the template on the worktop as illustrated ensuring that bushes are touching the worktop edge. Clamp using two quick...
- Page 19 Combi 1001 COMBI 1001 v2.0 11/2000 SPARE PARTS DIAGRAM -19-...
- Page 20 Combi 1001 COMBI 1001 - SPARE PARTS LIST v2.0 11/2000 Item Description Ref. Combi 1001 Jig COMBI/1001 Alloy Bush BUSH/1001 Length Setting Stop CJ/LSK Machine Screw Csk M8 x 50mm slot WP-SCW/41 Washer 8.5mm x 32mm x 1.0mm WP-WASH/17 Knob M8 WP-KNOB/10 Combi Jig ‘O’...
-
Page 21: Troubleshooting
Combi 1001 TROUBLE SHOOTING Fault Cause Remedy Joint does not fit correctly Cutter or guide bush is the Check concentricity of cutter at the radius. incorrect diameter or location with guide bush. Cutter 12.7mm bushes are not against diameter with 30mm diameter worktop edge. - Page 22 WWW: __________www.trendmachinery.co.uk © Copyright Trend 2002. No part of this publication may be reproduced, stored or transmitted in any form without prior permission. Our policy of continuous improvement means that specifications may change without notice. Trend Machinery and Cutting Tools...


Need help?
Do you have a question about the COMBI 1001 and is the answer not in the manual?
Questions and answers