Table of Contents
Advertisement
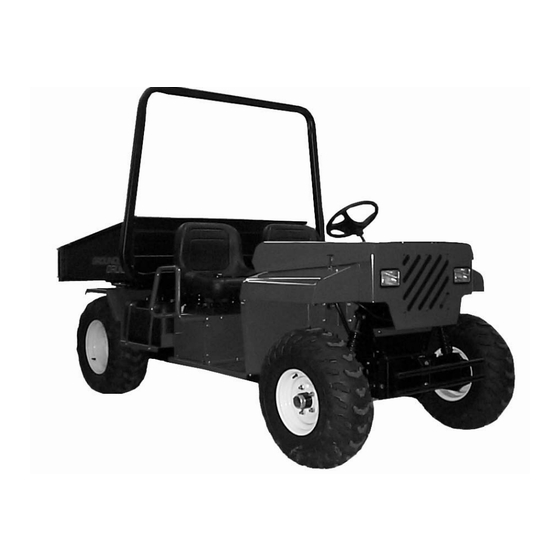
Safety Instructions, Installation & Operator's Manual For
GROUNDS CRUISER
GC9520KW
Thank you for buying a SNAPPER Product! Before operating your machine, read this manual carefully and pay
particular attention to the "IMPORTANT SAFETY INSTRUCTIONS" on Pages 2 thru 5. Remember that all power
equipment can be dangerous if used improperly. Also keep in mind that SAFETY requires careful use in
accordance with the operating instructions and common sense!
COPYRIGHT © 2003
SNAPPER PRODUCTS INC.
ALL RIGHTS RESERVED
MANUAL No. 7-3552 (REV.2, 2/17/03)
Advertisement
Table of Contents

Related Manuals for Snapper GROUNDS CRUISER GC9520KW


Summary of Contents for Snapper GROUNDS CRUISER GC9520KW
- Page 1 GROUNDS CRUISER GC9520KW Thank you for buying a SNAPPER Product! Before operating your machine, read this manual carefully and pay particular attention to the “IMPORTANT SAFETY INSTRUCTIONS” on Pages 2 thru 5. Remember that all power equipment can be dangerous if used improperly. Also keep in mind that SAFETY requires careful use in accordance with the operating instructions and common sense! COPYRIGHT ©...
-
Page 2: Important Safety Instructions
If you have any questions pertaining to your machine, which your dealer cannot answer to your satisfaction, call or write the Customer Service Department at SNAPPER, McDonough, Georgia 30253. Phone: 800/935-2967. - Page 3 9. DO NOT put your foot on the ground to try and the machine. Use only tires approved by stabilize the machine. Snapper. 10. DO NOT operate machine under any condition where traction, steering or stability is doubtful. TOWING 11. DO NOT remove or modify the Operator Protective Structure.
- Page 4 3. DO NOT leave the machine with the engine construction approved by SNAPPER. running. Stop engine, set park brake, shift to 15. Obey all local ordinances and laws governing neutral and remove key before leaving the the operation of off-road vehicles.
- Page 5 15. Have machine serviced by an authorized 17. Watch out for traffic when near or crossing SNAPPER dealer at least once a year and have roadways. dealer install any new safety devices. 18. DO NOT operate engine in enclosed areas.
-
Page 6: Table Of Contents
TABLE OF CONTENTS IMPORTANT SAFETY INSTRUCTIONS..............2-5 TABLE OF CONTENTS ....................6 SECTION 1 – FAMILIARIZATION ....................7-8 CONTROL IDENTIFICATION & SAFETY SIGNS ..........9-11 SECTION 2 - OPERATING INSTRUCTIONS............12-18 Pre-Start Check List ......................12-13 Controls – Function & Operation..................13-15 Starting & Stopping Engine....................15 Starting &... -
Page 7: Familiarization
This manual has been prepared for the operator’s of The nomenclature information above shows the the SNAPPER Grounds Cruiser utility vehicle. Its essential parts of the SNAPPER Grounds Cruiser. It is purpose, aside from recommending standard operating recommended that all operators of this equipment... - Page 8 SECTION 1 – FAMILIARIZATION DASHBOARD 12 VOLT ACCESSORY AMMETER PLUG HAND GRIP STEERING WHEEL IGNITION HOUR LIGHT SWITCH METER SWITCH BRAKE PEDAL & ACCELERATOR PEDAL START STOP IGNITION BRAKE PEDAL SWITCH ACCELERATOR PEDAL CONTROL CONSOLE DIFFERENTIAL PARK BRAKE LOCK LEVER LEVER CHOKE LEVER...
-
Page 9: Control Identification & Safety Signs
CONTROL IDENTIFICATION & SAFETY SIGNS BRAKE PEDAL UNLOCK UNLOCK HEADLIGHTS PARK DIFFERENTIAL BRAKE LOCK LIGHT SWITCH LOCK LOCK FORWARD PARK BRAKE & DIFFERENTIAL LOCK CONTROL NEUTRAL REVERSE TRANSMISSION SHIFTER DANGER – OPERATOR PROTECTIVE STRUCTURE CHOKE CONTROL... - Page 10 CONTROL IDENTIFICATION & SAFETY SIGNS WARNING – NO RIDERS WARNING - TO PREVENT FIRE WARNING – OFF ROAD USE ONLY WARNING – HOT SURFACE WARNING – HITCH & TOWING SPECIFICATIONS & MAINTENANCE ● DO NOT OPERATE MACHINE WITH CARGO BED RAISED. ●...
- Page 11 CONTROL IDENTIFICATION & SAFETY SIGNS WARNING AVOID SERIOUS INJURY OR DEATH ● OPERATOR MUST BE ADULT OR RESPONSIBLE TEENAGER AT LEAST ● MAXIMUM; ONE OPERATOR AND ONE 16 YEARS OLD AND POSSESS A PASSENGER (400 LBS TOTAL). BOTH VALID DRIVERS LICENSE. MUST BE SEATED IN SEATS PROVIDED, WITH SEAT BELT LATCHED AND ADJUSTED TO A SNUG FIT.
-
Page 12: Section 2 - Operating Instructions
Replace worn, damaged or deteriorated tires engine over heating, severe damage and fire. before operating machine using only tires of the same size, type and construction approved by SNAPPER. 2.1.10. Adjust Operator’s Seat. With engine stopped, and park brake set, loosen two seat adjusting knobs 2.1.4. -
Page 13: Controls - Function & Operation
SECTION 2 – OPERATING INSTRUCTIONS DIFFERENTIAL 2.1.11. Check Seat Belts. Mounting hardware must LOCK LEVER be tight. Buckle must latch securely. Webbing must PARK BRAKE not display signs of deterioration, wear, or damage. LEVER 2.1.12. Check Operator Protective Structure (OPS). DO NOT operate a machine that has had the OPS removed, damaged, or modified in any way. - Page 14 SECTION 2 – OPERATING INSTRUCTIONS CONTROLS – FUNCTION AND OPERATION WARNING (Continued from previous page) DO NOT engage the differential lock with the 2.2.3. Transmission Shift Lever. The shift lever has machine in motion or the rear wheels rotating. Operate the machine with the differential locked three positions.
-
Page 15: Starting & Stopping Engine
SECTION 2 – OPERATING INSTRUCTIONS 2.2.8. Ammeter. The amp meter indicates the F. Turn ignition key to “START” position and hold amount of current flowing into (charging) or flowing out until engine starts. If after 5 to 10 seconds of of (discharging) the battery. -
Page 16: Parking Machine
SECTION 2 – OPERATING INSTRUCTIONS A. Bring machine to a complete stop on a flat WARNING surface. B. Move the park brake lever towards the rear of BEFORE BACKING, Stop machine completely. the slot and latch in the “Locked” position. LOOK and SEE behind and down for children, pets C. -
Page 17: Driving The Machine
SECTION 2 – OPERATING INSTRUCTIONS 2.6 DRIVING THE MACHINE F. Maximum occupants 2: one operator and one passenger, 400 lb. (181 kg.) maximum. Both must be properly seated in the seats provided, with seat IMPORTANT! OPERATOR MUST BE 16 belts securely latched and adjusted to a snug fit. YEARS OLD OR OLDER AND POSSESS A G. -
Page 18: Towing
SECTION 2 – OPERATING INSTRUCTIONS 2.10 TRANSPORTING MACHINE CARRYING LOADS (Continued) The machine will fit in the bed of most full size pick-up G. Tires must be inflated to 15 psi before carrying trucks. The truck or trailer used to transport the a load. -
Page 19: Section 3 - Maintenance
The machine must be on a level surface 3.1 INTRODUCTION and the dipstick unthreaded when checking To retain the quality of the Snapper Grounds Cruiser utility engine oil level. vehicle, use genuine SNAPPER replacement parts only. 8. Lower cargo bed and latch securely. -
Page 20: Check Transmission Fluid
1. Park machine on level surface. DO NOT operate machine if brakes are not 2. Release park brake. functioning properly. Adjust, repair or replace as 3. Locate grease fitting on left axle coupling. See necessary. Contact your local Snapper dealer for Figure 3.4. assistance. -
Page 21: Check Interlocks
Set park brake. 14. If the machine failed any of the above tests, do not operate machine. Contact your local Snapper dealer for assistance. WARNING DO NOT operate machine if interlocks are not WEAR PADS functioning properly. -
Page 22: Service - Every 200 Operating Hours (Or Yearly)
SECTION 3 – MAINTENANCE SERVICE – EVERY 200 OPERATING HOURS STORAGE (OUT OF SEASON) (OR YEARLY) 3.6.1. Perform all maintenance as specified in the “Maintenance Schedule” in this manual and in the 3.5.1. Perform all maintenance required after 50 Engine Owners Manual. hours of operation. -
Page 23: Section 4 - Adjustments & Repairs
Adjust, repair or replace as 2. Remove key and disconnect spark plug wire. necessary. Contact your local Snapper dealer for 3. Set park brake and shift transmission to neutral. assistance. 4. Roll belt off of driven clutch. See Figure 4.1. -
Page 24: Battery Removal
SECTION 4 – ADJUSTMENTS & REPAIRS 2. Observe and note cable positions on battery. SERVICE BRAKE & PARK BRAKE See Figure 4.4. ADJUSTMENT (Continued) 3. Disconnect cables from battery terminals, 8. Operate machine on smooth flat surface at disconnecting BLACK (Negative) cables first. approximately 1/2 speed. -
Page 25: Battery Installation
SECTION 4 – ADJUSTMENTS & REPAIRS 4.3.2. Battery Installation 4.3.3. Battery Service IMPORTANT! The orientation of the battery and 1. Remove battery. Refer to Section “BATTERY the routing of the battery cables is very important. REMOVAL”. Install battery carefully as shown. Always install 2. -
Page 26: Battery Testing
SECTION 4 – ADJUSTMENTS & REPAIRS 4.3.5. Battery Testing There are two types of battery tests: Unloaded and Loaded. The unloaded test is the procedure that will be discussed. It’s the simplest and most commonly used. An unloaded test is made on a battery without discharging current. -
Page 27: Section 5 - Electrical
SECTION 5 - ELECTRICAL... -
Page 28: Wire Harness Detail
SECTION 5 - ELECTRICAL 30 AMP FUSE 15 AMP FUSE 30 AMP FUSE... -
Page 29: Troubleshooting
Electric Starter 3. Spark plug wire disconnected. 3. Place spark plug wire onto spark plug. 4. Faulty interlock circuit. 4. Contact authorized SNAPPER dealer. 5. Brake pedal not depressed fully. 5. Depress brake. 6. Blown Fuse. 6. Replace with new 15 AMP fuse. -
Page 30: Maintenance Schedule
MAINTENANCE SCHEDULE EACH EACH SUBJECT SERVICE REFERENCE HOURS HOURS HOURS HOURS SEASON TO BE PERFORMED PAGES Engine Check Oil Level Page 12 Engine Initial Oil Change Page 19 Engine Periodic Oil Change Page 21 Air Cleaner Service/Replace Engine Manual & Page 19 Spark Plug Replace Plugs Engine Manual. -
Page 31: Warranty & Product Registration Form
For one (1) year from purchase date for the original purchaser's use, SNAPPER, through any authorized SNAPPER dealer will replace, free of charge (except for taxes where applicable), any part or parts found upon examination by the factory at McDonough, Georgia, to be defective in material or workmanship or both. - Page 32 Date of Purchase ___________________________________________________________ Retailer ___________________________________________________________________ Retailer’s Phone Number____________________________________________________ It is very important that you register your purchase with Snapper to ensure warranty coverage. Please mail your product registration card to: Snapper at P.O. Box 1379, McDonough, Georgia 30253. Or you may register on line at www.snapper.com.
- Page 33 Read, Understand, and Follow all warnings and instructions in this manual, the engine manual, and on the machine, engine and attachments. If you have any questions about your Snapper product, contact your local authorized Snapper dealer or contact Snapper Customer Service at Snapper, McDonough, GA.
Need help?
Do you have a question about the GROUNDS CRUISER GC9520KW and is the answer not in the manual?
Questions and answers