
Subscribe to Our Youtube Channel
Related Manuals for Metrohm 896


Summary of Contents for Metrohm 896
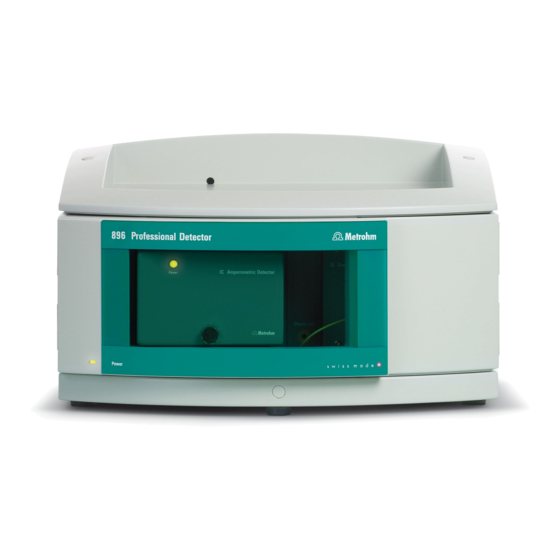
- Page 1 IC Professional Detector 896 Professional Detector – Conductivity & Amperometry Manual 8.896.8006EN...
- Page 3 Metrohm AG CH-9100 Herisau Switzerland Phone +41 71 353 85 85 Fax +41 71 353 89 01 info@metrohm.com www.metrohm.com IC Professional Detector 896 Professional Detector – Conduc- tivity & Amperometry 2.896.0030 Manual 8.896.8006EN 10.2012 zst...
- Page 4 Teachware Metrohm AG CH-9100 Herisau teachware@metrohm.com This documentation is protected by copyright. All rights reserved. Although all the information given in this documentation has been checked with great care, errors cannot be entirely excluded. Should you notice any mistakes please send us your comments using the address given above.
-
Page 5: Table Of Contents
Connecting the instrument to power supply ......18 4 Start-up Instrument test with dummy cell ........20 Testing the leak sensor ............22 Testing the preheating capillary ........22 Testing the detector output capillary ....... 23 ■■■■■■■■ 2.896.0030 896 Professional Detector – Conductivity & Amperometry... - Page 6 7 Technical specifications Reference conditions ............44 Conductivity detector ............44 Amperometric detector ............45 Power connection ............... 46 Leak sensor ................. 46 Ambient conditions ............46 Housing ................47 Interfaces ................47 ■■■■■■■■ 2.896.0030 896 Professional Detector – Conductivity & Amperometry...
- Page 7 ■■■■■■■■■■■■■■■■■■■■■■ Table of contents Safety specifications ............47 7.10 Electromagnetic compatibility (EMC) ........ 48 8 Warranty (Guarantee) 9 Accessories Scope of delivery ..............51 Optional accessories ............54 Index ■■■■■■■■ 2.896.0030 896 Professional Detector – Conductivity & Amperometry...
- Page 8 Front – Front lid removed ..............7 Figure 3 Rear ....................8 Figure 4 Connection detector – separation column ........16 Figure 5 Connection detector – suppressor ........... 17 Figure 6 Connection detector – MCS ............17 ■■■■■■■■ 2.896.0030 896 Professional Detector – Conductivity & Amperometry...
-
Page 9: Instrument Description
MagIC Net™ software. 872 Extension Modules, 891 Analog Out and 800 Dosinos, Remote Boxes, etc. can all be operated through the 896 Professional Detector – Conduc- tivity & Amperometry. This opens up the flexibility of Metrohm IC systems considerably. -
Page 10: Intended Use
Intended use The 896 Professional Detector – Conductivity & Amperometry is used as an independent detector in an IC system. With its two different detector types, it is used on the one hand for the precise measurement of conduc-... -
Page 11: Tubing And Capillary Connections
Damaged tubing ends lead to leakage. Appropriate tools can be used to loosen connections. Check the connections regularly for leakage. If the instrument is used mainly in unattended operation, then weekly inspections are manda- tory. ■■■■■■■■ 2.896.0030 896 Professional Detector – Conductivity & Amperometry... -
Page 12: Flammable Solvents And Chemicals
1.4.1 Content and scope This document describes the 896 Professional Detector – Conductiv- ity & Amperometry, its assembly and connection to the IC instrument, as well as the installation, operation and maintenance of the individual components. Technical specifications, troubleshooting and information concerning scope of delivery and optional accessories make up the rest of the manual. -
Page 13: Symbols And Conventions
This symbol draws attention to a possible biological hazard. Caution This symbol draws attention to a possible damage of instruments or instrument parts. Note This symbol marks additional information and tips. ■■■■■■■■ 2.896.0030 896 Professional Detector – Conductivity & Amperometry... -
Page 14: Overview Of The Instrument
For the amperometric detector. For removing the front lid. Coupling Detector input capillary Connector for the eluent output capillary of Of the conductivity detector. Permanently the conductivity detector. Labeled with mounted. Cond. Eluent out. ■■■■■■■■ 2.896.0030 896 Professional Detector – Conductivity & Amperometry... - Page 15 For draining liquid from the tray. Plugged with a stopper. Thread 10 Coupling For the knurled screw used for fastening the For connecting the detector input capillary. Labeled with Eluent in. front lid. ■■■■■■■■ 2.896.0030 896 Professional Detector – Conductivity & Amperometry...
-
Page 16: Rear
10 MSB connection sockets For connecting the mains cable Two MSB connection sockets for connecting (6.2122.0x0). instruments with MSB connection, labeled with MSB 1 and MSB 2. (MSB = Metrohm Serial Bus) ■■■■■■■■ 2.896.0030 896 Professional Detector – Conductivity & Amperometry... -
Page 17: Setting Up The Instrument
3.1.4 Proposed setup One option is to install the 896 Professional Detector – Conductivity & Amperometry directly above an 850 IC instrument. To accomplish this, the bottle holder of the IC instrument must be removed and then be placed back on the 896 Professional Detector –... -
Page 18: Mounting Base Tray And Bottle Holder (Optional)
881 Compact IC pro or an 882 Compact IC plus, then the System Connector (6.2061.120) must be used instead of the base tray of the IC instrument; this adjusts the larger surface area of the 896 Profes- sional Detector – Conductivity & Amperometry to the smaller surface area of the 881 or 882, respectively. - Page 19 There are no loose parts in the instrument. ■ The instrument is lying on it side, and the bottom surface is visible. ■ To mount the base tray, you need a 3 mm hexagon key (6.2621.100). ■■■■■■■■ 2.896.0030 896 Professional Detector – Conductivity & Amperometry...
-
Page 20: Removing / Mounting The Bottle Holder
The bottle holder is cleared. ■ Drainage tubing is disconnected from the drainage tubing connection ■ of the bottle holder. To remove the bottle holder, you need a 3 mm hexagon key (6.2621.100). ■■■■■■■■ 2.896.0030 896 Professional Detector – Conductivity & Amperometry... - Page 21 Before you can mount the bottle holder, the following preconditions must be met: The instrument is switched off. ■ To mount the bottle holder, you need a 3 mm hexagon key (6.2621.100). ■■■■■■■■ 2.896.0030 896 Professional Detector – Conductivity & Amperometry...
- Page 22 (see also the manual for the IC instrument). 5 If one of the instruments in the stack is equipped with a leak sensor connection socket, connect the leak sensor (see manual of the IC instrument). ■■■■■■■■ 2.896.0030 896 Professional Detector – Conductivity & Amperometry...
-
Page 23: Conductivity Detector
"Connecting the detector input capillary to the suppressor", page 16). With instruments with sequential suppression, to the MCS (see "Con- ■ necting the detector input capillary to the MCS", page 17). ■■■■■■■■ 2.896.0030 896 Professional Detector – Conductivity & Amperometry... - Page 24 Connect the detector input capillary (5-1) and the capillary of the ■ suppressor (5-2) labeled with out to one another using one cou- pling (6.2744.040) (5-3) and two short PEEK pressure screws (6.2744.070) (5-4). ■■■■■■■■ 2.896.0030 896 Professional Detector – Conductivity & Amperometry...
- Page 25 Fasten the detector input capillary (6-1) with one long PEEK pres- ■ sure screw (6.2744.090) (6-2) to the output of the MCS (6-3). Figure 6 Connection detector – MCS Detector input capillary PEEK pressure screw, long (6.2744.090) MCS output ■■■■■■■■ 2.896.0030 896 Professional Detector – Conductivity & Amperometry...
-
Page 26: Amperometric Detector
Which power supply cable is supplied depends on the location: 6.2122.020 with plug SEV 12 (Switzerland, …) ■ 6.2122.040 with plug CEE(7), VII (Germany, …) ■ 6.2122.070 with plug NEMA 5-15 (USA, …) ■ ■■■■■■■■ 2.896.0030 896 Professional Detector – Conductivity & Amperometry... - Page 27 Once the system test is complete and the connection to the software has been established, the LED lights up continuously. ■■■■■■■■ 2.896.0030 896 Professional Detector – Conductivity & Amperometry...
-
Page 28: Instrument Test With Dummy Cell
Start-up chapter in the manual for the IC instrument. The following tests and installation tasks must be performed during the first start-up of the IC device with the 896 Professional Detector – Con- ductivity & Amperometry. Instrument test with dummy cell When you are putting the 896 Professional Detector –... - Page 29 In the program part Manual: Switch on the cell ■ After no more than 1 minute, the detector signal should level off at 2.667 nA ± 7 %. Noise should not exceed 0.005 nA. ■■■■■■■■ 2.896.0030 896 Professional Detector – Conductivity & Amperometry...
-
Page 30: Testing The Leak Sensor
1 Hold a cloth moistened with eluent or tap water on the two contacts of the leak sensor . The leak sensor of the detector responds. If the leak sensor does not respond, please request Metrohm Service. Testing the preheating capillary The amperometric detector has a preheating capillary in its interior that ensures that the eluent flows through the measuring cell at a constant temperature. -
Page 31: Testing The Detector Output Capillary
Table 1 Recommended lengths for the detector output capillary Flow Capillary length (⌀0.25 mm) 2.0 mL/min 0.5…1.5 m 0.5…1.0 mL/min 1.0…2.5 m 0.25 mL/min ■■■■■■■■ 2.896.0030 896 Professional Detector – Conductivity & Amperometry... - Page 32 6 Finish the test In the program part Manual of MagIC Net™, stop the high pres- ■ sure pump. Remove the detector output capillary from the Eluent to cell ■ connector. ■■■■■■■■ 2.896.0030 896 Professional Detector – Conductivity & Amperometry...
-
Page 33: Testing The Measuring Cell
"Testing the detector output capillary", page 24). 2 Insert the measuring cell Insert the chip of the measuring cell into the cell holder so that you can hear it locking in. ■■■■■■■■ 2.896.0030 896 Professional Detector – Conductivity & Amperometry... - Page 34 – Shorten the capillary and fasten once again to the Out con- nector on the measuring cell. ■■■■■■■■ 2.896.0030 896 Professional Detector – Conductivity & Amperometry...
-
Page 35: Deaerating The Measuring Cell
Wait until the reference electrode chamber has filled with eluent. ■ Reinsert the reference electrode. Wipe up any emerging eluent ■ with a cloth. Screw the nut on the reference electrode connector back on ■ tightly. ■■■■■■■■ 2.896.0030 896 Professional Detector – Conductivity & Amperometry... -
Page 36: Connecting The Electrode Connection Cables
2 Plug in the straight plug of the reference electrode connection cable (black sleeve) into the RE socket of the detector. 3 Plug in the straight plug of the auxiliary electrode connection cable (blue sleeve) into the AE socket of the detector. ■■■■■■■■ 2.896.0030 896 Professional Detector – Conductivity & Amperometry... - Page 37 ■■■■■■■■■■■■■■■■■■■■■■ 4 Start-up Inserting the measuring cell into the cell holder 1 Insert the chip of the measuring cell into the cell holder so that you can hear it locking in. ■■■■■■■■ 2.896.0030 896 Professional Detector – Conductivity & Amperometry...
-
Page 38: Attaching The Front Lid
When you are attaching the front lid, observe the following: Do not pinch any capillaries! ■ Guide the capillaries through the capillary feed-throughs . Do not pinch any cables! ■ ■■■■■■■■ 2.896.0030 896 Professional Detector – Conductivity & Amperometry... -
Page 39: General Notes
Maintenance by Metrohm Service Maintenance of the instrument is best carried out as part of an annual service, which is performed by specialist personnel from Metrohm. If working frequently with caustic and corrosive chemicals, a shorter mainte- nance interval is recommended. Metrohm Service offers every form of technical advice for maintenance and service of all Metrohm instruments. -
Page 40: Shutting Down
1 Release the detector input capillary or the detector output capillary, respectively, from the system. 2 Connect the detector output capillary directly to the output of the high pressure pump. ■■■■■■■■ 2.896.0030 896 Professional Detector – Conductivity & Amperometry... -
Page 41: Amperometric Detector
3 Rinse the system with the same eluent as before the blockage or with ultrapure water. The eluent requires sufficient time to trickle through and dissolve the crystals. 4 Do not increase the flow rate until the pressure has stabilized. ■■■■■■■■ 2.896.0030 896 Professional Detector – Conductivity & Amperometry... -
Page 42: Quality Management And Validation With Metrohm
(see "Rinsing the preheating capillary", page 33). If the blockage can also not be dissolved by rinsing in the opposite direc- tion, then the preheating capillary must be replaced by a Metrohm Service employee. Quality Management and validation with Metrohm... -
Page 43: Problems With The Hardware
Use a higher-performance high pressure ■ sufficient for the selected pump. sensitivity. Reduce sensitivity. ■ Measuring cell – Air bubble Deaerate the measuring cell. ■ in the measuring cell. Degas the eluent continuously. ■ ■■■■■■■■ 2.896.0030 896 Professional Detector – Conductivity & Amperometry... - Page 44 (over night). achieved. DC method – Working con- An excessively high baseline is normal at the ditions not yet achieved. start of the equilibration. Equilibrate until the ■■■■■■■■ 2.896.0030 896 Professional Detector – Conductivity & Amperometry...
- Page 45 Air bubble in the measur- Deaerate the measuring cell (see Chapter 4.6, ing cell. page 27). Background current too Check the background current, e.g. use fresh high, e.g. caused by conta- eluent. minated eluent. ■■■■■■■■ 2.896.0030 896 Professional Detector – Conductivity & Amperometry...
-
Page 46: General Remarks Regarding Sensitivity Fluctuations
IC system – Eluent conta- Apply new eluent. minated. IC system – pH of the elu- Check the pH of the eluent and optimize it if ent has changed. necessary. ■■■■■■■■ 2.896.0030 896 Professional Detector – Conductivity & Amperometry... -
Page 47: Problems With The Pressure
Replace working electrode. electrode damaged. Measuring cell – Measur- Check cable connections (see Chapter 4.7, ing cell not correctly con- page 28). nected. Software – Measurement Optimize the measurement potential. potential incorrect. ■■■■■■■■ 2.896.0030 896 Professional Detector – Conductivity & Amperometry... -
Page 48: Problems With The Chromatogram
IC system – Eluent is old. Ionic strength of the sam- Dilute the sample or optimize the pH of the ple or pH of the sample sample. deviates greatly from the eluent. ■■■■■■■■ 2.896.0030 896 Professional Detector – Conductivity & Amperometry... -
Page 49: Other Problems
Deaerate the measuring cell (see Chapter 4.6, bubbles in the measuring page 27). cell. Measuring cell – Electrode Perform instrument test with dummy cell (see connection cable defective. Chapter 4.1, page 20). ■■■■■■■■ 2.896.0030 896 Professional Detector – Conductivity & Amperometry... -
Page 50: Systematic Error Diagnostics
Reinsert the measuring cell. ■ If the problem has not yet been localized, continue with Step 5. 5 Replacing the reference electrode If the problem has not yet been localized, continue with Step 6. ■■■■■■■■ 2.896.0030 896 Professional Detector – Conductivity & Amperometry... - Page 51 If the problem has not yet been localized, continue with Step 8. 8 Request Metrohm Service If none of these measures help, please request Metrohm Service. Note Please note that, when the electrodes are replaced, the system requires a longer run-in time before the earlier values can be reproduced.
-
Page 52: Reference Conditions
Ring-shaped electrodes made from stainless steel Materials in Chemically inert PCTFE contact with eluent Maximum oper- 5.0 MPa (50 bar) ating pressure Cell tempera- 20…50 °C in steps of 5 °C ture ■■■■■■■■ 2.896.0030 896 Professional Detector – Conductivity & Amperometry... -
Page 53: Amperometric Detector
Software filter, can be set by the user Temperature con- trol Temperature better than 0.05 °C with ambient temperature +8 °C…80 °C stability at the heater Operation Direct Via Software MagIC Net™ ■■■■■■■■ 2.896.0030 896 Professional Detector – Conductivity & Amperometry... -
Page 54: Power Connection
Leak sensor Type Electronic, no calibration necessary Ambient conditions Operation Ambient tem- +5…+45 °C perature Humidity 20…80 % relative humidity Storage Ambient tem- –20…+70 °C perature Transport Ambient tem- –40…+70 °C perature ■■■■■■■■ 2.896.0030 896 Professional Detector – Conductivity & Amperometry... -
Page 55: Housing
Safety mark for certification type 2 in accordance with NEV (type ■ testing with market monitoring, EMC conformity) Design and testing According to EN/IEC 61010-1, UL 61010-1, CSA-C22.2 No. 61010-1, degree of protection IP20, protection class I. ■■■■■■■■ 2.896.0030 896 Professional Detector – Conductivity & Amperometry... -
Page 56: Electromagnetic Compatibility (Emc)
■ EN/IEC 61000-6-2 ■ EN/IEC 61000-4-2 ■ EN/IEC 61000-4-3 ■ EN/IEC 61000-4-4 ■ EN/IEC 61000-4-5 ■ EN/IEC 61000-4-6 ■ EN/IEC 61000-4-8 ■ EN/IEC 61000-4-11 ■ EN/IEC 61000-4-14 ■ EN/IEC 61000-4-28 ■ ■■■■■■■■ 2.896.0030 896 Professional Detector – Conductivity & Amperometry... -
Page 57: Warranty (Guarantee)
■■■■■■■■■■■■■■■■■■■■■■ 8 Warranty (Guarantee) 8 Warranty (Guarantee) Metrohm guarantees that the deliveries and services it provides are free of errors in materials, design or manufacturing. The general warranty period is 36 months (exclusions below) from the date of delivery or 18 months in the event of continuous operation. The... - Page 58 If Metrohm AG is unable to meet this obligation due to circumstances beyond the control of Metrohm AG, then the ordering party shall be offered alternative solutions at preferential conditions.
-
Page 59: Accessories
■■■■■■■■■■■■■■■■■■■■■■ 9 Accessories 9 Accessories Note Subject to change without notice. Scope of delivery 2.896.0030 896 Professional Detector – Conductivity & Amperometry Qty. Order no. Description 1.896.0030 Intelligent stand-alone detector equipped with the high performance IC Conductivity Detector and the IC Amperometric Detector, with the four measuring modes DC, PAD, flexIPAD and CV. - Page 60 Inner diameter (mm): 0.75 Length (m): 6.2151.020 Cable USB A - USB B 1.8 m USB connecting cable Length (m): 6.2165.000 Connecting cable to 61257XXX Connecting cable for amperometric detector cell. ■■■■■■■■ 2.896.0030 896 Professional Detector – Conductivity & Amperometry...
- Page 61 With UNF 10/32 connection. For the connection of PEEK capillaries Material: PEEK Length (mm): 6.2813.040 Dummy cell to the IC Amperometric Detec- tor. Dummy cell for performance tests. 8.896.8006EN Manual for 896 Professional Detector – Conductivity & Amperometry, 2.896.0030 ■■■■■■■■ 2.896.0030 896 Professional Detector – Conductivity & Amperometry...
-
Page 62: Optional Accessories
■■■■■■■■■■■■■■■■■■■■■■ 9.2 Optional accessories Optional accessories 2.896.0030 896 Professional Detector – Conductivity & Amperometry Order no. Description 6.5333.000 IQ/OQ Kit for IC The IQ/OQ Kit contains all parts and standard solutions required for IQ/OQ in ion chromatography. 6.5337.000 IC equipment Wall-Jet cell: without electrodes Wall-Jet cell without electrodes 6.5337.010... - Page 63 Working electrode made of Glassy Carbon for amperometric detection, 3 mm diameter. 6.1257.230 Pt working electrode Platinum working electrode for amperometric detection, 3 mm diameter. 6.1257.240 Ag working electrode Silver working electrode for amperometric detection, 3 mm diameter. ■■■■■■■■ 2.896.0030 896 Professional Detector – Conductivity & Amperometry...
- Page 64 Spacer 25 µm for the amperometric Wall-Jet Cell. 8.896.3001 Declaration of conformity for 896 Professional Detec- 8.896.5000 Brochure: 896 Professional Detector / 850 IC Ampero- metric Detector - Amperometric detection for deter- mining electroactive components ■■■■■■■■ 2.896.0030 896 Professional Detector – Conductivity & Amperometry...
- Page 65 Au, Ag, Pt, GCDiffer- ent maintenance-free reference electrodesVery fast start-up without long condi- tioning timesLeak sensor in the cell compartmentFully compliant with Metrohm Inline Sample Preparation techniquesControl and monitoring by MagIC Net™ - the proven software for ion chromatography 8.850.5007...
- Page 66 MagIC Net™ Multi com- plies fully with FDA Regulation 21 CFR Part 11 as well as GLP. Dialog languages: German, English, French, Spanish, Chinese, Korean, Japanese, et. al. Client- Server version with 3 licenses. ■■■■■■■■ 2.896.0030 896 Professional Detector – Conductivity & Amperometry...
-
Page 67: Index
Power consumption ....46 Power supply cable ....18 Warranty ........49 Electrostatic charge ....3 Power supply unit ..... 46 Frequency ........ 46 Quality Management ....34 GLP .......... 34 ■■■■■■■■ 2.896.0030 896 Professional Detector – Conductivity & Amperometry...
Need help?
Do you have a question about the 896 and is the answer not in the manual?
Questions and answers