Advertisement
Quick Links
www.insigniashowers.com
Last Modified: 07/10/2021
INSTALLATION MANUAL
RW101
Sauna Series
30 Day Technical Support:
Call 01908 317512 and request technical support for aiding your
installation.
Replacements Parts:
Inside of your warranty period visit:
https://www.insigniashowers.com, click support and make a
warranty claim.
Spares/Replacements Parts:
Outside of your warranty period visit
https://www.insigniashowers.com/replacement-parts.html
ATTENTION INSTALLERS:
These instructions must be
left with the customer
CHECK ALL CONTENTS BEFORE BUILD COMMENCES. NO RETURNS CAN BE MADE
ONCE THE BUILD HAS STARTED AS IT IS DEEMED ACCEPTANCE OF PRODUCT!
Advertisement

Subscribe to Our Youtube Channel
Summary of Contents for Insignia RW101 Series
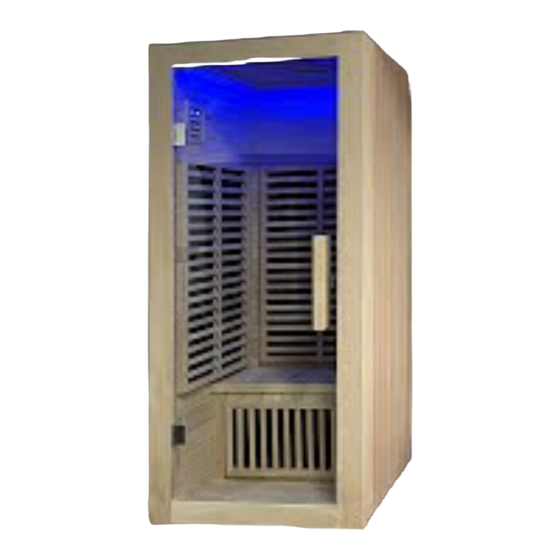
- Page 1 www.insigniashowers.com Last Modified: 07/10/2021 INSTALLATION MANUAL RW101 Sauna Series 30 Day Technical Support: Call 01908 317512 and request technical support for aiding your installation. Replacements Parts: Inside of your warranty period visit: https://www.insigniashowers.com, click support and make a warranty claim. Spares/Replacements Parts: Outside of your warranty period visit https://www.insigniashowers.com/replacement-parts.html...
- Page 2 www.insigniashowers.com Last Modified: 07/10/2021 Contents Thank you for your purchase Electrical & Tool requirements Box contents Back Panel to Base Install Left Side Panel Install Bench Heater Install Bench Install Right Side Panel Install Door Install Roof Install Connecting the Electrics Control Panel Instructions Sauna Room Safety Guide WEEE Compliance Statement...
- Page 3 Last Modified: 07/10/2021 Thank you for your recent purchase of an Insignia Sauna. Please read this booklet with great care to ensure you get the best out of your build and have a Sauna that will last for many years to come! Like everything, in order to obtain a first class product that will serve you well for many years, the effort and correctness put into the assembly will reflect in the quality of your finish.
- Page 4 www.insigniashowers.com Last Modified: 07/10/2021 Electrical Requirements RW101 Tools Required Voltage Rating 220-240AC • Scissors Frequency Rating 50Hz • Knife Power Rating 2500 Watts • Spirit Level Total Amperage 10.41 Amps • Tape Measure • Philips Screwdriver Always consult a qualified Electrician before connection as to suitability •...
- Page 5 Back Panel 40mm Screw Wooden Dowel VERY IMPORTANT Have you got everything? If not please contact the Insignia directly on 01908 317 512. Remember NEVER book your tradesman until everything has arrived, been checked and is present. No replacement/missing parts can be obtained free of charge during or after the build.
- Page 6 www.insigniashowers.com Last Modified: 07/10/2021 Step 1 — Placing the base and back panel in position...
- Page 7 www.insigniashowers.com Last Modified: 07/10/2021 Step 2 — Connecting the left side panel to the back panel Please Note: Screws connect on the interior of the Sauna 3x 40mm Screws...
- Page 8 www.insigniashowers.com Last Modified: 07/10/2021 Step 3 — Installing bench heater Slide the bench heater up against the wooden strut Connect heater panel to back panel using the wires below.
- Page 9 www.insigniashowers.com Last Modified: 07/10/2021 Step 4 — Installing the seat Slide the top of the seat into position, resting on the wooden struts.
- Page 10 www.insigniashowers.com Last Modified: 07/10/2021 Step 5 — Installing the right side panel Please Note: Screws connect on the interior of the Sauna 3x 40mm Screws...
- Page 11 www.insigniashowers.com Last Modified: 07/10/2021 Step 6 — Installing the door Please Note: Screws connect on the interior of the Sauna 8x 40mm Screws...
- Page 12 www.insigniashowers.com Last Modified: 07/10/2021 Step 7 — Installing the Roof The roof simply slots into position. Now the Sauna is assembled, take the wooden dowels and insert over any screw to give the Sauna a sleek and neat finish.
- Page 13 www.insigniashowers.com Last Modified: 07/10/2021 Step 8 — Connecting the power The power box is located on the roof. Take all power cables from the panel heaters and the control panel and connect together. Connect the control panel to the lights and speakers, located in the roof.
- Page 14 www.insigniashowers.com Last Modified: 07/10/2021 Control Panel Instructions Button 1/2 (Temperature) Use the plus and minus buttons to change the temperature your sauna will reach. Button 3/4 (Time) Use the plus and minus buttons to change the duration of the sauna session, until the heaters automatically shut off.
- Page 15 www.insigniashowers.com Last Modified: 07/10/2021 Sauna Usage & Safety Guide Never leave children unattended in the Sauna. Regulate the temperature of sauna before session - Pre-heat time 15-30 minutes (from room temperature 20c) Never touch the heater panels whilst in operation, possible burning may occur. Recommended time of use 15-20 minutes per session Stay hydrated during each Sauna session.
- Page 16 (EEE) have to fulfil certain obligations. Under the WEEE directive Insignia is considered the producer of certain products we supply and in line with the demands of the legislation we are pleased to offer the op- portunity to return these products to us for treatment and recycling.
- Page 17 www.insigniashowers.com Last Modified: 07/10/2021...


Need help?
Do you have a question about the RW101 Series and is the answer not in the manual?
Questions and answers