Table of Contents
Advertisement
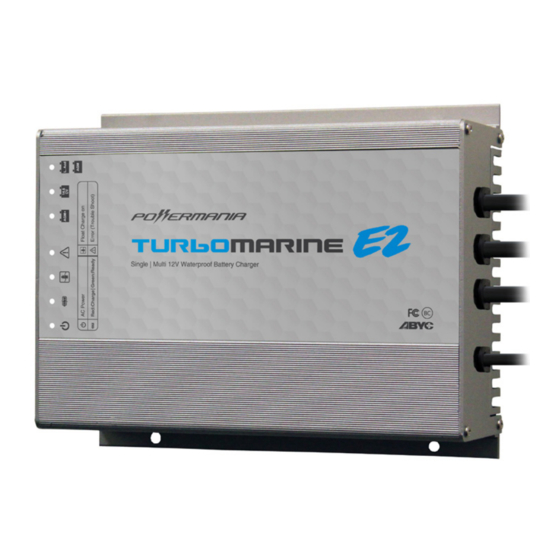
Turbo ME2 series battery charger
Operation Manual
Manufacturer's P/N
57201
57202
57203
57204
57205
57206
57207
57208
R
Model
Turbo M106E2
Turbo M108E2
Turbo M208E2
Turbo M115E2
Turbo M215E2
Turbo M315E2
Turbo M220E2
Turbo M320E2
# 12V Output
1
1
2
1
2
3
2
3
Total Output
6 Amps
8 Amps
8 Amps
15 Amps
15 Amps
15 Amps
20 Amps
20 Amps
Advertisement
Table of Contents
Troubleshooting

Related Manuals for Powermania Turbo ME2 Series


Summary of Contents for Powermania Turbo ME2 Series
- Page 1 Turbo ME2 series battery charger Operation Manual Manufacturer’s P/N Model # 12V Output Total Output 57201 Turbo M106E2 6 Amps 57202 Turbo M108E2 8 Amps 57203 Turbo M208E2 8 Amps 57204 Turbo M115E2 15 Amps 57205 Turbo M215E2 15 Amps...
- Page 2 Important Notice This manual contains important safety, operation, and installation instructions. Please read all the instructions before using your Powermania Turbo ME2 onboard battery charger. WARNING: CHECK BATTERY TYPE This charger is designed to charge only certain types 12V DC batteries; Flooded Lead-Acid, AGM (Absorbent Glass Mat), and some LiFEPO4 (Lithium Iron Phosphate).
-
Page 3: Table Of Contents
Contents Introduction ........................3 Personal safety precautions ...................3 Precautions before charge battery.................3 Box contents ........................4 Specifications .........................5 Feature Highlights ......................8 Installing the charger ....................10 Installation illustration ....................11 Select battery type ....................... 12 Connect the DC cables ....................13 Operating the charger .................... -
Page 4: Introduction
Introduction INTRODUCTION Thank you and congratulations on your new purchase of the Powermania Turbo ME2 series onboard battery charger. This charger is waterproof, corrosion-resistant and shock-resistant— ideal for recharging and maintaining 12V DC batteries in various marine applications and other harsh environments. -
Page 5: Box Contents
Do not bend the AC power cord or extension cord repetitively, especially in the same area. • Make sure the AC power outlet you are connecting to the charger is GFCI (Ground Fault Circuit Interrupt) protected. BOX CONTENTS • Turbo ME2 series battery charger • Operation manual / Registration card • Mounting screws www.powermaniausa.com... -
Page 6: Specifications
Specifications SPECIFICATIONS M106E2 M108E2 M208E2 M115E2 Manufacturer’s P/N 57201 57202 57203 57204 Max. Input 1.7 Amps 2.2 Amps 2.2 Amps 3.5 Amps Current (@120V AC) # 12V Output / 1 output / 1 output / 2 output / 1 output / Total Maximum Amp 6 Amp 8 Amp... - Page 7 M215E2 M315E2 M220E2 M320E2 57205 57206 57207 57208 3.5 Amps 3.5 Amps 5.5 Amps 5.5 Amps 2 output / 3 output / 2 output / 3 output / 15 Amp 15 Amp 20 Amp 20 Amp 18 AWG (AC) / 18 AWG (AC) / 18 AWG (AC) / 18 AWG (AC) /...
- Page 8 Specification (All models) SPECIFICATIONS (All models) Input voltage: 120V AC Input frequency: 50/60Hz Oututput voltage: 13.4V ~ 14.8V DC Battery type setting: 1. Flooded (Lead-Acid) / AGM 2. 14.6 CV (Constant Voltage) 3. AGM+ Min. Absorption time: 2.5 hours Output cable length: 5 feet / 152 cm Power cord length: 5 feet / 152 cm...
-
Page 9: Feature Highlights
Feature Highlights FEATURE HIGHLIGHT: Adaptive Loading USER Fully charges all connected batteries in BENEFIT: the shortest time. The Adaptive Loading feature adjusts the charger’s output level automatically and dynamically on each output bank. This function allows more charging power goes to the more depleted bat- tery, and less power goes to the battery that is closer to full charge. - Page 10 Feature Highlights FEATURE HIGHLIGHT: 3-Stage Smart Charge USER Maximizes battery potential and pro- BENEFIT: longs battery life. Turbo ME2 charges a battery in three sequential stages: Bulk, Absorption, and Monitor / Float. This method is proven to bring a battery to its fullest charge, as well as maintain a fully charged battery’s from self-discharge.
-
Page 11: Installing The Charger
Installation INSTALLING THE CHARGER The Powermania Turbo ME2 series charger is designed to be mounted onboard a vehicle or watercraft. Please refer to the illustration on the next page for the optimal mounting orientation. The top row LED lights should line up horizontally at the top and the output cables at the bottom of the charger. -
Page 12: Installation Illustration
Installation INSTALLATION ILLUSTRATION 8 inch clearance 8 inch 8 inch clearance clearance 8 inch clearance DIMENSIONS AND MOUNTING MEASUREMENT ” ” ” ” 7” ” ” ” www.powermaniausa.com... -
Page 13: Select Battery Type
Secure the screws back to the battery selector. CAUTION: RISK OF PERSONAL INJURY Do NOT use any other screws that are not provided by Powermania to tighten the selector cap. Using unauthorized screws could damage the charger and result in serious personal injury. www.powermaniausa.com... -
Page 14: Connect The Dc Cables
PROPER OPERATION. CONNECT THE DC CABLES The following pages demonstrate proper DC wiring configurations for Powermania Turbo ME2 series chargers. When making DC connections, make sure connecting the same set of positive and negative connectors to the same 12V battery. The red wires are positive (shown as grey color on the diagrams), and the black ones are negative. - Page 15 DC wiring connections Connecting a dual output charger to a single 12V battery Connect both sets of DC outputs to the same battery’s terminal. DO NOT LEAVE ANY SPARE OUTPUT UNCONNECTED. Connecting a 12V output to two 6V batteries If a 12V system is composed of two 6V batteries, connect the output’s positive terminal ring to battery #1’s positive terminal and the same...
- Page 16 DC wiring connections Connecting a dual output charger to two serial-connected 12V batteries (24V system) Connect each set of output to each 12V battery. The jumper can be left connected between the two batter- ies during charging. Connecting a dual output charger to two parallel-connected 12V batteries Connect one set of output to each 12V battery.
- Page 17 DC wiring connections Connecting a triple output charger to three 12V batteries The batteries could be independent, serial-connected or parallel-con- nected. If connecting a quad output charger to three 12V batteries, connect the spare output to any one of the three (preferably the weakest) batteries.
-
Page 18: Operating The Charger
Operating instructions OPERATING THE CHARGER Install the charger and make appropriate DC wiring connections according to the diagrams. Choose an appropriate setting on the Battery Selector (page 12). Plug in AC power cord to a properly grounded outlet. Avoid repeatedly bending a section of the power cord. -
Page 19: Troubleshooting
Troubleshooting ALWAYS DISCONNECT AC POWER CORD PRIOR DANGER: TO MAKING ANY DC WIRING CONNECTION CHANGE OR WHEN CHECKING FUSES. TROUBLESHOOTING Problem Possible Cause Solution Check AC input connection. Try with a dif- No LED On No AC input ferent AC outlet to make sure AC power is present. -
Page 20: Troubleshooting - Battery Isolation Test
If the charger performs full, completed charging cycles in both tests, it may be a connec- tion error from the previous set up. If the charger returns error LED in both tests, contact Powermania to check for warranty coverage. MAINTAINING THE CHARGER The Powermania Turbo ME2 charger requires no specific maintenance. -
Page 21: Fuse Replacement Instruction
Other Information FUSE REPLACEMENT INSTRUCTION • Make sure the charger’s AC power cord is unplugged. Disconnect all the DC outputs from batteries. • Pull the fuse holder straight apart. Do not bend the fuse holder as it will break the fuse in- side. -
Page 22: Warranty And Service Information
Other Information WARRANTY AND SERVICE INFORMATION Powermania, at its discretion, provides a 2-year limited warranty on Turbo ME2 chargers against defects in material or workmanship under normal use. The warranty coverage period is calcu- lated as follows: • If the customer provides a valid purchase receipt, the two-years coverage begins from the date of purchase. - Page 25 RW1909A...
Need help?
Do you have a question about the Turbo ME2 Series and is the answer not in the manual?
Questions and answers