
Related Manuals for Xtralis ADPRO PRO E


Summary of Contents for Xtralis ADPRO PRO E
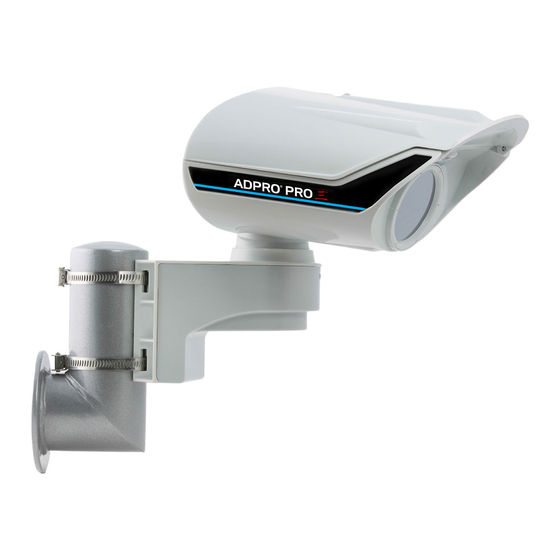
- Page 1 ® ADPRO Passive-Infrared Perimeter Intrusion Detection Systems (PIR PIDS) Installation Guide October 2016 Document: 27386_05...
- Page 3 You acknowledge that you have not relied on any oral or written information, representation or advice given by or on behalf of Xtralis or its representatives.
- Page 4 Installation Guide ADPRO PRO E by Xtralis Document Conventions The following typographic conventions are used in this document: Convention Description Bold Used to denote: emphasis Used for names of menus, menu options, toolbar buttons Italics Used to denote: references to other parts of this document or other documents.
-
Page 5: Table Of Contents
ADPRO PRO E by Xtralis Installation Guide Table of Contents General Notes Information about this guide Warranty Customer Service and Product Monitoring Proper use Applicable documents Safety precautions Environmental protection Transportation, Packaging and Storage Installation Preparatory instructions Instructions on cabling Lightning and overvoltage protection... - Page 6 Installation Guide ADPRO PRO E by Xtralis This page is intentionally left blank. 27386_05...
-
Page 7: General Notes
Please inform the manufacturer of any incidents or malfunctioning. Proper use Xtralis ADPRO detectors are designed to detect the presence in sensitive areas of individuals without access authorization (in this guide, "intruder") and to initiate intervention measures speedily or cause a camera to switch on for a further analysis of the event. -
Page 8: Applicable Documents
You can find data sheets as well as commercial information in the public area of the website. Registration is free, and our partners have access to detailed information such as guides, Xtralis white papers, presentations, images, videos, certificates, as well as software and drivers free of charge. -
Page 9: Environmental Protection
Documentation and resources, such as the latest version of the planning and installation guide, ADPRO PRO PIR e-data sheets and e-brochures, drivers and software tools etc., can be downloaded free of cost from the Xtralis Security Solutions Support Site at www.xtralissecurity.com While unpacking the detector, please take the usual electrical and electrostatic (ESD) precautions by providing sufficient earthing, and observe applicable work safety guidelines. - Page 10 Installation Guide ADPRO PRO E by Xtralis This page is intentionally left blank. 27386_05...
-
Page 11: Installation
ADPRO PRO E by Xtralis Installation Guide Installation Preparatory instructions 2.1.1 Safety precautions WARNING: Risk of injury due to improper installation and commissioning! Improper installation and commissioning can lead to serious injury or damage. Hence: Work on the electric system should be performed only by qualified electricians Look out for openly accessible, sharp-edged parts. -
Page 12: Instructions On Cabling
Installation Guide ADPRO PRO E by Xtralis Instructions on cabling Note: To prevent water ingress, ensure the following: Avoid assembly in rain and prevent soaking in the rain through appropriate means Maintain the minimum diameter for cables Always place the plastic safety washer into the unused screwed cable gland correctly In preparation for the detector assembly, comply with local cable installation regulations and applicable norms. -
Page 13: Detector Assembly
ADPRO PRO E by Xtralis Installation Guide EN 61643-11 Overvoltage protection devices for L.T. Section 11 - Overvoltage protection devices for use in L.T. systems - standards and test procedures EN 61643-21 Overvoltage protection devices for L.T. Section 21 - Overvoltage protection devices for use in telecommunications and signal-processing networks –... -
Page 14: Pole Mounting Of Detector Holder
Installation Guide ADPRO PRO E by Xtralis 2.4.2 Required tools Folding ruler Cross screwdriver Hexagon socket screw driver 4 mm Flat-tip screwdriver 2 mm (pole assembly) Suitable screwdriver, shank length at least 180 mm (wall mount) Engineer’s pliers Cutter (knife) Pole mounting of detector holder... - Page 15 ADPRO PRO E by Xtralis Installation Guide 3. Insert the rounded molding (marked in red here) into the detector arm as shown. 4. Choose screw clips of a suitable diameter depending on the pole. 5. Guide the cables through the cable entry point in the detector arm casing.
-
Page 16: Wall Installation Of Detector Holder
Installation Guide ADPRO PRO E by Xtralis Wall installation of detector holder Notes: Ensure that the wall is sufficiently sturdy. If you mount on thin and dry construction walls, use special hollow cavity plugs if necessary. Use sufficiently long screws with an external diameter of at most 5 mm and a flat screw head. - Page 17 ADPRO PRO E by Xtralis Installation Guide 2.6.1 Installation of detector in detector holder 1. Place the detector as shown and press it in lightly into the detector arm till it locks into place and the lateral notches are no longer visible.
-
Page 18: Installation
Installation Guide ADPRO PRO E by Xtralis Installation 2.7.1 Cabling In the design of the detector and integrated detector holder, great care was taken to see that cabling (cable management) could be installed very easily and quickly, and yet provide the highest level of tamper protection, a veritable boon for the installer. -
Page 19: Pro E-Series Installation Steps
ADPRO PRO E by Xtralis Installation Guide 2.7.2 Recommendations for cable use The following are the cable specifications for PRO E-detectors (cable colours may vary): Peak voltage: 50V AC Temperature range: -40 .. 80°C Test voltages: Wire/wire 1500 V, wire/shield 1200 V... - Page 20 Installation Guide ADPRO PRO E by Xtralis 3. Open the housing cover by unscrewing both housing screws. 4. Install the IP module, part number: CH12005001 (optional): The IP module is an accessory and is not included in delivery of PRO E detectors. Using the IP Module (IPM) converts the RS-485 bus to Ethernet and makes it available remotely through the IP address of the module.
- Page 21 Insert the IP module carefully as shown and push it in with moderate strength, until it locks into the slot as shown. See the ADPRO PRO E PIR System Setup Guide, document no. (26571), PRO E-IPM (IP Module) section for more details.
- Page 22 Installation Guide ADPRO PRO E by Xtralis 9. Feed all cables through the seal as shown, based on their diameter. CAUTION: If you have erroneously removed one groove too many from the cable seal, close it with a piece of cable remnant of appropriate diameter to maintain IP 65 rating.
- Page 23 ADPRO PRO E by Xtralis Installation Guide 11. Connect the power supply and bus cable as shown, the red Front LED blinks slowly to indicate that the power supply is connected, as long as the cover is open. 12. Close the housing cover, torque 0.5 Nm.
- Page 24 13. Align the detector (see "Alignment with the help of the telescope" on page 27), adjust the settings using the PRO software (see the ADPRO PRO E PIR System Setup Guide, document no. (26571), Use of ADPRO PRO E-Tool Software section) and confirm through walk tests.
- Page 25 ADPRO PRO E by Xtralis Installation Guide 2.8.1 Fine adjustment of tamper switch Note: If everything is correctly wired and no component of the tamper protection mechanism reports tamper, the LED in the detector starts to blink for approximately one minute. There are tamper switches both in the detector housing as well as in the cable routing. Before configuring the rear tamper switch, therefore, make sure that the housing and cabling are correctly closed as described above.
-
Page 26: Pro E-Rf Installation Steps
Note: Once connected to the PC, installation, drivers and use are the same as with the RS-485 interface (IFM- 485-ST). See the ADPRO PRO E PIR System Setup Guide, document no. (26571), PRO E-Tool Software section. PRO software (Version 9.27 and up) fully supports PRO E wireless detectors, once connected via PRO E- IFM-RF module. - Page 27 Please refer to the PRO E guide for site layout, mounting, alignment, software settings, etc.(see the ADPRO PRO E PIR System Setup Guide, document no. (26571), Use of ADPRO PRO E-Tool Software section). As with the standard detectors, it is always recommended to use the SW interface for fine tuning, but since...
- Page 28 Installation Guide ADPRO PRO E by Xtralis 2.9.1 Overview PRO E-RF PCB Inovonics wireless transmitter module, plugged in PCB Right battery pack connector External power source terminal Cover tamper switch RF Interface module connector (power/bus) Left battery pack connector Alarm relay terminal (NO/C/NC)
- Page 29 ADPRO PRO E by Xtralis Installation Guide 2.9.2 Installation Steps for PRO E-RF Detectors To install PRO E-RF detector, follow these steps: 1. Mount the detector, 2. Make sure that the bracket switch is connected (SKT5), and the bracket hatch is open, 3.
- Page 30 Installation Guide ADPRO PRO E by Xtralis b. Go through setup: Alignment, walk tests, software settings, fine tuning alignment. When the performance is satisfactory, close the bracket. Front LED will start blinking fast. If LED does not start blinking, make sure the tamper switch in bracket is closed by turning front screw until LED does start blinking.
-
Page 31: 2.10 Final Check
Vertical alignment is optimal when the upper edge of the field of view is at 2 m above ground at the end of the nominal detection range. Nominal detection ranges are listed in the document "ADPRO PRO E PIR System Design and Planning Guide, document no. (27387)". - Page 32 Installation Guide ADPRO PRO E by Xtralis This page is intentionally left blank. 27386_05...
-
Page 33: Detector Alignment
ADPRO PRO E by Xtralis Installation Guide Detector Alignment WARNING: Ensure that the three screws that attach the detector to the detector arm are not tightened but kept loose. Never align the detector by pressing down such that the field of view ends at the perimeter boundary (0 m. - Page 34 10. The vertical dip angle can be adjusted later either manually or more conveniently with iCommission. See the ADPRO PRO E PIR System Setup Guide, document no. (26571), iCommission section. 11. Use iCommission or CT PRO 2 to check whether the detector is detecting.
-
Page 35: Ct Pro 2 - Wireless Walk Tester
ADPRO PRO E by Xtralis Installation Guide CT PRO 2 – wireless walk tester The wireless walk tester CT PRO 2 facilitates precise detector alignment over the entire nominal detection range. Optical-acoustical displays, as well as an LED bar to display the strength of the signal received at the detector make this product an absolute ‘must-have’... - Page 36 Installation Guide ADPRO PRO E by Xtralis This page is intentionally left blank. 27386_05...
-
Page 37: Detector Configuration
ADPRO PRO E by Xtralis Installation Guide Detector configuration More information about detector configuration with a PC and ADPRO PRO-Tool-software please refer to document ADPRO PRO E PIR System Setup Guide, document no. (26571). 27386_05... - Page 38 Installation Guide ADPRO PRO E by Xtralis This page is intentionally left blank. 27386_05...
-
Page 39: Overview Of The Circuit Board
ADPRO PRO E by Xtralis Installation Guide Overview of the circuit board 1. Alarm output terminal 2. Heating terminal 3. Backup battery 4. Light-sensitive proximity sensor 5. Tamper switch socket 6. Rotary switches (do not change) 7. Test (bus/power) or IP module (optional) socket 8. -
Page 40: Interface Module Ifm-485-St
Installation Guide ADPRO PRO E by Xtralis tamper end-of-line Tamper tamper output Fault fault output alarm end-of-line Alarm alarm output Out 4 free programmable output Out 5 free programmable output RS 485 RS-485 terminal V+ Supply power supply (+) GND Supply power supply (-) Interface module IFM-485-ST 5.2.1... - Page 41 ADPRO PRO E by Xtralis Installation Guide 5.2.2 Multiple detectors at interface module IFM-485-ST Perform the following steps to connect more than one detector to a PC via the RS485 data bus: 1. First, connect each detector individually to a computer on which the PRO software is installed and assign it an individual address (1-255) in the software settings.
- Page 42 Installation Guide ADPRO PRO E by Xtralis 27386_05...
-
Page 43: Technical Data
ADPRO PRO E by Xtralis Installation Guide Technical data Please note that fundamentally, there are 2 different versions: Standard version High performance – version (H version) The H version is distinguished by the following enhanced features: The housing front pane is not made up of IR-transmissive sheeting, but a silicon-wafer pane which was developed specifically for this application and is distinguished by its high transmissivity to IR radiation. -
Page 44: Maintenance And Cleaning
/video monitoring systems, or via a risk management system through a 24x7 alarm receiving system (n) (ARS) in accordance with DIN EN 50518-1. ADPRO PRO E-PIR detectors were third party tested and fully meet the following norms: 2004/108/EC... -
Page 45: Unwanted Alarms
ADPRO PRO E by Xtralis Installation Guide Unwanted alarms Possible cause Possible solution Animals in the detection range. Check whether there are any animals. Fence in the detection range if necessary. Vegetation moved by wind or Check, whether vegetation (such as branches and leaves) moves. - Page 46 Installation Guide ADPRO PRO E by Xtralis This page is intentionally left blank. 27386_05...
-
Page 47: Dismantling And Disposal
ADPRO PRO E by Xtralis Installation Guide Dismantling and disposal At the end of its useful life, the device must be dismantled and disposed of in an eco-friendly manner. Work safety Personnel Work on the electrical system must be performed only by qualified electricians. -
Page 48: Notes
Installation Guide ADPRO PRO E by Xtralis Notes 27386_05... - Page 50 UK and Europe +44 1442 242 330 D-A-CH +49 431 23284 1 The Americas +1 781 740 2223 Middle East +962 6 588 5622 Asia +86 21 5240 0077 Australia and New Zealand +61 3 9936 7000 A Disclaimer about this document, statements about Intellectual Property, Copyrights, and Liability, as well as a General Warning are available in an earlier section of this document.
Need help?
Do you have a question about the ADPRO PRO E and is the answer not in the manual?
Questions and answers