Table of Contents
Advertisement
Quick Links
Advertisement
Table of Contents

Related Manuals for Zte e810


Summary of Contents for Zte e810
-
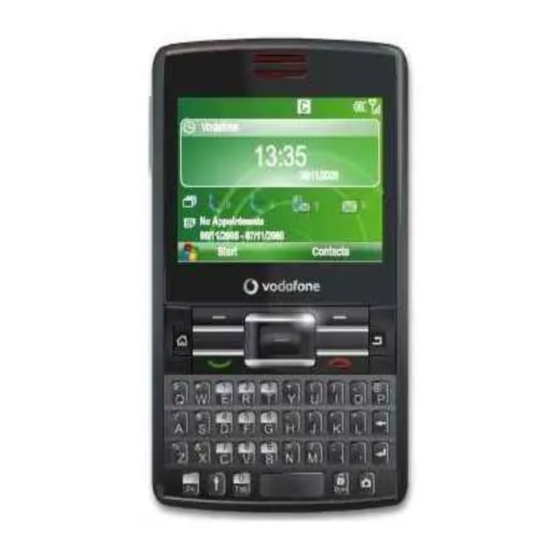
Page 1: Zte E810
ZTE e810 User Guide... - Page 2 All Rights Reserved Your ZTE e810Smartphone is made exclusively for Movistar by ZTE CORPORATION. No part of this manual may be reproduced or transmitted in any form or by any means without prior written consent of ZTE CORPORATION. Notice The information in this manual is subject to change without notice. Every effort has been made in the preparation of this manual to ensure accuracy of the contents, but all statements, information, and recommendations in this manual do not constitute a warranty of any kind, expressed or implied.
-
Page 3: Product Safety Information
Product Safety Information Read the Safety Information section of this Do not use while re-fuelling user guide on page** Do not use hand-held while driving This device may produce a bright or flashing light For body-worn operation maintain a Do not dispose of in a fire separation of ** mm Small parts may cause a choking hazard Avoid contact with magnetic media... - Page 4 While there may be differences between the SAR levels of various ZTE phone models, they are all designed to meet the relevant guidelines for exposure to radio waves.
- Page 5 Distraction Driving Full attention should be given to driving at all times in order to reduce the risk of an accident. Using a phone while driving (even with a hand free kit) causes distraction and can lead to an accident. You must comply with local laws and regulations restricting the use of wireless devices while driving. Operating machinery Full attention must be given to operating the machinery in order to reduce the risk of an accident.
- Page 6 Seizures/ Blackouts This phone is capable of producing bright flashing lights. Repetitive Motion Injuries • To minimize the risk of RSI, when texting or playing games with your phone: • Do not grip the phone too tightly. • Press the buttons lightly. •...
- Page 7 interference with sensitive medical equipment. Aircraft Switch off your wireless device whenever you are instructed to do so by airport or airline staff. Consult the airline staff about the use of wireless devices on board the aircraft, if your device offers a ‘flight mode’ this must be enabled prior to boarding an aircraft.
-
Page 8: About Your Zte E810
To increase the security of your device, you can consider installing appropriate antivirus software with a regular update service and using a firewall application. Warning: To use any features including alarm clock in this device, the ZTE e810 must be switched on. Do not switch the device on when your mobile device use may cause interference or danger. -
Page 9: Table Of Contents
Contents ZTE e810 ..............................错误!未定义书签。 User Guide ....................................1 Product Safety Information ................................3 About Your ZTE e810 ...................................8 1 Getting Started ..................................11 1.1 Starting Up............................11 1.2 Your Phone ............................13 1.3 Home Screen............................ 14 1.4 Input Methods..........................16 1.5 Basic Operations ..........................16 1.6 Function and Feature Preview ...................... - Page 10 8.4 Microsoft Office Excel Mobile .......................43 ® ® 8.5 Microsoft Office PowerPoint Mobile....................44 ® ® 9 Synchronization ..................................46 9.1 Using ActiveSync ..........................46 9.2 Synchronizing Music, Video, and Pictures with your PC ..............46 9.3 SyncML ......................错误!未定义书签。 9.4 Synchronizing Your Device with the Exchange Server........错误!未定义书签。 9.5 Working with Company E-mails ...............
-
Page 11: Getting Started
1 Getting Started 1.1 Starting Up Install the SIM Card and Battery 1. Hold your SIM card with the cut corner oriented as shown below and then insert it into the card holder properly. See Figure 1. 2. Insert the battery by aligning the gold contacts on the battery with the gold contacts in the battery compartment on the phone. Push down the battery until it clicks into place. - Page 12 MicroSD Card Your phone supports MicroSD cards. It expands the storage capacity of the phone. You can store or copy files such as videos, photos, music ,etc. To insert & remove MicroSD card 1. Insert: Open the cover of MicroSD card slot is on the left side of the phone. See Figure 9. Insert the card with the metal contacts facing upwards until it clicks to the right position.
-
Page 13: Your Phone
1.2 Your Phone Key Definition Front components Figure 11 Item Name Function Earpiece Listen to a phone call. Display Screen View information on the display screen.. Home Key Press to go to the Home screen. Left Soft Key Press to perform the command shown in the label above the key. Press to dial a phone number, answer a call, switch to another call, or put a Dial Key call on hold. -
Page 14: Home Screen
Back components Figure 12 Item Name Function Speaker Listen to system sound, conversation, and music. Camera Lens CMOS lens with 1.3 megapixels. Camera Flash Provide flashlight when taking picture. Self-photo Mirror Take a photo of yourself by aligning your reflection in this mirror. Battery Cover Open the battery cover to install or remove the battery and SIM card. - Page 15 Common Status Indicators on the Title Bar of the Home Screen Figure 14 Indicator What it means Missed call New message New mail Bluetooth connection is active Bluetooth on New Windows Live message Calls are forwarded EDGE in use GPRS in use GPRS roaming Vibrate mode Sound off...
-
Page 16: Input Methods
1.4 Input Methods Switch between Different Input Modes Press the Fn key to switch between input modes when you need to enter characters, numbers, or symbols. The input mode indicator is displayed on the title bar. Enter Numbers and Symbols Use the Fn key to switch between the following modes: for numeric or symbol input. -
Page 17: Function And Feature Preview
To return to the Home screen At any screen, press the Home key to go back to the Home screen so that you can run other tasks. Note: You can also press the End key to return to the Home screen. If you press the End key during a call, however, the call will be ended. To go back to the previous page Press the Back key to go back to the previous screen. - Page 18 Clock & Alarm Select Start > Organiser & Tools > Clock & Alarm. Set the time zone along with the current time and date. The time and date information will affect the calendar reminders and the alarm ring time. To set the date and time, select Date and Time. Select the time zone and then use the numeric keys to enter the current date and time. To set the alarm, select Alarm 1 or Alarm 2.
-
Page 19: Using The Phone
2 Using the Phone 2.1 Starting the Phone Function Disable & Enable Phone Function When using this phone, you can control wireless functions. When the phone function is off, you will not be able to receive calls, send/receive messages, or use GPRS to connect to wireless mobile network. -
Page 20: Answering Incoming Calls
Make Speed Dial Press and hold the speed key to call in the Home screen. You can set speed dial entries/shortcuts for the frequently dialed contact numbers. To learn how to use Speed Dial, see Section 2.6. 2.3 Answering Incoming Calls When there is an incoming call, the phone will display the information on the screen. -
Page 21: Using Speed Dial
2.6 Using Speed Dial Create a Speed Dial You can create speed dial entries (or shortcuts) for frequently dialed numbers or accessed programs. 1. To add a frequently dialed number: Activate the Contacts list. Choose one contact, then choose an item to set up, for example, mobile phone number. To add a frequently accessed program: Highlight a program. -
Page 22: Messaging
3 Messaging Messaging is where all of your e-mail, SMS, and MMS accounts are located. When you receive a new message, you can open it from the Home screen. Simply scroll to the row where the new message is located and select it to read. To access your message accounts, select Start >... -
Page 23: Outlook E-Mail
Sent Items: Store sent messages. • To move message On Draft, Deleted Items, Outbox or Sent Iterms screen, select the message you wish to move. Then select Menu > Move. Select the folder to keep the message. To select messages Select Menu >... -
Page 24: Movistar E-Mail
Create and Reply to E-mails To compose and send an e-mail 1. Select Start > Messaging, and then select an e-mail account. 2. Select Menu > New. 3. Enter the e-mail address of one or more recipients, separating them with a semicolon. To access e-mail addresses stored in Contacts, select Menu >... -
Page 25: Personal Information
4 Personal Information 4.1 Contacts Select Start > Contacts. Open Contacts application program. Open Contacts from Home Screen You can add new contacts along with their information. Setting up communication information for the contact will allow you to connect with the person quickly or browse the contact's information. -
Page 26: Calendar
Select Menu > Send as vCard. Enter the recipient in To of the MMS message, and then select Send. • If the recipient accepts the MMS message, the contact information you sent are automatically saved in that person’s Contacts. Send MMS to Contacts Select Menu >... -
Page 27: Tasks
4.3 Tasks Select Start > Organiser & Tools > Tasks. Add New Tasks 1. Select Menu > New Task. 2. Enter the task information. 3. Select Done. The detailed task information includes: Subject: Enter the subject. • Priority: Choose the priority level of the task. •... -
Page 28: Sim Manager
4.5 SIM Manager Select Start > Organiser & Tools > SIM Manager to open the SIM manage tool. With SIM Manager, you can manage the contacts information in your SIM card and perform actions such as select, delete, copy to Outlook, etc. You can select Options >... -
Page 29: Settings
5 Settings 5.1 General Settings Select Start > Settings to open the homepage of Settings. Select More to see more settings. Set up the Home Screen The Home screen is the starting place for most tasks you perform on your phone. You can get access to all features and programs from the Home screen. To customize the Home screen: Select Home Screen.You can set the Home screen layout, Show recent programs, Color scheme, Background image, and Time out for the Home screen, see Figure 17. -
Page 30: Function Settings
Reset to Factory Default Setting Select Reset To Factory Settings. Follow the on-screen instructions to reset the phone. The phone will restart after reset. Warning! After you reset your phone to factory default setting, all the information and settings you have saved will be lost. Device Information Select Device Information to check the hardware &... - Page 31 Select Start > Settings to open the homepage of Settings. Select More to see more settings. Add and Remove Programs Before you purchase additional programs for your phone, make sure that they are compatible with the Windows Mobile 6.1 Standard operating system. ®...
- Page 32 Set the Error Reporting Select to enable/disable Error Reporting. If enabled,,the phone can automaticlly send the error report to Microsoft Corporation. For more information, read the description on the Error Reporting screen. Set the Customer Feedback Select Customer Feedback, and then press the Left/Right key to enable/disable this function. If enabled, the phone can automaticlly send a feedback to Microsoft Corporation.
-
Page 33: Experiencing Multimedia
6 Experiencing Multimedia 6.1 Camera Use Camera To open camera On the Home screen, select Start > Entertainment > Camera to launch the camera program. Tip: You can also launch your camera program from anywhere by pressing the Camera key. Camera standby screen It displays Standby on the camera screen after 30-second idle as shown in Figure18. -
Page 34: Managing Pictures And Video Files
camera are saved with a default prefix “img”. You can change the prefix and compress pictures to different levels. Tip: The file names are numbered in an increasing order. For example, the files are saved as “img001” and “img002”. Note: The Type filename prefix field cannot be blank; otherwise, the files will be saved with default prefix automatically. Video: You can decide whether to include audio when recording video files. - Page 35 About Licenses and Protected Files Some media files have associated licenses that protect them from being unlawfully distributed or shared. If you want to copy a protected file from your PC to your phone, use the Windows Media Player on your PC to synchronize the file to your phone. This will ensure that the license is copied along with the protected file.
-
Page 36: Java Applications
My Playlists: You can add the media files into your playlist. • Now Playing: You can see the current file being played and files that are queued up to play next. • To update media library You can manually update the library to ensure that it contains new files that you recently copied to your phone or storage card. Select Menu > Update Library to manually update the library list. -
Page 37: Getting Connected
7 Getting Connected 7.1 Connecting to the Internet Ways of Connecting to the Internet Your phone’s networking capabilities allow you to access the Internet or your corporate network at work through wireline and wireless and connections. You can connect to the Internet by: GPRS or Dial-up. Note: You can also add and set up the following connections: •... -
Page 38: Internet Sharing
connection, shut down the phone function in the Wireless Manager. For more information about the Wireless Manager, see Section 2.1. Enter the text when the cursor is in the text field. Press the OK key to send the entered text. Use the Navigation keys to move around the screen. Use the Navigation keys to move to the hyperlink;... -
Page 39: Bluetooth
3. In the Network Connection list, choose the connection that your phone uses to connect to the Internet. 4. Press Connect to connect your phone to a PC through Bluetooth. 7.4 Bluetooth Bluetooth is a short-range wireless communications technology. Phones with Bluetooth capabilities can exchange information within a distance of about 10 meters without any physical connection. -
Page 40: Windows Live Messenger
7.6 Windows Live Messenger Live Messenger lets you send and receive instant messages online. With this mobile version of Windows Live Messenger, you enjoy many of the same cool features that you get from the desktop version. The features are: Send and receive instant messages via text and voice •... - Page 41 again. Another message screen opens. 4. To switch from one message screen to another, press the Left/Right key to the display picture of the contact whom you want to talk to. 5. To end a conversation with the current contact, select Menu > End conversation. 6.
-
Page 42: More Applications
8 More Applications 8.1 File Explorer File Explorer provides many easy-to-use features for file and folder management. Start File Explorer On the Home screen, select Start > File Explorer. File Explorer displays the entire file structure in your phone’s memory. The functions focus primarily on folder management. When initially started, File Explorer is in List View by default. -
Page 43: Microsoft ® Office Excel ® Mobile
Note: Text in tables cannot be wrapped. To change scrolling preference When a document is opened, select Menu > Scroll Up/Down and then select By Page or By Line. To find a word in a document 1. Select Menu > Find…. 2. -
Page 44: Microsoft ® Office Powerpoint ® Mobile
To switch to another worksheet If your Excel file has multiple worksheets, you can go to a different worksheet by selecting View > Sheet and then select the worksheet you want to view. Edit and Send Worksheets In order to edit Excel worksheets, you need to switch to Edit mode. When the worksheets are opened, to switch to Edit mode, select Menu > Edit. To edit the cell text 1. - Page 45 Select Start > Office Mobile > PowerPoint Mobile. View PPT Files To open a file 1. In PowerPoint Mobile, select Menu and choose the location where the *.ppt file is saved. 2. Locate the file you want to open and press Select. To go through the slides of the presentation Press the Right key to go through the slides of the presentation;...
-
Page 46: Synchronization
9 Synchronization You can synchronize information between your PC or Microsoft Exchange Sever and your phone with ActiveSync on both your phone and PC. Before ® synchronizing information, please install ActiveSync on the PC. Once you install ActiveSync on your PC, you will be prompted to connect your phone and create a synchronization relationship with the device by using a USB cable or Bluetooth connection. - Page 47 Before you can start to synchronize with or access information from the Exchange Server, you need to set up an Exchange Server connection on your phone. You need to get the following information from your network administrator and enter them to your phone: Exchange Server name (must be the Outlook Web Access server name) •...
-
Page 48: Specifications
10 Specifications Dimension Approx. 113 mm × 65.4 mm × 14.5 mm Weight Approx. 130 g Bearer GRPS and EDGE support Main Display dimension,resolution, color space 2.5', 320*240, 65K color Camera Sensor Type CMOS Still Image Capture Resolution 1.3M Pixel Total internal memory (end user available) in MB 64MBytes for user Removable memory card... -
Page 49: Troubleshooting
11 Troubleshooting This section describes how to troubleshoot some problems when they occur to your phone. Why can’t I turn on my phone as I press the power key? Either you didn’t press the key long enough, or the phone has shut down because the battery power level is too low to make calls. Please recharge the battery. -
Page 50: Declaration Of Rohs Compliance
Declaration of RoHS Compliance To minimize the environmental impact and take more responsibility to the earth we live in, this document shall serve as formal declaration that the ZTE e810 manufactured by ZTE CORPORATION is in compliance with the Directive 2002/95/EC of the European Parliament - RoHS (Restriction of Hazardous Substances) with...
Need help?
Do you have a question about the e810 and is the answer not in the manual?
Questions and answers