Table of Contents
Advertisement
Quick Links
Advertisement
Table of Contents

Related Manuals for Zte EasyTouch Discovery 2


Summary of Contents for Zte EasyTouch Discovery 2
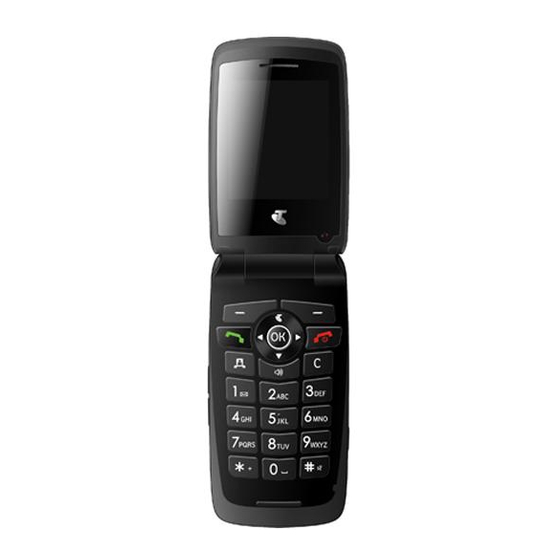
- Page 1 The EasyTouch® Discovery 2 HSDPA Multi band 3G Mobile Phone User Guide...
- Page 2 Congratulations on choosing the E E E E E asyT asyT asyTouc asyT ouch h h h h ® Disc ® Disc ® Disco o o o o v v v v v ery ® Disc ery 2 2 2 2 2 a simple way to keep in touch and so much asyT ®...
-
Page 3: How To Use Messages How To Use Messages
The package includes: Contents Image EasyTouch® Discovery 2 Handset, battery and charger USB Data Cable and per- sonal handsfree headset. Instructional DVD with Join Me PC Software, user guide and more… User Guide and warranty card... - Page 4 ZTE shall not be liable for any loss of profits or indirect, special, incidental or consequential damages re- sulting from or arising out of or in connection with using this product, whether or not ZTE had been advised, knew or should have known the possibility of such damages. The user should refer to the en-...
-
Page 5: Table Of Contents
Contents RF Safety Information ..............................9 General Safety and Maintenance Information ....................... 10 1 1 1 1 1 How to use this guide How to use this guide ................................................How to use this guide How to use this guide ........................How to use this guide ........................ -
Page 6: Access The Internet On Your Mobile Phone Access The Internet On Your Mobile Phone
How to make / answer a Video Call ......................32 How to use the headphones (Personal Handsfree) ................33 5 5 5 5 5 How to Personalise the Phone How to Personalise the Phone How to Personalise the Phone ....................How to Personalise the Phone How to Personalise the Phone .................... -
Page 7: Making Calls Making Calls
PC Connection ..............................56 7.12 USB Mode – Use the handset as a Mass Storage Device ................ 56 7.13 Connect to the ZTE Bluetooth Car Kit ...................... 57 7.14 Connect to a Bluetooth Wireless Device ....................57 7.15 How to use Dial Up Networking via USB or Bluetooth ................. 59... - Page 8 11.3 Use your Mobile as a Modem ........................76 Use with Hearing Aid Devices and Text Terminals Use with Hearing Aid Devices and Text Terminals Use with Hearing Aid Devices and Text Terminals ............Use with Hearing Aid Devices and Text Terminals Use with Hearing Aid Devices and Text Terminals ............
-
Page 9: Rf Safety Information
RF Safety Information The handset has an internal antenna located in the top of the phone. For optimum performance with minimum power consumption do not cover the antenna area with your hand. Hold the handset between thumb and finger in the middle of the device. Covering the antenna affects call quality, may cause the handset to operate at higher power levels than needed, and may shorten talk and idle times. -
Page 10: General Safety And Maintenance Information
General Safety and Maintenance Information The handset contains delicate electronic circuitry, magnets and battery systems. You should treat it with care and pay attention to the following points: • Handle the handset with care. Do not drop or • Do not use damaged batteries. •... - Page 11 • Do not place the handset close to the edge of the same compartment as flammable gas, liq- a table in case it moves when set on vibrate uid or explosives. • Do not leave the handset discharged or discon- mode.
-
Page 12: How To Use This Guide
1 How to use this guide The following conventions are used in the manual: The following conventions are used in the manual: The following conventions are used in the manual: The following conventions are used in the manual: The following conventions are used in the manual: I n s t r u c t i o n I n s t r u c t i o n I n s t r u c t i o n... -
Page 13: How To Find Your Way Around Your New Handset
2 Getting Started How to find your way around your new handset? 1. Earpiece 2. Main Display 3. Arrow Keys ( 4. Left Top Key 5. Call Key, show Call History 6. Video Call Key 7. Keypad 8. Microphone 9. Speakerphone button 10. - Page 14 Speaker External Antenna port Charger, USB and Headset port Memory Port Volume keys Battery Cover Camera key Left Rear Right...
-
Page 15: How To Remove The Battery Cover
How to remove the battery cover Push down gently on the thumb notch then slide the cover down and lift off. How to insert the USIM Card USIM card USIM card The USIM card USIM card USIM card (UMTS Subscriber Interface Module) is the small plastic smart-card with gold contacts. It holds personal information such as names and phone numbers. - Page 16 How to insert the USIM card How to insert the USIM card How to insert the USIM card How to insert the USIM card How to insert the USIM card Insert the USIM card with the gold contacts facing down and the bevelled edge on the right hand side. There is a diagram showing the correct orientation embossed onto the plastic sleeve.
-
Page 17: How To Insert The Battery
How to insert the Battery Insert the battery Insert the battery as shown with the contacts located against the gold springs. The battery only fits one Insert the battery Insert the battery Insert the battery way. Close the case Close the case Close the case Close the case by locating the plastic cover horizontally into the grooves and sliding the cover up to close Close the case... -
Page 18: How To Connect The Charger
How to connect the charger Charge before initial use. The charger lead only fits one way . The charger lead only fits one way . The charger lead only fits one way . The charger lead only fits one way. The plug is marked with an arrow on the . -
Page 19: How To Switch The Phone On Or Off
How to switch the phone On or Off Press and hold Press and hold Press and hold the Press and hold Press and hold key for two seconds two seconds two seconds two seconds to switch the phone ON two seconds ON or OFF. -
Page 20: Getting To Know My Mobile
3 Getting to Know My Mobile Information Bar Icons The Information Bar icons appear at the top of the Main Screen to indicate what is happening on your mobile. For example, the signal strength icon indicates what level of signal strength or reception you are getting in a particular location. -
Page 21: Keypad Functions
Keypad Functions K e y K e y C o r r e s p o n d i n g F u n c t i o n s C o r r e s p o n d i n g F u n c t i o n s K e y K e y C o r r e s p o n d i n g F u n c t i o n s K e y... -
Page 22: What Is The Main Menu
What is the Main Menu? The Main Menu Main Menu Main Menu Main Menu presents a list of options for selection. eg. Find a contact, create a message, set an alarm. Main Menu To access the Main Menu Main Menu Main Menu Main Menu Main Menu press the OK key... -
Page 23: Menu Quick Reference Guide
Menu Quick Reference Guide... - Page 24 Menu Quick Reference Guide Continued… Menu Quick Reference Guide Continued… Menu Quick Reference Guide Continued… Menu Quick Reference Guide Continued… Menu Quick Reference Guide Continued…...
- Page 25 Menu Quick Reference Guide Continued… Menu Quick Reference Guide Continued… Menu Quick Reference Guide Continued… Menu Quick Reference Guide Continued… Menu Quick Reference Guide Continued…...
-
Page 26: How To Navigate The Menus And Select A Menu Item
How to navigate the Menus and select a menu item Main Screen Main Screen Main Menu Main Menu. Use the Arrow Keys Main Menu Arrow Keys Arrow Keys Arrow Keys to move the cursor From the Main Screen Main Screen Main Screen press OK OK to access the Main Menu Main Menu... -
Page 27: Making Calls
4 Making Calls How to make / answer a Voice Call 4.1.1 How to make a Voice Call • Enter the number number number number on the keypad number keypad keypad keypad keypad and press the Call key to make a voice call. •... - Page 28 4.1.4 How to make a Call using Contacts • Press OK OK for the main menu, press the down arrow for Contacts Contacts Contacts Contacts Contacts then press OK • Use the Arrow Keys Arrow Keys Arrow Keys Arrow Keys Arrow Keys to scroll to the chosen contact •...
- Page 29 4.1.6 General tips for Calls • For International numbers International numbers International numbers International numbers International numbers press the star key star key star key star key star key twice for the International Prefix International Prefix International Prefix International Prefix International Prefix ‘+ + + + + ’...
- Page 30 4.1.8 How do I make Emergency Calls? T T T T T o make an emer o make an emer o make an emer o make an emer o make an emergenc genc genc genc gency c y call during normal use all during normal use all during normal use all during normal use...
- Page 31 4.1.9 How to use Call Divert Menu > Settings > Menu > Settings > Menu > Settings > Arrow Right Menu > Settings > Menu > Settings > to Call > Call divert Call > Call divert Call > Call divert Call >...
-
Page 32: How To Make / Answer A Video Call
device device to answer the call. Press the call key on the Bluetooth device for Last Number Redial. The handset device device device does not support the transfer of Contacts over Bluetooth. An active call active call active call active call can be switched active call switched switched... -
Page 33: How To Use The Headphones (Personal Handsfree)
4.2.3 How to use Call Options during an active Video Call Press the L L L L Le e e e e f f f f f t T t Top K op K op K op Key op K ey ey ey ey for the following O O O O O ptions ptions... -
Page 34: How To Personalise The Phone
5 How to Personalise the Phone There are many ways to customise the handset such as changing the profiles, wallpaper, ringtones and setting up shortcuts. How to Change Volumes During a call press the side volume keys to adjust the earpiece or speaker volume 5.1.1 How to Change the Profiles Profiles... - Page 35 5.1.2 How to Adjust the Ring Volume • Select Menu Menu Menu Menu Menu > Set Settings tings tings tings tings > Arrow Right to P P P P P r r r r r of of of of ofile ile ile ile iles s s s s > press the Right T Right T Right T Right T...
-
Page 36: How To Manage My Contacts
5.1.6 How to Enable Meeting Mode with a single key press • Meeting Mode Meeting Mode Meeting Mode Meeting Mode Meeting Mode puts the handset in silent mode with vibrate on • From the Main Screen Main Screen Main Screen # key # key Meeting Mode... - Page 37 5.2.2 How to search Contacts From the Main scr Main scr Main scr Main scr Main scre e e e e en en en en en Ar Ar Ar Ar Arr r r r r o o o o o w w w w w D D D D D o o o o o wn for C C C C C ont ontac ac ac ac acts ts ts ts ts.
- Page 38 5.2.5 How to set a particular ringtone or image to a Contact The contact needs to be stored on the handset in order to set a dedicated ring or image. See 5.2.1 to copy your contacts into the handset. Menu Menu >...
-
Page 39: How To Change The Viewing Options
How to change the Viewing Options 5.3.1 How to Change the Background Screen (Wallpaper) Menu Menu Settings Settings Wallpaper Wallpaper Menu Menu > Settings Menu Settings Settings > Wallpaper Wallpaper Wallpaper • Browse to the required folder eg Photos > My Pictures required folder eg Photos >... -
Page 40: How To Set Up Other Useful Options
How to set up other useful options 5.4.1 How to use Speed Dial Speed Dials Speed Dials Having Speed Dials Speed Dials Speed Dials set makes it quicker to call selected contacts. Menu Menu Contacts Contacts Contact Contact Options Options Arrow down Arrow down Speed Dial >... -
Page 41: How To Set The Time And Date
5.4.5 Missed Calls Alert Menu Menu Menu > Settings Menu Menu Settings Settings Settings Settings > Arrow Right to Handset > Missed calls alert Handset > Missed calls alert Handset > Missed calls alert Handset > Missed calls alert Handset > Missed calls alert After missing a call, the missed call icon missed call icon missed call icon... -
Page 42: How To Disable Or Change The Pin Code
How to Disable or Change the PIN Code Menu Menu Settings Settings Settings > Arrow Right Security Security Enable PIN codes > PIN code Enable PIN codes > PIN code Menu Menu > Settings Menu Settings to Security Security Security > Enable PIN codes > PIN code Enable PIN codes >... -
Page 43: How To Use Messages
6 How to use Messages How to use Text Messages (SMS) 6.1.1 How to send a Text Message From the main scr main scr main scr main scre e e e e en main scr en en en en press the L L L L Le e e e e f f f f f t T t Top K op K op K... - Page 44 6.1.3 How to use Predictive Text Predictive text allows words to be entered more efficiently using a single keypress for each letter, as opposed to multiple keypresses in multi-tap text mode. Compare how to write the word ‘the’: Traditional multi-tap text mode (ABC, abc) Traditional multi-tap text mode (ABC, abc) Predictive Text Mode (En) Predictive Text Mode (En)
- Page 45 6.1.4 How to add words to the built in Dictionary (My Words) • From predictive text predictive text predictive text predictive text predictive text mode enter words directly by choosing Spell Word? Spell Word? Spell Word? Spell Word? Spell Word? •...
- Page 46 6.1.6 How to Delete a message • From the Main Scr Main Scr Main Scr Main Scr Main Scre e e e e en en en en en press L L L L L e e e e e f f f f f t T t Top K op K op K...
-
Page 47: How To Send A Multimedia Message (Mms)
How to send a Multimedia Message (MMS) Use a Multimedia message Multimedia message Multimedia message Multimedia message to send pictures pictures pictures, music pictures music music music or video files video files video files video files to your friends. Multimedia message pictures music video files... -
Page 48: How To Use Email On Your Mobile
How to use Email on your mobile The default default default Email client is configured for MyEmail default MyEmail MyEmail MyEmail provided by Telstra. Configure the settings via Menu Menu Menu Menu default MyEmail Menu > My Place My Place My Place My Place My Place >... -
Page 49: How To Receive An Email
How to receive an Email The de de de de def f f f f ault ault ault ault Email client is configured for MyEmail MyEmail MyEmail provided by Telstra. To receive Emails from alternate MyEmail ault MyEmail providers configure the native Email Client with your personal settings: Menu >... -
Page 50: How To Use Other Features On My Mobile
7 How to use Other Features on my Mobile How to Set Alarms Menu Menu Menu > T T T T T o o o o o ols Menu Menu ols > Alarm Alarm Alarm Alarm Alarm > Ad Add d d d d Configure the alarm as required using the Alarm Setup Screen: •... -
Page 51: How To Set Appointments Using The Calendar
How to Set Appointments using the Calendar Menu Menu > T T T T T o o o o o ols Menu ols > C C C C C alendar alendar alendar alendar > Ad Add d d d d Menu Menu alendar... -
Page 52: Calculator
Calculator Menu Menu > T T T T To o o o o ols Menu ols > C C C C C alc alculat ulat ulator or or or or ulat Menu Menu ulat • Press 0~9 keys to enter numbers. Press Point Point Point Point... -
Page 53: Stopwatch
Stopwatch Menu > T Menu > To o o o o ols > St Menu > T ols > St ols > St ols > Stopw opw at at at at at c c c c c h h h h h Menu >... -
Page 54: File Manager
File Manager Menu Menu > File Manager Menu File Manager File Manager File Manager Menu Menu File Manager File Manager is a storage area for Photos Photos Photos, Audios Photos Audios Audios, and Videos Audios Videos Videos. It is separated into four folders, Photos Videos Photos Photos... -
Page 55: How To Use A Memory Card (Microsd Card)
7.10 How to use a Memory Card (MicroSD Card) Handset memory can be increased by inserting a Micro SDHC card up to 8GB. MicroSD cards up to 2GB are supported (FAT 16 format) MicroSD HC (high capacity) cards up to 8GB are supported (FAT 32 format) •... -
Page 56: Pc Connection
7.11 PC Connection Menu > Settings > Menu > Settings > Arrow Right Menu > Settings > Handset > PC Connection Handset > PC Connection Menu > Settings > Menu > Settings > to Handset > PC Connection Handset > PC Connection Handset >... -
Page 57: Connect To The Zte Bluetooth Car Kit
7.13 Connect to the ZTE Bluetooth Car Kit The dedicated hands-free wired car kit provides a superior car kit solution. The fully wired cradle supports charging and an external antenna connection. The handset connects via Bluetooth to the car kit. See your dealer and car kit manual for more information. - Page 58 • If you are connecting to a PC or another mobile enter the same password when requested on that device. • Once the password has been shared and accepted by both devices they are paired. Send files from the handset to another device Send files from the handset to another device Send files from the handset to another device Send files from the handset to another device...
-
Page 59: How To Use Dial Up Networking Via Usb Or Bluetooth
Select the ZTE USB Modem and uncheck any other modems The ISP Name ISP Name ISP Name ISP Name can be any name you like eg. T2 Handset... - Page 60 Press Dial Dial Dial Dial to test the connection Dial The PC opens an internet connection using the handset as a high speed modem 2. Dial Up Networking over Bluetooth 2. Dial Up Networking over Bluetooth 2. Dial Up Networking over Bluetooth 2.
-
Page 61: How To Use Photos And Videos
8 How to use Photos and Videos How to Take, Save and Send a Photo Menu Menu Menu Menu Menu > Multimedia Multimedia Multimedia Multimedia Multimedia > Camera > Camera > Camera > Camera > Camera > Press OK OK to Capture Capture Capture Capture... -
Page 62: How To Take, Save And Send A Video
How to Take, Save and Send a Video Menu > Multimedia > Vide Menu > Multimedia > Video c Menu > Multimedia > Vide o camer amer amera > OK amer a > OK a > OK to R R R R Rec ec ec ec ecor or or or ord. d. d. d. d. Press the Right T a >... -
Page 63: How To View Pictures And Videos
How to View Pictures and Videos 1 . 1 . 1 . 1 . 1 . View the file directly from file manager View the file directly from file manager View the file directly from file manager View the file directly from file manager View the file directly from file manager Menu Menu... -
Page 64: Listen To Music On Your Mobile
9 Listen to Music on your mobile How to use the FM Radio Menu Menu Menu > Multimedia Menu Menu Multimedia Multimedia Multimedia Multimedia > FM radio FM radio FM radio FM radio FM radio • Insert the personal hands free kit. The headset acts as the antenna for the FM radio and must be con- nected to use the FM radio •... -
Page 65: How To Create A New Music Playlist
How to create a new Music Playlist Method 1: Create a Playlist from File Manager Method 1: Create a Playlist from File Manager Method 1: Create a Playlist from File Manager Method 1: Create a Playlist from File Manager Method 1: Create a Playlist from File Manager Menu >... -
Page 66: Access The Internet On Your Mobile Phone
10 Access the Internet on your mobile phone 10.1.1 Access the Internet using the Browser From the Main Scr Main Scr Main Scre e e e e en Main Scr en en en en press the Right T Right T Right T Right Top K op K... -
Page 67: 1 Connect Your Phone To A Computer
• Multi-boot systems are not supported • Please install the software before connecting your phone to your computer • The software should be installed and run with the Administrator login • For installation support please consult our web site FAQ’s http://www.zte.com.au... - Page 68 • The USB lead is unique and should not be used for other devices (it is not the same as digital camera leads) • When the handset is plugged in the computer automatically installs the drivers. If this fails consult our website for more help or access Windows Device Manager to update the drivers. See http://www.zte.com. au for instructions.
- Page 69 11.2.2 How to copy photos to a computer Transfer photos from the handset to a computer using Join Me: • Make sure the phone is switched on and connected to the computer and Join Me has Make sure the phone is switched on and connected to the computer and Join Me has Make sure the phone is switched on and connected to the computer and Join Me has Make sure the phone is switched on and connected to the computer and Join Me has Make sure the phone is switched on and connected to the computer and Join Me has...
- Page 70 How to copy files How to copy files (eg Photos) from your phone to a computer How to copy files (eg Photos) from your phone to a computer (eg Photos) from your phone to a computer (eg Photos) from your phone to a computer How to copy files How to copy files (eg Photos) from your phone to a computer...
- Page 71 11.2.3 How to copy music from a computer Music files can be transferred onto the phone using Join Me • Make sure the phone is switched on and connected to the computer Make sure the phone is switched on and connected to the computer Make sure the phone is switched on and connected to the computer Make sure the phone is switched on and connected to the computer, and Join Me has , and Join Me has...
- Page 72 Copy files (eg Music) from a Computer to the handset using Join Me Copy files (eg Music) from a Computer to the handset using Join Me Copy files (eg Music) from a Computer to the handset using Join Me Copy files (eg Music) from a Computer to the handset using Join Me Copy files (eg Music) from a Computer to the handset using Join Me drag drag...
- Page 73 11.2.4 How to Enter your Contacts using Join Me Use Join Me to enter new contacts into the phone. On the phonebook tab enter contacts directly using the PC. Select “New Contact” then complete the required fields. Select the Save Position; Local, Phone or (U)SIM.
- Page 74 11.2.5 How to create a backup of your Phonebook on your PC 2. ‘Select all’ by checking the box at the top. 3. Drag and drop the complete list to Local. This will copy all the USIM contacts to the PC (Local) You can also select an individual contact to copy it in either direction.
- Page 75 11.2.6 How to Import Contacts from Microsoft Outlook • Launch Microsoft Outlook, have Join Me running and connected to the handset. • Note, at the end of the import process Outlook can shut down. Please save any information beforehand. • Make sure you are on the Phonebook tab in Join Me, see image in 11.2.5 above. •...
-
Page 76: Use Your Mobile As A Modem
11.2.7 Import Calendar events from Microsoft Outlook • Launch Microsoft Outlook, have Join Me running and connected to the handset • Note, at the end of the import process Outlook can shut down. Please save any information beforehand • Make sure you are on the Calendar tab in Join Me •... -
Page 77: Use With Hearing Aid Devices And Text Terminals
12 Use with Hearing Aid Devices and Text Terminals 12.1 How to Pair with a Bluetooth Neckloop or Hearing Aid Menu Menu Menu > T T T T T o o o o o ols Menu Menu ols > Bluet Bluet Bluet Bluet... -
Page 78: Ctm
12.4 Other Accessibility Features (ACIF G627 Matrix) The handset supports other features in line with the ACIF Accessibility Matrix. This specifies the features available to help elderly or disabled users. The full list of supported features can be viewed on our website http://www.zte.com.au... -
Page 79: Technical, Support And Warranty Information
Check: Menu > Settings > Handset > PC Connection > USB Check: Menu > Settings > Handset > PC Connection > USB Join Me Join Me Join Me Join Me Join Me Uninstall and re-install the DVD software See FAQ’s at http://www.zte.com.au for more assistance... - Page 80 S y m p t o m S y m p t o m R e s o l u t i o n R e s o l u t i o n S y m p t o m S y m p t o m S y m p t o m R e s o l u t i o n...
-
Page 81: Error Messages
S y m p t o m S y m p t o m R e s o l u t i o n R e s o l u t i o n S y m p t o m S y m p t o m S y m p t o m R e s o l u t i o n... -
Page 82: Technical Specifications
13.3 Technical Specifications N e t w o r k C o m p a t i b i l i t y N e t w o r k C o m p a t i b i l i t y N e t w o r k C o m p a t i b i l i t y N e t w o r k C o m p a t i b i l i t y N e t w o r k C o m p a t i b i l i t y... -
Page 83: Support Information
Use of the product with any unauthorized third party products such as generic chargers. Any other cause beyond the range of normal usage for products. The End User shall have no right to reject, return, or receive a refund for any product from ZTE under the above-mentioned situations. -
Page 84: Environmental Statement
13.6 Environmental Statement The ZTE handset is made using the latest manufacturing techniques and environmental standards to reduce waste and hazards to the environment. However at the end of life of the equipment the manufacturer recommends that you return the handset and accessories to the nearest re-cycling depot or send it to our recycling agent below. - Page 85 Index Alarms Call Waiting Anniversary Camera 61, 62 Answer a Call 19, 28 Appointments Change PIN Numbers Arrow keys 13, 22 Charger Background Screen Connect to a computer Backlight Duration Contacts 28, 36, 37 Battery Copy music BigPond Copy photos 69, 70 Bluetooth 57, 58...
- Page 86 Email Java Games Emergency Calls Join Me Key tones Environmental Keypad Error Messages Keypad Backlighting FAQ’s Last Number Redial File Manager 51, 54 Main Menu 22, 26 FM radio Make a Voice Call 19, 27 Games and Applications Mass Storage Device Greeting Meeting Mode Handset lock code...
- Page 87 Music Player Set the Time My Words Shortcuts 22, 40 Owner name Silent Mode 68, 71 SIM card PC Connection Photos and Videos SMS Message Length PIN Numbers Snooze Playlist Speakerphone Predictive Text Speed Dial Profiles Stopwatch Receive a Text Message Support RF Safety Information Switch On / Off...
- Page 88 Unlock your handset View Pictures Voice Recorder USB Mode Wallpaper Vibrate Mode Warranty Video Call World Time...
Need help?
Do you have a question about the EasyTouch Discovery 2 and is the answer not in the manual?
Questions and answers