
Related Manuals for OT Bioelettronica NOD


Summary of Contents for OT Bioelettronica NOD
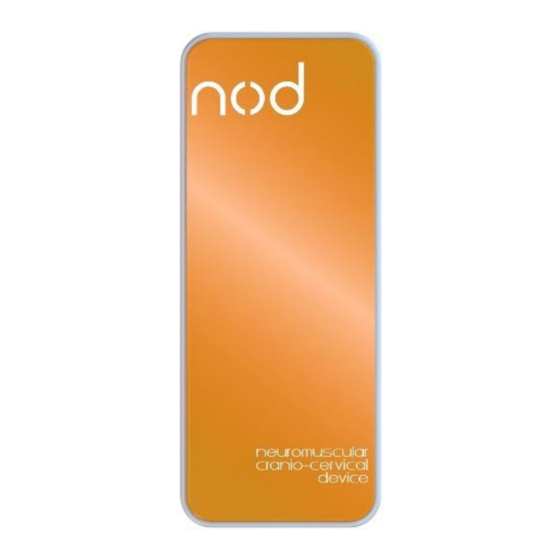
- Page 1 User Manual v1.3 Three functions, one device Read this manual carefully before using...
-
Page 3: Table Of Contents
3 END USER……………………………………………….5 3.1 C ………………………………………………5 ONTRAINDICATIONS 3.2 S ……………………………………………..………..5 IDE EFFECTS 4 SAFETY PRECAUTIONS AND WARNING………….6 5 SYMBOLS USED ON NOD AND IN USER MANUAL7 6 TECHNICAL SPECIFICATIONS……………………..8 7 DETAILED DESCRIPTION …………………………10 7.1 C ……………………..10 ONTROLS INDICATORS AND ADAPTERS 7.1.1 LED …………………………………………….10... -
Page 4: General Description
GENERAL DESCRIPTION The NOD device is a generic 1-channel amplifier. This system can amplify and filter any differential and single ended signal. NOD is a multi-purpose tool that combines the functionality of three different tools: 1) Biofeedback, provides real-time feedback on... -
Page 5: End User
END USER is intended to be used in an outpatient physi- otherapeutic or medical environment, so that the medical staff can use the information detected by the device to perform a diagnosis. Type of users are specialized operators: Background: Minimum. Basic physics b) Language Understanding: Basic English Experience: Minimum. -
Page 6: Safety Precautions And Warning
Therefore, we recommend that you do not use the NOD device near de- vices that could cause the problems described above such as mobile phones, instrumentation with large transformers, etc. -
Page 7: Symbols Used On Nod And In User Manual7
• DO NOT use soap or water on the connector pins. • DO NOT clean the NOD device or connect ca- bles by immersion, autoclave or steam clean- ing. SYMBOLS USED ON NOD AND IN THE USER MANUAL... -
Page 8: Technical Specifications
Regulations mentioned above. Otherwise OT Bioelettronica declines any responsi- bility. Regarding the functionality of the software, please refer to the specific manual provided. TECHNICAL SPECIFICATIONS... - Page 9 942 V/V Output range 0 ÷ 5 V Resolution of the A/D 16 bit converter Wireless transmission Bluetooth® model Sampling rate 100 Hz Dimensions 79 x 194 x 17 mm Weight 300g Tab. 6.1: Technical specifications of the NOD system...
-
Page 10: Detailed Description
Front view Side view Switch ON/OFF USB Connector Battery/Error/Status LED Fig. 7.1: Front panel and side view of the NOD system. 7.1 C ONTROLS INDICATORS AND ADAPTERS Description of controls, indicators and connectors shown in figure 7.1: 7.1.1... -
Page 11: On/Off Switch
Red when the connection with the smartphone or tablet has been lost. 7.1.2 ON/OFF SWITCH The NOD system turns on and off using the ON/OFF button. 7.1.3 ONNECTORS AND ADAPTERS USB connector: this connector is used to recharge the battery. -
Page 12: System Requirements For Smartphones /Tablets
NOD device to the Smartphone or Tablet via Bluetooth®; • launch the Physio application; • select from the device list the name of the NOD device (only the first time); • select the desired functionality; • if necessary, reset the offset via the App and... -
Page 13: Use Of Nod
USE OF NOD NOD is intended to be used as a force detection system generated by load cells or transducers with differential output and single ended. RINCIPLE OF OPERATION The device, called NOD, is a dynamometer capable of detecting force when it is applied perpendicular to its front surface. -
Page 14: Algometer (Pain Test )
The operator will place the NOD on the patient's body (at a specific point) and the latter will have to progressively push against the front surface of the NOD until reaching his/her maximum strength. -
Page 15: Methods Of Use
NOD A OWNLOAD THE • Click on the Google Play Store icon • Write the word "nod ot bioelettronica" in the search bar • Click on the NOD App icon (OT Bioelettronica) • Click on “install” icon and wait for the end of... -
Page 16: Pairing Smartphone / Tablet And Nod Device
Exit Google Play Store and proceed with the next step 8.4.2 AIRING SMARTPHONE TABLET AND DEVICE • Turn on the NOD device • Click on the settings icon of your Android de- vice • Press the “Bluetooth®” button • Search for the NODxxx device and then click... - Page 17 • Click on “pair” • Check that the NODxxx device is present among the paired devices and NOT on the available devices • Return to the main screen and proceed to the next step.
-
Page 18: First Use
8.4.3 IRST USE • Turn on the NOD device • Launch the NOD App • Allow all the required permissions • Click on NODxxx (Paired) and wait for the con- nection • Select the required function... -
Page 19: Usage Functions
NODxxx (Paired) click on the Android button ( ), select the required function, open the side menu bar and then press “Connect”. Then click on NODxxx. 8.4.4 SAGE FUNCTIONS In the NOD App you can use three different modes: Dynamometer, Force Biofeedback and Algometer. - Page 20 Biofeedback (IST) • Place the magnetized Magnetic pad over the NOD device and then press the Calibration but- ton, if there is an offset it will be reset. The yellow circle in the figure below shows the Cal- ibration button.
- Page 21 • You can change the options for using the func- tion by pressing the “Settings” button in the side menu. Click “Save”. • The new graph is the relative mode which shows the level of contraction expressed as a percentage of the previously recorded MVC. When you are ready press on “Start”...
- Page 22 • The figure below shows the recording window. To stop the acquisition press on “Stop” button. • Choose whether to continue with another re- cording or end the session. • If you want to proceed with the final report, the results will be shown. In the window shown below you can choose the PDF report name and add notes.
- Page 23 • Dynamometer (CCFT) • Place the magnetized Magnetic pad over the NOD device and then press the Calibration but- ton, if there is an offset it will be reset. • You can change the options for using the func- tion by pressing the Settings button in the side menu.
- Page 24 • Click on the “Record” button when you are ready to record the MVC. • Save or discard the recording. • Choose whether to continue with another re- cording or end the session. • If you want to continue, there is a waiting time that you can also skip by pressing the “Skip”...
- Page 25 • If you want to proceed with the final report, the results will be shown. In the window shown below you can choose which tests to include in the PDF report. • Then you can select the Setup using in the test.
- Page 26 • All PDFs are stored in the internal memory →...
- Page 27 • Algometer (PT) • Place the magnetized awl above the NOD and then press the Calibration button, if there is an offset it will be reset. • You can change the options for using the func- tion by pressing the Settings button in the side menu.
- Page 28 • Save or discard the trial • Decide whether to continue or not: • If you want to continue, there is a waiting time that you can also skip by pressing the “Skip” button. Return to step 3. • If you want to proceed with the final report, the results will be shown.
- Page 29 • PDF files can be shared via e-mail, Whatsapp, etc… • All PDFs are saved in the internal memory →...
-
Page 30: Troubleshooting
TROUBLESHOOTING This section describes the most common problems encountered during the use of the NOD system. Description of the problem Intervention After turning on the NOD device, the Bluetooth® Check the battery charge connection does not work Low battery: recharge... - Page 31 NOT be cleaned as described below: • DO NOT clean the NOD device us- ing acetone, ether, freon, petroleum de- rivatives or other solvents; • DO NOT use soap or water on the connector pin contacts;...
- Page 32 Warning: Do not dispose this product as non-differentiated waste. Prepare re-use separate collection of the product according to the provisions Directive 2002/96 / EC of the European Parliament and of the Council of the European Union on the disposal of electrical and electronic equipment (WEEE). The directive does not apply in the case of a contaminated product.
-
Page 33: Risk Analysis
Manufacturer's declaration and guidelines - electromagnetic emissions – Phenomenon Professional healthcare environment RF radiated emissions EN 55011:2009 + EN 55032 Manufacturer's declaration and guidelines - electromagnetic immunity – NOD Phenomenon EMC reference Immunity test levels - standard or test Professional healthcare method... -
Page 34: Technical Characteristics
TECHNICAL CHARACTERISTICS Model: Risk class: I in compliance with the standard 93/42/CEE. Classification: IP20, protected against solid objects over 12 mm - unprotected against falling drops of water. Case: Painted Plexiglas case Power supply: Internal Rechargeable Li-Po battery 3.7 V Consumption: 0.04 W Limitations:... -
Page 35: Warranty
Manual. The warranty applies for the period of 2 years and in any case, only after completing and signing the form attached below. With regard to the service and repair services, the obligations of OT Bioelettronica under the terms of... - Page 36 OT Bioelettronica has the right to refuse the repair of any product sent by the customer for repair, this refusal will be appropriately detailed.
- Page 38 Designed and produced by: OT Bioelettronica s.r.l. Via Lancia 62 10141 – Torino (TO) - ITALY Tel: +39.011.6198498 Fax: +39.011.6198498 www.otbioelettronica.it mail@otbioelettronica.it...
Need help?
Do you have a question about the NOD and is the answer not in the manual?
Questions and answers