Table of Contents
Advertisement
Quick Links
Advertisement
Table of Contents

Subscribe to Our Youtube Channel
Related Manuals for Garlando TOORX ROWERSEA COMPACT


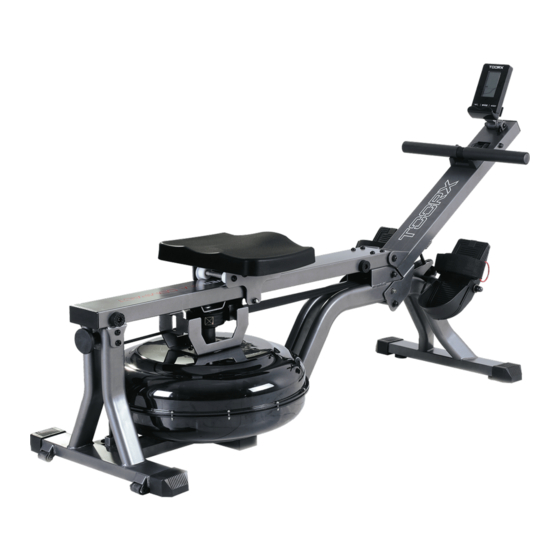
Summary of Contents for Garlando TOORX ROWERSEA COMPACT
- Page 1 MANUALE D’ISTRUZIONI...
-
Page 2: Exploded Drawing
EXPLODED DRAWING... -
Page 3: Parts List
PARTS LIST Part Name Part Name Part Spec. Part Spec. Main Frame Meter Front Support Sensor Wire Rail Sensor Holder Front post Magnet Φ6*5mm Handlebar Grommet Ф12*11*Ф3 Meter Plate Adjusting pad Mounting Bracket Bearing 6000zz Tank Brace Bearing 608zz Impeller Bolt, Flat Socket Head M6 x 10mm Seat Carriage... - Page 4 Seat Large Washer OD25*ID10.5*T2.0 Φ16 xΦ31.8 x Rail Bushing Impeller Seal Φ50*Φ19*5 12.5 Tank Seal Φ40*Φ27.4*6.8 Φ Φ Meter Plate Bushing 25.4* 8.2*10 Stopper Ф33*Ф8*13 Foam Spacer Ф98*Ф28*20 Pedal PC Plate OD40*ID20*0.2 Φ8.1 x Φ10 x Pedal Strap Roller Spacer 13mm Idle Roller Short Handlebar Seat...
- Page 5 ASSEMBLY INSTRUCTIONS NOTE: We recommend having 2 people to assemble the product. Step 1: 1. Pull out safety pin (105) which is pre-assemble on the Main frame (1), and put the front support to the right place as below illustration(A)(B), 2.
- Page 6 Step 3:...
- Page 7 Connect the 2pc sensor wire (55) to meter (54). Attach the computer (54) to meter plate (6), secure using two bolts (76)
-
Page 8: Computer Instructions
COMPUTER INSTRUCTIONS USING THE FITNESS METER Move the handlebar or press any button. POWER ON: POWER OFF: Automatically shuts off after 4 minutes of inactivity. FUNCTION BUTTONS : MODE : In the setting mode, press and release to select each function for preset target values for TIME, COUNT, DISTANCE, CALORIES, and PULSE. -
Page 9: How To Install And Replace Batteries
preset the function values for counting down. Press and release the MODE button until “SCAN” does not appear on display, the meter will enter setting mode. Use SET and RESET buttons to input the values, and press MODE button to confirm. Or, just press the MODE button to skip the setting and move on to the next function. -
Page 10: Water Level
HOW TO FILL AND EMPTY THE TANK 1. Remove the FILL PLUG(21) from the UPPER TANK(18). 2. To fill with water, refer to illustration C. Place the FUNNEL(101) into the tank. Use a water cup, or the SYPHON PUMP(100) and a bucket to fill the tank. Use Water Level Gauge on the side of tank to measure volume of water in tank to the desired level. -
Page 11: Adjustment Guide
ADJUSTMENT GUIDE MOVING THE MACHINE ❖ To move the machine, lift up the Front Support (2) until the Moving wheels(36) on the main ❖ ADJUSTING THE BALANCE frame touch the ground. With the wheels on the ground, you can transport the rower to the desired location with ease. -
Page 12: Function List
Date 2018/9/25 Item Name ST5887&ST5888 SPEC V1.0 Page FUNCTION LIST: A. Range:Rolling B. 2 pcs 3# battery. C. Main function: TIME、 DISTANCE、 CALORIE、 SPM、 STROKES、 TOTAL STROKES、 WATT、 PULSE、 Manual、 INTERVAL 20-10、 INTERVAL 10-20、 INTERVAL CUSTOM、 TARGET TIME、 TARGET DISTANCE、 TARGET CALORIES、TARGET STROKES、TARGET PULSE DISPLAY FU NCTION: 1.SPM:range from0~999。... -
Page 13: Power Off
POWER ON ,POWER OFF: POWER ON : Power the LCD, the screen will display for 2 seconds (picture 1) and has a long beep for 2 seconds at the same time, then enter into standby mode. Picture1 POWER OFF: 1. With any signal been transmitted into the monitor for 4 minutes, IC will enter into SLEEP mode. 2. - Page 14 Picture2 Picture3 Picture4 Picture5 Picture6 Picture7 Picture8 Picture9 Picture10 Picture11 Picture12 2. MANUAL: A. In standby mode, with been RPM signal been transmitted, then QUICK START immediately, the buzzer beeps at the same time.(picture 15~picture16)r B. Or in standby mode, press MODE KEY, MANUAL blinks(picture 14), then press MODE KEY to start MANUAL function,buzzer beeps for 1 minutes.
- Page 15 exercise picture. If user press RESET KEY in STOP,electronic watch enter into standby. If user don’t press any buttons or finish training, electronic watch enter into standby. Picture14 Picture15 Picture16 Picture17 Picture18 3. INTERVAL: In standby mode, press MODE KEY and SET to switch and choose INTERVAL function,INTERVAL blinks(picture 19) (1) INTERVAL 10/20 A.
- Page 16 Picture19 Picture20 Picture21 Picture22 D. “REST 01/08”(picture 23),buzzer beeps 0.5 second for each second, TIME start to count down from 20 to zero. TIME, DISTANCE, CALORIES, PULSE, SPM, WATT, TOTAL STROKES and STROKES start to count according to operation value and display. CALORIES, PULSE, SPM, WATT, TOTAL STROKES and STROKES will switch to display in every 5 seconds,in the last 3 seconds “READY”...
- Page 17 exercise value in every 5 seconds,PULSE display heart rate, and press MODE KEY at the same time, electronic watch continues to perform exercise picture. If user press RESET KEY,electronic watch enter into standby. In STOP state, if user don’t press any buttons or after finished training fro 4 minutes, electronic watch enter into standby.
- Page 18 Picture27 Picture28 Picture29 Picture30 Picture31 Picture32 F. When end the training, STOP flashes. TIME and DISTANCE display training value,CALORIES, PULSE, TOTAL STROKES and STROKES switch to display in every 5 seconds,PULSE display heart rate, press MODE KEY at the same time,you can also perform INTERVAL 10/20 function. In the training finished screen, if user press RESET KEY,electronic watch enter into standby, buzzer beeps 0.5 second.
- Page 19 A. When “INTERVAL” is flashing, press MODE KEY, press SET to switch and choose CUSTOM function,CUSTOM flashes,press MODE KEY and enter CUSTOM to set function.(picture 33) B. “SET ROUND”,TIME display 01 to flash,press SET to setting ROUND,ROUND,and set range from 01~99,they can be set circularly, after press MODE KEY, buzzer beeps 0.5 seconds and enter into the next option to set.
- Page 20 Picture37 picture38 picture39 picture40 picture41 After end the exercise (picture 40~41),the screen display STOP is flashing. TIME, DISTANCE display the finished value. CALORIES, PULSE, TOTAL STROKES and STROKES switch to display exercise value when to be 5 second, PULSE display heart rate, press MODE KEY, at the same time,then user can perform INTERVAL CUSTOM function again;In stop state, press RESET KEY,electronic watch enter into standby, buzzer beeps 0.5 second;In STOP state, if user don’t press any buttons or after finished training for 4 minutes, electronic watch enter into standby, buzzer beeps 0.5 second.
- Page 21 (2) TARGET TIME: A. When LCD flashing display TARGET image,press “MODE “ KEY,at this time press “SET” key to switch to choose the TARGET TIME function, LCD stay shining display “TARGET”,TIME is flashing(picture43),press “MODE” KEY start to set the TIME function. B.
- Page 22 picture46 picture47 picture48 (3) TARGET DISTANCE: A. When LCD flashing display TARGET image(picture42),press “MODE “ KEY,at this time press “SET” key to switch to choose the TARGET DISTANCE function, LCD stay shining display “TARGET”,DISTANCE is flashing(picture49),press “MODE” KEY start to set the DISTANCE function.
- Page 23 Picture 49 Picture 50 Picture 51 Picture 52 Picture 53 Picture 54 (4) TARGET CALORIES: A. When LCD flashing display TARGET image,press “MODE “ KEY,at this time press “SET” key to switch to choose the TARGET DISTANCE function, LCD stay shining display “TARGET”, CALORIES is flashing(picture55),press “MODE”...
- Page 24 D. During exercise press MODE KEY, stop working and LCD flashing display STOP, TIME , DISTANCE is shining and display the current sports data . CALORIES, PULSE, TOTAL STROKES and STROKES switch to display the current sports data every 5 seconds . PULSE show instant heart rate value, and then press MODE KEY , at this time , the console continue to implement the working screen, if press the RESET KEY, the console enter the standby screen, if the STOP condition, no press any keys or end working after 4 minutes,The console enters the standby mode.
- Page 25 Picture59 Picture 60 (5) TARGET STROKES: A. When LCD flashing dispay TARGET image,press “MODE “ KEY,at this time press “SET” key to switch to choose the TARGET DISTANCE function, LCD stay shining display “TARGET”, STROKES is flashing(picture61),press “MODE” KEY start to set the STROKES function. B.
- Page 26 Picture 65 Picture 66 (6) TARGET PULSE: A. When LCD flashing display TARGET images, press MODE KEY, then press SET to switch to choose TARGET DISTANCE function , LCD stay shining display TARGET , PULSE flashing display (picture 67), press MODE KEY to start the PULSE setting function. B.
- Page 27 Picture 67 Picture 68 Picture 69 Picture 70...
- Page 28 GARLANDO SPA Via Regione Piemonte, 32 - Zona Industriale D1 15068 - Pozzolo Formigaro (AL) - Italy www.toorx.it - info@toorx.it...
Need help?
Do you have a question about the TOORX ROWERSEA COMPACT and is the answer not in the manual?
Questions and answers