Table of Contents
Advertisement
Quick Links
Advertisement
Table of Contents

Related Manuals for XAC 170R

Summary of Contents for XAC 170R
- Page 1 XAC 170R U ANUAL ESOURCES CONFIDENTIAL...
-
Page 2: Table Of Contents
XAC 170R User Manual Resources Table of Contents Purpose and audience of this document ............5 References ..................... 5 Specifications....................6 Package Content .................... 8 Device Overview .................... 9 Power On/Off the Device ................10 Using the Magnetic Card Reader ..............11 Using the IC Card Reader................ - Page 3 XAC 170R User Manual Resources 15.8 Loss of WiFi ........................26 15.9 Configuring Device Page ....................28 16 Payments..................... 30 16.1 Introduction ........................30 16.2 Common Scenarios ......................30 16.2.1 Simple Sale with Payment Card................. 30 16.2.2 Sale with a tip ....................37 16.2.3 Sale with Manual Card Entry ................
-
Page 4: Purpose And Audience Of This Document
XAC 170R User Manual Resources 1 Purpose and audience of this document This document is a resource of information about the XAC 107R Smart POS device. The present version of this document describes the hardware and the Launcher software. 2 References... -
Page 5: Specifications
XAC 170R User Manual Resources 3 Specifications ARM Cortex-A7 microprocessor cores (quad-core) up to 1.1GHz Operating system Android 8.x Memory 1GB DDR3 SDRAM 8GB eMMC Memory Display 1280x800 full color TFT IPS Capacitive touch screen display Audio Audio Jack and Microphone... - Page 6 XAC 170R User Manual Resources Visa PayWave - Mastercard PayPass Discover DPAS - AMEX ExpressPay ChinaUnionPay QuickPass Local Contactless L2 Japan Jspeedy - Canada Interac Flash Germany GBIC - France Carte Bleue Russia MIR Security Algorithm: 3DES, AES, RSA Key Management: MK/SK, DUKPT TLS 1.2 support...
-
Page 7: Package Content
XAC 170R User Manual Resources Accessory 5V/2A DC power adapter USB cable (type C to type A) Rechargeable battery Paper roll Quick user guide/safety instruction Cradle (XC-70) - Charger Stand - Charger Stand + Ethernet + USB host x 2+ RS232 x 2... -
Page 8: Device Overview
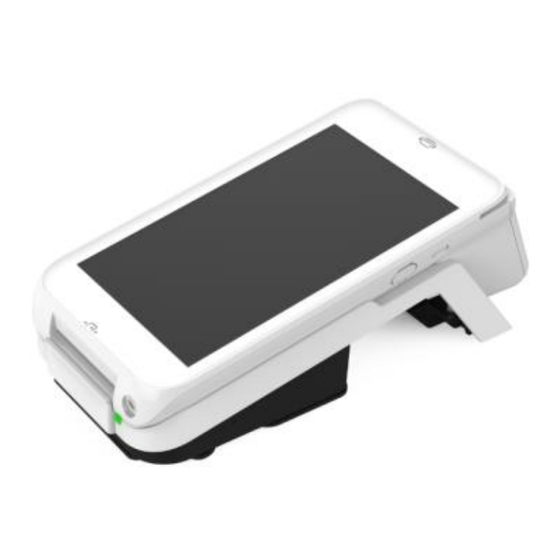
XAC 170R User Manual Resources 5 Device Overview AT-170 Key Buttons & Interface Ports (Figure 1) FRONT REAR Right Side Figure 1 Front: To ch Displa Printer Paper Cover & Contactless Card Tapping Area Camera for barcode scanning (Optional) Smart Card Reader (SCR) slot... -
Page 9: Power On/Off The Device
Input: 100 ~240 Vac Output: 5V DC, 2A Caution: Use only the AC adapter approved and provided by XAC Automation Corporation for use with this device. Use of any other AC adapter may cause a risk of fire or explosion. -
Page 10: Using The Magnetic Card Reader
XAC 170R User Manual Resources 7 Using the Magnetic Card Reader Swipe the card through the slot with magnetic stripe at the back side of the card: 8 Using the IC Card Reader Insert an IC card into the slot with the chip side facing upward:... -
Page 11: Using The Key Pad
XAC 170R User Manual Resources 9 Using the Key Pad After inserting the chip card, press the numeric keys of virtual keypad shown on the display to enter the password. Press Cancel (X) key to terminate any current function and press the Enter (O) key to confirm a value or an option. -
Page 12: Changing The Battery
XAC 170R User Manual Resources 11 Changing the Battery STEP 1. Remove the 2 screws and open the battery cover as Figure 7. STEP 2. Lift the battery and pull up the battery connector from device as Figure 8 STEP 3. -
Page 13: Insert Sam & Sim Card
XAC 170R User Manual Resources 12 Insert SAM & SIM card After removing the battery cover, two SAM and two SIM card slot are top of the battery (Figure 9). Please insert the card correctly as the icon shown on the cover:... -
Page 14: Installing The Strap
XAC 170R User Manual Resources 14 Installing the Strap Align two ends of strap pin to the notches on AT-170 rear cover: Press downward the strap pin into the notches, than pull another pin of the strap to install another side as Figure 11-2. -
Page 15: Operating The Terminal
XAC 170R User Manual Resources 15 Operating the Terminal 15.1 Launcher Screen The layout of the launcher screen will be customised. It can have a number of styles, and show any number of apps. The following is an illustrative example, which is unlikely to be exactly like... -
Page 16: Status Bar
XAC 170R User Manual Resources 15.2 Status Bar The device shows a status bar at the top of the screen. It is the same in appearance and functionality as the standard Android system bar. It conveys the following types of information: Communications type eg. -
Page 17: Notifications
XAC 170R User Manual Resources 15.3 Notifications If you swipe down from the status bar, you will see a panel of notifications. The actual notifications vary and are explained later in this section. A typical set of notifications would resemble the set below: MDM Agent (Mobile Device Management) is an app that communicates with a central server. - Page 18 XAC 170R User Manual Resources Other notifications that the MDM Agent could display include: If the agent loses its connection with the server (most likely due to a loss of Wi-Fi signal), the Agen connec ed no ifica ion is replaced by the one below and you should check the WiFi...
-
Page 19: Navigation Bar
XAC 170R User Manual Resources 15.4 Navigation Bar The navigation bar at the bottom of the screen is a standard Android one, offering a Back and a Home option: 15.5 Logging in 15.5.1 Login Modes The device will have been configured by the system administrator to operate in one of two modes: Login not required. -
Page 20: Authorization Screen
XAC 170R User Manual Resources 15.5.2 Authorization Screen The authorization screen, as well as accepting a password, presents information that is useful, especialy if seeking technical assistance: A he op he name of he de ice is sho n BR-OBR in his e ample The name canno be changed from the device, and can only be set centrally, using the partner device procurerment portal. - Page 21 XAC 170R User Manual Resources Use the number pad to enter a password. You may have been given two passwords: an operator one (if using Login Required mode) and a manager one. It is sufficient to press Cancel to login as an Operator.
- Page 22 XAC 170R User Manual Resources You may wish to change from being logged in as an operator to being a manager or vice versa. To do this, swipe down from the status bar to display the notifications, one of which will state the...
-
Page 23: Settings
XAC 170R User Manual Resources 15.6 Settings The settings that can be edited vary according to the logged-in level. A manager can edit more settings than an operator, though neither has access to the full range of Android settings. The table below lists the settings that are made available, with an indication of the log-in level that is required. -
Page 24: Sleep
XAC 170R User Manual Resources 15.7 Sleep The device will go to sleep after a period of inactivity. The screen switches off and it can be woken up by a single press on the power button. On being woken up, depending on the configuration set... -
Page 25: Loss Of Wifi
XAC 170R User Manual Resources 15.8 Loss of WiFi If the device loses its Wi-Fi connection for a period of time, it displays this screen: The period of time that triggers this is set by the administrators of your device and is not the same... - Page 26 XAC 170R User Manual Resources The two icons in the top status bar, on the right, offer two options for remedying this condition: Use this to Factory Reset the device. Only choose this option after taking advice from your technical support team, as it is an irreversible action that renders the device unusable as a payment device without re-installation of components.
-
Page 27: Configuring Device Page
XAC 170R User Manual Resources 15.9 Configuring Device Page The de ice s apps are pda ed by a remote server. The Configuring Device page provides a summary of the installations that have been done. The page is opened from a notification from MDM Agent. - Page 28 XAC 170R User Manual Resources The Configuring Device page shows a chronological list of the apps, and their version, that are currently installed on your device, e.g.: If any app installation failed, a notice of failure is presented for the app installation that failed.
-
Page 29: Payments
XAC 170R User Manual Resources 16 Payments 16.1 Introduction The Payment App processes card authorizations and sales. Transactions are initiated from a separate POS application (it is not possible to initiate one from the Payment App directly). A user guide to the POS will have been provided separately and its functionality is not described in this document. - Page 30 Insert, tap or swipe the card. See the sections above for more information about the correct ways to do these on the XAC 170R device. The user may in some cases be presented with a screen to choose between a credit card and a debit card and sometimes also with other choices, e.g.
- Page 31 XAC 170R User Manual Resources While the device reads the card, the following screen is presented:...
- Page 32 XAC 170R User Manual Resources If a PIN is required, the PIN entry screen is presented: An incorrect PIN is notified on the same PIN screen:...
- Page 33 XAC 170R User Manual Resources The card should be removed when the device prompts:...
- Page 34 XAC 170R User Manual Resources While the payment app is authorizing the payment, the following screen is displayed:...
- Page 35 XAC 170R User Manual Resources If the transaction is successful, this is reported: Receipts are printed on completion of the transaction (a signature may be required).
-
Page 36: Sale With A Tip
XAC 170R User Manual Resources 16.2.2 Sale with a tip The customer is prompted to add a tip to the sale amount. The device will process a tip only if the system administrator has activated that functionality. The POS application initiates the sale (the goods are selected and the sale transaction has been requested by the POS app). - Page 37 XAC 170R User Manual Resources The customer can choose to: Pay Now, without any tip. Add any of the pre-calculated tips by tapping on the percentage / amount that they want to give (and then Pay Now). Select Custom, which presents a page in which they can define an amount of their own (and...
-
Page 38: Sale With Manual Card Entry
XAC 170R User Manual Resources 16.2.3 Sale with Manual Card Entry The POS initiates a sale and the merchant manually enters the card details. Depending on how the system administrator has configured the device, manual card entry might not be supported. -
Page 39: Pre-Authorization Only
XAC 170R User Manual Resources Select Manual. In the manual entry screen, enter the card number and expiry date (use leading eros e g for the month) and select Confirm: From this point on, the transaction is the standard one, as defined in the scenario Simple Sale with Payment Card (above). -
Page 40: Common Transaction Exceptions
XAC 170R User Manual Resources 16.3 Common Transaction Exceptions 16.3.1 Cancelled Transaction If the user cancels a transaction before it is completed, by selecting a Cancel option in any screen, the following is displayed: If the user selects Yes, the transaction is cancelled and a confirmation screen is displayed:... -
Page 41: Card Removed
XAC 170R User Manual Resources 16.3.2 Card Removed If the card is removed prematurely, the following screen is displayed:... -
Page 42: Timeout
XAC 170R User Manual Resources 16.3.3 Timeout The transaction times out if the user fails either to insert a card or to submit a manual card number within the required period of time. On a timeout, the following screen is displayed and... -
Page 43: Card Read Error
XAC 170R User Manual Resources 16.3.4 Card Read Error If the device or the payment app are unable to read the CHIP on the card, the following is displayed (followed by advice to remove the card):... -
Page 44: Communication Error
XAC 170R User Manual Resources 16.3.5 Communication Error If there is a communication error, the following screen is displayed: Check that the device is connected to the WiFi. If the problem persists, contact support.
Need help?
Do you have a question about the 170R and is the answer not in the manual?
Questions and answers