Table of Contents
Advertisement
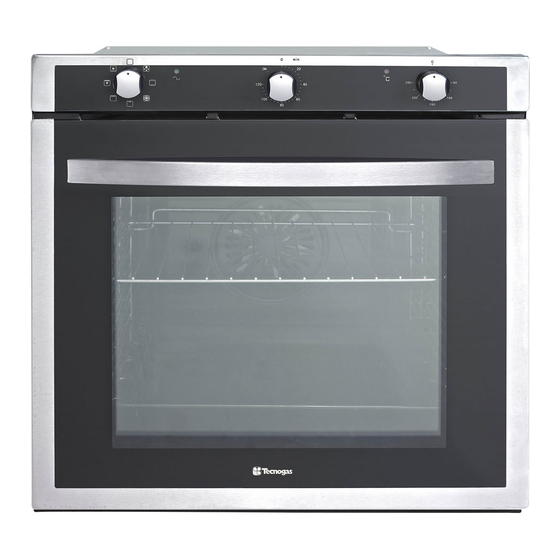
Built-in Oven
Instruction Manual
Model: TEO6091SS
NOTE
This User Instruction Manual contains important information, including safety &
:
installation points, which will enable you to get the most out of your appliance. Please keep
it in a safe place so that it is easily available for future reference; for you or any person not
familiar with the operation of the appliance.
Advertisement
Table of Contents

Related Manuals for Tecnogas TEO6091SS


Summary of Contents for Tecnogas TEO6091SS
-
Page 1: Description Of The Oven
Built-in Oven Instruction Manual Model: TEO6091SS NOTE This User Instruction Manual contains important information, including safety & installation points, which will enable you to get the most out of your appliance. Please keep it in a safe place so that it is easily available for future reference; for you or any person not... -
Page 2: Table Of Contents
Contents Environmental note 4 – 8 Important safety information 9 – 10 Description of the oven Accessories Control panel Oven programmer/timer display Setting and using the oven programmer/timer 11 - 18 Selecting manual operation mode Setting the time of day Before first use The oven timer The minute minder function... -
Page 3: Setting And Using The Oven Programmer/Timer
The packaging materials that we use are environmentally friendly and can be recycled. Please discard all packaging material with due regard for the environment - 2 -... -
Page 4: Important Safety Information
IMPORTANT SAFETY INFORMATION Caution! Do not use the oven until you have read this instruction manual. The oven is intended for household use only. General Information This appliance is designed for domestic household use and can be built into a standard kitchen cabinet or housing unit. -
Page 5: Setting The Duration Function
Warning and safety instructions This appliance complies with all current European safety legislation. We do wish to emphasis that this compliance does not remove the fact that the appliance surfaces will become hot during use and retain heat after operation. -
Page 6: The End Cook Function
If the supply cord is damaged, it must be replaced by the manufacturer, its service agent or similarly qualified persons in order to avoid a hazard. During use the appliance becomes hot. Care should be taken to avoid touching heating elements inside the oven. - A steam cleaner is not be used. -
Page 7: The Automatic Cooking Function
General Safety This appliance is not intended for use by persons (including children) with reduced physical sensory or mental capabilities, or lack of experience and knowledge, unless they have been given supervision or instruction concerning use of the appliance by a person responsible for their safety. ... - Page 8 Heat, steam and moisture will be created during use of the appliance, take care to avoid injury and ensure that the room is adequately ventilated. If the appliance is going to be used for prolonged periods of time, then additional ventilation may be required.
-
Page 9: Accessories
DESCRIPTION OF THE APPLIANCE Control panel Side shelf lamp Oven shelf Oven door Door handle Accessories Side shelf left Side shelf right Bake tray Oven shelf - 8 -... -
Page 10: Control Panel
Control panel 1) Oven function selector knob 2) Power indicator light 3) Mechanical cut off timer 4) Oven operating light 5) Thermostat control knob 1.If no need to use the oven programmer/timer, setting the timer on “ON” and connected to your mains supply, see the picture. 2.If need to timing, you could turn the timer knob as you wish, the choose time is 0~120 mins, the oven power off when the timing finished. -
Page 11: Using You Oven
Selecting a cooking function and temperature 1,After the oven is connected to the main electricity supply,the indicator of power flashes.Set the temperature after selecting the cooking function.Set the cooking time when the indicator of cooking function flashes.(The cooking time can be set from 0 to 120 minutes.Turn around the knob clockwise to the corresponded time. -
Page 12: Thermostat Control Knob
is distributed by the fan. This results in a faster and more economical cooking process. The fan oven allows food to be cooked simultaneously on different shelves, preventing the transmission of smells and tastes from one dish onto another. HALF GRILL: This method of cooking utilises the inner part only of the top element, which directs heat downwards onto the food. -
Page 13: Cooking Guidelines
Oven operating light This light will come on to indicate that the oven’s heating elements are in operation. The light will turn off when the temperature set on the thermostat control knob has been reached. It will cycle on and off throughout the cooking time. -
Page 14: Warnings
Warnings o Keep the oven door closed when using any of the grill functions. o Do not use aluminum foil to cover the grill pan or heat items wrapped in aluminum foil under the grill. The high reflectivity of the foil could potentially damage the grill element. -
Page 15: Cleaning And Maintenance
CLEANING AND MAINTENANCE The oven should be thoroughly cleaned before it is operated for the first time and after each use. This will avoid residual food stuffs becoming baked on the oven cavity. After residues have been baked on several times, they are far more difficult to remove. -
Page 16: Replacing The Oven Bulb
Replacement of the oven light bulb In order to avoid the possibility of an electric shock ensure that the appliance is switched off before replacing the bulb. o Remove all oven shelves, the drip tray and the side rack that is on the same side as the oven light. o Using a screwdriver, remove the lamp cover (1). -
Page 17: Removing The Inner Glass Panel
Removal of the internal glass panel Press the bracket latch on two side that is in the corner at the top of the door .Next take out the glass from the second blocking mechanism and remove. After cleaning, insert and block the glass panel, and push the blocking mechanism. -
Page 18: Installation
INSTALLATION Electrical connection WARNING: THIS APPLIANCE MUST BE EARTHED. This appliance should be wired into a 16 A double pole switched fused spur outlet, having 3 mm contact separation and placed in an easily accessible position adjacent to the appliance. The spur outlet must still be accessible even when your oven is located in its housing to enable the appliance to be disconnected from the mains supply. -
Page 19: Installing The Oven Into The Kitchen Cabinet
Installing the oven into the kitchen cabinet The kitchen area should be dry and aired and equipped with efficient ventilation. When installing the oven, easy access to all control elements should be ensured. Positioning the appliance Ensure that the aperture that you will be fitting the oven into is of the size given in the above diagram. -
Page 20: Ventilation Requirements
Ventilation requirements (Figure shows the ventilation and cut-out requirements for the installation of the appliance into a tall housing unit). Ensure that the oven has been securely fixed into the housing unit. The fixing of the oven into the housing is made by using four screws. These should be screwed through the oven cabinet and into the housing unit. -
Page 21: My Appliance Isn't Working Correctly
My appliance isn’t working correctly The oven isn’t coming on. Check that the oven is in manual operation mode. Check that you have selected a cooking function and a cooking temperature. There appears to be no power to the oven and grill. ... - Page 22 The oven light is not working Refer to page 24 and follow the “ Replacing the oven bulb ” section. I am getting condensation in my oven. Steam and condensation is a natural by product of cooking any food with high water content, such as frozen food, chicken etc.
-
Page 23: Oven Main Function Cooking Instruction
Oven main function cooking instruction: use the back elements and fan working mode Food Weight Preheat Tray Position Temperature Finished Time Beef 10 mins 2nd floor 40-50mins 200℃ Pork 1 kg 10 mins 2nd floor 200℃ 70-80mins Chicken 1.2 kg 10 mins 2nd floor 200℃... -
Page 24: Technical Data
Use the upper element working mode: Food Weight Preheat Tray Position Temperature Finished Time Beef 0.8kg 10 mins floor 20-25 mins 250℃ Pork 0.8 kg 10 mins floor 250℃ 25-30 mins Chicken 1.2 kg 10 mins floor 250℃ 40-45 mins Banger 0.6 kg 10 mins...
Need help?
Do you have a question about the TEO6091SS and is the answer not in the manual?
Questions and answers