
Related Manuals for Moosoo R4


Summary of Contents for Moosoo R4
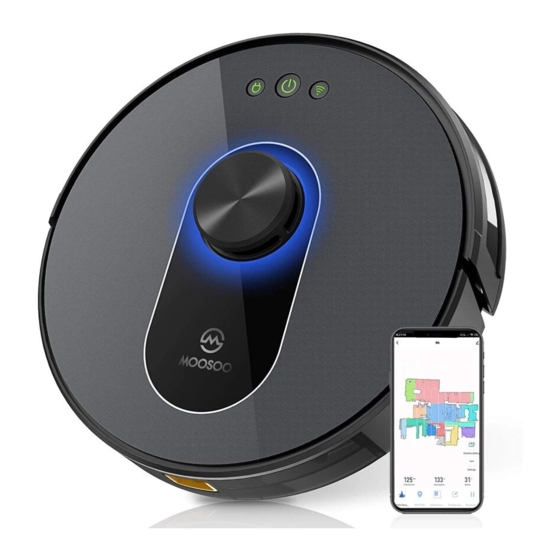
- Page 1 Robotic Vacuum Cleaner Instructions Manual Model: R4 For any questions and malfunctions of the appliance during use, please contact our customer service email: usa@imoosoo.com...
-
Page 3: Table Of Contents
Contents Safety Instructions Product and its Accessories Product Composition Attention Use Instructions Parts Maintenance Troubleshooting Installation... -
Page 4: Safety Instructions
Safety Instructions Before using this product, read the following safety instructions and follow all conventional safety precautions. Read this manual carefully, and keep it properly. Any operation not conforming to this manual may cause damage to this product. CAUTIONS 1. Only authorized technicians can disassemble this product. Users are not recommended to disassemble this product by themselves. 2. - Page 5 17. Do not use this product in a high temperature environment. 18. Remove the battery from the product before scrapping it. 19. When removing the battery, make sure that the product is disconnected from the power supply. 20. Properly recycle the waste batteries. WARNINGS 1.
-
Page 6: Product And Its Accessories
Product and its Accessories Main unit Docking station Power adapter Cleaning brush Instructions Manual Side brush (2 sets) HEPA filter Dust box Accessories box... -
Page 7: Product Composition
Product Composition Front view Wi-Fi button On/Pause button Cover Return to docking station button Laser head Omnidirectional lens Dust box button Rear view Charging electrode Cliff sensor Omnidirectional wheel Side brush Battery Drive wheel Roller brush assembly Dust box... - Page 8 Dust Box HEPA filter HEPA filter cover Prefilter Conductive shrapnel of the dust box Sheet metal of the dust box Side cover of the dust box Remote Control Charging Dock Signal indicator DC connector Charging electrode...
- Page 9 Parameter Product Model 100~240V,50/60Hz Input Power Li-ion 3000mAh Battery Capacity 0.6L Dust Box Capacity Cleaning Time Max, 120 min Charging Time Around 300 min 100~240V,50/60Hz Input Output 19V/0.6A...
-
Page 10: Attention
Attention Considerations 1. Before starting the vacuum cleaner, clean up wires and sundries 2. Avoid using this product in the wading area; otherwise, the fan scattered on the ground, and remove easy-to-fall, fragile, valuable may be damaged, affecting the performance of the vacuum and potentially dangerous items. - Page 11 Remove the protective strip Before using the main unit, remove the protective strip from the main unit.
- Page 12 Charging the Main Unit 1. Place the docking station on the flat ground against the wall. Do 2. Connect the docking station to the power supply. not place any articles 0.5m to the left and right of the docking 3. Install the left and right side brushes. station and 1.5m in front of the docking station.
-
Page 13: Use Instructions
Use Instructions Tips: • If the power is too low, the vacuum cleaner cannot start Power on and off the machine cleaning. Therefore, charge the vacuum cleaner before starting it. Tap and hold the button to power on the machine. Then, the •... - Page 14 Enter the sleep mode Faulty state If no operation is performed in 10 minutes, the vacuum cleaner If the vacuum cleaner encounters a fault while working, the automatically enters the sleep mode, and the power indicator power indicator blinks quickly in red, and a voice prompt is blinks every several seconds.
- Page 15 Set a restricted zone or virtual wall Pin and Go You can use the mobile app to specify a target point on the map. You can use the mobile app to set a restricted zone or virtual wall. The vacuum cleaner will automatically plan the route and move to After the setting is completed, the vacuum cleaner will not enter the specified point.
- Page 16 More app functions Real-time map update Volume adjustment Cleaning record viewing Map management Robot voice changing Firmware update Robot positioning Robot status viewing Configured zone cleaning Tip: The functions and details of the app may change slightly due to You can use the mobile app to configure a zone for cleaning. The continuous development and upgrade of the app.
-
Page 17: Parts Maintenance
Parts Maintenance Regular maintenance To achieve the best cleaning effect, clean and maintain the main unit regularly according to the table below. Determine the frequency of cleaning and maintenance according to your use habits. Recommended cleaning and maintenance frequency: Cleaning Replacement Frequency Component of the Main Unit Frequency... - Page 18 Dust Box 1. Press down the button on the dust box to remove the dust 4. Open the HEPA filter cover. box. 5. Take out the HEPA filter and prefilter. Tap the HEPA filter to 2. Open the side cover of the 3.
- Page 19 6. Wash the prefilter. 8. Dry the dust box and filter components, and keep them dry to ensure their service life. Note: It is recommended that you wash the prefilter every 15 to 30 days. The maximum service life of the HEPA filter is 3 months.
- Page 20 Roller Brush and Side Brush 1. Clean the roller brush. 4. Use a tool to clean the tangled hair. 2. Open the roller brush cover assembly. 3. Take out the roller brush shaft. 5. Clean the side brushes.
- Page 21 Charging electrode, anti-fall sensor, drive wheel and omnidirectional wheel 1. Clean the charging electrode. 2. Clean the drive wheel and omnidirectional wheel. 3. Clean the anti-fall sensor.
-
Page 22: Troubleshooting
Troubleshooting If the vacuum cleaner encounters a fault while working, the power indicator blinks quickly in red, and a voice prompt is generated. In this case, rectify the fault by referring to the table below. Error Prompt Solution The laser ranging sensor is blocked or jammed by a foreign object. Remove the Error 1: Laser head is blocked or stuck, please check. - Page 23 Fault Solution The battery power is insufficient. Please use the vacuum cleaner after charging it on the docking station. Failed to power on the machine The battery temperature is too high or too low. Please use the vacuum cleaner when the ambient temperature is 0°C to 40°C.
- Page 24 Fault Solution The power is insufficient. Scheduled cleaning will be started only when the Scheduled cleaning cannot be carried out. remaining power is more than 20%. The power consumption is extremely low when the vacuum cleaner always Is any power consumed if the vacuum cleaner always stays at the docking stays at the docking station.
-
Page 25: Installation
Installation Download the Smart Life app, tap the plus (+) sign to add the home appliance, and select the 2.4 GHz Wi-Fi network. Enter the correct Wi-Fi name and password, and tap Next to connect the vacuum cleaner to the Wi-Fi network. You can configure the Wi-Fi network using either of the following methods: 1. - Page 26 2. Hotspot pairing: Press and hold the Wi-Fi button on the machine for 6s. The machine beeps every 3s. After the machine beeps twice, it enters the AP mode, and the Wi-Fi indicator blinks slowly. Then, you can enter the correct Wi-Fi name and password, and tap Go to Connect. Select the SmartLife-XXXX hotspot without password.
Need help?
Do you have a question about the R4 and is the answer not in the manual?
Questions and answers