Table of Contents
Advertisement
Quick Links
Advertisement
Table of Contents

Related Manuals for Pure Pressure Axis


Summary of Contents for Pure Pressure Axis
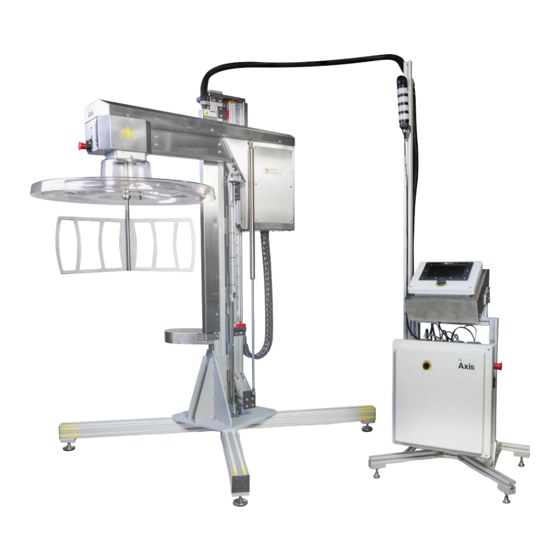
- Page 1 Axis Trichome Separator Axis User Manual R1.1...
-
Page 2: Table Of Contents
4.3. Guard Installation 1.5. Disclaimers & Safety Precautions 4.4. Leveling the Axis 1.6. Uncrating Your Axis 4.4.1. Leveling the Axis continued 4.4.2. Leveling the Axis continued System Overview 4.5. Wash Liner Installation 2.1. Defining the System 4.5.1. Washer Liner Installation continued 2.1.1. - Page 3 Material Processing 6.1. Material Quality 6.2. Intended Use 6.3. Single Vessel 6.4. Multiple Vessels 6.5. Filtration Cleaning the Axis 7.1. Power Down 7.2. Vessel Guard Removal & Cleaning 7.3. Cleaning the Axis 7.4. Control Stand Cleaning 7.5. Paddle & Coupler Cleaning 7.6.
-
Page 4: Introduction
1. Introduction From all of us here at PurePressure, thank you for your purchase! The Axis trichome separator is engineered to last for many years with proper care. The following user manual covers virtually every topic, Contact: including how to use the machine, technical specifications, tips on getting the most out of your Axis, and much more. -
Page 5: Warranty
PurePressure's trichome separators are built to last for many years with proper care. We want you to be satisfied with your equipment so if there are ever any concerns, please do not hesitate to contact us. PurePressure guarantees the following warranty coverage for the Axis Trichome Separator: ●... -
Page 6: What's Included
1.2 What’s Included What’s Included With Your Axis: (items may differ depending on kit or model) ● (x1) Axis trichome separator ● (x1) Control stand with touchscreen (connected to Axis) ● (x1) Vessel guard ○ (3x) ¼-20x1in Button Head Screws ●... -
Page 7: Technical Specifications
1.3 Technical Specifications Specifications & Requirements Axis, 120V / 240V Weight Axis - 190 lbs, Control Stand - 90 lbs -> Total = 280 lbs Overall Dimensions 53.1” x 72.4” x 84.0” Depth x Width x Height Paddle System Quick change paddle system for all 3 vessel sizes (30, 44, 65) -
Page 8: Definitions
Axis Trichome Separator is the main agitation unit that includes the vertical support framing and the relocating head. Relocating Head is the mobile component of the Axis Trichome Separator. It has the ability to raise, lower, and pivot 90 degrees. This allows the operator to traverse from one vessel to another. -
Page 9: Disclaimers & Safety Precautions
WARNING: DO NOT WASH ANYTHING OTHER THAN SOFT PLANT MATERIALS IN THE TRICHOME SEPARATOR. WASHING OTHER OBJECTS WILL VOID THE WARRANTY. WARNING: WHEN USING ISOPROPYL ALCOHOL TO CLEAN THE AXIS THE POWER SHOULD BE DISCONNECTED. ALWAYS WEAR GLOVES AND EYE PROTECTION. -
Page 10: Uncrating Your Axis
Cut off any external shrink wrap. Remove any 2x4’s supporting the Axis head of the machine first. Take note of any screws that need to be removed to disassemble the sides of the crate. Start with a large side, then the two smaller sides. and finally the last large side. - Page 11 At this point, the Axis should be the only item left on the crate base. Unbolt the Axis from the crate base using a 9/16” socket. A lifting eye is provided to safely and easily lift the Axis off of the crate. A forklift, overhead hoist, or tall engine hoist can lift the 190 lb Axis off of the crate.
-
Page 12: Defining The System
2.1 Defining the System System Definition This section will highlight and define various sub-systems throughout the machine. Sub-systems included: Interlocks, e-stop & motor enable function Light tower function Components... -
Page 13: Interlocks, E-Stop & Motor Enable
● The touchscreen interface will indicate which interlocks are satisfied. When all 3 interlocks are satisfied, a blue indicator light will illuminate on the Axis as well as on the light tower. ● “Pivot Locked” = Axial Interlock There is an interlock switch to indicate that the pivoting portion Need pic to indicate of the machine is locked into either of the 2 positions. -
Page 14: Light Tower Function
2.1.2 Defining the System Light Tower Function ● The light tower indicates the safe operation of the machine so that operators can, from a distance, tell what state the machine is in. ● There are four lights on the tower and each one indicates a different state of the machine. - Page 15 2.1.3 Defining the System Axis Trichome Separator and the Control Stand The Axis ○ The Axis contains a frame with legs and a relocating head. ○ Vessels may remain in-place during operation or rolled in-and-out of place for offline filtration.
-
Page 16: System Dimensions
2.2 System Dimensions... -
Page 17: Basic Movement & Operation
● Vertical Movement ● Joystick Control ○ The Axis is designed to raise and lower the relocating head with ○ Located on the control stand, the assistance from a gas spring and a pneumatic cylinder. joystick operates the paddle function ○... -
Page 18: Paddles
2.4 Paddles Sizes, Geometry, and Function ● The paddle geometry has been specially designed for low RPM hash agitation. ● Paddles are sized per the vessel diameters, so the appropriate paddle must be used with the corresponding vessel. ● The precision servo-drive system is ideal to easily repeat gentle motions used for low shear agitation all the way up to aggressive agitation and everything in between. -
Page 19: Vessel Setup
The following instructions will show you how to set up your Bruteless hash washing system to integrate with the Axis trichome separator. While each system is design to be used in a certain way, there are opportunities to customize the setup to your liking as you become more familiar with using it. - Page 20 Bruteless 65 Gal Center Drain Assembly Instructions The Axis trichome separator is designed to accommodate any of the three vessel sizes: 30 gallon, 44 gallon, and 65 gallon. The recommended setup for utilizing the Axis trichome separator is with the Bruteless 65 gallon center drain vessel.
- Page 21 first use! Bruteless 30 & 44 Gal Assembly Instructions The Axis trichome separator can accommodate multiple vessel sizes. The following instructions will highlight the setup for the 30 and 44 gallon vessels. Vessel Ports ●...
-
Page 22: Dolly Setup
During the wash process, Bruteless vessels need to travel to a variety of stations during the wash process. From the fill station, to one of the Axis washing locations, the cleaning station,and everything in between, the vessels move throughout the process. Due to this, elevated dollies were created, which quickly mount to the vessel and provide the user with easy transportation of vessels. -
Page 23: Gallon Dolly Setup
3.2.1 65 Gallon Dolly Setup Bruteless 65 Gallon Dolly Instructions What’s included with setup: (4x) PPM165, Welded Base plate (4x) PPM166, Vessel Spacer plate (2x) PPM167, Vessel Secure plate (4x) PPH179, 5” PU Casters Dolly hardware (16x) PPH180, 5/16-18” Dome nut (16x) PPH184, 5/16-18”... -
Page 24: Gallon Dolly Setup Continued
Note: Remember to clean 3.2.2 65 Gallon Dolly Setup (continued) your equipment prior to use! Bruteless 65 Gallon Dolly Assembly Instructions Tools needed for assembly: ● 5/16” allen wrench ● Adjustable wrench or 9/16” Socket Head Drill bit ● Flathead Screwdriver Assembling dolly: ●... -
Page 25: Gallon Dolly Setup Schematic
3.2.3 65 Gallon Dolly Setup Schematic... - Page 26 Center Drain Support Bruteless 65 Gal Center Drain Assembly Instructions One of the new features of the Axis setup is the 65 Gal Center drain vessel. To fully utilize the center drain properties, we recommend to use the following setup: ●...
-
Page 27: 30/44 Gallon Dolly Setup
Note: Remember to clean 3.2.5 30/44 Gallon Dolly Setup your equipment prior to use! Bruteless 30/44 Gallon Dolly Assembly Instructions What’s included with setup: (2x) PPM169 or PPM171, Base Tilt plate (2x) PPM168 or PPM170, Base Non-tilt plate (4x) PPM166, Vessel Spacer plate (2x) PPM167, Vessel Secure plate (4x) PPH205, 3”... - Page 28 3.2.6 30/44 Gallon Dolly Setup Bruteless 30/44 Gallon Dolly Assembly Instructions Tools needed for assembly: ● 5/16” allen wrench ● Adjustable wrench or 9/16” Socket Head Drill bit Assembling dolly: ● Align the 4 x weld plates in a circle. The two tilt plates (PPM169/PPM171) should be connected together and the two non-tilt plates (PPM168/PPM170) should be connected together.
-
Page 29: Gallon Dolly Schematic
3.2.7 44 Gallon Dolly Schematic... -
Page 30: Gallon Dolly Schematic
3.2.8 30 Gallon Dolly Schematic... -
Page 31: Insulation Adjustment
3.3 Insulation Adjustment Adjusting insulation for guard fitment One of the key features to help with regulating water temperature is the closed-cell foam insulation. Each Bruteless vessel comes with an antimicrobial neoprene sleeve encompassing closed-cell foam. This layered construction helps dramatically reduce ice usage by up to 50% and is easily removable for cleaning. - Page 32 Setting Up the Axis Trichome Separator is Easy After uncrating the Axis and setting up the vessels & dollies, we are now ready to setup the machine. The following pages will show you how to set up your Axis trichome separator.
-
Page 33: Cable Management
First, you need to decide a desired location to setup the Axis. ● Now that the Axis has been placed in its final position, you may route the cable conduit so that it is secured out of the way of the operators. -
Page 34: Cable Management Continued
○ Starting at the Axis, zip tie the conduit to the cable support rope. Work your way back towards the control stand. Ensure that the conduit maintains at least a 5” bend radius during final installation. -
Page 35: Compressed Air Supply
Connect the dry compressed air source and validate that you have 120 psi. Now, the cross arm can be operated by using the toggle Pic of air supply switch on the Axis. install? The middle position will hold the head. -
Page 36: Guard Installation
Place the guard on top of the vessel. Lower the head of the axis and mate it with the guard. The D-shape of the guard and the receiving portion of the agitator should nest together in one position. -
Page 37: Leveling The Axis
● The Axis has leveling feet that can account for up to +/- ½” of uneven floor surface. It is important to have your machine, mainly your guard, parallel with the top of your vessels so that it can consistently mate with the vessel. -
Page 38: Leveling The Axis Continued
4.4.1 Leveling the Axis (continued) Setting Machine Height for Operation ● Follow these instructions for setting the Axis height and angle with the leveling feet: ○ Remove the enclosure faceplate above the guard, from here you can view the spring-loaded parts that control the guard safety function also known as the guard interlock. - Page 39 4.4.2 Leveling the Axis (continued) Setting Machine Height for Operation ● Follow these instructions for setting the Axis height and angle with the leveling feet: ○ Next, inspect the interlock plates as they need to be fully compressed. If they are not, then the machine needs to be lowered or the angle needs to be adjusted.
- Page 40 This allows room so that trichomes have a place to flow outward and settle to the bottom. ● There are 3 sizes available to match the vessels that can be used with the Axis machine (30 gallon, 44 gallon, & 65 gallon). ●...
- Page 41 4.5.1 Filtration Wash Liner Installation (continued) Installing a Wash Liner into a Vessel There are 2 food grade dowels included with each liner, which will need to be installed, as they are not inserted prior to shipping to avoid damage. There are pros and cons to using 1 versus 2 dowels. With both dowels inserted into the liner, the operator decreases the likelihood of improperly installing the wash liner into the vessel.
-
Page 42: Axis Touchscreen Interface
Touchscreen Interface Overview The Axis comes integrated with a touchscreen to help control and program an automated hash washing process. The servo-driven paddle may be controlled using the included joystick or motion can be programmed using the touchscreen interface. -
Page 43: Home Screen
5.1 Home Screen The Home Screen appears after startup and you can navigate to most places from the home screen. The upper portion of the screen is persistent and will indicate the status of the most important items including interlock switches and paddle movement. -
Page 44: Joystick Patterns
Note: Use the fast setting with caution to 5.2 Joystick Patterns avoid damaging your material or to prevent breaking up the ice with the paddle. Joystick patterns allow the operator to create complex paddle motion that would otherwise be difficult to program manually as you might do in a table pattern. -
Page 45: Joystick Patterns Continued
5.2.1 Joystick Patterns (continued) Press “Record”; the system will wait for you to move the joystick before it will start recording paddle motion. Once recording is started, you will see a countdown timer for 30 seconds. You may use the entire 30 seconds or you may press “Stop”... - Page 46 5.3 Table Patterns Table Patterns allow the operator to create simple paddle motion by programming the paddle RPM, direction, and time. This includes a rest period, called a dwell, that may be programmed into the table pattern as well. To program a table pattern, follow these steps: Select an existing or blank pattern and press “Edit”.
- Page 47 You will notice a graph is built to represent the motion of the pattern. A higher RPM will be seen with an increased amplitude on the Y-Axis, whereas time is represented on the X-Axis. Press “Save” when complete.
-
Page 48: Quick Wash
Note: You will not be able to operate the 5.4 Quick Wash Quick Wash feature without the motor enabled. The Quick Wash feature allows the operator to load a vessel and start washing right away. Simply scroll through the list of available patterns. -
Page 49: Recipes
5.5 Recipes Recipes is where you will find all of your saved recipes. A recipe consists of one of more patterns and may include a dwell (rest period). Recipes may be created manually or using Quick Wash and can be edited/customized as you wish. -
Page 50: Recipes Continued
Note: You will not be able to operate the 5.5.1 Recipes (continued) Run Recipes feature without the motor enabled. Running a Recipe On the “Recipes” page, you are able to run any of your saved/created recipes, as well as the preset recipes that PurePressure provides In order to successfully run a recipe, follow these steps: Ensure a vessel is loaded and the motor is enabled. -
Page 51: Recipes Continued
5.5.2 Recipes (continued) Run Recipe Screen Playing Recipe Screen... -
Page 52: History
There are many different ways to utilize the history and the statistical data the Axis displays. We have found the following best practices to maximize data output: ●... -
Page 53: System Settings
5.7 System Settings You can adjust your system settings at any time. This will allow you to change a few key things to assist during the washing process. Below is a summary of the buttons available at the setting screen: 1: Buzzer Turn the audible beeps on or off. - Page 54 first. You are NOT able to change this schedule. C: Bearing / Drivetrain Service The drivetrain of the Axis will need a major service after approximately 20,000 motor usage hours. You may change the schedule of service as needed.
- Page 55 Check for an obstruction and/or reduce the paddle RPM and ramp. “Lifting head while moving” If the relocating head of the Axis is lifted while the paddle is in motion, the interlocks will no longer be satisfied and this error will occur.
-
Page 56: Material Quality
6.1 Material Quality Material Quality Common Trichome Types ● When processing ice water hash, high quality material goes a long way. ● It is important to select a strain/batch that has well developed trichome heads that are prone to separate under agitation. ●... -
Page 57: Intended Use
6.2 Intended Use Intended Use ● The Axis trichome separator is intended to be used for the production of ice water hash utilizing a relocating head and interchangeable wash vessels. ● A filtration mesh wash bag lines the inside of the vessel. -
Page 58: Single Vessel
6.3 Single Vessel Single Vessel Operation ● The Axis can be used in either single or multiple vessel operation. ● Single vessel operation is great for small batch or test washes. ● The relocating head may be raised and pivoted to gain access to the vessel while leaving the vessel in place. -
Page 59: Multiple Vessels
6.4 Multiple Vessels Multiple Vessel Operation ● The Axis truly shines when the operator is able to take advantage of multiple vessel operation. ● The idea here is to maximize throughput by keeping the Axis paddle turning. The percentage of time the paddle is turning compared to the process time is called Machine Utilization Percentage. -
Page 60: Filtration
6.5 Filtration Grading Your Hash and Making Product Decisions After you’ve finished draining, collecting, and prepping your material for freeze drying (or air drying), then you can better determine what the strain you just washed is capable of, and where most of its trichome sizes ended up. -
Page 61: Power Down
Always power down and unplug the machine before cleaning. ● The Axis is designed to meet the IP65 standard. We recommend using a wipe-only cleaning method as opposed to a hose down method to prevent standing water in undesirable locations. -
Page 62: Vessel Guard Removal & Cleaning
7.2 Vessel Guard Removal & Cleaning Vessel Guard Removal & Cleaning We recommend you do this before and after processing on a daily basis at minimum. To remove the guard, first lower down onto a vessel. Ensure that no paddle is attached. -
Page 63: Cleaning The Axis
7.3 Cleaning the Axis Cleaning the Axis Exterior sheet metal and structural frame: ● We recommend you clean the machine every 40 hrs of operation at minimum to maintain a sanitary work environment. ● Cleaning more often may be required depending on material, level of machine use, and/or requirements of the facility/local regulators. -
Page 64: Control Stand Cleaning
7.4 Control Stand Cleaning Control Stand Cleaning ● Power down and unplug the unit. ● Keep the HMI screen clean. This should be wiped down daily. ○ Note: if hash or plant matter is stuck to the control screen, it will not operate correctly. -
Page 65: Paddle & Coupler Cleaning
7.5 Paddle & Coupler Cleaning Paddle & Coupler Cleaning ● These components can be steam cleaned, washed in a commercial dishwasher or in an isopropyl alcohol and water mixture. ● Rinse thoroughly with tap water and dry off any standing water. ●... -
Page 66: Vessel Cleaning
7.6 Vessel Cleaning Care Instructions and Cleaning Advice We strongly recommend deep cleaning your Bruteless stainless steel vessel, fittings, and paddle at the end of each day’s washing. This will help ensure that your system stays contaminant free, which is crucial. RO water can be extremely corrosive; surface rust can appear even on stainless steel because of rogue particulate in standing water on the metal. -
Page 67: Maintenance & Troubleshooting
8. Maintenance & Troubleshooting Maintenance Overview Your Axis trichome separator is engineered to operate for an extremely long time if its basic maintenance needs are met. Please refer to the Axis service manual for more information or contact us at 720-446-9565 or support@gopurepressure.com... -
Page 68: Common Issues
8.1 Common Issues Problem: Interlock will not engage (no blue light). Problem: Motor will not enable. Solution: Inspect the touch screen interface to Solution: All interlocks must be satisfied, and the blue determine which interlocks are not engaged. light must be illuminated. If the blue light is illuminated Pivot Locked - Ensure the head is locked and you cannot enable the motor, one of your interlock into position... -
Page 69: Common Issues Continued
Problem: Vertical play in motor or paddle drive shafts. engagement. Contact PurePressure if you have Solution: Disconnect power from the axis. Remove alignment issues. the pulley cover and remove the belt. Grab each pulley and push/pull to check for axial movement. -
Page 70: Common Issues Continued
8.1.2 Common Issues (continued) Problem: Bearing failure (squeak, squeal, grind). Solution: Eventually the bearings are going to need to be replaced. Paying careful attention to the sounds your machine makes can help diagnose a bearing failure before it happens. Listen for squeaks, squeals, and grinding noises that follow the motion of the paddle. -
Page 71: Frequently Asked Questions
What Pressure Should I Use? Air pressure controls the vertical travel of the machine. The Axis will come factory set to 120psi. All of that air pressure is used to raise the relocating head. There is an internal regulator for the downward travel and that pressure is factory set at 90psi. - Page 72 720-446-9565 purepressure.com Sales Inquiries: sales@gopurepressure.com General Questions: info@gopurepressure.com Technical Support: support@gopurepressure.com Axis User Manual @gopurepressure R1.1 We’re always here to help.
Need help?
Do you have a question about the Axis and is the answer not in the manual?
Questions and answers