Table of Contents
Advertisement
Quick Links
Advertisement
Table of Contents

Subscribe to Our Youtube Channel
Related Manuals for Pure Pressure Axis

Summary of Contents for Pure Pressure Axis
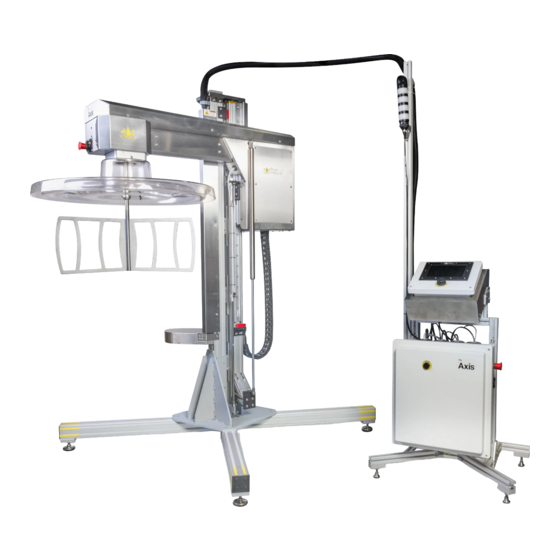
- Page 1 Axis Trichome Separator Axis Service Manual R1.1...
-
Page 2: Table Of Contents
Table of Contents Introduction Service Tools & Equipment Service Schedule Pneumatics Machine Travel 5.1. Pivoting 5.2. Latch Pins 5.3. Guard Interlock Assembly Drive System 6.1. Belt Tension 6.1.1. Belt Tension Continued 6.2. Bearing Replacement Options 6.3. Removing the Paddle Drive Assembly 6.3.1. - Page 3 Contact: machine, and much more. Please refer to the Axis User Manual for how to use the machine, 720-446-9565 technical specifications, tips on getting the most out of your equipment, and much more.
- Page 4 2. Service Tools & Equipment Note: Use of any grease must be food-grade, regardless of the manufacturer!!! Tools for the Job While there are plenty of tools available to setup and maintain your equipment, the following tools are necessary to have for complete and accurate assembly and tune-up of the machine.
- Page 5 Check filter regulator for condensation. ○ 6 Months: Grease hinges ○ 20,000 hours (L10 predicted life): Replace bearings, drive belt, motor and gearbox If you encounter an issue with your Axis that is not described in the following pages, please contact us at support@gopurepressure.com...
-
Page 6: Pneumatics
4. Pneumatics Air Supply & Pneumatic Function The Axis has a pneumatic assist designed into the function of the relocating head. The upward travel is controlled by the regulator on the back of the control stand. The downward travel has an internal regulator (not shown) that is factory set and requires no maintenance. -
Page 7: Machine Travel
Note: PurePressure’s recommend grease is Molykote G-0051 FM. Pivoting Function A food grade grease is used to lubricate the friction components on the Axis. The following pages highlight the most commonly lubricated components for optimal functionality of the machine: The hinge function should be smooth acting without binding or sticking. -
Page 8: Latch Pins
5.2 Machine Travel Note: PurePressure’s recommend grease is Molykote G-0051 FM. Latch Pins The latch pin engagement plates for vertical travel and pivot should be greased. These pins are important for securing the vessel in the up-position, as well as in either quadrant for washing. -
Page 9: Guard Interlock Assembly
5.3 Machine Travel Note: PurePressure’s recommend grease is Molykote G-0051 FM. Guard Interlock Assembly The function of this spring loaded assembly is to engage the safety interlock for the function of your paddle. To prevent both binding and particulate build-up from migrating, this has to be maintained. -
Page 10: Drive System
Pulley Guard Belt functionality is one of the keys to optimal success of the machine. Proper belt tension extends the life of the mechanical components used in operating the axis drive system. The following instructions highlight how to tension the belt: Remove the paddle assembly and the vessel from under the Axis. - Page 11 DO NOT OPERATE 6.1.1 Belt Tensioning (continued) MACHINE WITHOUT GUARDS IN PLACE!!! How to properly tension the belt (continued) LOOSEN, but do not remove the 6x paddle drive mount bolts. Use a ¼” and 3/16” allen socket wrench to loosen. Using a ¼”...
- Page 12 DO NOT OPERATE 6.1.2 Belt Tensioning (continued) MACHINE WITHOUT GUARDS IN PLACE!!! 2x Tensioning Bolts 1/4in Allen Wrench 2x Jam Nuts 9/16in Flat Wrench...
-
Page 13: Bearing Replacement Options
Bearing Replacement Options ● Food-grade bearings exist on the paddle and motor drive assemblies of the Axis. ● These bearings help with friction in the moving components. In the case that these assemblies need to be serviced, PurePressure offers multiple options for its customers to get them back up to speed. -
Page 14: Removing The Paddle Drive Assembly
6.3 Removing Paddle Drive Assembly How to Remove the Paddle Drive Assembly Pulley Guard The following pages highlight how to remove, replace, and re-install the paddle drive bearings. Disconnect power from the machine. Remove the guard from the relocating head (see user manual for detailed instruction). -
Page 15: Removing The Paddle Drive Assembly Continued
6.3.1 Removing Paddle Drive Assembly (continued) How to Remove the Paddle Drive Assembly (continued) Loosen the belt tension jam nuts (qty 2) and then remove the belt tension bolts. These bolts are finer thread than the other bolts used in the assembly. Do not mix them with other hardware, keep them separate Loosen (DO NOT FULLY REMOVE) the x6 allen socket head bolts for fixing the paddle drive block. -
Page 16: Replacing The Bearings, Paddle Drive
6.3.2 Replacing Paddle Drive Bearings How to Replace the Paddle Drive Bearings Now that the paddle drive assembly is removed from the machine, we are ready to swap out the bearings. See the next page for a sub assembly drawing of the paddle drive. Follow the below steps to replace the bearings in the paddle drive: Bring the paddle drive assembly over to a working area. -
Page 17: Paddle Drive Assembly Print
6.3.3 Paddle Drive Assembly Print... -
Page 18: Re-Installing The Paddle Drive Assembly
6.3.4 Re-install the Paddle Drive Assembly How to Re-install the Paddle Drive Assembly Now that the bearings have been swapped and the paddle drive assembly is back together, we are ready to re-install the assembly into the machine. Slide the paddle drive assembly onto the relocating head Reinstall the guard limit switch (PPW053-3) with a 3/32”... -
Page 19: Removing The Motor Drive Assembly
6.4 Removing Motor Drive Assembly How to Remove the Motor Drive Assembly The following pages highlight how to remove, replace, and re-install the motor drive bearings. Rear Lower Tray Follow the below steps to remove the motor drive assembly: Disconnect power from the machine. See Section 6.3 for how to remove the drive belt. - Page 20 6.4.1 Replacing Motor Drive Bearings Note: The biggest trouble is re-inserting the keyway!!! How to Replace the Motor Drive Bearings Now that the motor drive assembly is removed from the machine, we are ready to swap out the bearings. Follow the below steps to replace the bearings in the motor drive: Bring the motor drive assembly over to a working area.
-
Page 21: Motor Drive Assembly Print
6.4.2 Replacing Motor Drive Bearings Note: Make sure you install the correct keyway in the correct location. Motor Drive Sub Assembly Print... -
Page 22: Re-Installing The Motor Drive Assembly
6.4.3 Re-install the Motor Drive Assembly How to Re-install the Motor Drive Assembly Now that the bearings have been swapped and the motor drive assembly is back together, we are ready to re-install the assembly into the machine. Follow the below steps to re-install the motor drive assembly: Disconnect power from the machine and grab the motor drive assembly ready to be installed. - Page 23 720-446-9565 purepressure.com Sales Inquiries: sales@gopurepressure.com General Questions: info@gopurepressure.com Technical Support: support@gopurepressure.com Axis Service Manual @gopurepressure R1.1 We’re always here to help.
Need help?
Do you have a question about the Axis and is the answer not in the manual?
Questions and answers