
Related Manuals for Waterite Vectamaxx RSL


Summary of Contents for Waterite Vectamaxx RSL
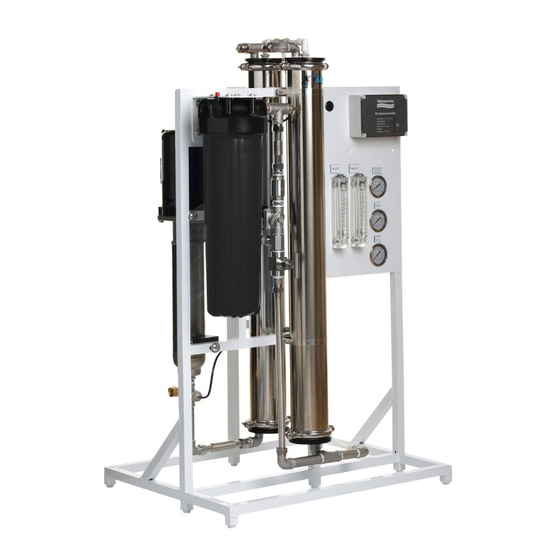
- Page 1 OWNER'S MANUAL Vectamaxx RSL and RSLHP Commercial RO Systems Manufactured by: WATERITE, INC. 5-200 Discovery Place, Winnipeg, MB, R2R 0P7 www.waterite.com...
-
Page 2: Table Of Contents
Section 5: Troubleshooting ..................................17 Section 6: Electrical Information ...............................18-19 Section 7: Replacement Parts ................................20-21 Section 8: System Performance Log ..............................22 Warranty .................................... BACK COVER Dealer Name __________________________________________________ Phone _______________________________ Address _______________________________________________________ Email ________________________________ ____________________________________________________________________________________________ Copyright © 2021, Waterite, Inc. All Rights Reserved... -
Page 3: Frequently Asked Questions
Where the RO system is used as a pre-treatment for a process requiring water to exact standards, you should adopt a regular ongoing sampling and testing procedure to ensure compliance, as product water will vary with the quality of the feed water. Copyright © 2021, Waterite, Inc. All Rights Reserved... - Page 4 Float switch contacts should be closed when the tank is empty, and open when the tank is full. Consult your Waterite commercial RO systems dealer for information and availability on a wide variety of water system components including storage tanks, re-pressurization pumps, bulkheads, tube, pipe, pressure switches, fittings, UV disinfection systems and float valves.
-
Page 5: Section 1: Installation
22 for quick reference. VECTAMAXX See: Section 6 for electrical requirements for auxiliary input connections to Manufactured by / Fabriqué par: Waterite, Inc., Winnipeg, MB, Canada the RO controller. FOR INDOOR USE ONLY - UNIQUEMENT POUR UTILISATION INTÉRIEURE Input / Entrée: 230Vac 60Hz... -
Page 6: Installing The Pre-Filter Cartridge
Remove plastic wrap from the filter cartridge. Insert filter into housing and reassemble. – DO NOT OVERTIGHTEN – 1/4 turn after hand tight is usually sufficient. See Section 8 for replacement cartridge part number. Figure 4 Figure 6 Copyright © 2021, Waterite, Inc. All Rights Reserved... -
Page 7: Installing The Drain Line
Consult an electrician if supply power is subject to variability. A boost transformer may be necessary especially in rural areas with 208V supply. Other motor voltages are available as a factory option. Consult your dealer for availability and pricing. DO NOT START THE SYSTEM UNTIL STEPS 2.4-2.5 ARE COMPLETED. Copyright © 2021, Waterite, Inc. All Rights Reserved... -
Page 8: Section 2: System Operation
If your feedwater has high TDS, Program 2 is recommended as it will increase membrane life. It will also increase water consumption. Program 1, No Flush (Default, Preset at factory) Program 2, Auto Flush (Option) RO Program Settings Switch 1 Switch 2 Program Figure 8 Copyright © 2021, Waterite, Inc. All Rights Reserved... -
Page 9: Switching Between Programs
5 GPM. Let the system operate for about 5 minutes with Recycle valve fully open. The system is now flushing preservative from the membrane. There will be minimal production from the machine during this time. Copyright © 2021, Waterite, Inc. All Rights Reserved... -
Page 10: Setting System Operation Pressure
SYSTEM DAMAGE MAY RESULT. You may wish to lock the valves in the proper position by removing the handles to discourage tampering. Your system is now set up to operate at its designed settings. Figure 11 Copyright © 2021, Waterite, Inc. All Rights Reserved... -
Page 11: Recovery Rates
This can be done by loosening the setscrews located in the valve handle. DO NOT ATTEMPT TO OPERATE THE SYSTEM AT HIGHER RECOVERY RATES, AS THIS WILL CAUSE PREMATURE MEMBRANE FAILURE OR INTERNAL SCALING AND EQUIPMENT FAILURE. Copyright © 2021, Waterite, Inc. All Rights Reserved... -
Page 12: Section 3: System Maintenance
Remove all plastic wrapping from filter cartridge. Insert the new filter in the housing and reassemble. – DO NOT OVERTIGHTEN – 1/4 turn after hand tight using the supplied filter wrench is usually sufficient. Always use Waterite factory replacement cartridges. -
Page 13: Membrane Removal
Re-install the housing end cap assembly into housings using rocking motion. Re-install the band clamp and snug bolts equally to maintain an even gap between the clamp halves. Repeat steps 6-8 on any remaining housing end cap assemblies. Copyright © 2021, Waterite, Inc. All Rights Reserved... -
Page 14: Monitoring System Performance
It will also be helpful for your dealer or Waterite technical personnel to have this information available to help troubleshoot your system, should it be necessary. -
Page 15: Section 4: Specifications
F1 5x20mm 1/4(0.25) Amp Little Fuse 0218.250MXP Controller power fuse Branch circuit protection, motor and valve protection must be provided externally. * Pre-treat lockouts are optional equipment (Refer to pre-treatment system valve manual for more information). Copyright © 2021, Waterite, Inc. All Rights Reserved... -
Page 16: General System Specifications
INSTALLATIONS WITH 208V SERVICE MAY REQUIRE THE USE OF A BOOST TRANSFORMER TO ENSURE A CONSTANT 208V TO THE SOLENOID VALVES. VARIABILITY IN 208V SERVICE CAN CAUSE VOLTAGE TO DROP BELOW THE VALVE REQUIREMENTS. Copyright © 2021, Waterite, Inc. All Rights Reserved... -
Page 17: Section 5: Troubleshooting
5 minutes then turn off. Turn off / on unit to clear manual mode. Wear nitrile gloves when handling filters on membranes. Contact Microbial growth Contamination of filter or membrane dealer. Copyright © 2021, Waterite, Inc. All Rights Reserved... -
Page 18: Section 6: Electrical Information
SECTION 6: ELECTRICAL INFORMATION Motor Service factor all units: Amps x 1.30 ALL RSL AND RSLHP UNITS ARE WIRED 230/208VAC 1 PH 60HZ, UNLESS OTHERWISE SPECIFIED Copyright © 2021, Waterite, Inc. All Rights Reserved... - Page 19 Figure 19 Copyright © 2021, Waterite, Inc. All Rights Reserved...
-
Page 20: Section 7: Replacement Parts
8 Product Adapter O-ring N70210 9 Membrane Housing End Cap O-ring N70342 10 Pre-Filter Housing O-ring RKE0013HLB 11 Black Max 4040 Membrane, TFC, XLP BME4040SXL 12 Black Max 4040 Membrane, TFC, S BME4040S RSLHP Copyright © 2021, Waterite, Inc. All Rights Reserved... - Page 21 Copyright © 2021, Waterite, Inc. All Rights Reserved...
-
Page 22: Section 8: System Performance Log
SECTION 8: SYSTEM PERFORMANCE LOG Line System Permeate Feed Water Pre-Filter Permeate Waste Flow Date Fast Flush Pressure Pressure Change Flow Meter Meter Copyright © 2021, Waterite, Inc. All Rights Reserved... - Page 23 THIS PAGE HAS BEEN LEFT INTENTIONALLY BLANK Copyright © 2021, Waterite, Inc. All Rights Reserved...
-
Page 24: Warranty
Vectamaxx RSL and RSLHP Commercial RO Systems Every Waterite reverse osmosis system is fully tested after assembly to ensure trouble free operation. This allows us to produce the best product we can. Should an issue arise, keep your bill of sale and your warranty certificate, included in this kit. This is needed to claim any parts or repair service during the warranty period.
Need help?
Do you have a question about the Vectamaxx RSL and is the answer not in the manual?
Questions and answers