Table of Contents
Advertisement
Quick Links
Basic User Guide
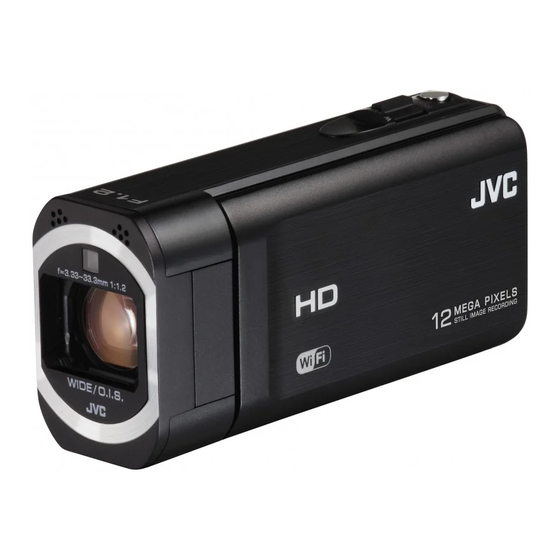
CAMCORDER
GZ-VX815BEK
Detailed User Guide
For more details on operating this
product, please refer to the "Detailed
User Guide" at the following website.
http://manual3.jvckenwood.com/
o
index.html/
Verifying the Accessories
AC Adapter
Power Cord
AP-V30M
USB Cable
(Type A - Mini Type B)
Please consult your JVC dealer or the nearest JVC service center when purchasing
a new AV cable.
Dear Customers
Thank you for purchasing this JVC product.
Before use, please read the Safety Precautions
and Cautions on p. 2 and p. 10 to ensure
safe use of this product.
.
When you are outside, refer to the
"Mobile User Guide". Mobile User Guide
can be viewed with standard browser for
Android tablet and iPhone.
http://manual3.jvckenwood.com/mobile/
o
eu/
Battery Pack
BN-VG212U
Stylus pen
CD-ROM
LYT2542-001A-M
Mobile User Guide
HDMI Mini
AV Cable
Cable
QAM1322-001
Basic User Guide
(this manual)
EN
Advertisement
Table of Contents

Related Manuals for JVC Everio GZ-VX815BEK


Summary of Contents for JVC Everio GZ-VX815BEK
- Page 1 Stylus pen CD-ROM (this manual) (Type A - Mini Type B) Please consult your JVC dealer or the nearest JVC service center when purchasing a new AV cable. Dear Customers Thank you for purchasing this JVC product. Before use, please read the Safety Precautions and Cautions on p.
-
Page 2: Safety Precautions
Safety Precautions IMPORTANT (for owners in the U.K.) When the equipment is installed in a cabinet or on Connection to the mains supply in the United a shelf, make sure that it has sufficient space on Kingdom. all sides to allow for ventilation (10 cm or more on DO NOT cut off the mains plug from this equipment. - Page 3 Make a backup of important recorded data remuneration to JVC will not be responsible for any lost data. (i) encode video in compliance with the AVC It is recommended to copy your important recorded standard (“AVC Video”) and/or...
-
Page 4: Table Of Contents
Contents Safety Precautions ......... 2 Recording Names of Parts and Functions ....4 Video Recording ........8 Grip Belt Adjustment ......4 Playback Getting Started Playing Back/Deleting Files on this Unit ..9 Charging the Battery Pack ..... 5 Further Information Inserting an SD Card ...... -
Page 5: Charging The Battery Pack
(p.6 ) CAUTION Be sure to use JVC battery packs. If you use any other battery packs besides JVC battery packs, safety and performance cannot be guaranteed. If malfunctions (overcurrent, overvoltage, transmission error, etc) occur, or if any battery manufactured other than JVC is attempted for battery charge, charging stops. -
Page 6: Inserting An Sd Card
Inserting an SD Card Insert a commercially available SD card before recording. Close the LCD monitor. Open the cover. (Base) Insert an SD card. Label ※ Turn off the power of this unit before inserting or removing an SD card. To remove the SD card Push the SD card inward once, then pull it out straight. -
Page 7: Clock Setting
Clock Setting Open the LCD monitor. Set the date and time. CLOCK SETTING DATE TIME 2013 The unit turns on. When the LCD When the year, month, day, hour, or minute monitor is closed, the unit turns off. item is tapped, 3 and 2 will be displayed. Tap 3 or 2 to adjust the value. -
Page 8: Video Recording
Video Recording You can record without worrying about the setting details by using the Intelligent Auto mode. Settings such as exposure and focus will be adjusted automatically to suit the shooting conditions. In case of specific shooting scenes such as person etc., its icon is displayed on the screen. Before recording an important scene, it is recommended to conduct a trial recording. -
Page 9: Playing Back/Deleting Files On This Unit
Playing Back/Deleting Files on this Unit Select and play back the recorded videos or still images from an index screen (thumbnail display). Tap A or B to select the video Volume adjustment during playback or still image mode. Turn down Turn up the the volume volume... -
Page 10: Troubleshooting/Cautions
Do not touch the metal parts. If the above do not solve the problem, consult • When formatting or erasing data using your nearest JVC dealer or JVC service center. the camcorder, only the file administration information is changed. The data is not Battery Pack completely erased from the recording medium. - Page 11 ... swing the soft camera case excessively when the camera is inside it. European representative of JVC KENWOOD ... store the camcorder in a dusty or sandy area. Corporation is: ... cover camcorder with a towel, cloth and so on.
-
Page 12: Recordable Time/Specifications
The specifications and appearance of this product are subject to changes for further improvement without prior notice. For more information, please refer to the Detailed User Guide. http://manual3.jvckenwood.com/index.html/ JVC KENWOOD Corporation 3-12, Moriyacho, Kanagawa-ku, Yokohama-shi, Kanagawa, 221-0022, Japan *LYT2542-001A-M* ©2013 JVC KENWOOD Corporation 0213ZAR-SW-VM...
Need help?
Do you have a question about the Everio GZ-VX815BEK and is the answer not in the manual?
Questions and answers