Advertisement
Table of Contents
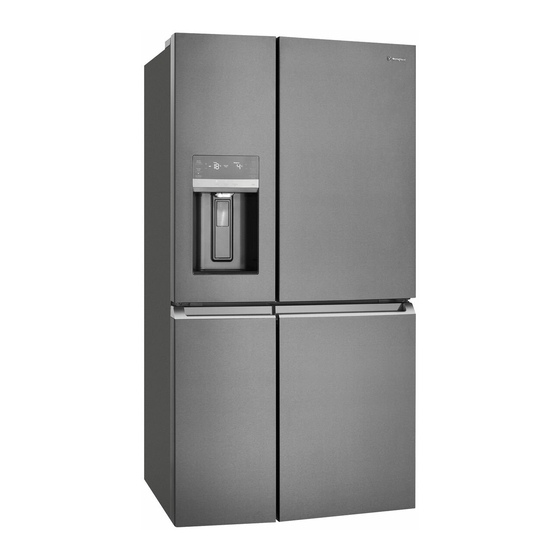
USER MANUAL
REGISTER YOUR FRIDGE
WITH YOUR SMARTPHONE
1
Locate the labe l
on the inside of
your fridge
Easy register with your smartphone
1.
P
h
o
o t
g
a r
including the 4 dots( ).
2.
T
h
e
n
e t
t x
(Australia only)
2
Photograph the
camera icon, including
the 4 dots ( )
3
Text image to 0488 446 622
(Australia only )
© 2017 Electrolux Home Products Pty Ltd. EST_PhotoRegister_Fridge_70x70_Dec17
p
h
the camera icon,
t i
o t
0488 446 622
00000000000
00000000000
WQE6870
REFRIGERATION
Advertisement
Table of Contents

Subscribe to Our Youtube Channel
Related Manuals for Westinghouse WQE6870BA


Summary of Contents for Westinghouse WQE6870BA
- Page 1 USER MANUAL REGISTER YOUR FRIDGE WITH YOUR SMARTPHONE Locate the labe l on the inside of your fridge Easy register with your smartphone the camera icon, including the 4 dots( ). 0488 446 622 (Australia only) 00000000000 Photograph the camera icon, including the 4 dots ( ) 00000000000 WQE6870...
-
Page 2: Table Of Contents
CONGRATULATIONS CONTENTS Important safety instructions ………………….… Dear Customer, Features at a Glance ……………………….…….……. Congratulations and thank you for choosing our refrigerator. We are sure you will find your new Installation ………………………………………..…………... refrigerator a pleasure to use. Before you use the relevant sections of this manual, which provides a Connecting Water Supply …………………………. -
Page 3: Important Safety Instructions
IMPORTANT SAFETY INSTRUCTIONS • The plug must be accessible when the appliance is in position. Note: You must read these warnings carefully • Never try to repair the refrigerator yourself, before installing or using the refrigerator. If you only use a qualified or authorized service need assistance, contact your customer care... -
Page 4: Features At A Glance
FEATURES AT A GLANCE Ice Maker FreshSeal™ crisper FlexSpace™ shelf Air distributor - Multiflow Left Snack Zone compartment Freezer shelf Air filter Right Snack Zone Compartment FlexSpace™ drawer Water filter Upper fixed door bin Freezer drawer Flip up glass shelf Left fixed door bin FlexSpace™... -
Page 5: Installation
When positioned in a corner area, spacing of INSTALLING YOUR NEW APPLIANCE right side at least 260 mm and left side at Unpacking least 355 mm on the hinge side will allow the doors to open enough to enable the removal of bins and shelves. - Page 6 Door opening Your refrigerator should be positioned to allow easy access to a counter when removing food. For best use of refrigerator drawers and freezer baskets, the refrigerator should be in a position where both can be fully opened. Door Door CAUTION LED lighting...
-
Page 7: Connecting Water Supply
CONNECTING THE WATER SUPPLY WARNING Connect to potable water supply only. If using WARNING tank or bore water it is recommended to also use an To avoid electric shock, which can cause death or external filter (not supplied). severe personal injury, disconnect the refrigerator The new hose-sets supplied with the appliances from electrical power before connecting a water must be used and old hose-sets should not be... - Page 8 WARNING Never connect the appliance to a hot water Note: Expect the first ice harvest within supply. first 24 hours of unit operation. To prevent any issues concerning ice pro d uction, Do not use with water that is microbiologically please ensure that all water lines are unsafe or with water of unknown quality without primed .
-
Page 9: Controls
ABOUT THE USER INTERFACE Controls –External User interface BUTTON DESCRIPTION PRIMARY FUNCTION / ICON Quick Freeze Activates a faster rate for freezing food in the freezer. Deactivates (on/off) after 12 hours. Quickly chills a d rink insid e the freezer compartment. Touch the Drinks Chill Drinks Chill Key, a time value will display on the freezer temp display (in minutes) and can be changed using the +/- buttons. - Page 10 BUTTON DESCRIPTION PRIMARY FUNCTION / ICON Door Open Illuminates and sound s an alarm when the d oor is left open for 5 minutes or more. It stays illuminated as long as the d oor is open. Pressing any key will mute and reset the alarm. Replace Water Display illuminates every 6 months or when filter need s replacing.
- Page 11 ABOUT THE USER INTERFACE Controls – Internal User interface BUTTON DESCRIPTION PRIMARY FUNCTION / ICON The interface will automatically lock after 3 seconds Unlock without any interaction. Press and hold 3 seconds to unlock the interface. A tone will sound to confirm your choice.
- Page 12 Setting cooling temperatures Door Open If a d oor has been left open for 5 minutes or Note: The recommended settings for a more, an alarm will sound and the d oor open product installed in a kitchen is 3˚C for the indicator will illuminate on the display.
-
Page 13: Automatic Ice & Water Dispenser
AUTOMATIC ICE & WATER Ice maker operation & care DISPENSER After the refrigerator is installed properly and has Using the ice maker after installation cooled for several hours, the ice maker can Before making ice for the first time, be sure to produce ice within 24 hours. - Page 14 Ice maker/dispenser tips Remove and empty the ice bin if: • If your refrigerator is not connected to a water • An extended power failure (one hour or longer) supply or the water supply is turned off, turn off causes ice cubes in the ice bin to melt and the ice maker as d escribed in the previous refreeze together after power is restored,...
-
Page 15: Storage Features
STORAGE FEATURES IMPORTANT When removing or replacing the ice bin, avoid rotating the auger in the ice bin. If the auger is CAUTION accid entally rotated , you must realign the auger by turning it in 45 degree turns (see below) until To avoid personal injury or property d amage, the ice bin fits into place with the d rive... - Page 16 To adjust the slide-under/flip shelf: To remove the auto humidity control membrane: 1. Pull front half shelf forward until its back d rops down, then gently push front half shelf back and 1. Reach to back of humidity control cover. under back half shelf.
- Page 17 Recessed SnackZone To move door bin along a rail: This drawer is ideal for storage of deli meats and 1. Tilt bin up so the back of the bin is off the door cheese. but the hook is still engaged. Slid e back the cover to allow access to the 2.
- Page 18 Freezer storage To remove freezer and FlexSpace shelves and The middle drawers in the freezer and FlexSpace™ can be mounted up to three drawers: height positions and can also invert 90 All freezer and FlexSpace shelves and degrees allowing storage of bottles in the drawers are removable.
-
Page 19: Changing The Filter
CLEANING YOUR REFRIGERATOR CAUTION To clean a crisper or freezer bin with telescopic extension slid es, simply wipe with a d amp cloth and warm soapy water. Never immerse the cover WARNING in water, as this could affect the operation of the BEFORE CLEANING: Turn the refrigerator off at slide. - Page 20 WARNING Use the appliance with water filter supplied by Electrolux Home Products Pty Ltd or its authorized service agent only. For correct operation of this appliance it is essential to observe the manufacturer’s instructions. Replacing the Water Filter To Remove: Pull cover toward s you and cover will drop down and allow access to filter.
-
Page 21: Food Storage Guide
FOOD STORAGE GUIDE RECOMMENDED STORAGE TIMES FOR FRESH FOODS * CATEGORY PRODUCT STORAGE TIPS REFRIGERATOR ULTRA CHILL FREEZER Sausages Keep cold meat at the back of the MEAT 1-2 Days 3-5 Days 2-3 Months and Mince refrigerator where it is coldest. Plastic can cause meat to sweat if Chops and 3-4 Days... -
Page 22: Care And Cleaning
CARE & CLEANING Care & Cleaning Tips Part What To Use Tips and Precautions Use two tablespoons of baking soda in one quart of warm • Soap and water water. Be sure to wring excess water out of sponge or Interior &... -
Page 23: Troubleshooting
TROUBLESHOOTING Concern Potential Cause Common Solution Automatic Ice Maker Ice maker is not • Ice maker is turned off. • Turn on ice maker. For the fresh food ice maker, making any ice. press ice maker on-off button once. • Refrigerator is not connected to water line or water valve is not open. - Page 24 TROUBLESHOOTING Concern Potential Cause Common Solution Dispenser (Ice & Water) Dispenser (Ice & • Water filter not seated properly. • Remove and reinstall the water filter. Be sure to water) not rotate it to the right until it stops and the grip end is •...
- Page 25 TROUBLESHOOTING Concern Potential Cause Common Solution Running of Refrigerator Refrigerator seems to • Your variable speed compressor is • It is normal for the compressor to run continuously run too much or too designed to run 100% of the time except during defrost mode.
-
Page 26: Warranty
(c) ‘ASC’ means Electrolux’s authorised serviced centres; (vi) vi) incomplete or oper installation; (d) ‘Westinghouse’ is the brand controlled by Electrolux Home Products (vii) vii) i ect, improper or inappropriate operation; Pty Ltd of 163 O’Riordan Street, Mascot NSW 2020, ABN 51 004... - Page 27 Notes...
- Page 28 Top Service encompasses the after sales service provided by The Electrolux Group to consumers including delivery, home service and spare parts. and WESTINGHOUSE are trademarks of Westinghouse Electric Corporation. Used under license. All Rights Reserved. P/No. . A10883138 © 2017 Electrolux Home Products Pty Ltd.
Need help?
Do you have a question about the WQE6870BA and is the answer not in the manual?
Questions and answers