Endress+Hauser cerabar S Operating Instructions Manual
Pressure transmitter
Hide thumbs
Also See for cerabar S:
- Operating instructions manual (172 pages) ,
- Operating instructions manual (153 pages) ,
- Operating instructions manual (64 pages)

Related Manuals for Endress+Hauser cerabar S


Summary of Contents for Endress+Hauser cerabar S
- Page 1 BA 187P/00/en/04.99 cerabar S Software version 5.0 017673-1000 Pressure Transmitter Operating Instructions 4 .. .2 Te st 4 .. .2 Te st Endress Hauser Nothing beats know-how...
- Page 2 Short Operating Instructions Cerabar S Short Operating Instructions Remote operation Local operation over Commuwin II Cerabar S without/with display Matrix operation: HART: Section 3.2 Local operation over push buttons – – INTENSOR: Section 3.3 Section 3.1 HART or INTENSOR via Commuwin II: Section 3.4...
-
Page 3: Table Of Contents
Cerabar S Table of Contents Table of Contents Introduction ... . Maintenance and Repair ..39 Repair ... . . 39 Measuring system . - Page 4 Software History Cerabar S Software History Universal HART Communicator DXR 275 HART protocol (Operation via Instrument Device Changes Remarks Universal HART and SW No. revision revision Communicator 1.2 / 6512 No effect to DXR 275) 09.94 documentation. 3.0 / 6530 Improved functions, e.g.
- Page 5 Cerabar S Notes on Safety Notes on Safety The Cerabar S is a pressure transmitter used for measuring gauge or absolute pressure Approved usage depending on the version. Level is measured using the Commuwin II display and operating program or with the HART or INTENSOR handheld terminals.
- Page 6 Safety Conventions and Symbols Cerabar S Safety Conventions and Symbols In order to highlight safety-relevant or alternative operating procedures in the manual, the following conventions have been used, each indicated by a corresponding icon in the margin. Notes on safety...
-
Page 7: Introduction
Cerabar S 1 Introduction 1 Introduction The Cerabar S pressure transmitter measures the pressure of gases, steam/vapour and Applications liquids and can be used in all areas of chemical and process engineering. 0 - 10 bar 0 - 10 bar... -
Page 8: Measuring System
1 Introduction Cerabar S 1.1 Measuring system The complete measuring system consists of • Cerabar S pressure transmitter with 4…20 mA signal output • optional four-character pressure display • power supply 11.5…45 V , in Ex area 11.5…30 V 4…20 mA... -
Page 9: Installation
2.1 Mounting instructions without diaphragm seal The Cerabar S without diaphragm seal is mounted in the same way as a manometer. The Cerabar S use of shut-off valves and pigtails is recommended. Its position depends upon the without diaphragm seal –... - Page 10 2 Installation Cerabar S • Measurement in liquids: Mount on the shut-off valve below the tapping point or at the same height 0 - 10 bar Figure 2.4 Mounted on a shut-off valve for measuring liquids PVDF adapter For instruments with PVC adapter, a maximum torque of 7 Nm is permitted. The thread connection may become loose at high temperatures and pressures.
-
Page 11: Mounting Instructions With Diaphragm Seal
• The diaphragm of the diaphragm seal of the Cerabar S must not be pressed in or cleaned with pointed or hard objects. Figure 2.6 • The diaphragm seal and the pressure... -
Page 12: Mounting Accessories
To protect from high temperatures, moisture or vibration, or where the mounting point is tubing not easily accessible, the housing of the Cerabar S can be mounted with capillary tubing away from the measuring point. A bracket for mounting on a wall or pipe is available for this. -
Page 13: Mounting Position
Cerabar S 2 Installation 2.4 Mounting position After the Cerabar S has been mounted, the housing can be positioned so that: Positioning the housing • the terminal connection compartment can be accessed easily, • the display can be seen optimally, •... -
Page 14: Electrical Connection
BA187Y23 * *** CSA XP: 11.5…45 V CSA IS: 11.5…30 V 4...20 mA 0000 Text Figure 2.12 Electrical connection of Cerabar S for versions with the CSA certificate, Structure * *** BA187Y22 * *** Cerabar PMC Cerabar PMP when Imax = 21.4 mA R/Ω... - Page 15 Do not replace the battery of the handheld terminal in the explosion hazardous area. • For the Cerabar S with FM or CSA certificate: Electrical connections as shown in “Installation drawing” (enclosed in the packing with the Cerabar S). •...
-
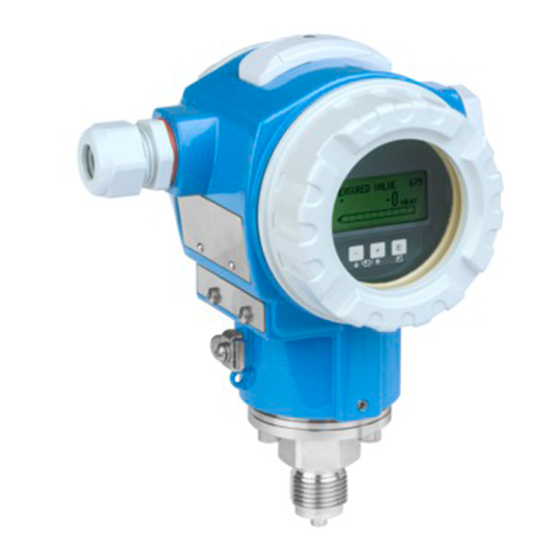
Page 16: Operation
The functions of the push buttons are shown in the table below. Display module Display in measurement mode Figure 3.1 Operating interface of the Cerabar S, with optional display module -0.1...0.3 bar – – Display in measurement mode 4-character display of... -
Page 17: Operating With The Hart Protocol Via The Universal Hart Communicator Dxr 271
– "Home" – "Entry" Push buttons for selecting the matrix and entering parameters • Cerabar S with INTENSOR protocol Select matrix field with is calibrated with the Commulog VU 260 Z • Call up entry mode with (Version 1.7 and above) •... -
Page 18: Operating With The Hart Or Intensor Protocol Via Commuwin
The appropriate server (e.g. HART or ZA 672) must therefore be activated. A description of the Commuwin II operating program is found in the operating manual BA 124F. Operating matrix The advanced functions of the Cerabar S can be accessed in this operating mode from the menu. •... -
Page 19: Local Operation
Cerabar S 4 Local Operation 4 Local Operation 4.1 Commissioning the measuring point This section contains the following information: Contents • General description of operation with push buttons – Setting lower and upper range values: Calibration without reference pressure – Adjusting lower and upper range values: Adjustment with reference pressure –... - Page 20 4 Local Operation Cerabar S Lower and upper range A reference pressure is available that is near to the lower and upper range values. The values: appropriate current must be calculated using to the following formula: – reference pressure is near the lower range and •...
-
Page 21: Damping Τ
Fixed damping values are assigned to the switch positions 0…7. They can be adjusted directly on the instrument. (Fixed damping values for root functions are assigned to the switch positions 8…F. This function cannot be selected for the Cerabar S.) Linear function: switch positions 0…7 100 % 63 % τ... -
Page 22: Pressure Measurement
5 Pressure Measurement Cerabar S 5 Pressure Measurement 5.1 Start-up with the Universal HART Communicator DXR 271, Commulog VU 260 Z or Commuwin II This section contains the following information: Contents • Preparatory work for start-up – Resetting to factory settings –... - Page 23 Cerabar S 5 Pressure Measurement Damping τ The damping affects the speed with which the display in V0H0 and the output signal react to changes in pressure. Setting the damping by remote communication is only possible with switch position "0"...
- Page 24 5 Pressure Measurement Cerabar S Compensation for If the display does not show zero after zero point adjustment (due to position), then this position of the display can be corrected to zero by entering a bias pressure or by adopting the bias pressure (bias pressure) acting (compensation for position).
-
Page 25: Locking/Unlocking Operation
Cerabar S 5 Pressure Measurement 5.2 Locking/unlocking operation After calibrating or entering all parameters, operation can then be locked. • via the push buttons +Z, –Z, +S and –S or via the matrix by entering a three-character code number ≠ 130 in V9H9 •... -
Page 26: Information On The Measuring Point
5 Pressure Measurement Cerabar S 5.3 Information on the measuring point The following information on the measuring point can be called up: Matrix field Display or entry Measured values V0H0 Main measured value: pressure, level or volume V7H0 Actual current in mA... -
Page 27: Level Measurement
6.1 Start-up with the Universal HART Communicator DXR 275, Commulog VU 260 Z or Commuwin II Level measurement with Cerabar S is only possible with instruments in which the order Function check code contains an M or N for the electronic version. - Page 28 6 Level Measurement Cerabar S Resetting to factory By entering a code, the entries in the matrix Matrix Moving through Entry settings the menus are reset partially or completely to factory settings. Further information on the various Main group: Transmitter Information...
- Page 29 Cerabar S 6 Level Measurement If calibration is carried out with water, or if the product changes, the calibration can be Density calibration corrected for by simply entering a density factor. new density density factor = current factor • –––––––––––...
-
Page 30: Calibration With Reference Pressure
6 Level Measurement Cerabar S 6.2 Calibration with reference pressure The vessel is filled for either the lower range value or the upper range value for calibration. Selecting the operating mode enables two vessel shapes to be chosen • vertical – "level linear" and •... -
Page 31: Dry Calibration
Dry calibration is a theoretical calibration which can be carried out even though the Cerabar S is not mounted and with a vessel filled to any height. The "empty" calibration point is usually at the mounting point of the measuring cell. If measurement starts at another level, then this must be included in the calculation. -
Page 32: Linearisation
With semi-automatic entry of the linearisation curve the tank is filled linearisation curve or emptied. The height is automatically determined by the "gauging" Cerabar S by the hydrostatic pressure, the appropriate volume is entered. In addition V3H6 offers the functions: Activating table A linearisation table is valid only if it is specifically activated. - Page 33 Cerabar S 6 Level Measurement Manual entry Requirements for manual linearisation are Entering the pairs of values for the as follows: linearisation curve is done after a calibration with reference pressure or a dry • The max. 21 pairs of values for the calibration in %.
- Page 34 6 Level Measurement Cerabar S Semi-automatic Requirements for semi-automatic entry of Entering the pairs of values for the entry the linearisation curve are as follows: linearisation curve is done after a calibration with reference pressure or a dry • The vessel can be filled for e.g. empty/full calibration in %.
-
Page 35: Locking/Unlocking Operation
Cerabar S 6 Level Measurement The current signal range is set to 3.8…20.5 mA as standard when operating correctly. When 4 mA level selecting the 4 mA level, a minimum current signal is not to fall below 4 mA. Thus: •... -
Page 36: Information On The Measuring Point
6 Level Measurement Cerabar S 6.6 Information on the measuring point The following information on the measuring point can be called up: Matrix field Display or entry Measured values V0H0 Main measured value: pressure, level or volume V7H0 Actual current in mA... -
Page 37: Diagnosis And Trouble-Shooting
When the Cerabar S detects a warning: Warnings • An error code is transmitted along with the measured value: the Cerabar S continues measuring • The actual error code can be read in V2H0, the last error code in V2H1. -
Page 38: Current Simulation
Main group: Transmitter Information V2H9 Factory values e.g. 2380 The Cerabar S differentiates among four types of reset each with various responses. The table below shows which parameters are affected by which reset. Sets Sets... -
Page 39: Maintenance And Repair
Cerabar S 8 Maintenance and Repair 8 Maintenance and Repair 8.1 Repair If the Cerabar S must be sent to Endress+Hauser for repair, then a note should be enclosed containing the following information. • An exact description of the application •... -
Page 40: Mounting The Display
8 Maintenance and Repair Cerabar S 8.2 Mounting the display • Mounting the display Switch off power supply. BA187Y58 • Open the cover to the display compartment (use a cover with a sight glass after mounting the display). 4. ..2... -
Page 41: Changing The Sensor Module And Electronics
Screw in the sensor module right to the stop, taking care to turn the cable with it. • To ensure that the Cerabar S can be fully turned when mounted, turn the unit in the other direction by one complete turn. -
Page 42: Changing The Seal
Cerabar S 8.4 Changing the seal The seal in contact with the medium inside the adapter of the Cerabar S PMC 731 can be replaced. Except for the PTFE seal (Structure D), all seals can thus be interchanged as required. The different temperature limits should thus be observed for individual materials. - Page 43 Cerabar S 8 Maintenance and Repair Endress+Hauser...
-
Page 44: Technical Data
9 Technical Data Cerabar S 9 Technical Data General information Manufacturer Endress+Hauser Instrument Pressure transmitter Designation Cerabar S PMC 631, PMP 635, PMC 731, PMP 731 Technical documentation BA 187P/00/en Version 04.99 Technical data DIN 19259 Input Measured variables Absolute and gauge pressure in gases, vapours, liquids... - Page 45 Cerabar S 9 Technical Data Process conditions Process temperature –40…+100 °C Ambient temperature –40…+85 °C Ambient temperature range –40…+100 °C Storage temperature –40…+100 °C Electromagnetic compatibility Interference emission to EN 50 081-1 Interference immunity to EN 50 082-2 and industrial standard...
- Page 46 Cerabar PMC 731/PMP 731 0 - 10 bar 0 - 10 bar Figure 9.2 left: Cerabar S PMC 631 with dairy thread right: Cerabar S PMP 635 with flange. See TI 216P and TI 217P for other process connections Endress+Hauser...
- Page 47 Cerabar S 9 Technical Data Cerabar S PMC 731 Certificates, Approvals, Protection R Standard G Cenelec EEx ia IIC T4/T6 and ATEX II 1/2 G Cenelec EEx d [ia] IIC T6 and ATEX II 2 G (not with flush-mounted process connections, with cable entry M 20x1.5, G ½, ½ NPT only) O FM IS (non-incendive) CL.
- Page 48 9 Technical Data Cerabar S Cerabar S PMP 731 Certificates, Approvals, Protection R Standard G Cenelec EEx ia IIC T4/T6 and ATEX II 1/2 G Cenelec EEx d [ia] IIC T6 and ATEX II 2 G (with cable entry M 20x1.5, G ½, ½ NPT only) D EEx ia IIC T4/T6, Zone 0 Q FM explosion proof CL I, II, III Div.
- Page 49 Others Accessories None Bracket for pipe and wall mounting Others Filling Fluid in Diaphragm Seal and Coupling to Cerabar S Silicone oil, direct Vegetable oil, direct Glycerine, direct High-temperature oil with spacer 100 mm (3.9 in) High-temperature oil with capillary 1 m (3.28 ft) Silicone oil with capillary 1 m (3.28 ft)
- Page 50 Others Accessories None Bracket for pipe and wall mounting Others Filling Fluid in Diaphragm Seal and Coupling to Cerabar S Silicone oil, direct Vegetable oil, direct Glycerine, direct High-temperature oil with spacer 100 mm (3.9 in) High-temperature oil with capillary 1 m (3.28 ft) Silicone oil with capillary 1 m (3.28 ft)
- Page 51 Cerabar S 9 Technical Data Process Connection Standard, Nominal Diameter, Nominal Pressure, Version Screw thread max. height AF G 1 A, DIN ISO 228/1, from 10 bar span 200 mm AG G 1½ A, DIN ISO 228/1, from 0.4 bar span 201 mm AR G 2 A, DIN ISO 228/1, from 0.1 bar span...
-
Page 52: Operating Matrix
10 Operating Matrix Cerabar S 10 Operating Matrix 10.1 Matrix INTENSOR Measured Sets Sets Sets Sets Sets Sets bias Damping Output on Selects Basic value 4 mA 20 mA 4 mA 20 mA bias pressure 0...40 s error pressure cablibration autom. -
Page 53: Matrix Hart
Cerabar S 10 Operating Matrix 10.2 Matrix HART Group Select 1 (H0) 2 (H1) 3 (H2) 4 (H3) 5 (H4) 6 (H5) 7 (H6) 8 (H7) 9 (H8) 10 (H9) Set bias Basic Output Pressure Measured Set 4mA Set 20 mA... - Page 54 Ignition protection ....Information on the measuring point ..26, 36 Warning ....37 Endress+Hauser...
- Page 55 Deltabar S Endress+Hauser...
- Page 56 Belorgsintez Poland Chile Minsk South Korea DIN Instrumentos Ltda. Endress+Hauser Polska Sp. z o.o. Tel. (01 72) 26 31 66, Fax (01 72) 26 31 11 Endress+Hauser (Korea) Co., Ltd. Warszawy Santiago Seoul Tel. (0 22) 7 20 10 90, Fax (0 22) 7 20 10 85 Tel.
Need help?
Do you have a question about the cerabar S and is the answer not in the manual?
Questions and answers