Advertisement
Owner's Manual & Safety Instructions
Save This Manual
operating, inspection, maintenance and cleaning procedures. Write the product's serial number in the
back of the manual near the assembly diagram (or month and year of purchase if product has no number).
Keep this manual and the receipt in a safe and dry place for future reference.
For Best Results,
Use 3.0 Amp Hour Battery
(Sold Separately)
Email our technical support at: productsupport@harborfreight.com
When unpacking, make sure that the product is intact
and undamaged. If any parts are missing or broken,
please call 1-888-866-5797 as soon as possible.
©
Copyright
2020 by Harbor Freight Tools
No portion of this manual or any artwork contained herein may be reproduced in
any shape or form without the express written consent of Harbor Freight Tools.
Diagrams within this manual may not be drawn proportionally. Due to continuing
improvements, actual product may differ slightly from the product described herein.
Tools required for assembly and service may not be included.
Keep this manual for the safety warnings and precautions, assembly,
Visit our website at: http://www.harborfreight.com
®
. All rights reserved.
Read this material before using this product.
Failure to do so can result in serious injury.
SAVE THIS MANUAL.
20j
Advertisement

Related Manuals for Bauer 20131C-B

Summary of Contents for Bauer 20131C-B
- Page 1 Owner’s Manual & Safety Instructions Save This Manual Keep this manual for the safety warnings and precautions, assembly, operating, inspection, maintenance and cleaning procedures. Write the product’s serial number in the back of the manual near the assembly diagram (or month and year of purchase if product has no number). Keep this manual and the receipt in a safe and dry place for future reference.
-
Page 2: Table Of Contents
table of contents Safety ............2 Maintenance ..........14 Specifications ..........8 Parts List and Diagram ......18 Setup ............8 Warranty ............ 20 Operation ............ 9 WARninG SyMBOLS AnD DEFinitiOnS This is the safety alert symbol. It is used to alert you to potential personal injury hazards. -
Page 3: Safety
Electrical Safety Do not expose power tools to rain or wet conditions. Water entering a power tool will increase the risk of electric shock. personal Safety 1. Stay alert, watch what you are doing 6. if devices are provided for the connection of and use common sense when operating dust extraction and collection facilities, ensure a power tool. - Page 4 Battery tool use and care 1. Prevent unintentional starting. Ensure the 6. Under abusive conditions, liquid may be switch is in the off-position before connecting ejected from the battery; avoid contact. to battery pack, picking up or carrying the If contact accidentally occurs, flush with power tool.
- Page 5 4. This product is not a toy. 6. The warnings, precautions, and instructions Keep it out of reach of children. discussed in this instruction manual cannot cover all possible conditions and situations that may 5. People with pacemakers should consult their occur.
- Page 6 17. Keep clear of the workpiece near the area being 22. Obey the manual for the air compressor fastened. Fasteners may bend sideways during used to power this tool. driving, causing them to exit the workpiece at 23. Install an in-line shutoff valve to allow an unexpected point, causing personal injury.
- Page 7 Grounding tO pREVEnt ELEctRic SHOcK AnD DEAtH FROM incORREct GROUnDinG: check with a qualified electrician if you are in doubt as to whether the outlet is properly grounded. Do not modify the power cord plug provided with the charger. Do not use the charger if the power cord or plug is damaged.
-
Page 8: Specifications
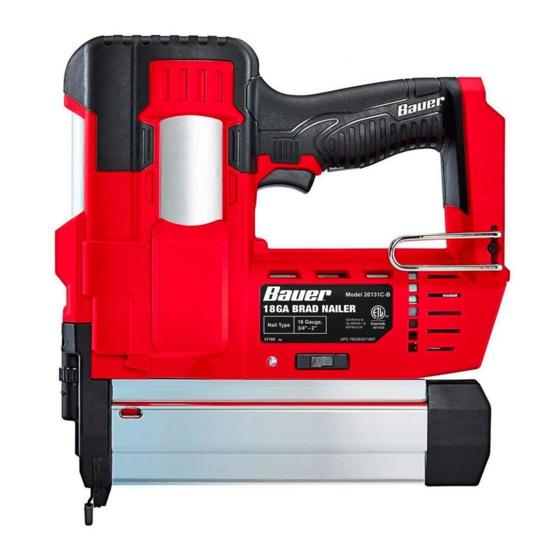
Specifications Battery Pack Bauer 20V Li-Ion, 3.0Ah / 63631, 1.5Ah / 63530 (sold separately) Charger Bauer 20V Li-Ion / 63529 (sold separately) Nailer Input Rating 20VDC, 60/min Actuation System Single Sequential and Contact Actuation Nail Type 18 Gauge 3/4″ – 2 ″ Brad... -
Page 9: Operation
Operating instructions Read the EntiRE iMpORtAnt SAFEty inFORMAtiOn section at the beginning of this manual including all text under subheadings therein before set up or use of this product. tool Set Up tO pREVEnt SERiOUS inJURy FROM AcciDEntAL DiScHARGE: Make sure that the trigger is in the off-position and remove its Battery pack before performing any procedure in this section. - Page 10 contact Actuation Mechanism Definition The contact actuation mechanism allows rapid placement of fasteners. Use the switch next to the LED Indicator to change modes. The tool should only actuate if the Workpiece Contact is pressed against the workpiece and the Trigger is pulled. It should actuate again if the Trigger is released and pulled OR if the Workpiece Contact is lifted and pressed against the workpiece again.
- Page 11 Loading the tool tO pREVEnt SERiOUS inJURy FROM AcciDEntAL DiScHARGE, BEFORE LOADinG: • Wear AnSi-approved safety goggles with side shields. Other people in the work area must also wear ANSI-approved impact safety goggles with side shields. • Release the trigger. •...
- Page 12 General Operating instructions 1. Make sure that the Trigger is in the 5. the LED indicator: off-position, then attach a fully charged Battery Pack making sure it clicks in place. 2. Before each use, test the tool as directed in the prior section. WARninG! tO pREVEnt SERiOUS inJURy: Keep second hand away from tool discharge area,...
- Page 13 clearing a Jam 1. If the LED Indicator is flashing red, it indicates 5. Reinstall the nail strip and Battery Pack. Close there is a jam in the Magazine. Stop and the Magazine. If the jam has been corrected, clear the jam before proceeding. the LED Indicator will no longer be illuminated.
-
Page 14: Maintenance
Maintenance and Servicing procedures not specifically explained in this manual must be performed only by a qualified technician. tO pREVEnt SERiOUS inJURy FROM AcciDEntAL DiScHARGE: BEFORE Any MAintEnAncE OR REpAiRS ARE DOnE (including clearing jams): • Wear AnSi-approved safety goggles with side shields. Other people in the work area must also wear ANSI-approved impact safety goggles with side shields. - Page 15 troubleshooting problem possible causes Likely Solutions Insufficient 1. Incorrect tool depth setting. 1. Adjust depth setting, if available. fastener depth. 2. Incorrect lubrication or not 2. Check for loose connections and make enough lubrication. Fasteners drive Incorrect Tool depth setting. Adjust depth setting, if available.
- Page 16 LEASE READ tHE FOLLOWinG cAREFULLy THE MANUFACTURER AND/OR DISTRIBUTOR HAS PROVIDED THE PARTS LIST AND ASSEMBLY DIAGRAM IN THIS MANUAL AS A REFERENCE TOOL ONLY. NEITHER THE MANUFACTURER OR DISTRIBUTOR MAKES ANY REPRESENTATION OR WARRANTY OF ANY KIND TO THE BUYER THAT HE OR SHE IS QUALIFIED TO MAKE ANY REPAIRS TO THE PRODUCT, OR THAT HE OR SHE IS QUALIFIED TO REPLACE ANY PARTS OF THE PRODUCT.
- Page 17 Record product’s Serial number Here: note: if product has no serial number, record month and year of purchase instead. note: Some parts are listed and shown for illustration purposes only, and are not available individually as replacement parts. Specify UPC 792363571807 when ordering parts. Item 57180 For technical questions, please call 1-888-866-5797.
-
Page 18: Parts List And Diagram
parts List and Diagram parts List part Description part Description part Description Screw, M4 X 6 Big Piston Y Seal Depth Knob Small Swing Link Big Piston Depth Knob Screw Rotating Shaft 1 Hollow Shaft LED Board Torsional Spring 1 Screw, M4 x 6 LED Cover Gasket 1... - Page 19 Assembly Diagram Item 57180 For technical questions, please call 1-888-866-5797. Page 19...
-
Page 20: Warranty
Limited 90 Day Warranty Harbor Freight Tools Co. makes every effort to assure that its products meet high quality and durability standards, and warrants to the original purchaser that this product is free from defects in materials and workmanship for the period of 90 days from the date of purchase. This warranty does not apply to damage due directly or indirectly, to misuse, abuse, negligence or accidents, repairs or alterations outside our facilities, criminal activity, improper installation, normal wear and tear, or to lack of maintenance.
Need help?
Do you have a question about the 20131C-B and is the answer not in the manual?
Questions and answers
little led red light keeps blinking and no nail shuts
@Rodger S Karwacki
If the red LED light on the Bauer 20131C-B keeps blinking, it indicates a jam in the Magazine or the internal striking mechanism. You should:
1. Remove the Battery Pack.
2. Open the Magazine, remove the nail strip and jammed fastener.
3. Reinstall the nail strip and Battery Pack, then close the Magazine.
4. If the LED still blinks, remove the Battery Pack and nail strip again.
5. Use the included 3mm Hex Key to remove four screws near the Depth Knob.
6. Remove the Drive Guide and jammed fastener.
7. Reattach the Drive Guide, tighten the screws, and ensure the Workpiece Contact moves smoothly.
8. Reinstall the Battery Pack and nail strip.
If the LED is still blinking after these steps, the tool needs service by a trained technician.
This answer is automatically generated