Table of Contents
Advertisement
Quick Links
User Manual for your Classique
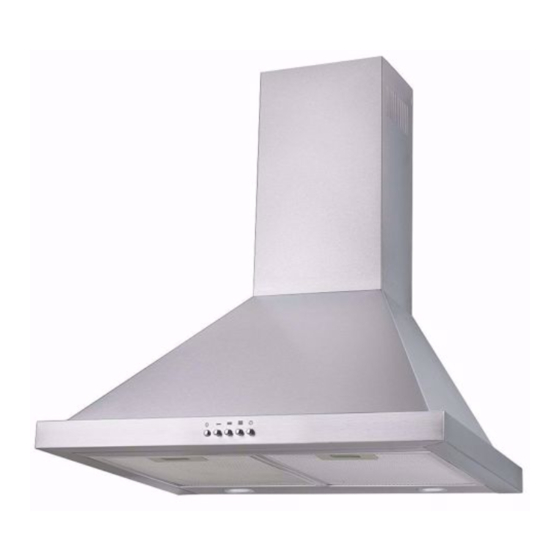
600mm Stainless Steel Canopy Rangehood
CLRH60LSS and CLRH60LW
NOTE: This user manual contains important information including safety &
installation points which will enable you to get the most out of your Classique
appliance. Please keep it in a safe place so that it is readily available for future
reference.
Advertisement
Table of Contents

Related Manuals for Classique CLRH60LSS


Summary of Contents for Classique CLRH60LSS
- Page 1 NOTE: This user manual contains important information including safety & installation points which will enable you to get the most out of your Classique appliance. Please keep it in a safe place so that it is readily available for future...
-
Page 2: Table Of Contents
Contents Environmental note Important safety information Specifications of your rangehood Using your rangehood Before first use To use your rangehood Cleaning your rangehood The grease filter Maintenance Removing and cleaning the grease filter Changing a light bulb Fitting the carbon filter Installation Electrical connection Before beginning installation... -
Page 3: Environmental Note
Environmental note Note: Before discarding an old appliance, switch off and disconnect it from the power supply. Cut off and render any plug useless. Cut the cable off directly behind the appliance to prevent misuse. This should be undertaken by a competent person. -
Page 4: Important Safety Information
Important safety information Your safety is of the utmost importance to us. Please make sure that you read this instruction booklet before attempting to install or use the appliance. If you are unsure of any of the information contained in this booklet, please contact the Retailer where you purchased your unit from. - Page 5 o When installed between adjoining wall cabinets, the cabinets must not overhang the hob. o The edges of the rangehood are sharp – be mindful of this as you handle your appliance, especially during installation and cleaning. DO NOT CLEAN IN BEHIND THE GREASE FILTERS! o If the room where the rangehood is to be used contains a fuel burning appliance such as a central heating boiler then its flue must be of the sealed or balanced...
- Page 6 o Do not connect the ducting system of this appliance to any existing ventilation system which is being used for any other purpose. o Do not install above a cooker with a high level grill. o Never leave frying pans unattended during use as overheated fats and oils might catch fire.
-
Page 7: Specifications Of Your Rangehood
Specifications of your rangehood Product dimensions Height: 700mm – 1080 mm Width: 600 mm Depth: 500 mm Your rangehood is fitted with: o Modern LED lighting (2 lamps) o Easy-reach pushbutton controls o A 3 speed fan o Brushed stainless steel finish o 2 aluminium filters o 54dB noise level o Easy bracket installation... -
Page 8: Using Your Rangehood
Using your rangehood Before first use IMPORTANT: This process must be followed before the rangehood is used for the first time. You should use a mild liquid detergent and a damp cloth on all the external areas of your rangehood before it is used for the first time. This will help to remove any residues from the manufacturing process. -
Page 9: Cleaning Your Rangehood
IMPORTANT: Ideally you should switch on your rangehood ten minutes before you start to cook, or at the very least when you begin cooking. You should also run your rangehood for ten minutes after you have finished cooking. Cleaning your rangehood IMPORTANT: Before cleaning, always ensure that you have switched your rangehood off at the omni-polar switch, set at the wall from the cable. -
Page 10: Maintenance
Maintenance Removing and cleaning the grease filter o First remove the grease filter by sliding the securing nibs at the sides of the grille on the underside of the cooker hood. o Soak the grease filter in hot water and washing up liquid for about an hour. o Rinse it off thoroughly with hot water. -
Page 11: Fitting The Carbon Filter
o IMPORTANT: Defective bulbs should be replaced immediately. o If the light still does not work, make sure that the internal plug is fitted properly before you call for technical assistance. o Refit the grease filter. Fitting the carbon filter (Part number ST1) If the appliance is going to be used in recirculation mode then it is necessary to fit a carbon filter. -
Page 12: Installation
Installation IMPORTANT: Before installation read all the instructions and make sure that the voltage (V) and the frequency (Hz) indicated on the rating plate are exactly the same as the voltage and frequency in your home. The rating plate can be found behind the grease filters. The manufacturer declines all responsibility in the event of the installer failing to observe all the accident prevention regulations in force, which are necessary for normal use and the regular operation of the electric... -
Page 13: Before Beginning Installation
Before beginning installation o Check that the product purchased is of a suitable size for the chosen installation area. In addition, check whether there is an electrical socket available that will be accessible once the rangehood is mounted. If the product is going to be used in extraction mode, then there should also be space to connect a ducting hose to the outside. -
Page 14: Installing Your Rangehood
Installing your rangehood IMPORTANT: You will have to decide before installing your rangehood whether to use it in extraction mode or recirculation mode. Please refer to page 17 to understand the differences between these two modes. o We recommend that at least two people install this rangehood. o If you are using the appliance in recirculation mode, then PLEASE NOTE that all of the vent in the upper chimney section must be exposed. -
Page 15: Fitting The Chimney
3) Feed the exhaust ducting to your desired position then adjust the height of the inside chimney to the inner chimney bracket and screw in place. Once the position is fixed secure the unit with two safety screws through the Ø6mm holes in the back casing. - Page 16 10) Lift chimney section (D) upwards until it reaches the ceiling. You must ensure that it is perpendicular to the hood. o Mark the side measurements of both sides of chimney section (D) on the wall with a pencil and then remove chimney section (D). 11) Take the flat bracket (E) and place it between the two pencil marks that you made in step 9.
-
Page 17: Connecting To External Ducting
o Refit chimney section (C) to the hood and fix it onto the hood using the two screws that are supplied. o Secure the top of chimney section (C) to the flat bracket, using the screws provided. o Slide chimney section (D) inside of chimney section (C). Then secure the L shaped bracket to the wall, using the same method as you have just used to secure the lower bracket. -
Page 18: Completing The Installation
o Connect a 150 mm ducting hose to a discharge outlet that is suitable for cooking vapours. Please note that the ducting hose is not supplied with the appliance but one can be obtained from the Retail outlet where you purchased your appliance. o The maximum distance between the coupling and your discharge outlet should be 3 metres, with one 90 degree bend. -
Page 19: Packing List
Packing List Opening the box, you will find the following items : Description Illustration Qty. Cooker hood Chimney Wall bracket Plate I Płate II Screw (4mm x 40mm) Screw (4mm x 30mm) Wall plug Screw (4mm x 8mm) Extraction mode or recirculation mode? IMPORTANT: You will have to decide prior to installing your rangehood whether to use it in extraction mode or recirculation mode. - Page 20 Unfortunately if you live in a flat, or if the rangehood is too far from an outside wall, this may not be possible. The only alternative is to recirculate the air. Do I need a charcoal filter? All rangehoods have a grease filter but if you are using your rangehood in recirculation mode, then a charcoal filter must be fitted in addition to the grease filter.
-
Page 21: Troubleshooting
Where do I go to get parts for my rangehood. o If you need bulbs, filters, or semi-rigid aluminium ducting for your rangehood, please contact the retailer from where you purchased it, or visit www.classique.co.nz/service for more information. - Page 22 My rangehood is not working properly. Do not attempt to repair the appliance yourself. If the appliance is not operating correctly please contact an authorised service agent. Go to www.classique.co.nz or phone 0800 M10 HLP / 0800 610 457 to locate your closest service agent.
- Page 24 Imported by Applico Ltd. Private Bag 92900 Onehunga, Auckland 1061, New Zealand Website www.classique.co.nz Phone 0800 M10 HLP 0800 610 457...
Need help?
Do you have a question about the CLRH60LSS and is the answer not in the manual?
Questions and answers