
Related Manuals for Electrolux OOP740NZ


Summary of Contents for Electrolux OOP740NZ
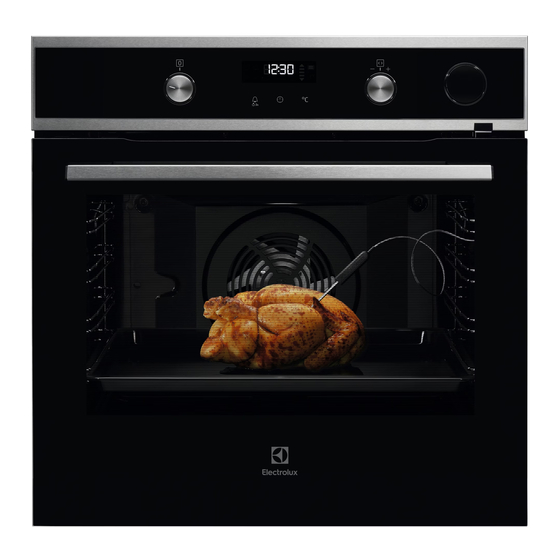
- Page 1 OOP740NZ Steam oven User Manual Get the most out of your appliance For quick access to manuals, how-to guides, support and more through our photo registration visit electrolux.com/register...
-
Page 2: Table Of Contents
14. ENERGY EFFICIENCY.................. 41 WE’RE THINKING OF YOU Thank you for purchasing an Electrolux appliance. You’ve chosen a product that brings with it decades of professional experience and innovation. Ingenious and stylish, it has been designed with you in mind. So whenever you use it, you can be safe in the knowledge that you’ll get great results every time. -
Page 3: Safety Information
ENGLISH SAFETY INFORMATION Before the installation and use of the appliance, carefully read the supplied instructions. The manufacturer is not responsible for any injuries or damage that are the result of incorrect installation or usage. Always keep the instructions in a safe and accessible location for future reference. -
Page 4: Safety Instructions
WARNING: The appliance and its accessible parts • become hot during use. Care should be taken to avoid touching heating elements. Always use oven gloves to remove or put in • accessories or ovenware. Before carrying out any maintenance, disconnect the •... - Page 5 ENGLISH 2.2 Electrical connection • Install the appliance in a safe and suitable place that meets installation requirements. WARNING! • Keep the minimum distance from Risk of fire and electric other appliances and units. shock. • Before mounting the appliance, check •...
- Page 6 • Do not put flammable products or items that are wet with flammable Cable types applicable for installa‐ products in, near or on the appliance. tion or replacement for Europe: WARNING! H07 RN-F, H05 RN-F, H05 RRF, H05 Risk of damage to the VV-F, H05 V2V2-F (T90), H05 BB-F appliance.
- Page 7 ENGLISH • Make sure the appliance is cold. • Unlike all humans, some birds and There is the risk that the glass panels reptiles can be extremely sensitive to can break. potential fumes emitted during the • Replace immediately the door glass cleaning process of all Pyrolytic panels when they are damaged.
-
Page 8: Installation
2.8 Service • Disconnect the appliance from the mains supply. • To repair the appliance contact the • Cut off the mains electrical cable Authorised Service Centre. close to the appliance and dispose of • Use original spare parts only. -
Page 9: Product Description
ENGLISH 3.2 Securing the oven to the cabinet 4. PRODUCT DESCRIPTION 4.1 General overview Control panel Knob for the heating functions Display Control knob (for the temperature) Water drawer Heating element Socket for the core temperature sensor Lamp Shelf support, removable Draining pipe Water outlet valve Shelf positions... -
Page 10: Control Panel
5. CONTROL PANEL 5.1 Buttons Sensor field / Button Description To set the MINUTE MINDER. Hold it for more than 3 seconds to turn on or turn off the oven lamp. To set a clock function. To check the oven temperature or the temperature of the core temperature sensor (if applicable). - Page 11 ENGLISH 7.2 Heating functions Oven func‐ Application tion Oven func‐ Application tion This function is de‐ signed to save energy The oven is off. during cooking. For the Moist Fan cooking instructions re‐ Baking Off position fer to "Hints and tips" chapter, Moist Fan Bak‐...
- Page 12 2. Press the cover of the water drawer to open it. Oven func‐ Application 3. Fill the water drawer with water until tion the display shows Tank Full indicator. To turn on the pyrolytic The maximum capacity of the tank is cleaning of the oven.
-
Page 13: Clock Functions
ENGLISH 7.8 Emptying the water tank 3. Open the oven door and put the connector (B) into the outlet valve CAUTION! (A). Make sure that the oven is 4. Push the connector again and again cold before you start to to empty the water tank. - Page 14 5. Turn the knob for the heating 2. Press to confirm and set the functions to the off position. minutes. The display shows and the set 8.5 Setting the TIME DELAY hour. "00" flashes. function 3. Turn the knob for the temperature to set the current minutes.
-
Page 15: Using The Accessories
ENGLISH After 90% of the set time the signal flash in the display. Press any button sounds. to stop the signal. 5. When the set time ends the signal sounds for 2 minutes. "00:00" and 9. USING THE ACCESSORIES When you use the core temperature WARNING! sensor for the first time, the default Refer to Safety chapters. - Page 16 Push the baking tray / deep pan between updated if necessary. the guide bars of the shelf support and the wire shelf on the guide bars above. You can change the temperature at any time during the cooking: 1.
- Page 17 ENGLISH Lid (B) Steel grill (E) • Do not put the hot baking dish on The injector and the injector tube cold / wet surfaces. "C" is the injector tube for steam cooking, • Do not put cold liquids in the baking "D"...
- Page 18 Make sure that you do not crush the injector tube or let it touch a heating element on the top of the oven. 4. Set the oven for the steam cooking function. 9.5 Direct steam cooking Put the food onto the steel grill in the baking dish.
-
Page 19: Additional Functions
ENGLISH When you cook food such as chicken, For more information about steam duck, turkey, kid or large fish, put the cooking, refer to the cooking tables for injector (D) directly into the empty part of steam cooking in the chapter "Hints and the meat. -
Page 20: Hints And Tips
If you turn off the oven, the cooling fan can continue to operate until the oven cools down. (°C) 10.6 Safety thermostat 30 - 115 12.5 Incorrect operation of the oven or 120 - 195... - Page 21 ENGLISH CAKES / PASTRIES (°C) (min) Tarts, preheating is 30 - 40 Cake mould, Ø 26 cm not needed Fruit cake, preheat‐ 80 - 90 Cake mould, Ø 26 cm ing is not needed Panettone 150 - 160 70 - 100 Cake mould, Ø...
- Page 22 Use the second shelf position. STEAM REHEATING (°C) (min) Lamb leg, 1 kg 175 110 - 130 (°C) (min) Whole chick‐ 55 - 65 Casseroles / 15 - 25 en, 1 kg Gratins Whole turkey, 180 - 240 Pasta and...
- Page 23 ENGLISH Set the temperature to 130°C. VEGETABLES SIDE DISHES (min) (min) Asparagus, green 35 - 45 Rice 35 - 40 Carrots 35 - 40 Boiled potatoes, quar‐ 35 - 45 Set the temperature to 130°C. tered Polenta 40 - 45 Unpeeled potatoes, me‐...
- Page 24 CAKES Conventional Cook‐ True Fan Cooking (min) (°C) (°C) Shortbread 3 (2 and 20 - 30 Cake mould dough Buttermilk 80 - 100 Cake mould, cheesecake Ø 26 cm Strudel 60 - 80 Baking tray Jam tart 30 - 40 Cake mould, Ø...
- Page 25 ENGLISH CAKES Conventional Cook‐ True Fan Cooking (min) (°C) (°C) Meringues, 2 and 4 80 - 100 Baking tray two levels, preheat the empty oven Buns, pre‐ 12 - 20 Baking tray heat the empty oven Eclairs 25 - 35 Baking tray Eclairs, two 2 and 4...
- Page 26 BREAD AND PIZZA Conventional True Fan Cooking Cooking (min) (°C) (°C) Scones 10 - 20 Baking tray Preheat the empty oven. Use the cake mould. FLANS Conventional Cooking True Fan Cooking (min) (°C) (°C) Pasta flan, preheat‐ 40 - 50 ing is not needed Vegetable flan, pre‐...
- Page 27 ENGLISH MEAT Conventional True Fan Cooking Cooking (min) (°C) (°C) Veal 90 - 120 English roast beef, rare 50 - 60 English roast beef, medium 60 - 70 English roast beef, well done 70 - 75 MEAT Conventional Cook‐ True Fan Cooking (min) (°C) (°C)
- Page 28 FISH Conventional True Fan Cook‐ Cooking (min) (°C) (°C) Trout / Sea bream, 3 - 4 fish 40 - 55 Tuna / Salmon, 4 - 6 fillets 35 - 60 11.5 Turbo Grilling Preheat the empty oven. PORK Use the first or the second shelf position.
- Page 29 ENGLISH POULTRY POULTRY (°C) (min) (°C) (min) Poultry, portions, 200 - 220 30 - 50 Turkey, 4 - 6 kg 140 - 160 150 - 240 0.2 - 0.25 kg each Chicken, half, 190 - 210 35 - 50 FISH (STEAMED) 0.4 - 0.5 kg each Chicken, pou‐...
- Page 30 11.7 Dehydrating - True Fan Cooking FRUIT Cover trays with grease proof paper or baking parchment. For a better result, stop the oven halfway through the drying time, open the door and let it cool down for one night to...
- Page 31 ENGLISH Ramekins Pizza pan Baking dish Flan base tin Ceramic Dark, non-reflective Dark, non-reflective 8 cm diame‐ Dark, non-reflective 28 cm diameter 26 cm diameter ter, 5 cm 28 cm diameter height 11.10 Moist Fan Baking For the best results follow suggestions listed in the table below.
- Page 32 (°C) (min) Shashlik, 0.5 kg baking tray or dripping 25 - 30 Cookies, 16 baking tray or dripping 20 - 30 pieces Macaroons, 24 baking tray or dripping 25 - 35 pieces Muffins, 12 baking tray or dripping 30 - 40...
- Page 33 ENGLISH (°C) (min) Small True Fan Baking 2 and 150 - 20 - 35 cakes, Cooking tray 20 per tray Apple Conven‐ Wire 70 - 90 pie, 2 tional Cook‐ shelf tins Ø20 Apple True Fan Wire 70 - 90 pie, 2 Cooking shelf...
-
Page 34: Care And Cleaning
(°C) (min) Beef bur‐ Grill Wire max. 20 - 30 Put the wire shelf ger, 6 shelf and on the fourth lev‐ pieces, dripping el and the drip‐ 0.6 kg ping pan on the third level of the oven. Turn the... - Page 35 ENGLISH 12.3 How to remove: shelf CAUTION! supports If there are other appliances installed in the same To clean the oven, remove the shelf cabinet, do not use them supports. when the Pyrolysis function operates. It can cause CAUTION! damage to the appliance. Be careful when you remove the shelf supports.
- Page 36 After some time, you can have lime The cleaning reminder deposits in your oven. To prevent this, goes out: clean the parts of the oven that generate • after the end of the the steam. Empty the tank after each pyrolysis.
- Page 37 ENGLISH 4. Rinse the water tank and clean the remaining lime residue in the oven with a cloth. 5. Clean the drain pipe by hand in warm water with soap. To prevent damage, do not use acids, sprays or similar cleaning agents.
-
Page 38: Troubleshooting
Make sure the glass slides out of the Make sure that you install the middle supports completely. panel of glass in the seats correctly. 12.8 How to replace: Lamp WARNING! 8. Clean the glass panels with water Risk of electric shock. - Page 39 ENGLISH 13.1 What to do if... Problem Possible cause Remedy You cannot activate or op‐ The oven is not connected Check if the oven is cor‐ erate the oven. to an electrical supply or it rectly connected to the is connected incorrectly. electrical supply (refer to the connection diagram if available).
- Page 40 Problem Possible cause Remedy The display shows "F102". • You did not fully close • Fully close the door. the door. • Deactivate the oven • The door lock is defec‐ with the house fuse or tive. the safety switch in the fuse box and activate it again.
-
Page 41: Energy Efficiency
We recommend that you write the data here: Model (MOD.) ......... Product number (PNC) ......... Serial number (S.N.) ......... 14. ENERGY EFFICIENCY 14.1 Product Information and Product Information Sheet* Supplier's name Electrolux OOP740NZ 949494735, Model identification 949494753 Energy Efficiency Index 81.2... - Page 42 Energy efficiency class Energy consumption with a standard load, con‐ 0.93 kWh/cycle ventional mode Energy consumption with a standard load, fan- 0.69 kWh/cycle forced mode Number of cavities Heat source Electricity Volume 72 l Type of oven Built-In Oven Mass 33.6 kg...
- Page 43 ENGLISH When you use this function the lamp action will reduce the expected energy automatically turns off after 30 seconds. savings. You may turn on the lamp again but this 15. ENVIRONMENTAL CONCERNS appliances marked with the symbol Recycle materials with the symbol with the household waste.
- Page 44 www.electrolux.com/shop...
Need help?
Do you have a question about the OOP740NZ and is the answer not in the manual?
Questions and answers