Table of Contents
Advertisement
Quick Links
Advertisement
Table of Contents

Subscribe to Our Youtube Channel
Summary of Contents for Pure Fun 9009SJ
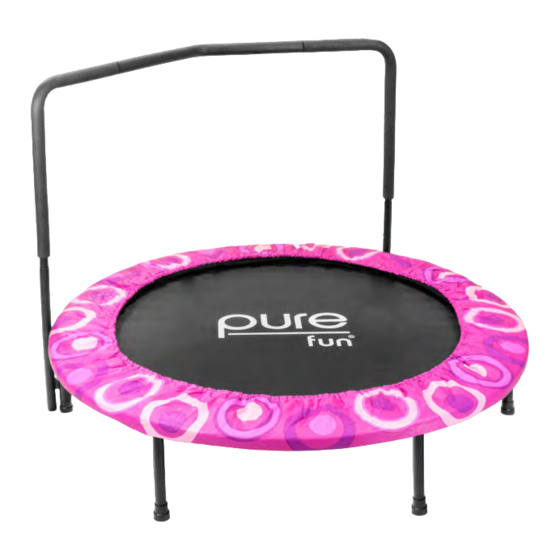
- Page 1 48-INCH SUPER JUMPER KIDS TRAMPOLINE MODEL# 9009SJ PRODUCT MANUAL - VERSION 4.21.01 FOR AGES: WEIGHT LIMIT: TO BUILD: TOOLS NEEDED: 3-10 45 Kgs CUSTOMER SERVICE GQBrands.com • CustomerService@GQBrands.com • 1-866-498-5269 • 4401 Samuell Blvd, Ste 150, Mesquite, TX 75149...
-
Page 2: Customer Service Information
Most up to date manuals, warnings and product information can be found at: KIDS TRAMPOLINE https://www.globalqualitybrands.com/warnings MODEL# 9009SJ To register you product please visit: If you have an issue with your item, do not return. Please report www.globalqualitybrands.com/product-registration... -
Page 3: Important Message
THIS PRODUCT CAN POSSIBLY EXPOSE YOU TO CHEMICALS INCLUDING Dl(2-ETHYLHEXYL) PHTHALATE (DEHP). WHICH IS KNOWN TO THE STATE OF CALIFORNIA TO CAUSE CANCER AND BIRTH DEFECTS OR OTHER REPRODUCTIVE HARM. FOR MORE INFORMATION GO TO WWW.P65WARNINGS.CA.GOV. MODEL# 9009SJ - TRAMPOLINE... -
Page 4: Warning Label Locations
- Replace label if illegible or removed. 100 LBS MAX WEIGHT Global Quality Brands - PureFun.net MODEL# 9009SJ 4401 Samuell Blvd, Ste 150 Mesquite, TX 75149 MADE IN CHINA CustomerService@GQBrands.com Global Quality Brands - PureFun.net CustomerService@GQBrands.com The labels shown on this page... - Page 5 Do not use the trampoline • DO NOT use the trampoline set when under without the frame pad securely in place fully the influence of alcohol, drugs or covering the frame and springs. medication which may impair the jumper’s judgment and coordination. MODEL# 9009SJ...
-
Page 6: Basic Trampoline Skills
BASIC TRAMPOLINE SKILLS The following exercises are examples of instructions for use of this exercise trampoline. It is highly recommended to stretch and warm up for at least 10 minutes before starting any exercise. Jumpers should practice these basic techniques and perfect them. Jumping Jacks Tuck Jumps Stand with your feet together and your arms alongside... -
Page 7: Parts List
Hand Rail Base - Left Hand Rail Base - Right Side Hand Rail Center Hand Rail 10 - 11 - 12 - 13 - 14 - Bolt Hex Nut Safety Nut Cap Plastic Washer Spring Wrench T-Hook Spring Tool MODEL# 9009SJ... - Page 8 ASSEMBLY INSTRUCTIONS NOTE: Make sure that you assemble the T-Section/Legs to the Top Rail as shown to be certain that the pre-drilled spring holes are facing in the correct direction when you attach the springs. STEP 1: A. Slide a T-Joint (Part 2) onto the end of a Top Rail (Part 1).
- Page 9 T-Joints. STEP 3: Flip the trampoline over to stand on its own Lay out the Jump Mat with Mesh (Part 5) in the center of the frame with the Logo facing up. RIGHT (7R) LEFT (7L) MODEL# 9009SJ...
- Page 10 ASSEMBLY INSTRUCTIONS STEP 4: Using the T-Hook Spring Tool (Part 16), attach eight initial springs (Part 14) directly across from each other at “compass points” as shown. NOTE: Only use the T-Hook Spring Tool included with this product to attach the springs. NEVER use your hands only or other household tools to attach these springs.
- Page 11 Place the Frame Pad (Part 6) on top the Jumping Mat. Stretch the Frame Pad so it completely covers all Springs and the Mesh of the Jumping Mat. NOTE: Make sure all springs are completely covered to avoid any injury while in use. MODEL# 9009SJ...
- Page 12 ASSEMBLY INSTRUCTIONS STEP 7: Attach 2x Side Hand Rails (Part 8) by placing the end into the Hand Rail Base. Secure with the push pins buttons located on the Hand Rails. Make sure that the push buttons are fully secure in the Hand Rail Base.
-
Page 13: Frequently Asked Questions
Thank You Coupon! As a way of saying thank you for purchasing one of our products, here is a 10% OFF coupon for your next purchase at www.PureFun.net Use Code: GQBRANDS10 at Checkout MODEL# 9009SJ...


Need help?
Do you have a question about the 9009SJ and is the answer not in the manual?
Questions and answers